• Skip to primary navigation
  • Skip to main content
  • Skip to primary sidebar
Sweet Red Poppy logo
  • Cricut
    • Free SVG Files
    • Paper Flowers
    • Mandala
    • Iron-On
    • Vinyl
    • Maker
    • Explore Air 2
    • Joy
  • Sewing
    • Baby
    • Kids
    • Accessories
    • Christmas
    • Blankets
    • Womens
    • Learn to Sew Tips & Tricks
    • Face Masks
  • DIY Crafting
    • Paint
    • Paper
    • Food
    • Kids
  • Holiday Crafts
    • Valentine’s Day
    • Easter
    • 4th of July
    • Halloween
    • Thanksgiving
    • Christmas
  • Books
    • Cricut Printed Book
    • Cricut E-Book
    • Cricut Joy Printed Book
    • Cricut Joy E-Book
    • Paper Flower E-Book
    • Sewing Printed Book
    • Sewing E-Book
    • Face Mask E-Book
    • Mandala E-Book Bundle
    • Mandala E-Book - Inkscape
    • Mandala E-Book - Adobe Illustrator
    • Mandala Printed Book - Inkscape
    • Mandala Printed Book - Adobe Illustrator
    • Baby Pattern E-Book
  • Courses
    • Cricut Course
    • Sewing Course
    • Serger Course
    • Quilting Course
    • SVG Design Course
    • Course Login: Teachable
  • Shop
    • E-Books
    • Printed Books
    • Sewing Patterns
    • SVG Files
    • Baby Patterns
    • Subscribe to Emails
    • Course Login: Teachable
    • Contact
  • Search

Cricut Print then Cut Stickers Everything You Need To Know

Written by Kimberly Coffin · This post may contain affiliate links · 87 Comments

How to Use the Cricut Print Then Cut Feature With a Canon Pixma TS9521C to Create Sticker Sheets.

Affiliate links are used in this Cricut Print then Cut tutorial. Thanks for shopping through them (at no extra cost to you) and supporting Sweet Red Poppy.

Cricut Print then Cut Stickers tutorial featured by top Cricut blogger, Sweet Red Poppy.

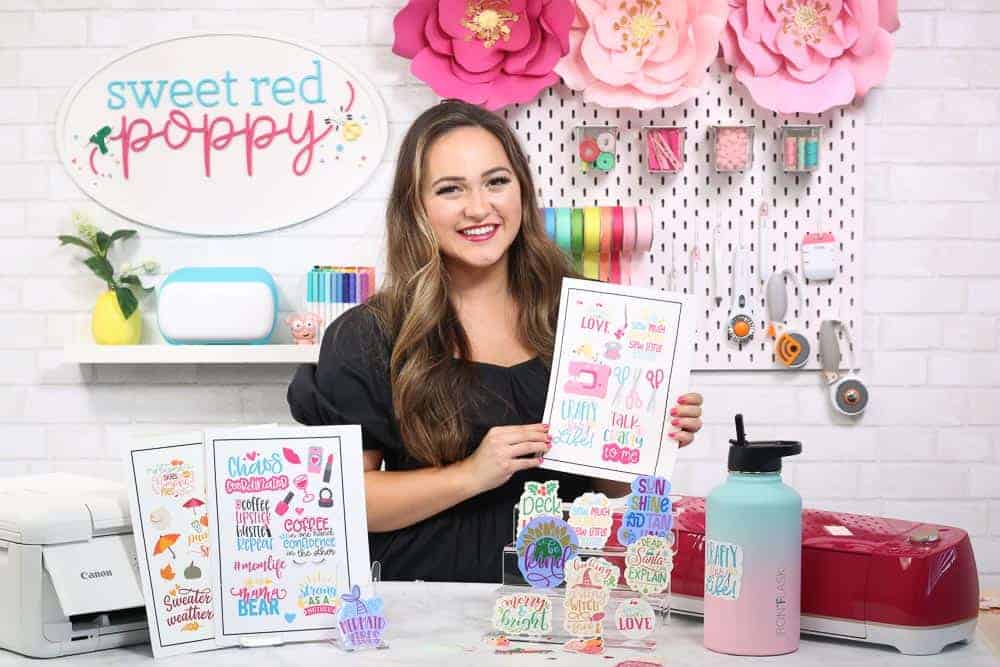
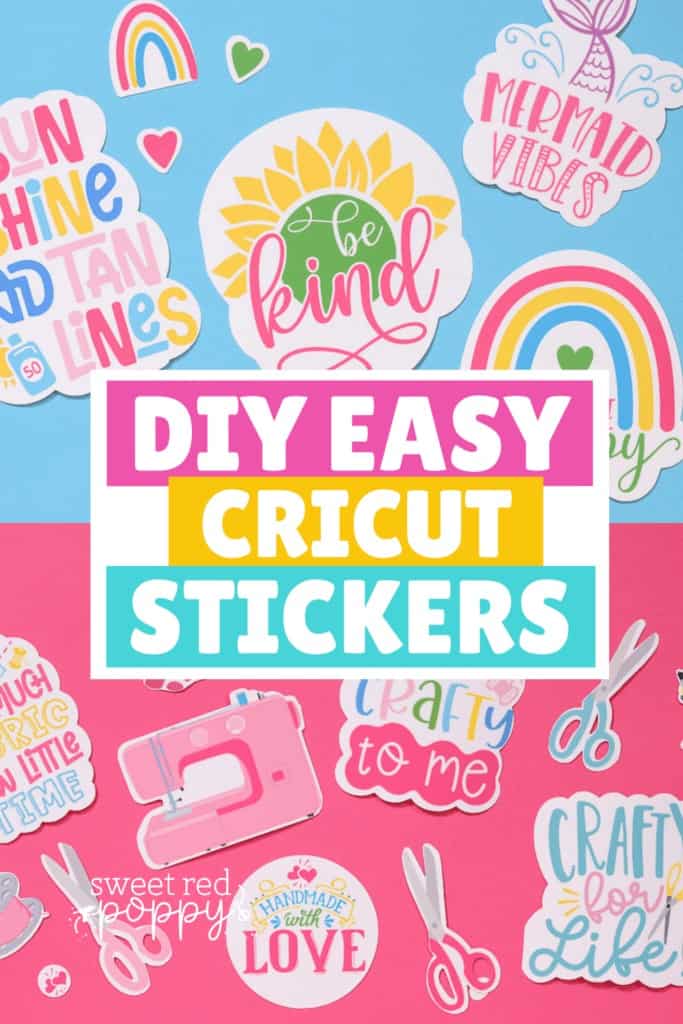
If you’ve ever wanted to make stickers with your Cricut then today’s post and video are perfect for you!

Today we are going to learn all about Cricut’s Print then Cut feature while making the cutest stickers!

In this tutorial, I’ll be using a Cricut Explore Air 2 and a Canon Pixma TS9521C.

If you’re new to Print then Cut, let me give you a quick walkthrough. Print then Cut lets you print your design out, using a home printer or printing service, then use your Cricut to perfectly cut around your design. 

You can use Print then Cut on Printable Vinyl, Printable Sticker Paper, Printable Clear Sticker Paper, Printable Iron-On, Card Stock/Paper, and really anything that you can put through your printer. 

I usually use Print then Cut to make stickers, gift tags, labels, and even cupcake toppers. 

A couple of things to keep in mind before you start designing your print and cut designs is that you can not print images larger than 6.75” x 9.25”.

Print then Cut works with Cricut Design Space images, uploaded SVGs or PNGs, pictures, really any file can be used with Print then Cut. 

If you haven’t already calibrated your machine for Print then Cut in Design Space, be sure to do this by clicking the drop down menu in the top left hand corner and selecting calibration.

Why Shop Through My Links?

When you shop through my affiliate links, it doesn't cost you anything extra, but it helps me out in a big way! I earn a small commission from those purchases, and that support allows me to continue creating and sharing free tutorials and patterns for you. Thank you so much for helping me keep this creative community going!

Supplies Needed for your Cricut Print then Cut Stickers

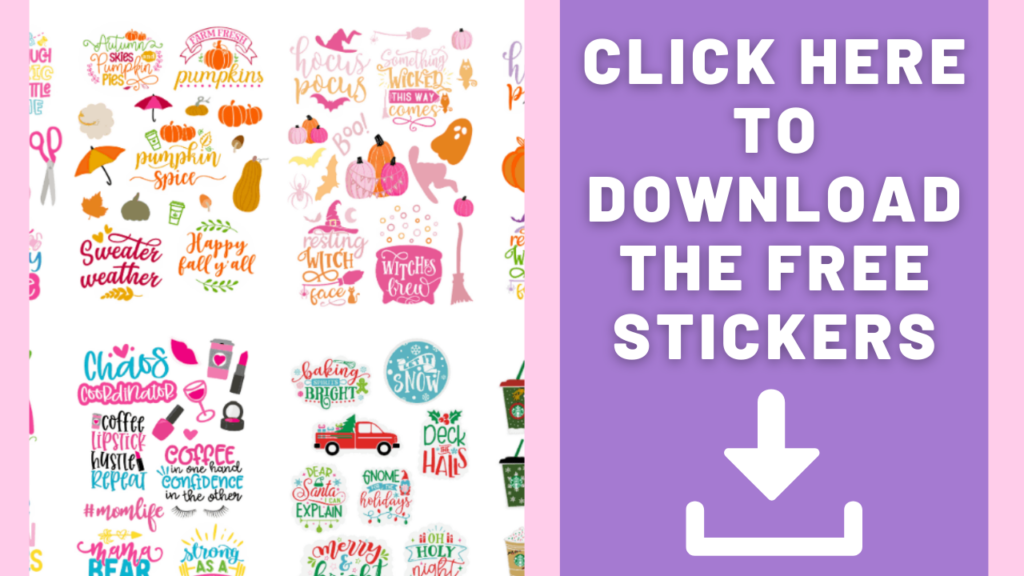
  • Click Here for Sticker Sheet PNG Download
  • Printable Sticker or Printable Vinyl
  • Inkjet Printer
  • Cricut Machine
  • Standard Grip Mat
  • Optional - Clear Vinyl

If you happen to have any issues with Print then Cut check out my troubleshooting tips at the end of the post.

Image rights: For personal use only. You are welcome to create personal projects using these images. However, if there is intent to resell for commercial purposes, that is prohibited. Under no circumstances are you permitted to resell, give-away, or otherwise distribute any actual files associated with digital designs, stickers or images offered at sweetredpoppycom.bigscoots-staging.com or sweetredpoppy.shop

Click HERE to download the FREE sticker files.

This is a zipped file. It's best to download this on a desktop computer. You will need to unzip the file before using the images.

Cricut Print then Cut Stickers tutorial featured by top Cricut blogger, Sweet Red Poppy.

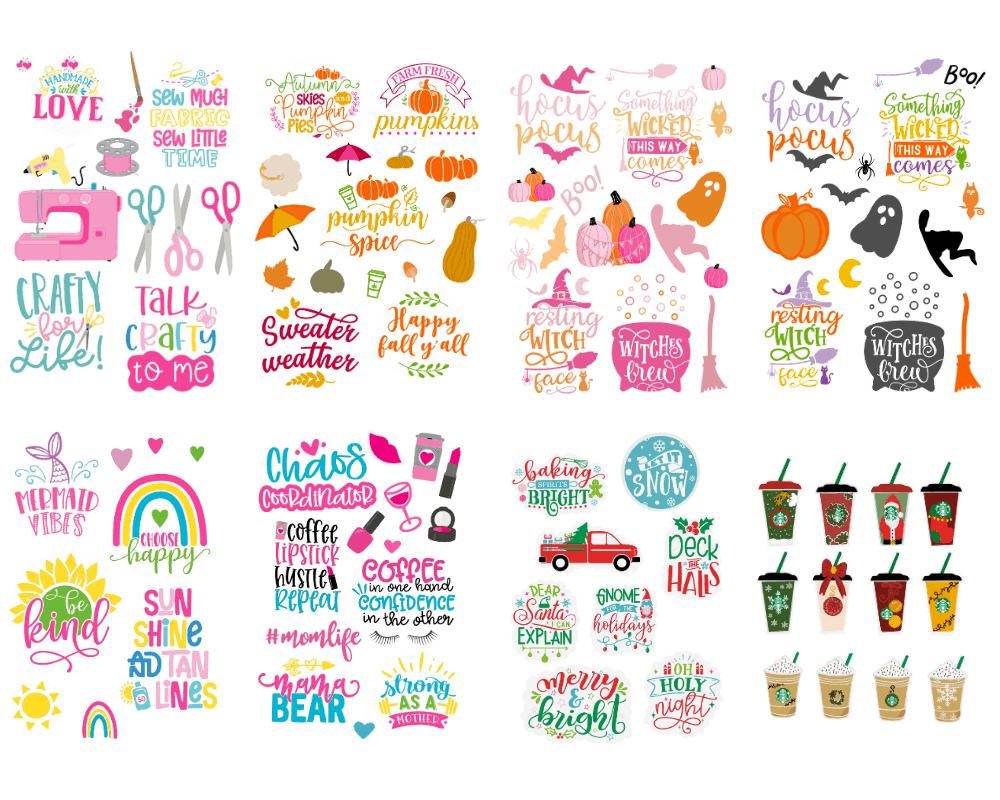
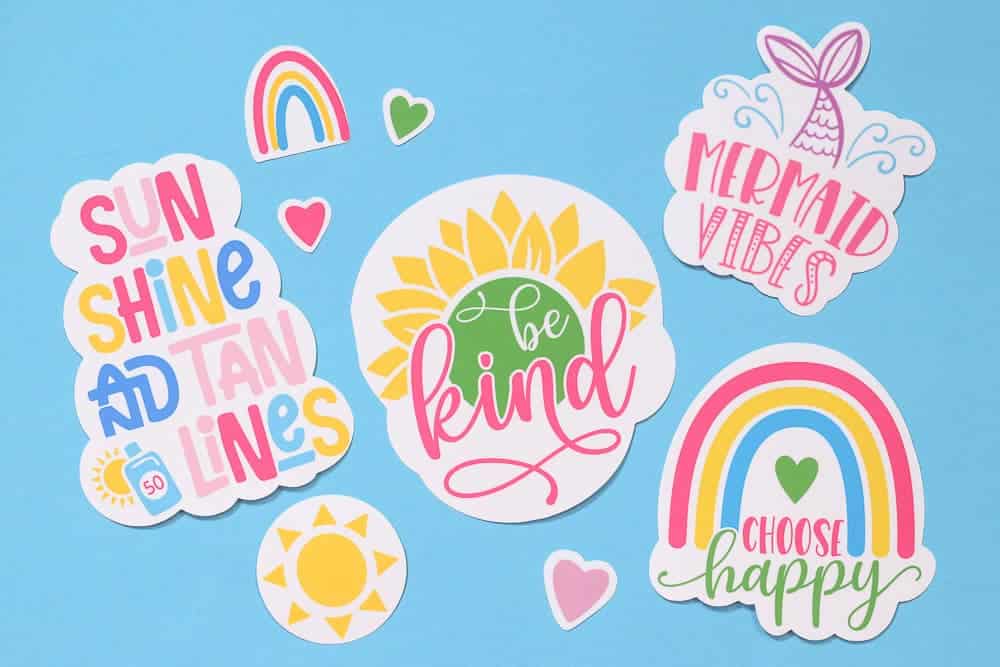
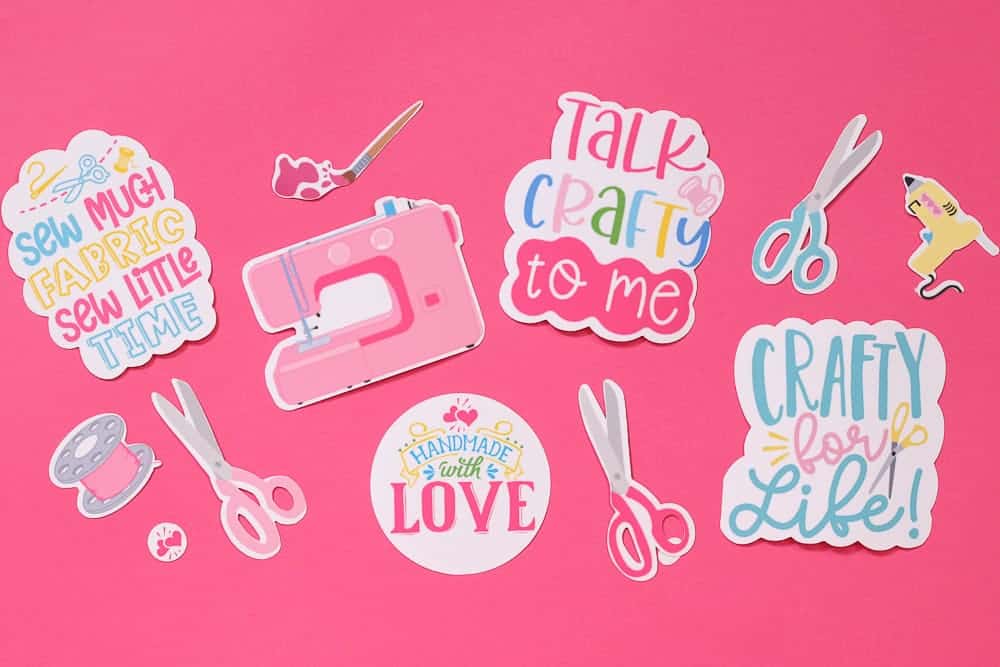
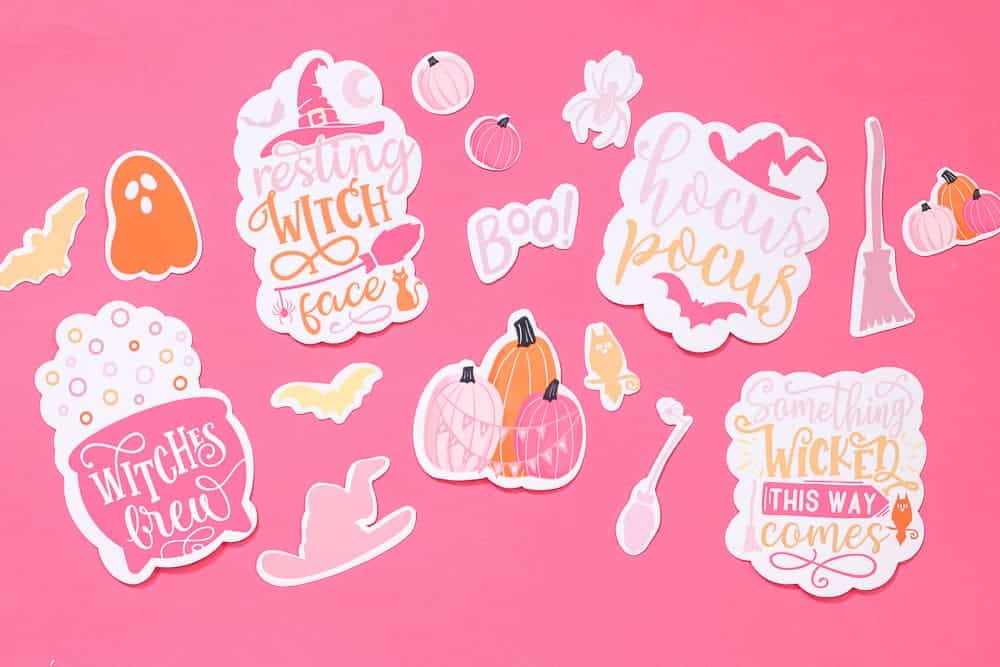
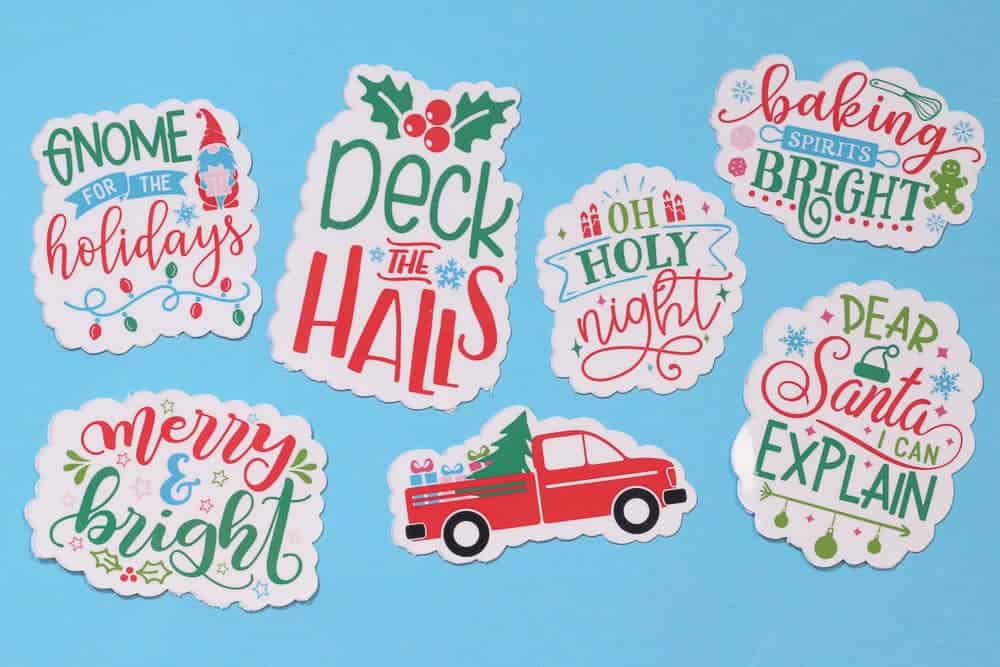
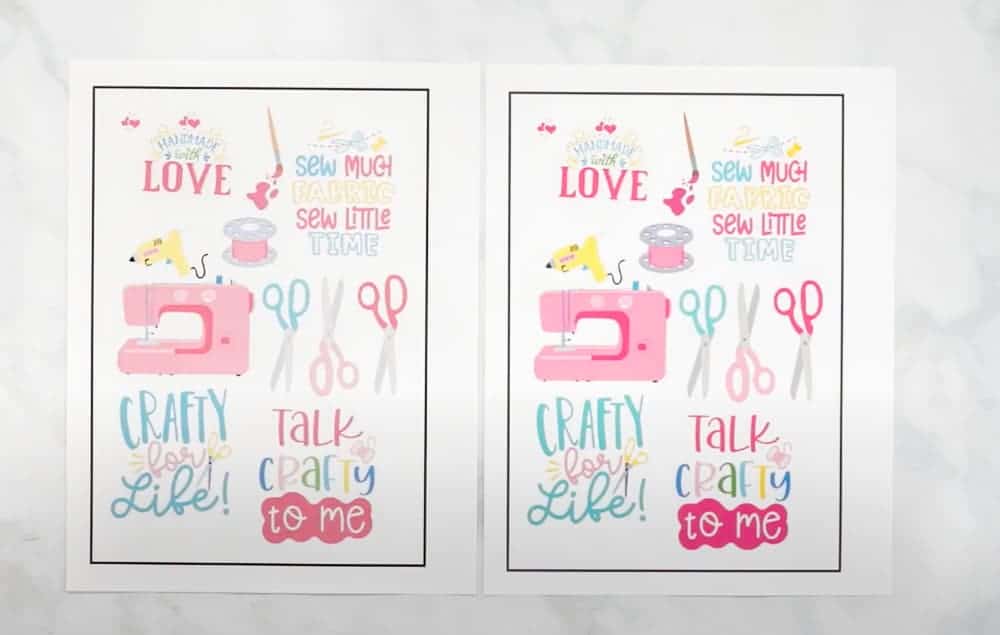
Here's a preview of all of our free printable files. Each design has a white border included around the image for a perfect cut!

Step 1: Upload Printable Sticker Sheets to Cricut Design Space

We are going to start by uploading our file to Cricut Design Space. Click on "Upload", "Upload Image", "Browse", then select the sticker sheet file from your computer.

When working with Print then Cut, I always select Complex and then hit continue.

Our designs are already to go so we can hit “Continue” and skip to the next part.

Click "Save as a Print then Cut Image" on the left-hand side. On the right side, you can name your image, then select “Save”

Select the image and click "Insert Images" to place it on your canvas.

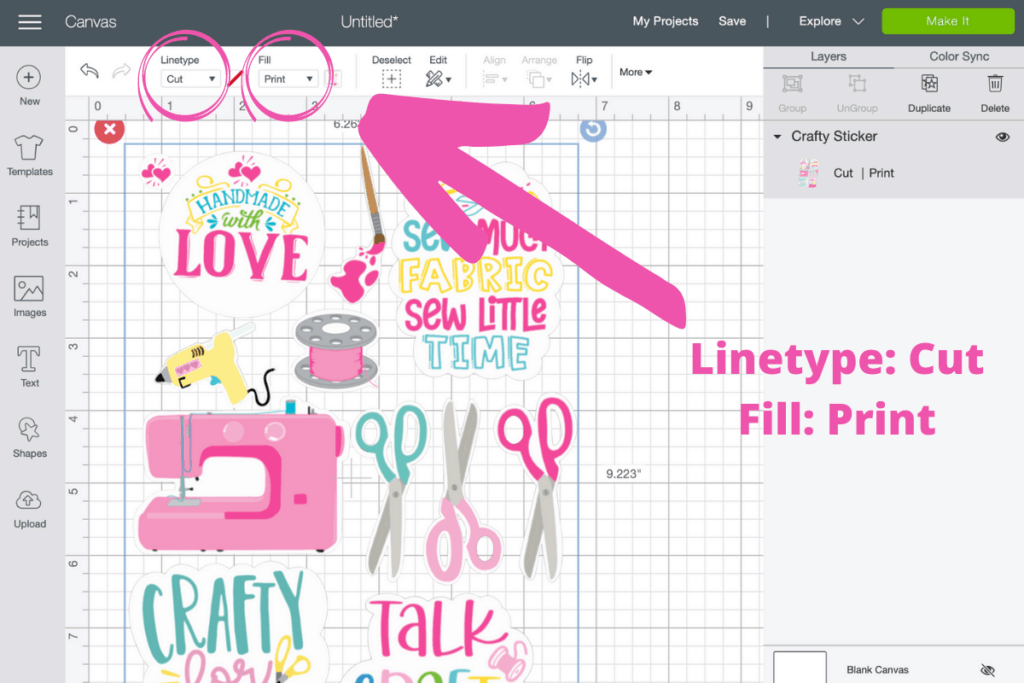
Now that we have our image on our canvas we want to double-check the measurements for compatibility. Remember that you only have a 6.75” x 9.25” area to print on. When I am making an entire sticker sheet, I like to use a 6.75” x 9.25” rectangle to size my stickers and get the most use out of my space. If your image is sized too large you'll get a warning sign on the left-hand side of the screen under the image.

You’ll notice that the line type at the top of the screen says cut, and the fill type says print. This lets Cricut know that we want to print out our image first and then cut it. 

Cricut Print then Cut Stickers tutorial featured by top Cricut blogger, Sweet Red Poppy.

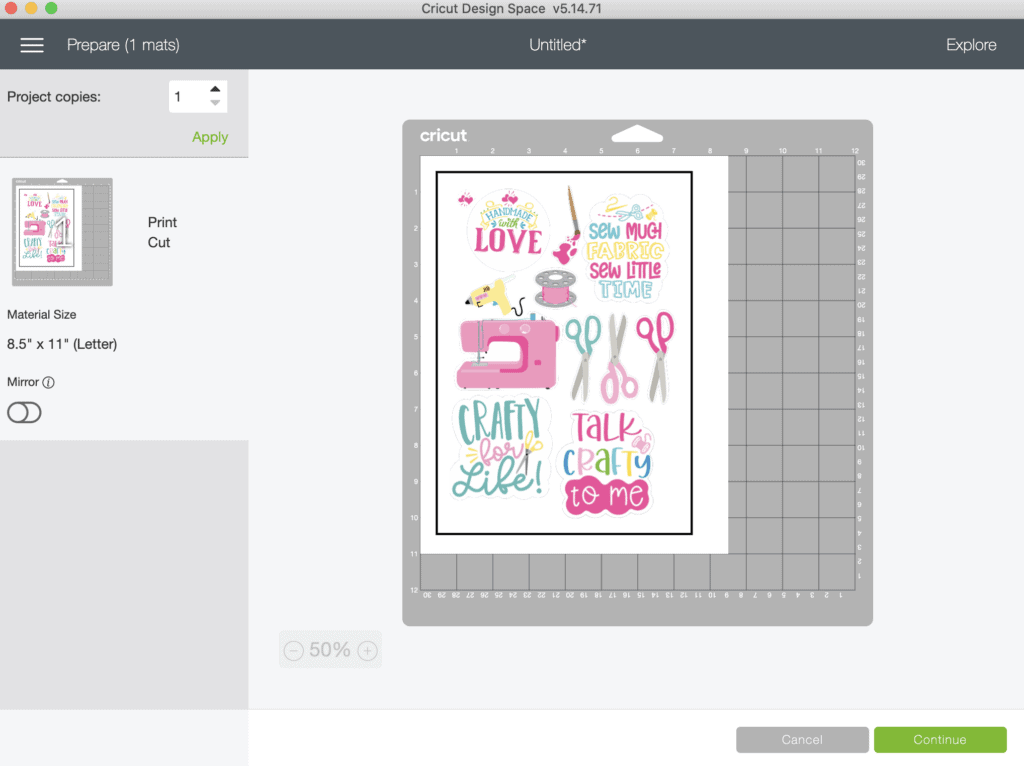
Now, that your design is ready to go, hit “Make It”. If you’re using a different design than the one I’ve provided, make sure that you’ve flattened the image before trying to cut it.

You’re going to notice a black rectangle around your design. This is what your Cricut machine uses to precisely cut out your design. 

Cricut Print then Cut Stickers tutorial featured by top Cricut blogger, Sweet Red Poppy.

Before cutting your design make sure that you've calibrated your machine for precise cuts! Click here to read the help article from Cricut.

Step 2: Print your Sticker Sheet Design

Next, I’m going to click “Send to Printer”.

Normally, I turn on Bleed but for these sticker sheets, I’ve designed them so you don’t need to turn it on because the outside of the sticker is transparent.  

Select “Use System Dialog”. This lets you manually select your printer settings for the best quality print. 
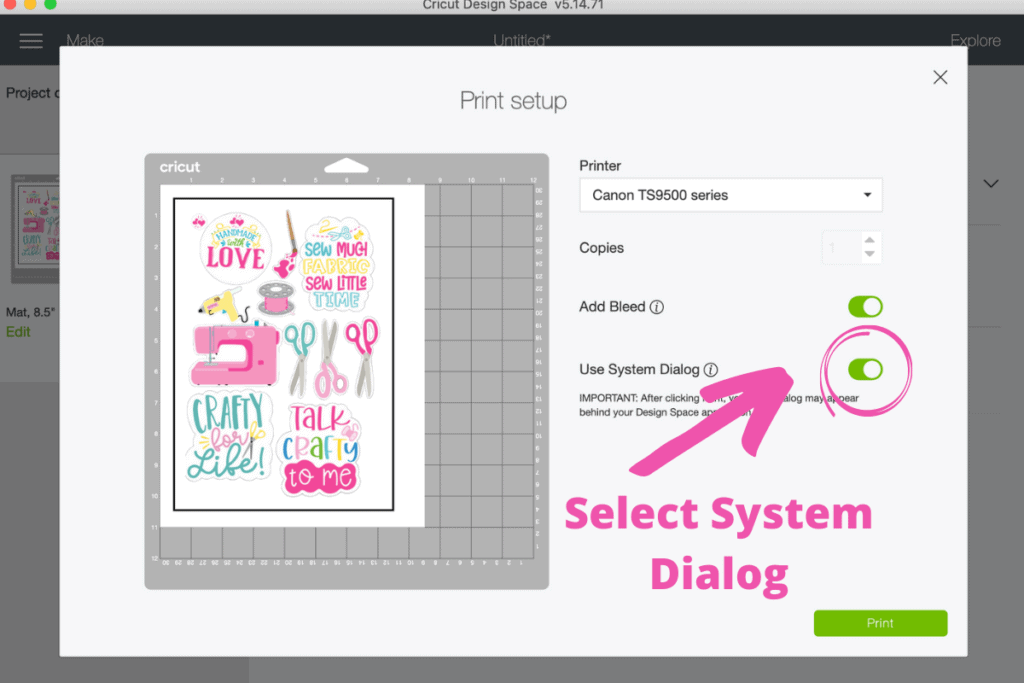
Cricut Print then Cut Stickers tutorial featured by top Cricut blogger, Sweet Red Poppy.

Select "Print".

Minimize Design Space to find the Printer settings pop-up on your desktop. I like to feed from the rear tray for the best results with this printer. I also select the Media Type as Photo and Increase the Quality to Best.

If you want to save ink you can select "Normal" as the quality but it won't be as vibrant!

Cricut Print then Cut Stickers tutorial featured by top Cricut blogger, Sweet Red Poppy.

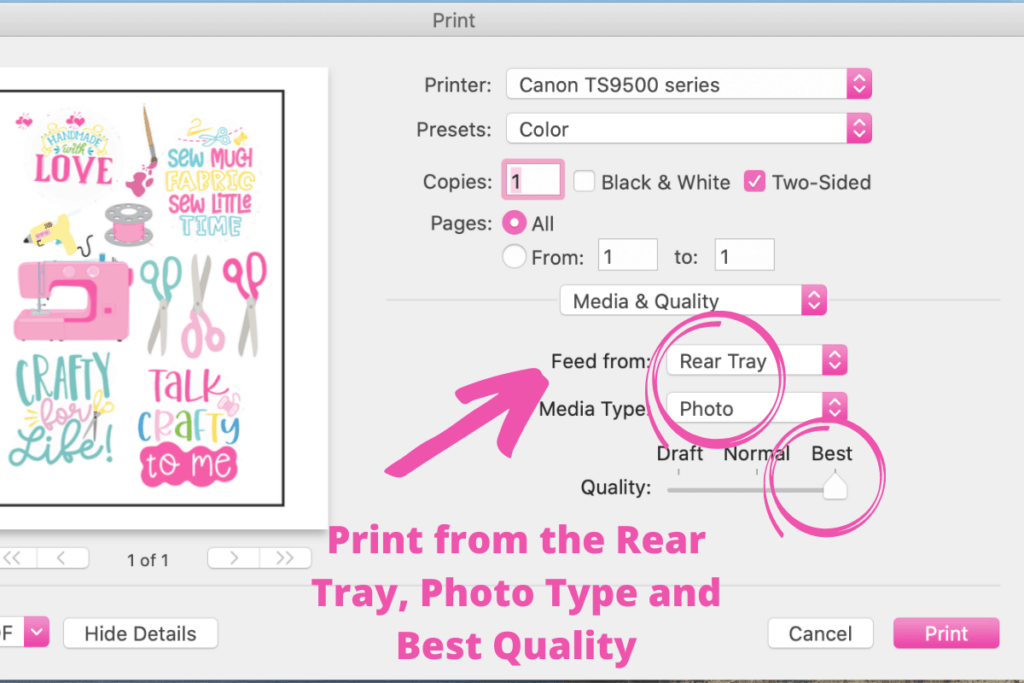
Now you can select "Print"

If you keep your printer settings on default, your images will not be as vibrant and professional looking. Here is a plain piece of paper I printed using my printer’s default settings versus the settings I recommend. You can see the image on the left-hand side is duller and the colors are less vibrant. 

Cricut Print then Cut Stickers tutorial featured by top Cricut blogger, Sweet Red Poppy.

I’ve been using a Printable Vinyl Sticker Paper from Craftables that’s waterproof and permanent. This type is perfect for adhering to a hydro flask. Typically, I really like Cricut products but I wasn’t impressed with the results I got with their sticker paper, so I’ve tried quite a few other brands. I’ve also really liked working with Silhouette’s sticker paper. I've also used Waterproof Matte Printable Sticker Paper from Online Labels that I've gotten really good results from. The backing on this one is thinner and easier to create die-cut stickers where you cut through the sheet completely to create stand alone stickers.

Make sure that you’ve loaded your paper in the correct direction. If you’re loading from the bottom tray it will need to be face down. If you’re loading from the back tray load face up.

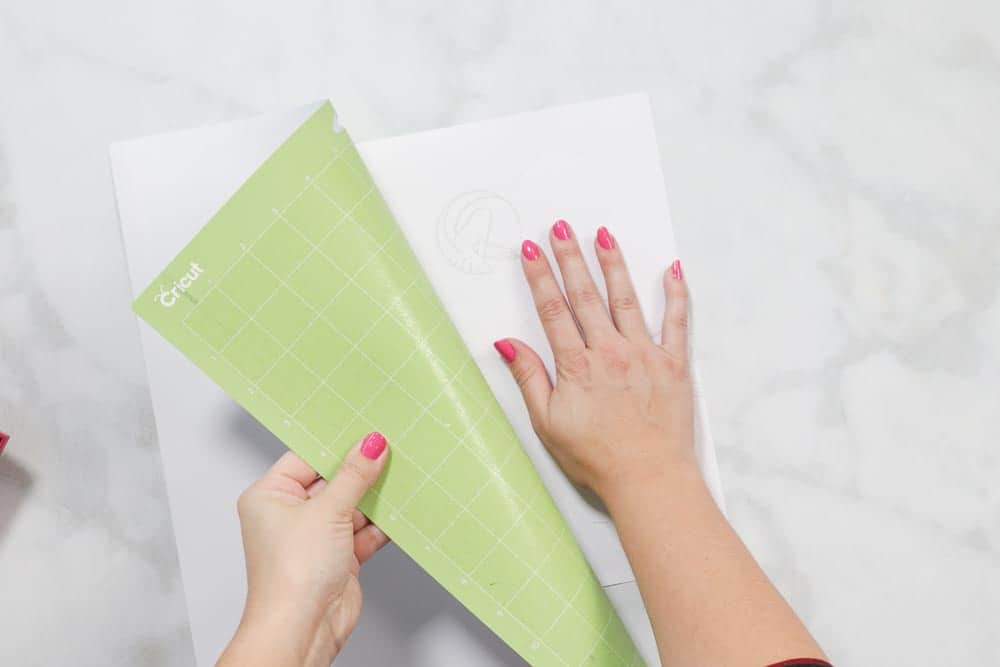
Once your paper has been printed, place your paper on your green mat, being sure to line it up with the top left-hand grid. 

Cricut Print then Cut Stickers tutorial featured by top Cricut blogger, Sweet Red Poppy.

Optional - If you'd like your stickers to have an added layer of protection you can cut a clear sheet of vinyl slightly larger than the design and adhere it to the sticker paper. Make sure it isn't covering the black lines.

On the screen, select, “Already Printed” 

Select the correct material (this will depend on the material you're using.) You can decide whether you want the stickers to be a Kiss-Cut sticker, meaning they are cut through just the top layer leaving the backing intact or a Die Cut Sticker, meaning they are cut all the way through both layers to create a stand-alone sticker.

Step 3: Cut Printed Sticker Design

Make sure you have your fine point blade loaded in your Cricut machine.

Load your mat using the arrow button. 

Once the “C” go button is flashing, go ahead and hit it to begin your cut. 

Your Cricut is going to start scanning your paper to determine where it should cut. It uses the black lines to determine where it should cut your stickers. You’ll want to make sure you have good lighting in your room so that the Cricut machine can easily see the registration lines.

After it scans everything, it will start cutting. 

Once it is done, your machine will start to unload the mat. Before completely unloading your mat, quickly check if your sticker has cut all the way through. If it hasn’t, go ahead and click the Cricut “C” to have it cut again before unloading the mat.

If you’re wanting a Kiss-Cut Sticker, unload your mat by clicking the arrow button. If I am going to be making a Die Cut Sticker, I’m going to send my sticker sheet back through the machine one more time. 

Cricut Print then Cut Stickers tutorial featured by top Cricut blogger, Sweet Red Poppy.

Once it is done cutting, unload your mat. 

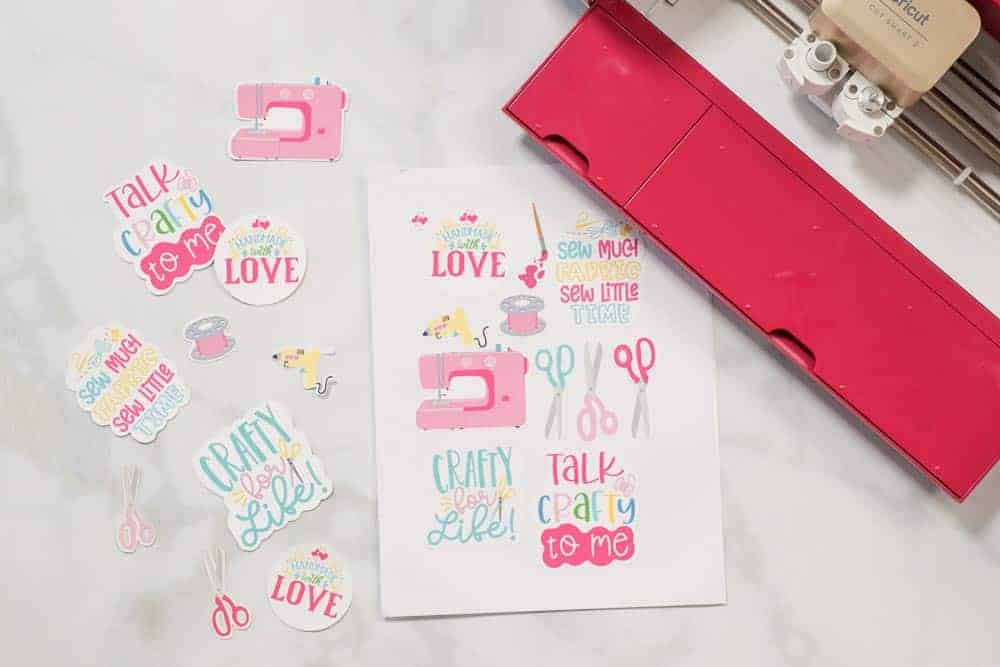
I like to flip my mat over, peeling the mat away from the sticker paper. This prevents my stickers from rolling up or tearing. 

Now we have this adorable sticker sheet!

Cricut Print then Cut Stickers tutorial featured by top Cricut blogger, Sweet Red Poppy.

Cricut Print then Cut Stickers Troubleshooting

When creating your print then cut projects, here are a few things to keep in mind:

  1. Print then Cut only works on images that fit within a 6.75” x 9.25” rectangle, so be sure your images fit within this. 
  2. Be sure that your lines are set “Cut”
  3. For best results, make sure your material is placed in the upper left-hand corner of your mat. Make sure to remove any wrinkles or bubbles as this could interfere with your machine’s sensors. 

If your machine is having trouble reading the Print then Cut registration lines, here are a few things to try:

  1. Any direct light on your Cricut could interfere with your machine’s sensors. Be sure to keep your machine away from any direct light. 
  2. If you are using a Circut Explore, print then Cut works best with matte light-colored materials, preferably white. Darker materials mess with your machine’s ability to read the cut lines. Cricut also does not recommend using glossy paper since the shine interferes with your machine’s ability to read the sensor marks. 
  3. Before beginning your print then cut, ensure your cut sensor light is clean. To clean it, gently brush the light with a dry watercolor brush. 

If your machine is cutting incorrectly, you may need to recalibrate your machine. You can do this by clicking the menu in Design Space, clicking calibration, and “Print then Cut.” Follow Cricut’s instructions in Design Space to correctly calibrate your machine. 

I can’t wait to see all the adorable stickers you make with this tutorial!

Click here to save these projects for later on Pinterest!

Cricut Print then Cut Stickers tutorial featured by top Cricut blogger, Sweet Red Poppy.
« 12 Dollar Tree Cricut Hacks You NEED To Know!
DIY Personalized Starbucks Cups Free SVG Template for Logo Border or Ring Decal (Part 1) »

Reader Interactions

Comments

  1. MAry says

    October 10, 2020 at 3:12 pm

    I like it

    Reply
  2. Nancy Smith says

    October 10, 2020 at 3:39 pm

    Love this instructional on print and cut. I have done it only a couple times. I’m anxious to make stickers now!
    Thank you!

    Reply
  3. Tina Young says

    October 10, 2020 at 4:02 pm

    I was wondering if you could perhaps do a quick video like this using a circuit maker? I find that you are easier to understand than some, thank you

    Reply
  4. Deb says

    October 10, 2020 at 4:08 pm

    Love all of these! Thanks so much for sharing the files and for the detailed tutorial. Can't wait to try it out!

    Reply
  5. Judi says

    October 10, 2020 at 8:57 pm

    I was getting upset cuz I could not find out how to get all those sticker ideas. So I said to myself (I'm a captive audience) check the file you downloaded and surprise there they all are. Thank you for adding them all to one file. I LOVE it!

    Reply
  6. Melissa Delgado says

    October 10, 2020 at 9:25 pm

    Thank you so much for this one and the tip of selecting “photo” for the printer. I will definitely try it our because I was seeing the quality not that good .
    Thanks Kim!

    Reply
  7. Kim says

    October 11, 2020 at 1:03 am

    Love your tutorials. Can you tell me the pros and cons of that printer. I been looking into it because of the 12x12. What do you like and not like about it? Thank you

    Reply
  8. Olga says

    November 09, 2020 at 2:31 am

    Can’t wait to try and make these.

    Reply
  9. Jasmina says

    November 09, 2020 at 2:53 am

    Great as always!

    Reply
  10. Annette says

    November 09, 2020 at 8:52 pm

    I need to try these !!

    Reply
  11. Veronica says

    November 09, 2020 at 10:50 pm

    I have been thinking of making stickers for a few months. This tutorial has helped so much!!! Thank you

    Reply
  12. Heijenn says

    November 10, 2020 at 11:51 am

    Love it!

    Reply
  13. Sandra Garcia says

    November 10, 2020 at 5:23 pm

    Omg I lLOVE making stickers

    Reply
  14. Marcia Pacheco says

    November 14, 2020 at 3:58 am

    Love that you are so generous with the information you provide ! Thank you for the tutorials

    Reply
  15. stacy says

    December 30, 2020 at 2:40 am

    new to this, your videos are awesome.
    can the directions be printed out so I can follow them as I am working on projects?

    Reply
    • Kristin says

      April 19, 2021 at 2:11 pm

      Hi, Stacey. I do not know if there is a way to print them out but I copy them and put them into a Word document so I can print them. If you would like to have the ones I have already copied over, just contact me at kl*****@***il.com. I'd be happy to share! Thanks!

      Reply
  16. Wendy Ceja says

    March 27, 2021 at 7:41 am

    I cannot get the registration marks to print correctly. What am I doing wrong?

    Reply
  17. Alicia Ann says

    April 23, 2021 at 4:21 am

    Great information, fyi the sticker sheet download isn't working. It gives me the option to download, I entered my email but then nothing after that.

    Reply
  18. Loralei says

    January 29, 2022 at 6:37 pm

    This looks great! Is there any way to print the instructions?

    Reply
  19. Karen W says

    March 17, 2022 at 3:55 pm

    I am a beginner with stickers so I am using avery full sheet labels. Does anyone know how I would find what material setting to use for those?

    Reply
  20. Cricut.com/setup says

    March 29, 2022 at 7:20 am

    Cricut is a machine that can print many types of materials. If you are a crafter, you must have struggled to create easily manageable crafts yet attractive to commercialize the product by saving time as much as possible. However, creating something that requires less space and offers much productivity is not an easy task. But with the Cricut machines, you have a chance to create opportunities for your crafts. And if you want to discover the benefits, visit cricut.com/setup and get all the information you require for impressive Cricut ideas.

    Reply
  21. Kingston Braxton says

    March 31, 2022 at 5:21 am

    The http://www.cricut.com/setup and discover the acquisition of its innovative technology. Now, setting up your new Cricut machine can be exciting and challenging. So, how do you understand the basic tech features and possibilities that a Cricut has to offer? The solution is simple, follow this guide and learn the basic rules to generate your projects via cricut.com/setup. The Cricut machine cuts the designs with great speed and quality without using scissors and an x-acto. And this is possible due to the subscription and uploading the document or design you want for the project. It also gives the work a smooth effect. And the project also lasts for more time, and it doesn’t even peel off, no flaking, no cracking, and no wrinkling.

    Reply
  22. Monta Reina says

    August 20, 2022 at 12:10 pm

    I am unable to save the print-then-cut stickers. Your input will be greatly appreciated.

    Thanking you in advance.

    Reply
  23. Frankie G says

    August 26, 2022 at 12:33 am

    Thank you so much for the beautiful stickers and the great instructions. I have a Silhouette Cameo 4 and was given a new Explore Air 2 last year for Christmas but haven't tried it out yet. Seeing your clear instructions, I think I will have to try it out soon!

    Reply
  24. Martha B says

    January 29, 2023 at 7:41 pm

    Thanks so much for all the info. I've been wanting to make stickers and now I have a variety. If you come up with some travel stickers let me know. I'd like to try a travel journal with lots of stickers. Thanks again

    Reply
  25. Tina Scalone says

    August 15, 2023 at 12:25 pm

    You are a lifesaver. I could not figure out how to print from top feeder for my stickers. I was getting so frustrated. I just wanted to say thank you.

    Reply
  26. spammer don't spam no more says

    October 29, 2023 at 10:54 pm

    stop

    Reply
  27. zoritoler imol says

    February 28, 2026 at 11:26 pm

    I keep listening to the reports lecture about getting boundless online grant applications so I have been looking around for the top site to get one. Could you advise me please, where could i acquire some?

    Reply
  28. droversointeru says

    March 15, 2026 at 5:26 am

    Great post, I conceive blog owners should learn a lot from this blog its real user friendly.

    Reply
  29. Briannok says

    April 05, 2026 at 8:15 am

    prednisone 10 mg price: SteriCare Pharmacy - prednisone for dogs

    Reply
  30. Barrybot says

    April 07, 2026 at 10:30 pm

    prednisone without prescription 10mg: prednisone for inflammation treatment - buy prednisone online paypal

    Reply
  31. Andrewquinc says

    April 08, 2026 at 7:37 am

    Paw Trust Meds: pet prescriptions online - Paw Trust Meds

    Reply
  32. GabrielRor says

    April 08, 2026 at 9:49 am

    https://pawtrustmeds.com/# pet med

    Reply
  33. Andrewquinc says

    April 08, 2026 at 10:49 am

    canadian drug stores: NorthAccess Rx - canada pharmacy reviews

    Reply
  34. Williamtum says

    April 08, 2026 at 12:02 pm

    https://globalindiapharmacy.shop/# top 10 pharmacies in india

    Reply
  35. Arthurlap says

    April 08, 2026 at 12:15 pm

    best canadian online pharmacy: legitimate canadian pharmacy online - thecanadianpharmacy

    Reply
  36. GabrielRor says

    April 08, 2026 at 1:20 pm

    https://globalindiapharmacy.shop/# online pharmacy india

    Reply
  37. Andrewquinc says

    April 08, 2026 at 1:56 pm

    Paw Trust Meds: online vet pharmacy - Paw Trust Meds

    Reply
  38. GabrielRor says

    April 08, 2026 at 4:45 pm

    https://northaccessrx.com/antibiotics-guide.html# canadian pharmacy review

    Reply
  39. Andrewquinc says

    April 08, 2026 at 4:56 pm

    discount pet meds: Paw Trust Meds - Paw Trust Meds

    Reply
  40. Williamtum says

    April 08, 2026 at 7:09 pm

    http://pawtrustmeds.com/# pet meds official website

    Reply
  41. Andrewquinc says

    April 08, 2026 at 8:03 pm

    Global India Pharmacy: top 10 pharmacies in india - indian pharmacy paypal

    Reply
  42. GabrielRor says

    April 08, 2026 at 8:13 pm

    https://northaccessrx.com/otc-meds.html# canadian online pharmacy

    Reply
  43. Arthurlap says

    April 08, 2026 at 8:55 pm

    Global India Pharmacy: Global India Pharmacy - indian pharmacy paypal

    Reply
  44. GabrielRor says

    April 08, 2026 at 11:41 pm

    http://northaccessrx.com/# canadian world pharmacy

    Reply
  45. Arthurlap says

    April 09, 2026 at 2:15 am

    best rated canadian pharmacy: pharmacies in canada that ship to the us - the canadian pharmacy

    Reply
  46. Williamtum says

    April 09, 2026 at 2:17 am

    https://globalindiapharmacy.shop/# п»їlegitimate online pharmacies india

    Reply
  47. Andrewquinc says

    April 09, 2026 at 2:17 am

    Global India Pharmacy: Global India Pharmacy - buy prescription drugs from india

    Reply
  48. GabrielRor says

    April 09, 2026 at 3:07 am

    https://pawtrustmeds.com/# online pet pharmacy

    Reply
  49. Andrewquinc says

    April 09, 2026 at 5:21 am

    canadian pharmacy tampa: NorthAccess Rx - canadian pharmacy reviews

    Reply
  50. GabrielRor says

    April 09, 2026 at 6:20 am

    https://pawtrustmeds.com/# pet prescriptions online

    Reply
  51. Arthurlap says

    April 09, 2026 at 7:33 am

    canadian pharmacy ltd: NorthAccess Rx - canadian pharmacy near me

    Reply
  52. Andrewquinc says

    April 09, 2026 at 8:24 am

    best rated canadian pharmacy: NorthAccess Rx - online canadian pharmacy reviews

    Reply
  53. Williamtum says

    April 09, 2026 at 9:26 am

    https://globalindiapharmacy.shop/# india online pharmacy

    Reply
  54. GabrielRor says

    April 09, 2026 at 9:33 am

    https://pawtrustmeds.com/# п»їdog medication online

    Reply
  55. Andrewquinc says

    April 09, 2026 at 11:22 am

    online vet pharmacy: pet pharmacy - pet meds online

    Reply
  56. Arthurlap says

    April 09, 2026 at 12:56 pm

    safe online pharmacies in canada: canadian pharmacy ltd - legit canadian online pharmacy

    Reply
  57. Andrewquinc says

    April 09, 2026 at 3:16 pm

    Paw Trust Meds: Paw Trust Meds - pet med

    Reply
  58. Michaelfrats says

    April 09, 2026 at 4:32 pm

    Online medicine order: Global India Pharmacy - india online pharmacy

    Reply
  59. Williamtum says

    April 09, 2026 at 6:58 pm

    https://pawtrustmeds.shop/# Paw Trust Meds

    Reply
  60. Andrewquinc says

    April 09, 2026 at 7:12 pm

    online pharmacy canada: NorthAccess Rx - canadian pharmacy store

    Reply
  61. Andrewquinc says

    April 09, 2026 at 11:07 pm

    canadian pharmacy 365: cheap canadian pharmacy - canadian drugs

    Reply
  62. Arthurlap says

    April 10, 2026 at 1:38 am

    Paw Trust Meds: pet meds online - pet meds official website

    Reply
  63. Andrewquinc says

    April 10, 2026 at 3:01 am

    india pharmacy mail order: Global India Pharmacy - buy medicines online in india

    Reply
  64. Williamtum says

    April 10, 2026 at 5:41 am

    https://pawtrustmeds.shop/# Paw Trust Meds

    Reply
  65. Andrewquinc says

    April 10, 2026 at 6:45 am

    Paw Trust Meds: Paw Trust Meds - pet meds official website

    Reply
  66. Arthurlap says

    April 10, 2026 at 7:43 am

    canadian pharmacy no scripts: NorthAccess Rx - canadian pharmacy no rx needed

    Reply
  67. GabrielRor says

    April 10, 2026 at 10:22 am

    https://globalindiapharmacy.com/# top 10 pharmacies in india

    Reply
  68. Andrewquinc says

    April 10, 2026 at 10:35 am

    indianpharmacy com: india online pharmacy - Global India Pharmacy

    Reply
  69. Russellensub says

    April 10, 2026 at 2:03 pm

    http://corebluehealth.com/# Generic Viagra for sale

    Reply
  70. Timothyeurot says

    April 10, 2026 at 2:32 pm

    Viagra online price: CoreBlue Health - Buy generic 100mg Viagra online

    Reply
  71. Justincup says

    April 10, 2026 at 2:40 pm

    top online pharmacy 247: CivicMeds - safe canadian pharmacies

    Reply
  72. JamesAmund says

    April 10, 2026 at 3:25 pm

    http://veritascarepharm.com/# Tadalafil Tablet

    Reply
  73. Timothyeurot says

    April 10, 2026 at 5:39 pm

    sildenafil over the counter: Viagra generic over the counter - sildenafil online

    Reply
  74. Russellensub says

    April 10, 2026 at 7:15 pm

    https://corebluehealth.shop/# CoreBlue Health

    Reply
  75. Timothyeurot says

    April 10, 2026 at 8:44 pm

    rx pharmacy coupons: CivicMeds - online pharmacy usa

    Reply
  76. Justincup says

    April 10, 2026 at 8:47 pm

    CoreBlue Health: Cheap generic Viagra online - CoreBlue Health

    Reply
  77. JamesAmund says

    April 10, 2026 at 10:42 pm

    http://civicmeds.com/# canadian pharmacy world coupon code

    Reply
  78. Justincup says

    April 10, 2026 at 11:46 pm

    VeritasCare: VeritasCare - VeritasCare

    Reply
  79. Timothyeurot says

    April 10, 2026 at 11:47 pm

    Cheap Viagra 100mg: Generic Viagra for sale - CoreBlue Health

    Reply
  80. Russellensub says

    April 11, 2026 at 12:19 am

    https://civicmeds.shop/# prices pharmacy

    Reply
  81. Justincup says

    April 11, 2026 at 2:43 am

    Generic Viagra online: CoreBlue Health - CoreBlue Health

    Reply
  82. Timothyeurot says

    April 11, 2026 at 2:48 am

    CoreBlue Health: Viagra Tablet price - sildenafil 50 mg price

    Reply
  83. Russellensub says

    April 11, 2026 at 5:11 am

    https://veritascarepharm.shop/# VeritasCare

    Reply
  84. Justincup says

    April 11, 2026 at 5:37 am

    rx pharmacy: CivicMeds - safe canadian pharmacy

    Reply
  85. Timothyeurot says

    April 11, 2026 at 5:49 am

    CoreBlue Health: buy viagra here - buy viagra here

    Reply
  86. JamesAmund says

    April 11, 2026 at 6:04 am

    https://civicmeds.shop/# canada pharmacy online legit

    Reply

Leave a Reply Cancel reply

Your email address will not be published. Required fields are marked *

Primary Sidebar

Ready, Set, Sew! An online sewing course for beginners by top US sewing blogger, Sweet Red Poppy.

Hello, I’m Kimberly, the creator of Sweet Red Poppy!

I’m a wife, mother to 3, seamstress, and lover of all things crafty! Sweet Red Poppy is my creative outlet where I find and create inspiration. It’s a place where I can share my never-ending sewing projects and my love of learning!

Read more about me →

The Latest

  • DIY Valentine Paper Bow Garland Template
  • All About Bags Round-Up
  • What is Fleece and How to Sew it
    What is Fleece Fabric and How to Sew It
  • Easy No-Sew Appliqué with Cricut Machine
  • How to Paint a Kraft Paper Banner
  • How to Create Magnetic Photo Frames with Glowforge & Cricut + 20 Free SVGs

Footer

↑ back to top

Legal

  • Privacy Policy
  • Disclosure

Newsletter

  • Get My Cricut Book HERE
  • Sign Up! For Emails and Updates
  • YouTube
  • Instagram
  • Facebook
  • Pinterest
  • TikTok
  • Mail

About

  • Contact
  • About
  • Home

Copyright © 2024 Sweet Red Poppy