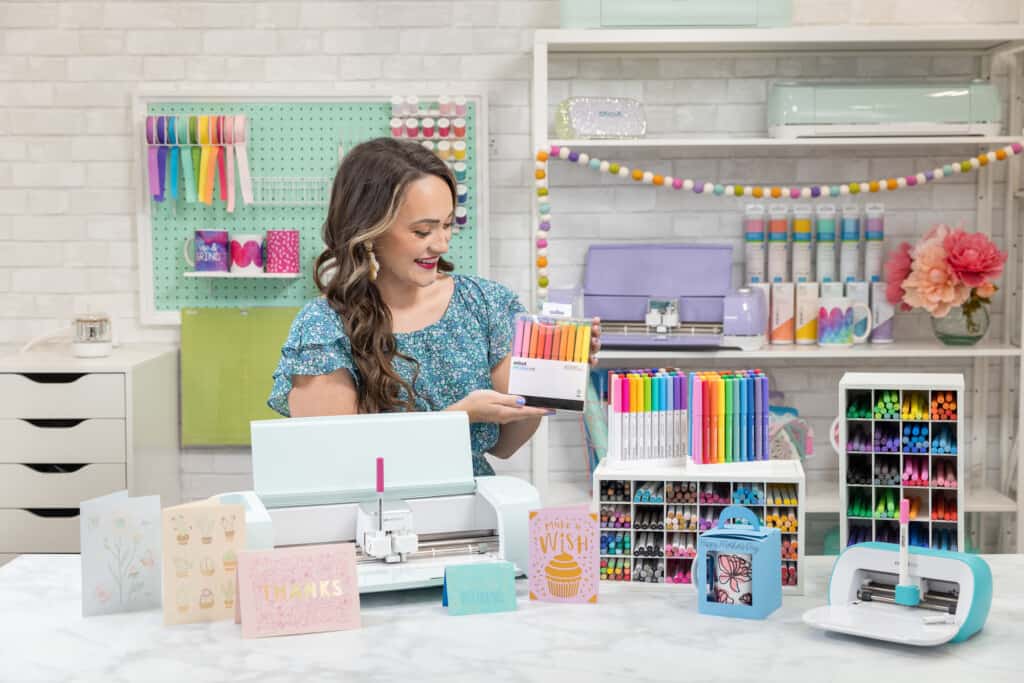
Wondering how to use your Cricut Pens and Markers with your Cricut machine? I’ll teach you everything you need to know in this comprehensive guide.
Learn about the different types of pens and markers that Cricut offers, how to install a Cricut pen, how to write with a Cricut, search for writing fonts, draw images, turn a cut image into a drawn image, and attach your drawing to a cut file, and my troubleshooting tips.
When I first got my Cricut, it took me a while to explore the writing function. But, ever since I discovered it, I look for any excuse to use it!
The drawing aspect of the Cricut machine is widely underused and I’m really excited to show you how using a pen or marker with your machine can give your projects a one-of-a-kind look!
It’s perfect for creating coloring pages, detailed birthday banners, cards, adding doodles, or even adding a sweet note to a gift.

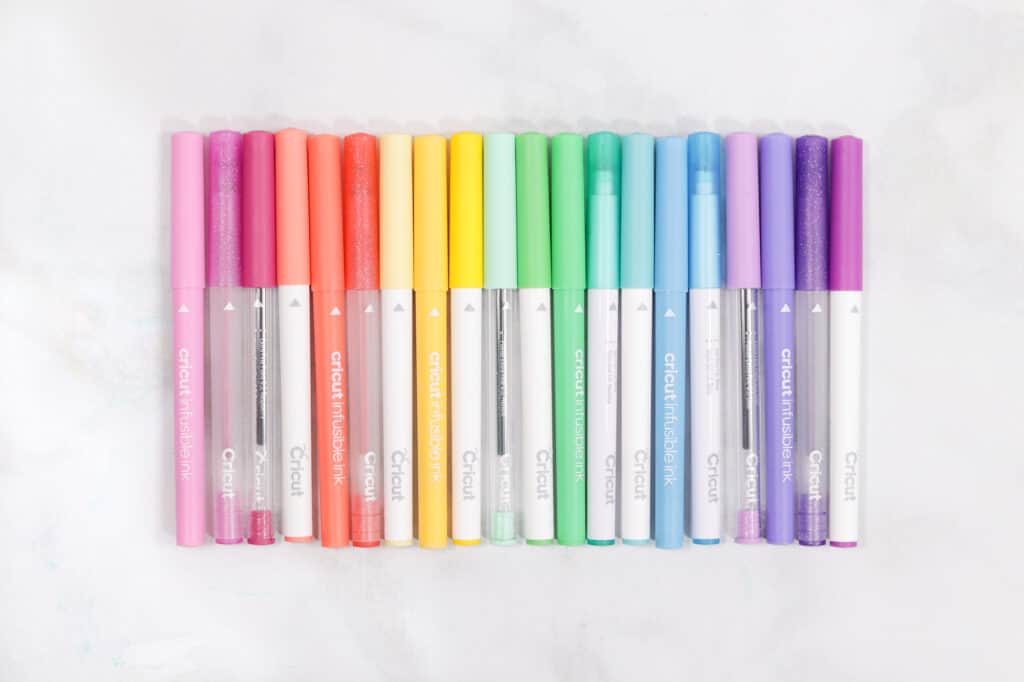
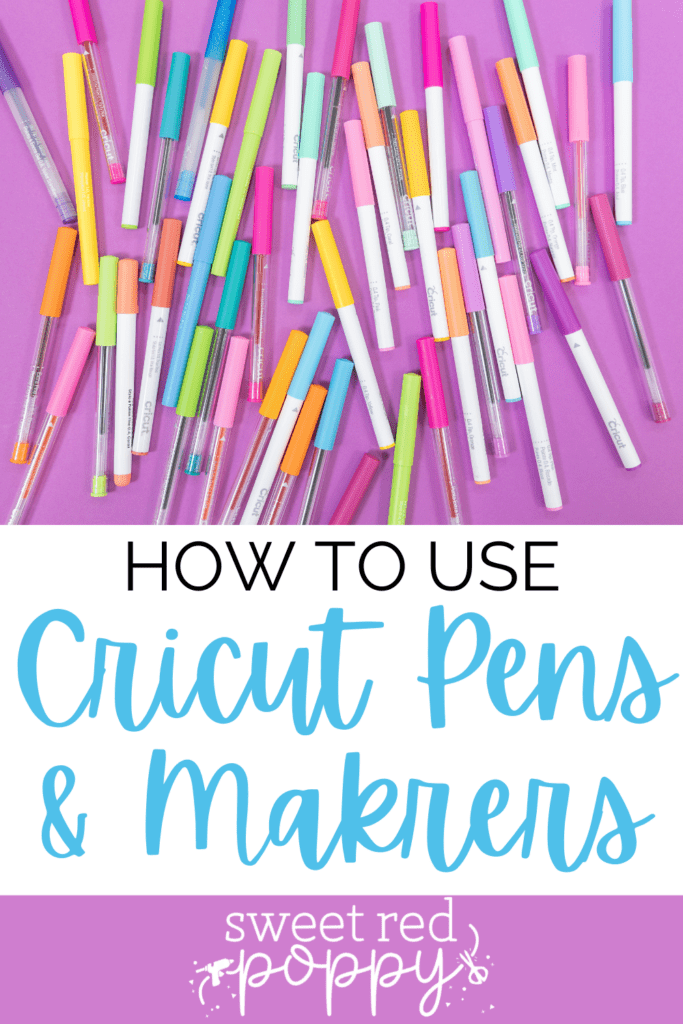
Cricut carries a variety of pens and markers, making it easy to find the perfect one for any project.
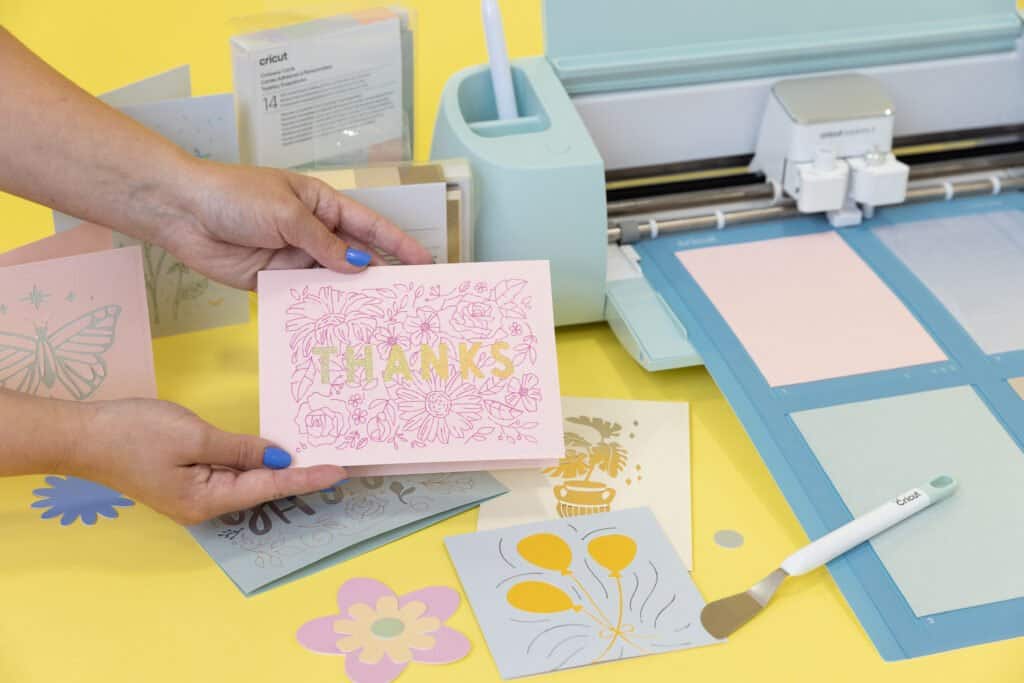
I love how pens and markers can create one-of-a-kind custom cards in just minutes!
I've even used them to organize my pantry by creating labels for spice jars and containers. Once you know how to use Cricut pens and markers, the possibilities are truly endless!
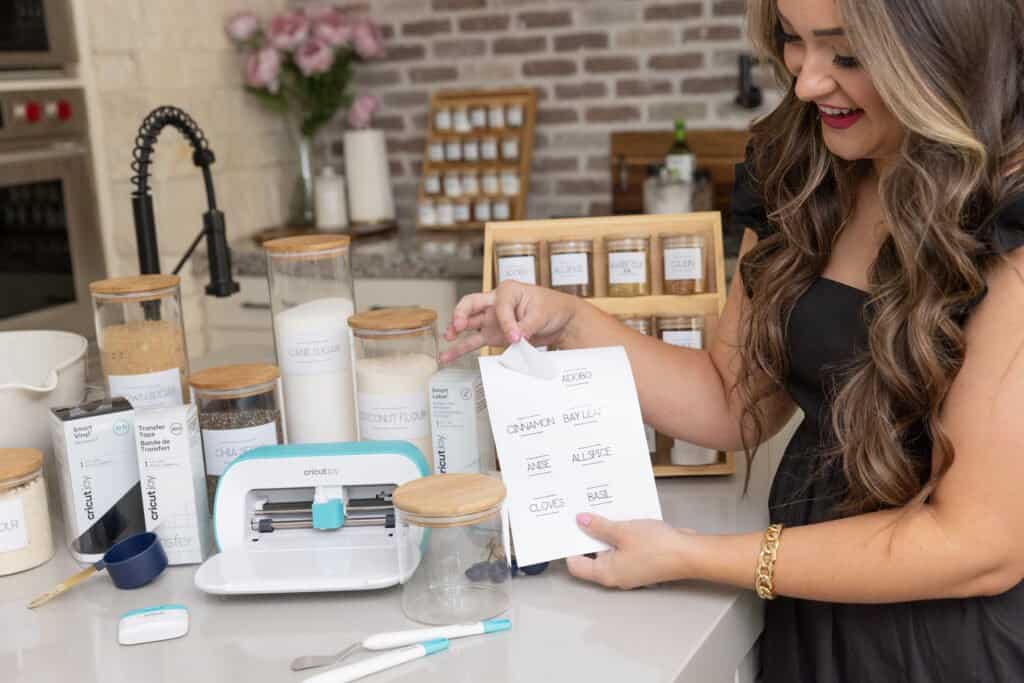
Table of Contents
Click HERE to download my FREE Cricut Pens Quick Reference Guide - All About Pens with Sweet Red Poppy.
Which Cricut Machines can use pens and markers?
Good news! All three of the Cricut machines, the Maker, Explore, and the Joy, are compatible with both pens and markers.
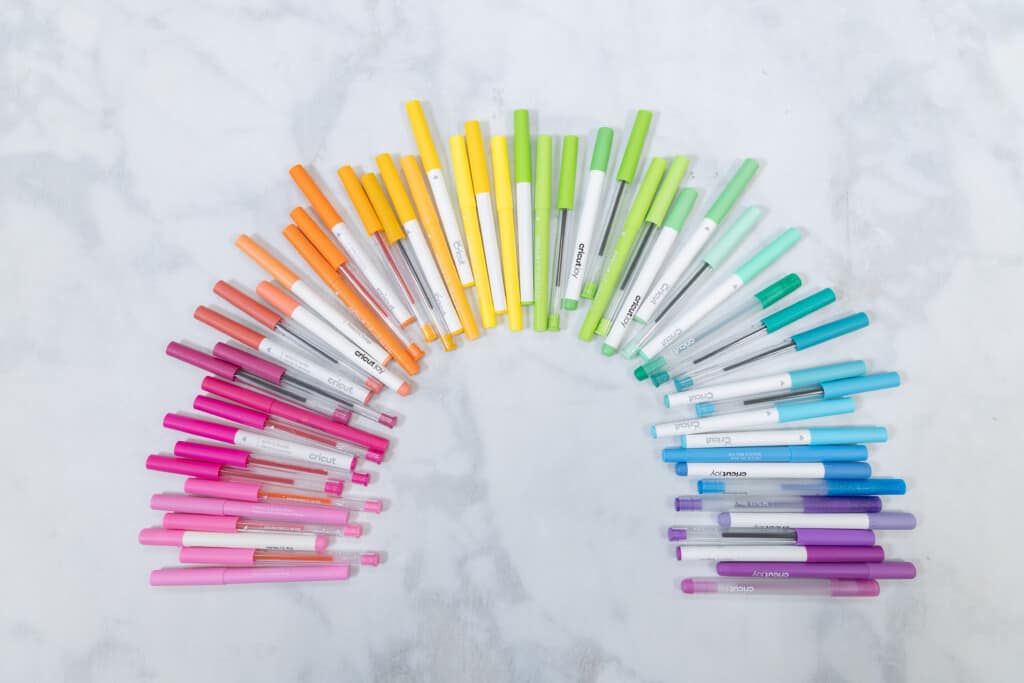
The Maker and the Explore use the standard Cricut pens and markers. However, the Cricut Joy has its own set of pens that are sized perfectly to fit in its smaller housing. The Cricut Joy Pens are labeled with “Cricut Joy” and are smaller in size.
These pens and markers are not compatible with other Cricut machines and the other pens and markers will not fit into the Cricut Joy, so make sure you buy the variety right for you!
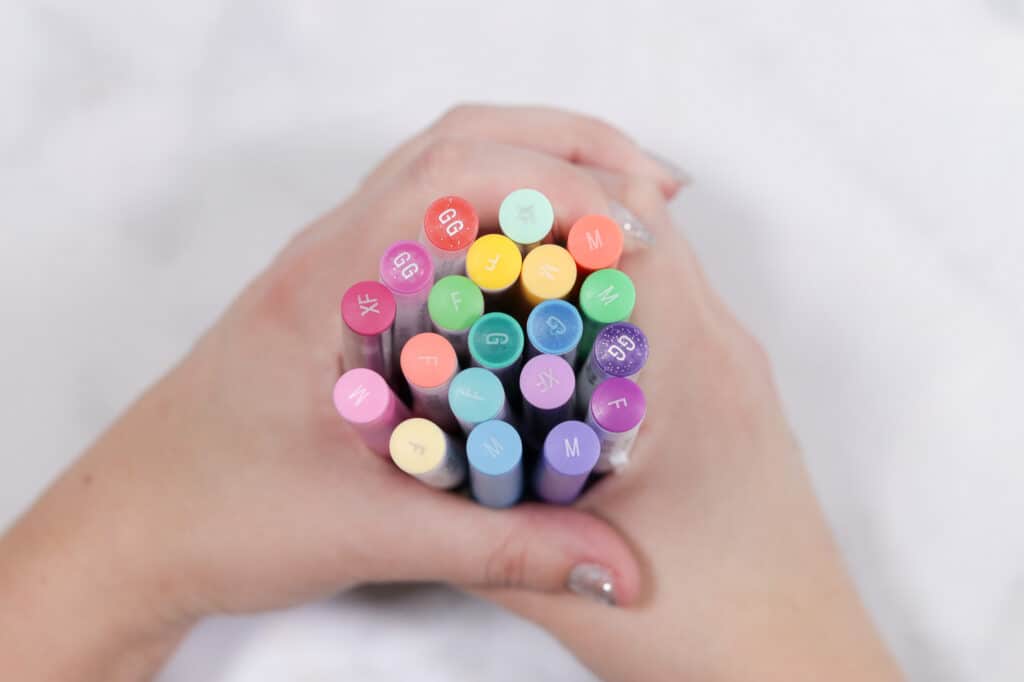
How do I Identify the Different Varieties of Pens?
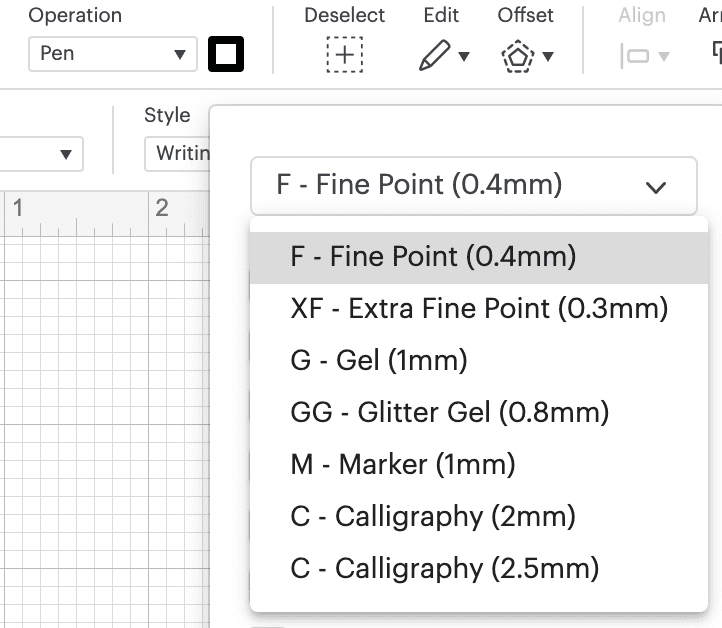
To tell the difference between all of the Cricut pens, simply look at the barrel color and the abbreviation stamped on the bottom of the pen. For example, Glitter pens are marked with a "G", Extra Fine Point Pens are marked with "XF", and so forth.
Pro Tip - Store your Cricut pens with the cap in the downward position for the best results. This will make sure that the tip always has ink and doesn’t dry up. This is particularly important for the Gel Pens, but good practice for all the varieties. This also allows you to see the stamps on the pens to quickly identify the different varieties.
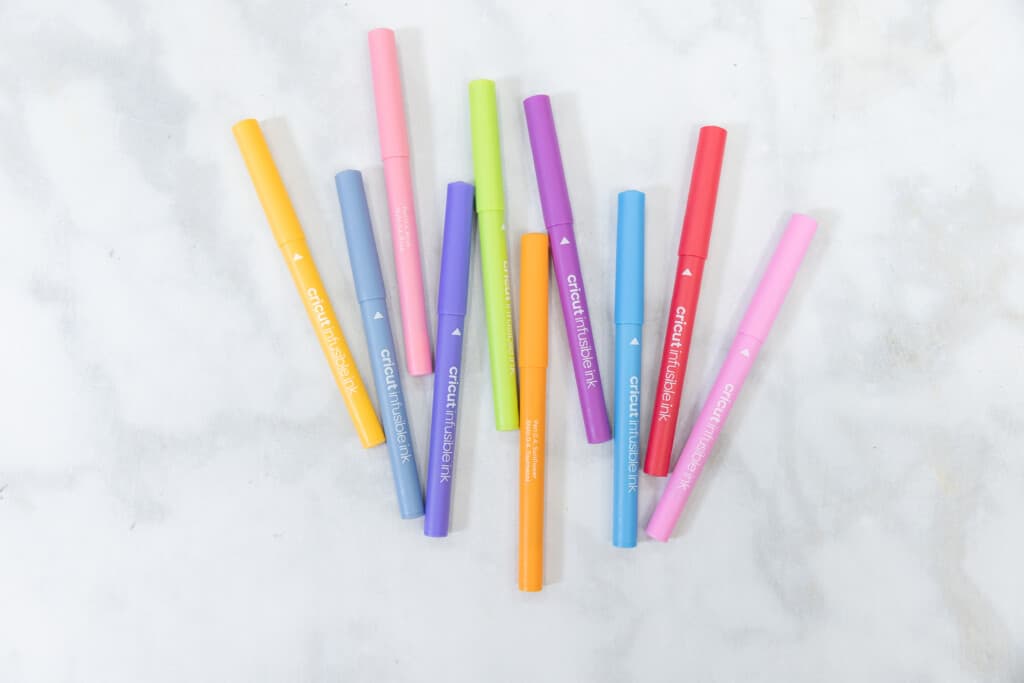
Cricut Pens
Extra Fine Point Pens (XF) 0.3
This style of pen is perfect for drawing fine, precise lines with your Cricut machine. The ink is permanent, making it perfect for long-lasting, waterproof designs.
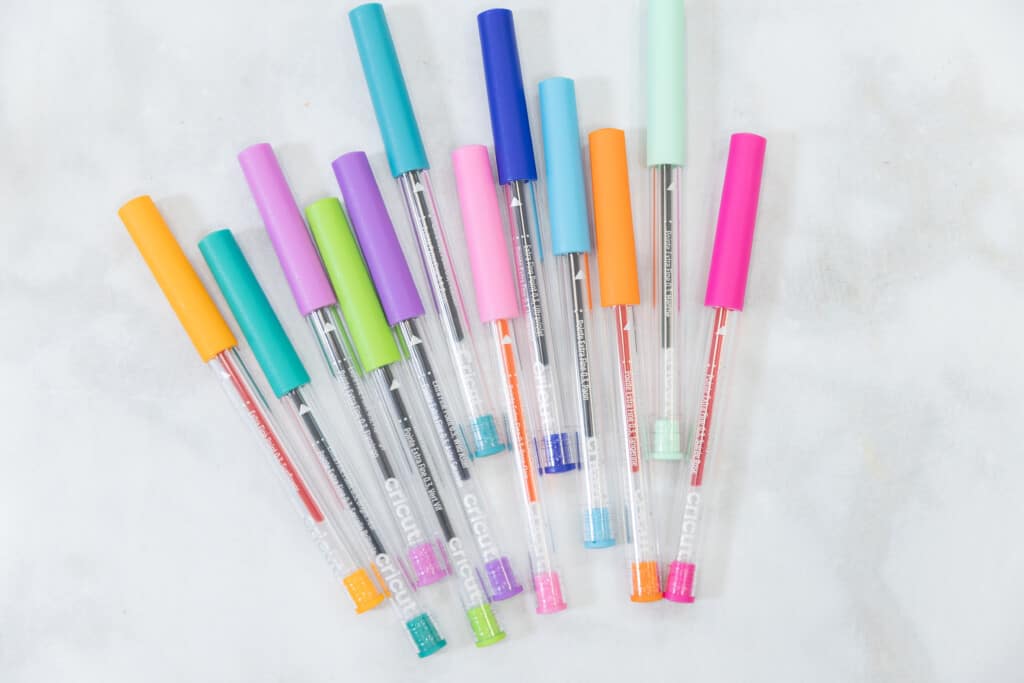
This pen set features a slightly larger tip and is great for writing messages, drawing flowers, and even outlining coloring pages. Cricut offers the largest variety of colors in this pen size, and it's my go-to for most projects. Once dry, this ink is permanent.
With a slightly larger point and roller ball tip, gel pens add a smooth and special touch to any project. Use them on holiday invites or cards to add permanent pop of color.
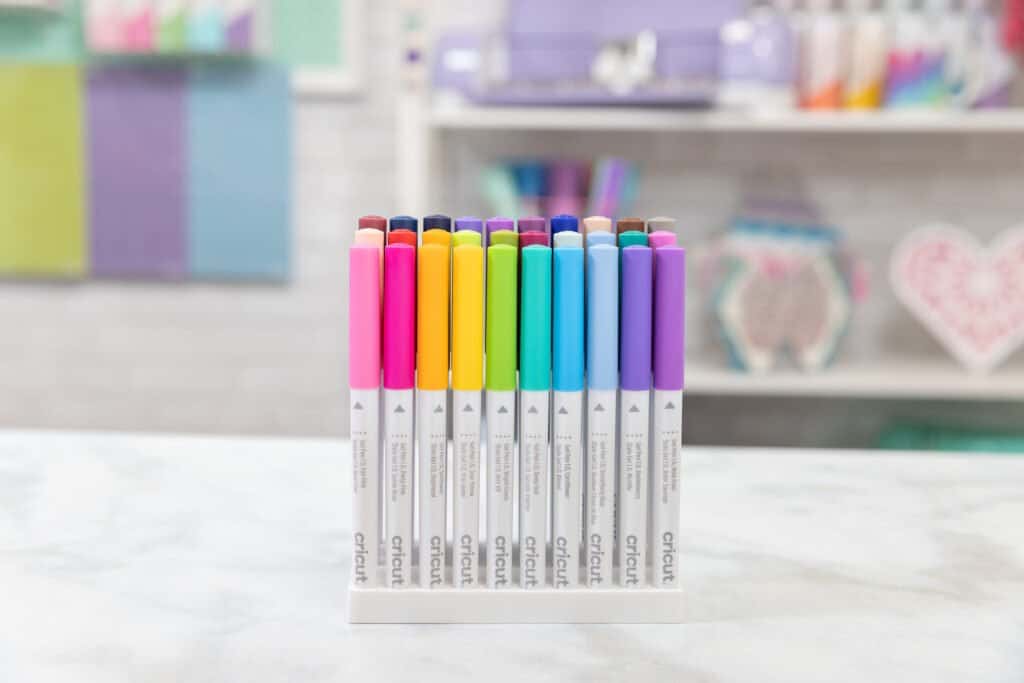
These are similar to the Gel Pens, but with some sparkle! If you want to add a little bit of pizazz to your project, consider using glitter gel pens.
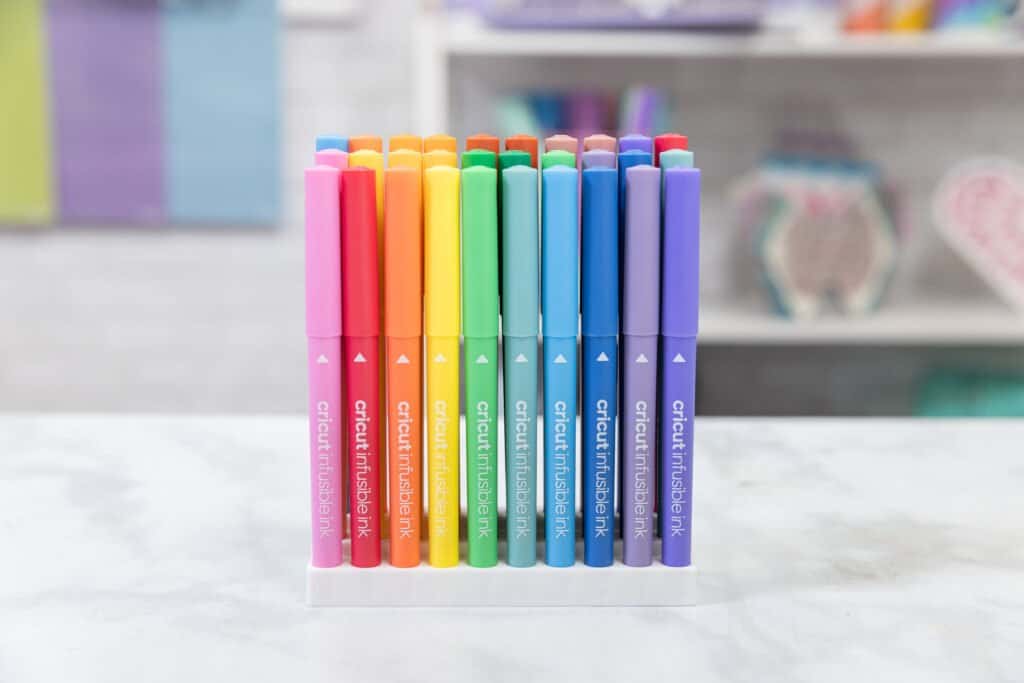
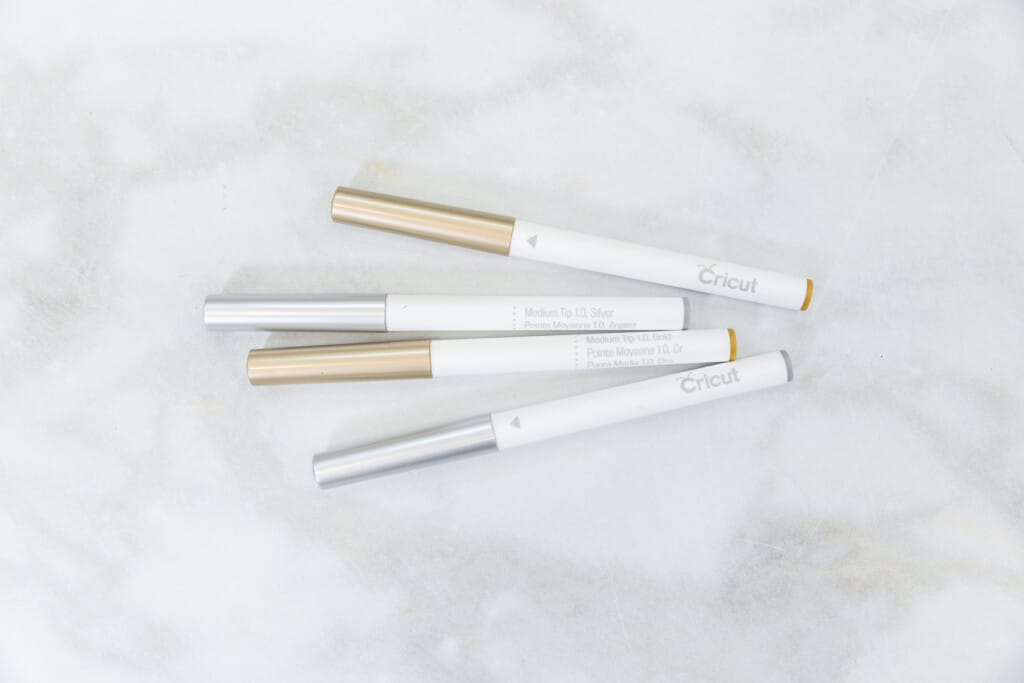
Infusible Ink Fine Point Pens (0.4)
Create vibrant, permanent designs with Infusible Ink Fine Point Pens. Draw intricate designs with this pen on laser copy paper to be applied to poly-coated sublimation transfers. Learn more about Infusible Ink Pens HERE.
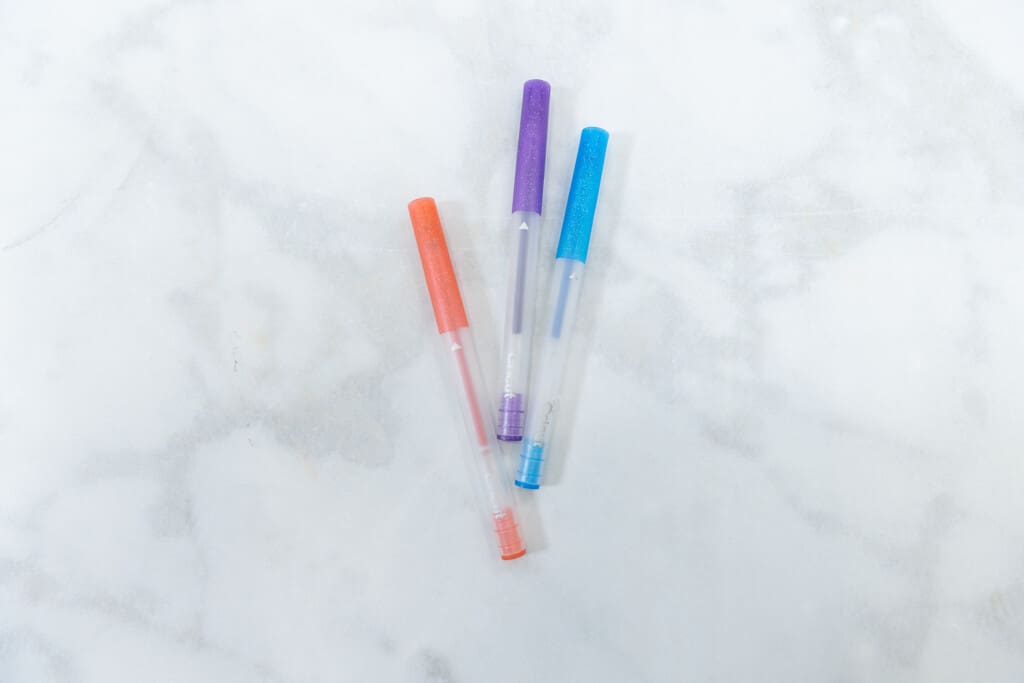
This pen was created to be used with the Cricut Maker when cutting out fabric projects. It’s a great way to mark seam allowances, embroidery patterns, and transfer markings since it’s easily removed with water.
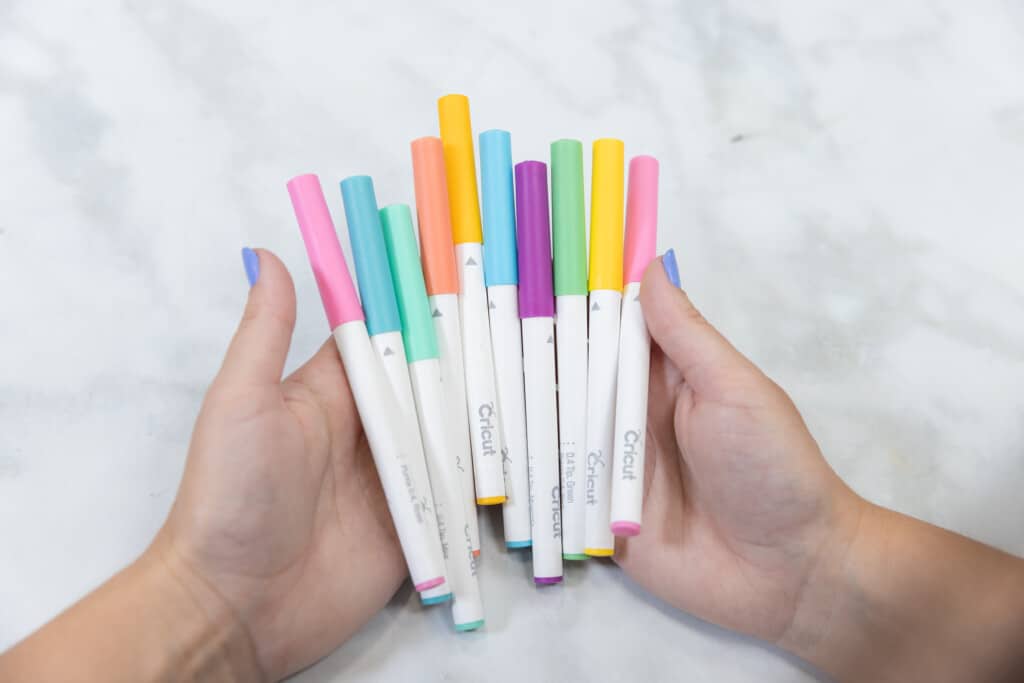
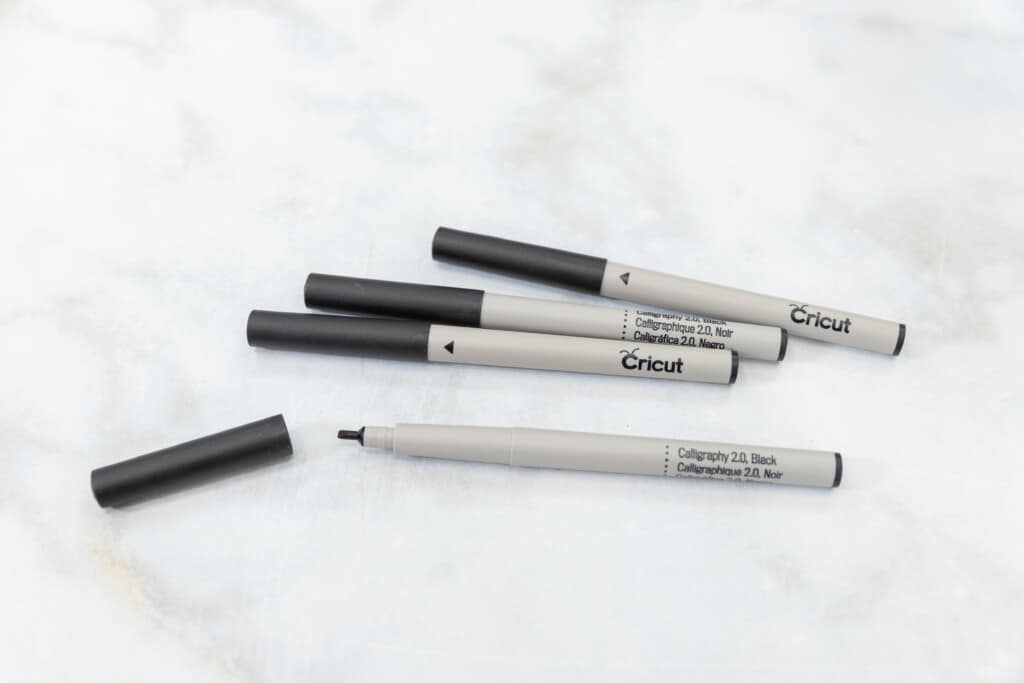
Markers
Similar to Infusible Ink Fine Point Pens, these markers also require an EasyPress and a compatible poly-coated base. Their larger point allows for a more bold, permanent design.
These markers are perfect for adding a bit of sheen to any project and come in a variety of bold and bright shades.
This is the largest marker that Cricut offers and it features a slightly angled tip that allows it to create a beautiful hand-drawn look. In order to correctly use the calligraphy pen, you need to tilt the pen at a 45-degree angle during the installation process.
What Materials Can I Write on?
For all Cricut pens and markers, you want to avoid any shiny, glossy, or textured surfaces. These will give you issues when you try to write on them using the Cricut Pen feature.
Always make sure you test your pens on the material you'd like to write on beforehand. This way you know if the ink will adhere, smear, bleed, etc. before you begin your project.
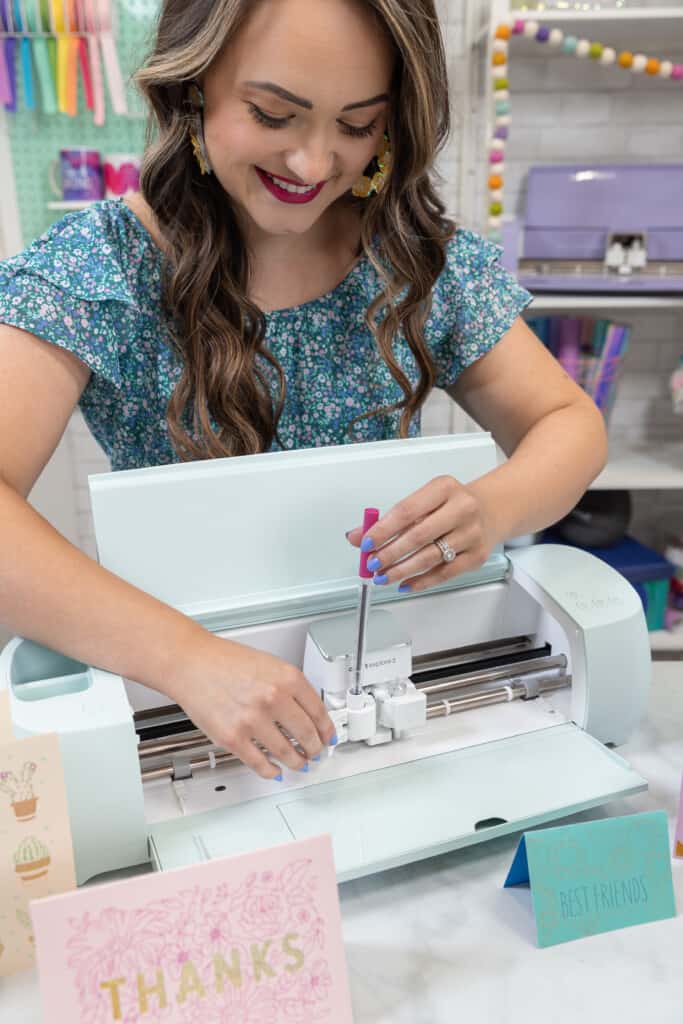
How to Install a Cricut Pen
Pro Tip: Before installing your pens or markers into your machine, test them out on a scrap piece of paper to make sure the ink is flowing. This will help avoid your pens from skipping.
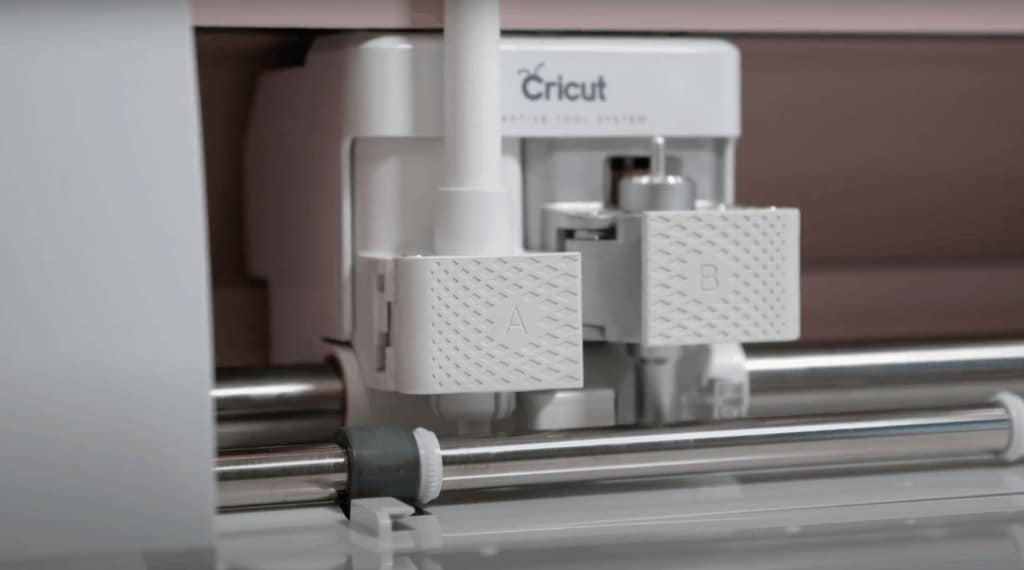
For the Maker and Explore, begin by opening up Clamp A on your machine. Your pens and markers will always go in Clamp A. Remove the lid of the pen or marker and secure it on the bottom of the marker.
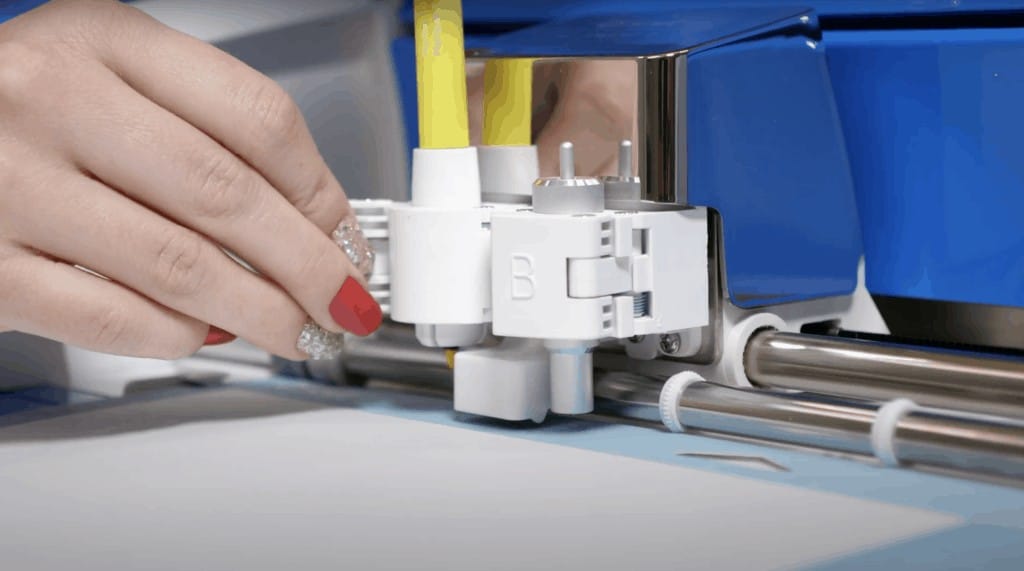
Slide the pen into Clamp A until you hear a small click. It’s important that you hear a click, otherwise, the pen is not fully engaged in the pen holder. There will be a little bit of resistance before it clicks.
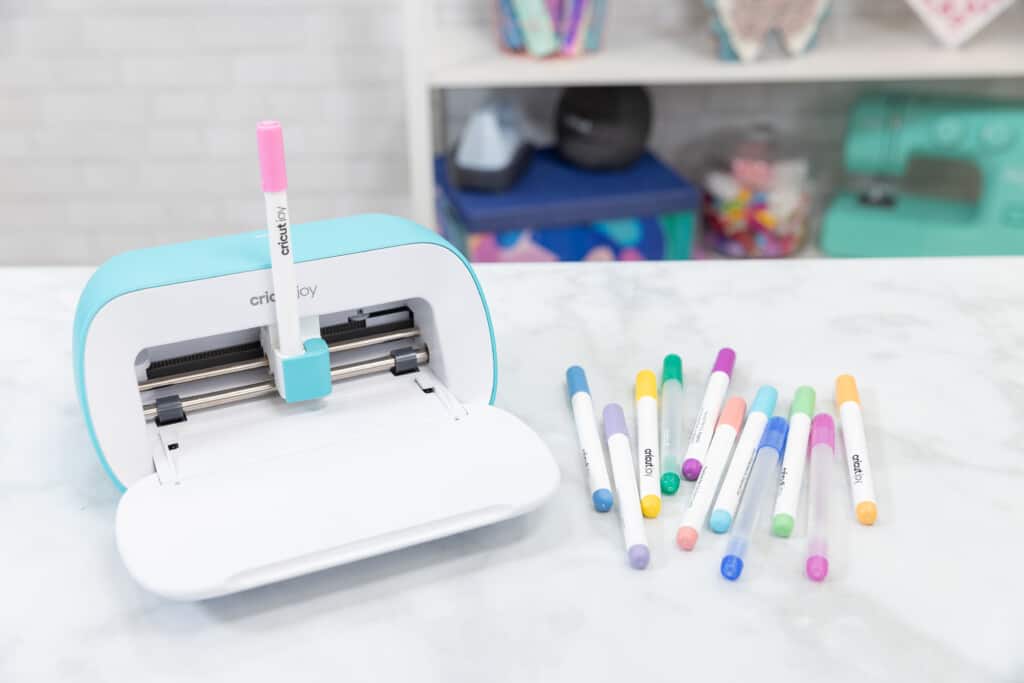
For the Cricut Joy, remove the blade. Slide the pen into place with the clamp open (there won’t be a click but it will feel secure). Close the clamp; now you are ready to begin writing.
How do I tell my Cricut Machine to Write instead of Cut?
Within Cricut Design Space the default operation of your machine is to cut. However, you can easily change this to use the other tools Cricut offers. In this case, we want to use the draw function.
Begin by selecting the word or phrase you want to write on your canvas in Design Space.
Now select the “Operation” panel in the upper left corner and under “Draw” select “Pen.”
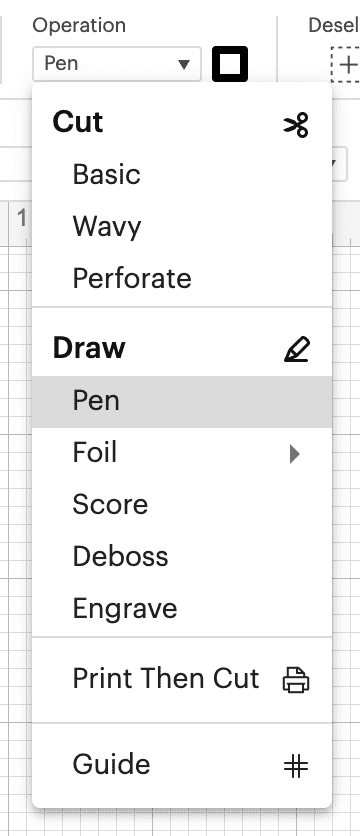
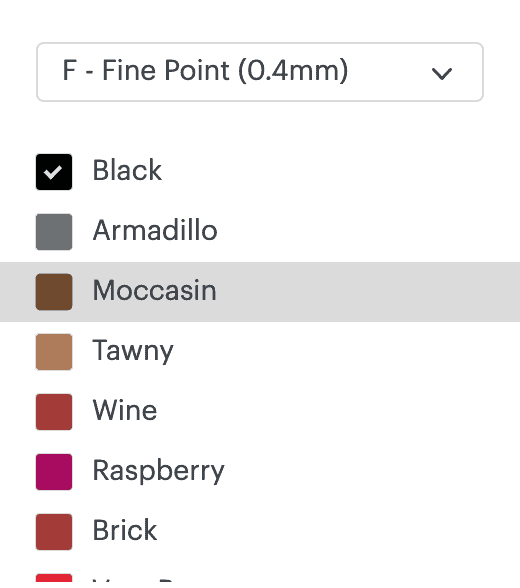
Next to the Operation button is a small outlined square. By clicking on the square you can now identify the specific type of pen or marker as well as the correct color you’ll be using.
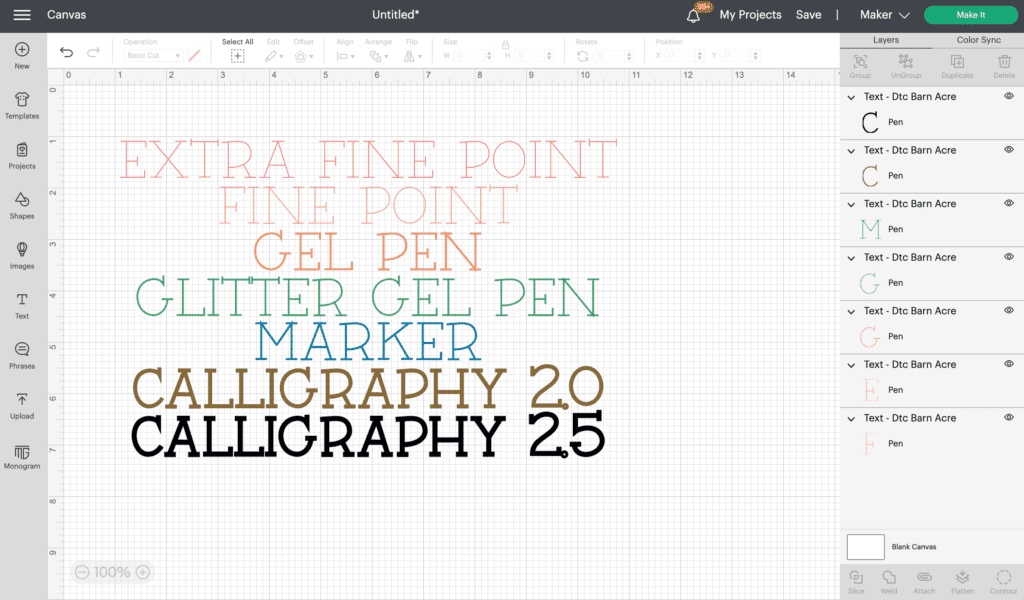
You can see in the graphic below how each pen and marker type appears in Design Space. It's a fairly accurate representation of what they’ll look like in real life, but not exact of course. Make sure you create a practice drawing before creating your final project.
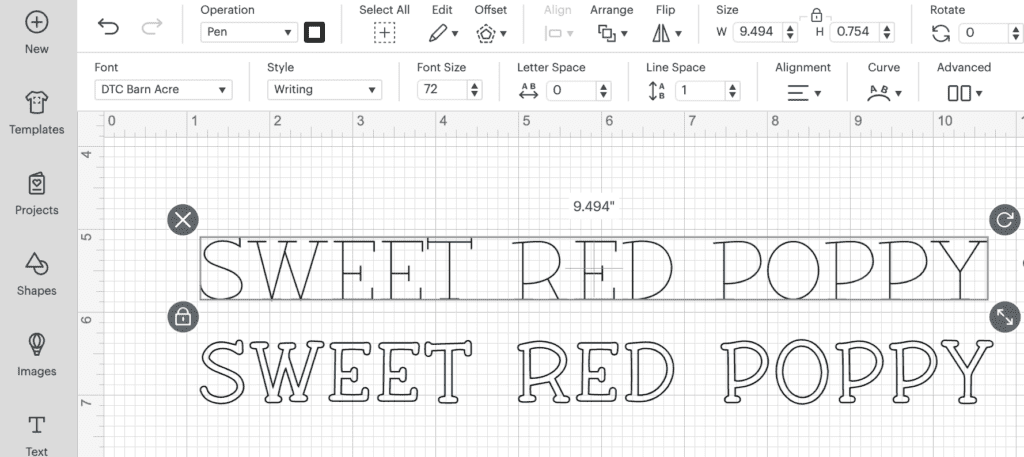
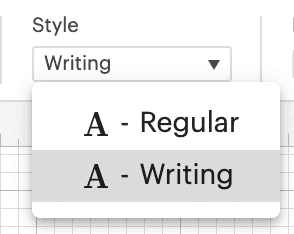
What is the difference between Regular Style vs Writing Style?
There are two different styles you can write fonts in: Regular and Writing. Regular Style is represented by an outline. So for a font, the inner and outer lines will both be drawn.
Writing Style is a single line, akin to normal handwriting. This option is only available for Cricut Fonts.
You can see the difference between the two in the image below.
All Cricut fonts are available in Regular style, but not all have the Writing option. You can see which options are available for each font by simply selecting your phrase or word and then clicking on the “Style” drop-down menu. Here either you’ll see both options for “Regular” and “Writing” or just “Regular.”
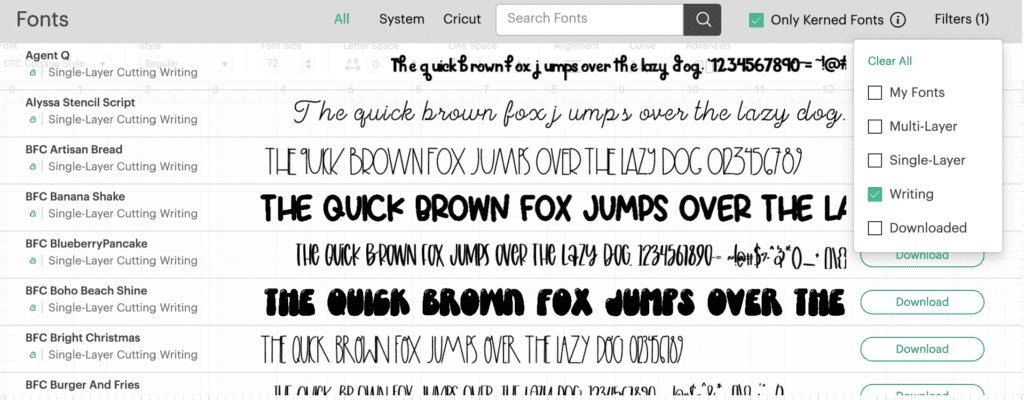
To help you quickly identify “Writing” fonts, open the fonts panel and use the filter feature to find “Writing” fonts.
System fonts, or fonts downloaded to your computer, cannot be changed to Writing Style. They must be created in that format.
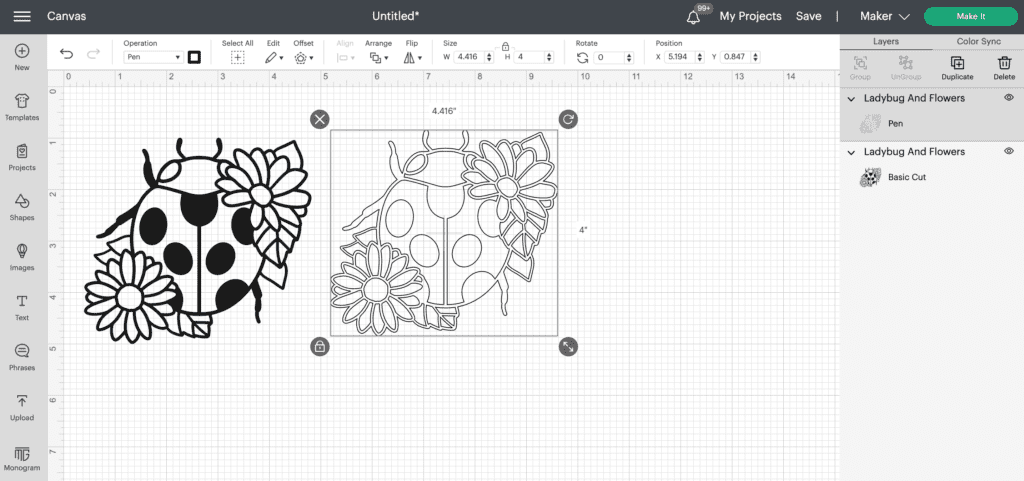
How do I draw Images?
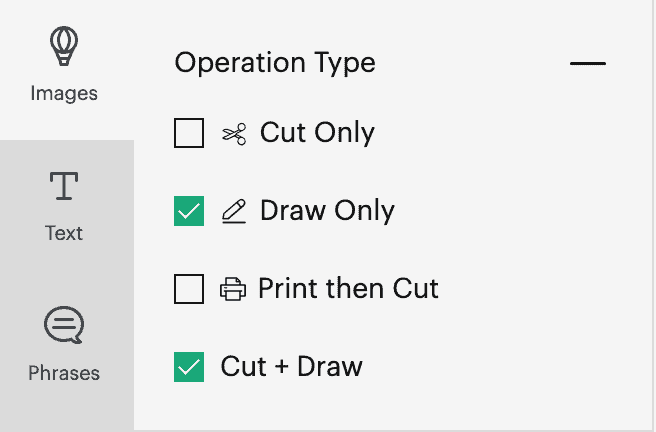
Similar to fonts, there are some images in Design Space that are created in the "Draw" format, and others you can turn into drawings.
When inserting an image onto your Design Space Canvas, set your filters on the left-hand side to "Draw Only" and "Cut + Draw" to quickly identify images that are formatted to use pens and markers.
You'll notice that once you insert your image onto your canvas, it will have various layers. For "Draw Only" images, there will be a layer or multiple layers with the "Pen" operation selected. You can customize the different pen layers by selecting each layer and changing the pen type and the color type.
For "Cut + Draw" images, the image will include layers to both "Basic Cut" and "Pen." These identifiers will distinguish which parts of the image will be cut and which ones will be drawn.
You can see that this Monarch Butterfly image (#M2ED0006B) has 6 different Pen Layers, each representing a different color pen, and one Basic Cut Layer.
You can change the pen colors of each layer in the drop-down menu if you'd like.
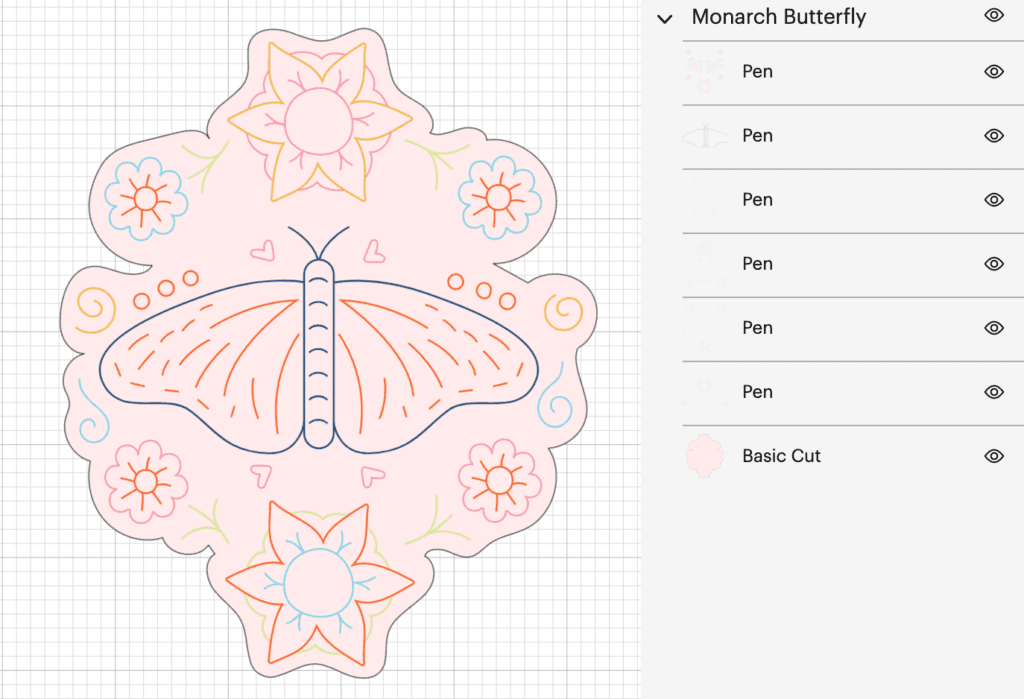
When you send this design to "Make It", Cricut will prompt you to put in the correct pen color as it draws and cuts your image.
How do I Turn a Cut Image into a Drawn Image?
You can turn a "Cut Only" image into a drawn image by simply selecting your image and changing the Operation in the drop-down menu from "Cut" to "Draw" --> "Pen."
If your image has multiple layers, there might be some overlapping of the layer images, which means the lines will overlap when being written. This could result in some thicker parts of the drawing where the pen has gone over multiple times. You also wouldn't want to use multiple pen colors if this is the case.
So be aware of this when turning a cut image into a drawn image!
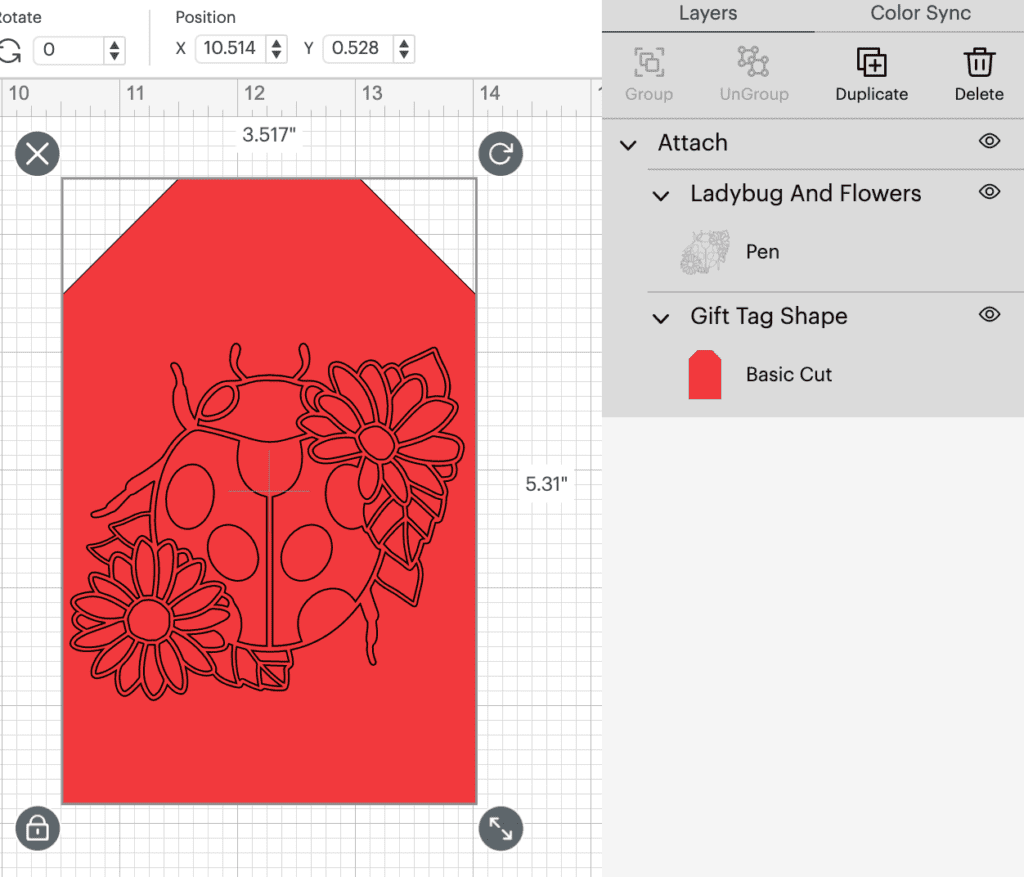
Attaching your Drawing to a Cut File
If you’re going to add the draw feature to a card, tag, or another image, make sure that you’ve attached it before selecting, “Make It.”
Do this by positioning your drawn image in your desired location on your cut image. Now select both the cut and drawn elements, and select the "Attach" button, shown with the paperclip image, in the lower right-hand corner.

You can also right-click and select "Attach" to do the same. This will tell Cricut that you want both elements to be created as one.
You can see in the image below that I've placed the lady bug "Draw" image on top of the red tag "Cut image." I selected both and clicked "Attach." Once selected, all the layers will be under the same "Attach" section in the Layers panel on the right-hand side.
How do I remove my pens?
To remove your pen from the Cricut Machine, simply unlock the clamp and use one hand to gently push the pen up from the bottom and your other hand to pull the pen from the top.
Can I use non-Cricut pens?
Yes, you can! If your pens fit into the appropriate tool clamp, then you can use them without any issue. Just select your Design Space settings to the pen or marker that is most similar.
For writing utensils that don’t fit snuggly into the tool clamp, you can use third-party pen adapters. I don’t have any experience with using the adapters, but many people love them!

Troubleshooting
Make sure your pen is inserted completely into your machine. For the Maker and Explore, ensure the pen is clicked into place.
Test your pens on a scrap piece of paper to make sure (1) the pen's ink is flowing and (2) your selected pen writes well on your desired material.
Are you going to try the Draw feature on your Cricut? What are you going to create first? I cannot wait to see!
Don't forget to join my Facebook group where you can show us what you're making, ask questions, and learn from others.
Looking for projects that use Cricut pens and markers? Click here.
Don't want to forget this post? Save it on Pinterest by clicking HERE!
Knowing what to use for the project you are working on is a must. I wind up researching again and again on some aspects of a project..
Great information! I've used my friend's Cricut a few times, but never used the pens and markers. I hope to win so I can use your tips and tricks!!!
I’ve only used a pen once! I need to try some more. Thanks for all the great tips!
These all looks absolutely WONDERFUL! Sure would love to give them a whirl soon!
Tips for pens that dry out quickly, any help for that?
Awesome!
Very creative cant wait to get started
Very helpful info! Thank you!!
You’re pretty talented
So much great information Thank you
All I can say is WOW!
Thank you for the tips. Both my wife and I love them.
Wow! This is a very detailed post about using pens and markers with the machines. I like the info about how to use non-Cricut pens and markers with the machines too. Great insight.
So many Awesome crafting possibilities!!! Thank You for the tips on pens & markers!!!
Thank you for the helpful tips
Cricuts are amazing machines.
Thanks so helpful
WOW so many crafting options!
Very Interesting and Informative. Thanks for all the Helpful Tips!!!
Thank you
I don't have a cricut (yet?), but just reading about this is so tempting! What a hobby!
My wife and kids love crafting so would make so many things with this.
Very thorough article
Thank you so much for all of the information.
This would be awesome i love to do crafts i love the jars so pretty thanks for all the information
I can think of a million different projects I could make, now that I have watched this video and read the page. My mind is racing with possibilities! 🙂
So many great tips! Thanks
Great ideas! Thanks for the info.
Thank you for your knowledge!
Perfect for all of those finishing touches. I would like to add these pens to my crafting collection.
love this! I didnt know about them
Love this site. And would love the pattern for the baby body suit. Is it a free pattern on this Web Site?
very useful
Nice markers!!!!
Thank you sharing for your knowledge! Picked up so many great tips!
I love using pens in my Cricut but haven't been able to find many fonts that I like that . Do you have any tips for finding non-Cricut fonts that are Writing style? I've only been able to find ones that end up being drawn as the outline.
buy prednisone 10mg online: generic prednisone tablets - prednisone canada
buy prednisone without prescription: prednisone tablets 10mg 20mg - buy prednisone online no script
world pharmacy india: Global India Pharmacy - Global India Pharmacy
https://pawtrustmeds.shop/# pet rx
https://globalindiapharmacy.shop/# indian pharmacy
https://northaccessrx.shop/# buying drugs from canada
http://pawtrustmeds.com/# Paw Trust Meds
canada pet meds: Paw Trust Meds - dog medicine
https://northaccessrx.com/ed-meds-guide.html# canadian pharmacy com
https://pawtrustmeds.shop/# п»їdog medication online
Online medicine order: Global India Pharmacy - online pharmacy india
https://pawtrustmeds.shop/# п»їdog medication online
http://northaccessrx.com/# canadian pharmacy no scripts
https://globalindiapharmacy.com/# top online pharmacy india
best canadian pharmacy online: canada drugstore pharmacy rx - canadian pharmacy ltd
https://pawtrustmeds.shop/# pet meds online
online vet pharmacy: vet pharmacy - pet meds official website
http://pawtrustmeds.com/# Paw Trust Meds
http://pawtrustmeds.com/# Paw Trust Meds
Global India Pharmacy: Global India Pharmacy - india pharmacy
vet pharmacy online: Paw Trust Meds - dog prescriptions online
safe reliable canadian pharmacy: NorthAccess Rx - the canadian pharmacy
https://pawtrustmeds.shop/# pet pharmacy
dog prescriptions online: pet med - Paw Trust Meds
northern pharmacy canada: canadian pharmacy online - canadian pharmacy 24 com
canadian pharmacy prices: NorthAccess Rx - canada ed drugs
https://globalindiapharmacy.com/# top 10 pharmacies in india
buy prescription drugs from india: indianpharmacy com - Global India Pharmacy
Paw Trust Meds: Paw Trust Meds - Paw Trust Meds
https://northaccessrx.com/otc-meds.html# ed drugs online from canada
Viagra without a doctor prescription Canada: CoreBlue Health - order viagra
https://civicmeds.com/# canadian pharmacy generic levitra
https://civicmeds.com/# pharmacy in canada
the pharmacy: buying from canadian pharmacies - best online foreign pharmacies
https://veritascarepharm.shop/# VeritasCare
legit canadian online pharmacy: canadian online pharmacy viagra - canada discount pharmacy
https://corebluehealth.shop/# Viagra tablet online
CoreBlue Health: order viagra - CoreBlue Health
http://civicmeds.com/# online pharmacy in germany
canada pharmacy online: cheapest pharmacy for prescriptions without insurance - pharmacy coupons
Generic Cialis without a doctor prescription: Cheap Cialis - Generic Tadalafil 20mg price
https://veritascarepharm.com/# VeritasCare
https://corebluehealth.shop/# CoreBlue Health
Generic Cialis price: Cialis without a doctor prescription - Generic Cialis price
CoreBlue Health: CoreBlue Health - CoreBlue Health
VeritasCare: Generic Cialis price - Buy Tadalafil 20mg
https://veritascarepharm.shop/# Tadalafil price
Cialis without a doctor prescription: VeritasCare - Cialis 20mg price
https://veritascarepharm.com/# VeritasCare
CoreBlue Health: CoreBlue Health - Order Viagra 50 mg online
https://civicmeds.shop/# online shopping pharmacy india
legit online pharmacy: CivicMeds - best online pharmacy india
VeritasCare: Cialis over the counter - Buy Tadalafil 20mg
pharmacy wholesalers canada: CivicMeds - reliable online pharmacy
https://veritascarepharm.com/# VeritasCare
Viagra online price: CoreBlue Health - CoreBlue Health
http://civicmeds.com/# medstore online pharmacy
VeritasCare: cheapest cialis - VeritasCare
online pharmacy cialis: CivicMeds - canadian pharmacy cialis reviews
https://civicmeds.shop/# pharmacy prices
best pharmacy: CivicMeds - pharmacy online 365 discount code
https://veritascarepharm.shop/# VeritasCare
VeritasCare: Cialis without a doctor prescription - Cheap Cialis
http://civicmeds.com/# rx pharmacy online
Viagra online price: CoreBlue Health - viagra canada
CoreBlue Health: best price for viagra 100mg - CoreBlue Health
https://civicmeds.shop/# pharmacy rx
https://veritascarepharm.com/# VeritasCare
Sildenafil 100mg price: Viagra online price - sildenafil over the counter
https://civicmeds.shop/# discount pharmacy card
pharmacy rx world canada: online pharmacy india - rx online pharmacy
CoreBlue Health: CoreBlue Health - Cheap Sildenafil 100mg
canadian pharmacy uk delivery: best online pet pharmacy - reliable canadian pharmacy reviews
CoreBlue Health: generic sildenafil - sildenafil online
buy cialis pill: VeritasCare - VeritasCare
online pharmacy discount code: CivicMeds - tadalafil canadian pharmacy
https://veritascarepharm.com/# Cialis without a doctor prescription
https://corebluehealth.com/# CoreBlue Health
legitimate canadian mail order pharmacy: the pharmacy - canadian pharmacy reviews
mexican pharmacy what to buy: CivicMeds - canadian pharmacy generic levitra
https://corebluehealth.shop/# buy Viagra over the counter
http://civicmeds.com/# best canadian online pharmacy
http://veritascarepharm.com/# VeritasCare
VeritasCare [url=https://veritascarepharm.com/#]VeritasCare[/url] VeritasCare
https://civicmeds.shop/# canadian pharmacy tampa
http://corebluehealth.com/# CoreBlue Health
https://civicmeds.com/# reputable online pharmacy no prescription
http://corebluehealth.com/# CoreBlue Health
VeritasCare: cialis for sale - VeritasCare
https://corebluehealth.com/# CoreBlue Health
https://civicmeds.com/# canadian pharmacy no scripts
https://corebluehealth.com/# Cheapest Sildenafil online
https://veritascarepharm.shop/# Buy Tadalafil 20mg
https://civicmeds.com/# online canadian pharmacy reviews
https://civicmeds.shop/# safe reliable canadian pharmacy
pin up pin up casino
https://pinupaz.online/ pin-up oyunu
pin up az online pin-up online casino
pin up az online pin-up oyunu
pin up pin-up online casino
pin up pin up
pin up az online pin-up online casino
pin-up pin-up oyunu
https://pinupaz.online/ pin up casino
pin up pin-up oyunu
pin up pin-up oyunu
https://steadymedspharmacy.shop/# SteadyMeds pharmacy
no script pharmacy: top 10 online pharmacy in india - legitimate online pharmacy
worldwide pharmacy: world pharmacy india - trusted online pharmacy
pharmacy no prescription required [url=http://formulinepharmacy.com/#]FormuLine Pharmacy[/url] us pharmacy no prescription
SteadyMeds pharmacy: SteadyMeds pharmacy - SteadyMeds pharmacy
http://accessbridgepharmacy.com/# AccessBridge Pharmacy
overseas pharmacy no prescription [url=https://formulinepharmacy.shop/#]pharmacy website india[/url] pharmacy online
SteadyMeds pharmacy: SteadyMeds - SteadyMeds
medicine online: top 10 pharmacies in india - best mail order pharmacy
no prescription pharmacy paypal: FormuLine Pharmacy - pharmacy online
https://accessbridgepharmacy.shop/# buying prescriptions in mexico
canada pharmacy 24h [url=https://steadymedspharmacy.shop/#]canadian king pharmacy[/url] buying drugs from canada
http://steadymedspharmacy.com/# SteadyMeds
SteadyMeds pharmacy: SteadyMeds pharmacy - SteadyMeds pharmacy
best rx pharmacy online [url=https://formulinepharmacy.com/#]FormuLine Pharmacy[/url] new pharmacy online
https://formulinepharmacy.com/# online drugs order
https://accessbridgepharmacy.com/# AccessBridge
reliable canadian pharmacy: canadian pharmacy ed medications - canadian pharmacy world reviews
mexican pharmacy ship to usa: AccessBridge - AccessBridge
http://accessbridgepharmacy.com/# AccessBridge Pharmacy
online pharmacy without prescription: FormuLine Pharmacy - п»їinternational drug mart
https://accessbridgepharmacy.shop/# AccessBridge
SteadyMeds pharmacy [url=https://steadymedspharmacy.shop/#]canadian pharmacy price checker[/url] SteadyMeds
us pharmacy no prescription: indian pharmacies safe - reliable online pharmacy
mexican mail order pharmacy: purple pharmacy online - progreso, mexico pharmacy online
SteadyMeds: SteadyMeds pharmacy - SteadyMeds
http://formulinepharmacy.com/# buy drugs online
trustworthy online pharmacy: FormuLine Pharmacy - best mail order pharmacy
SteadyMeds pharmacy [url=http://steadymedspharmacy.com/#]SteadyMeds[/url] SteadyMeds
https://steadymedspharmacy.shop/# SteadyMeds pharmacy
foreign online pharmacy: FormuLine Pharmacy - trustworthy online pharmacy