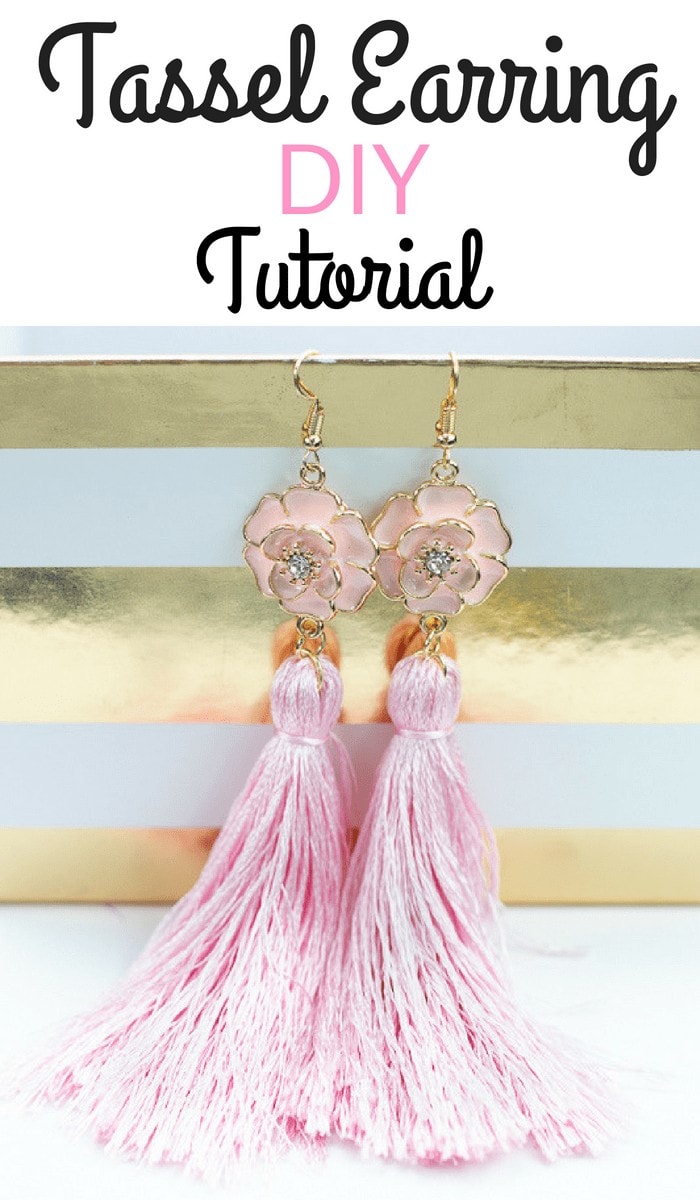
Tassel Earring DIY Tutorial
I have some exciting news!! I've teamed up with JOANN as a sewing ambassador and I couldn't be more excited about this partnership!
I will be bringing you monthly tutorials featuring all of the products that I LOVE from JOANN! If you've been following along with my blog for a while, then you already know that I shop at JOANN almost weekly for all of my sewing and crafting supplies. When they approached me about this opportunity I jumped at the chance because it's the perfect fit for my blog!
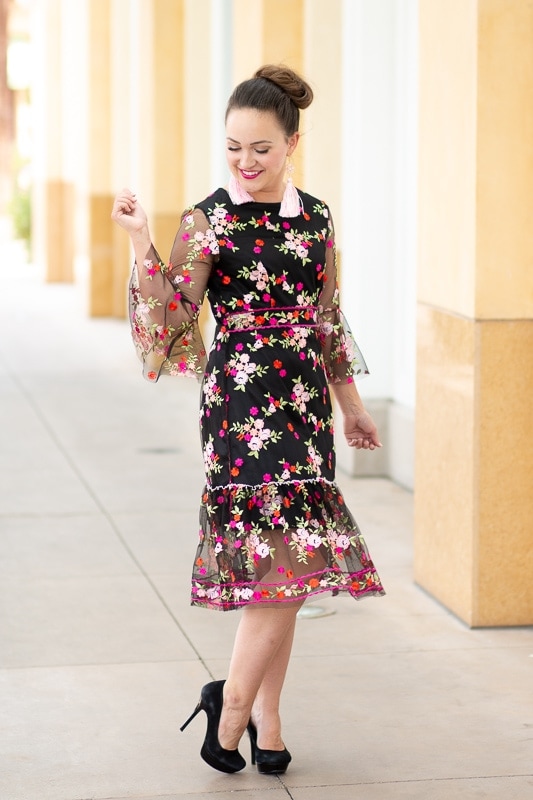
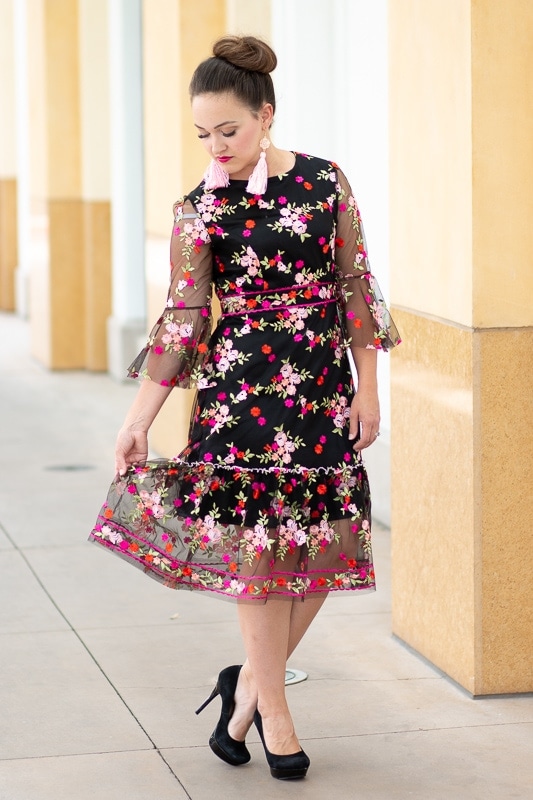
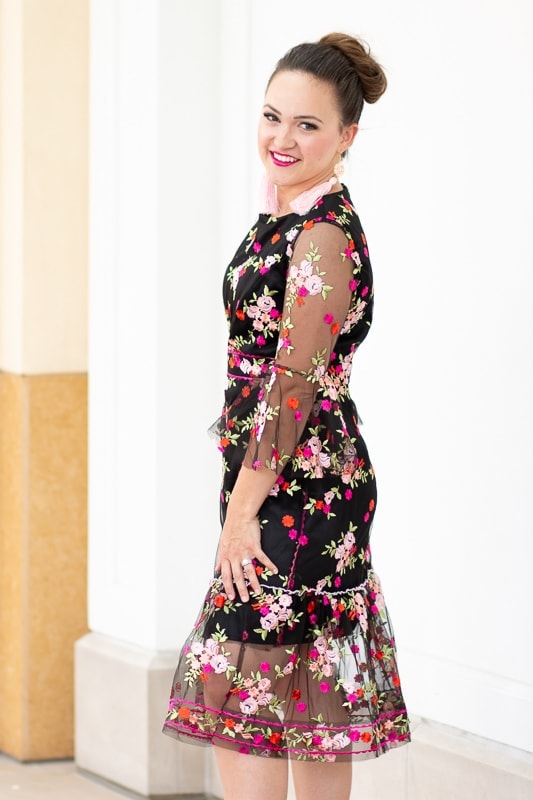
When I fell completely head over heels in love with a $1,000 Kate Spade dress I knew the only reasonable thing to do was to recreate the dress for a fraction of the price. So off I headed to the nearest JOANN in search of the perfect fabric and supplies for a fun set of earrings!
I find it’s easiest to start off by selecting a pattern that has the style lines I’m looking for. I knew I wanted a fitted bodice and a detailed sleeve. The pattern needed to have a semi-fitted skirt that I could add a bit of detail to. But it needed to be fitted enough that if I added some volume it wouldn’t become too overwhelming. McCall’s M7717 View D was perfect for the look I wanted!
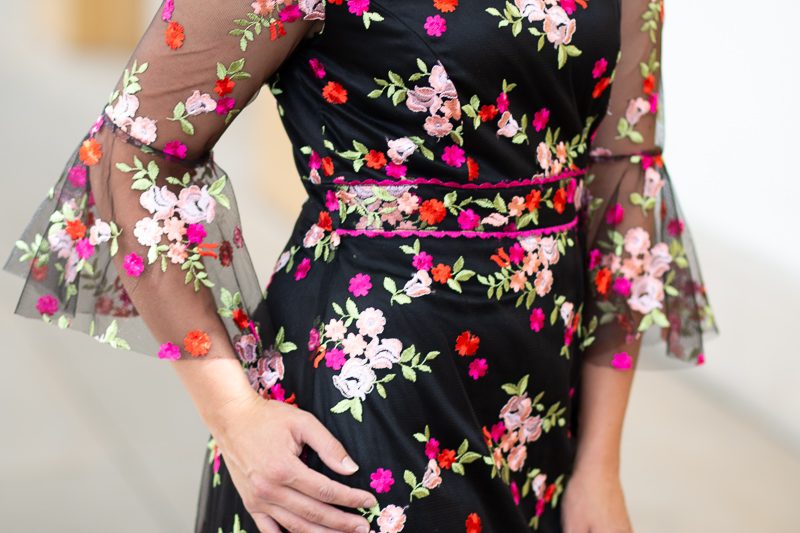
I really lucked out when it came to the fabric for this dress! It’s such a stunning color palette and I knew it would be a show stopper! I found this embroidered lace fabric in the specialty department. I haven’t been able to locate it online but I’ve found it in person in a few stores so if you hurry you might still find it!
I measured myself and compared my measurements to the finished garment measurements and decided how much ease I wanted throughout the dress. This is one of my most important tips when sewing with paper patterns! Instead of going off of the size chart, find an outfit in your closet that already fits the way you want your new dress to fit. Measure the waist and the bust to get an idea of how much ease (that’s the difference between your actual measurement and the garment measurement) you will need.
I sewed up a quick muslin to check the fit of the bodice, then I held my breath and cut into my gorgeous embroidered fabric praying every step of the way that I wouldn’t ruin it! Do you ever get nervous when you cut into fabric? I swear it doesn’t matter how many times I sew with beautiful fabric, I always get a bit nervous!
Luckily I didn’t make any mistakes! I wanted this dress to be as beautiful on the inside as it was on the outside so I took care to finish the dress with french seams and a lining. I can honestly say the inside looks just as good as the outside. Yay!
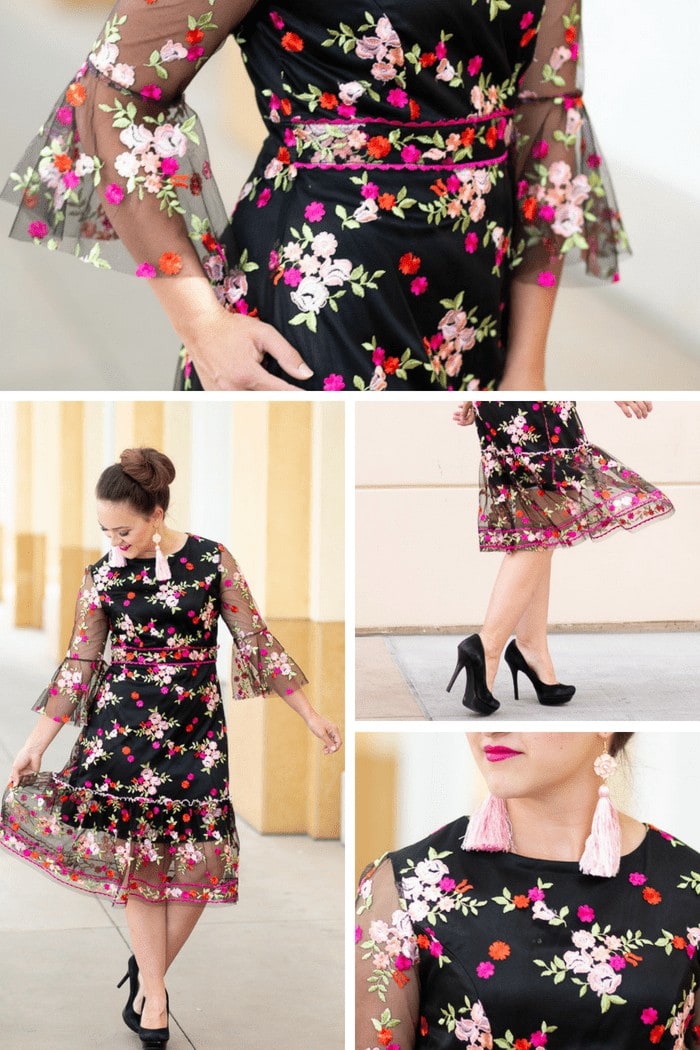
There are a few important things I wanted to share that made a huge difference for this dress! First off, invisible thread was a must! After sewing a few seams with a normal thread I headed back to JOANN and found black invisible thread. It’s a very thin, and slightly stretchy thread that’s somewhat invisible once it’s been sewn. The trim around the bottom of the skirt is actually pieced together using invisible thread so it looks like it belongs. You can barely even see the stitching.
Second, in order to get princess seams to lay correctly, they need to be trimmed, graded, clipped and notched. That took a good amount of time, but it was totally worth the extra work!
Lastly, I used chalk marking paper to transfer all of my darts and pattern markings to the fabric. If you haven’t tried it before it’s a must-have! I always keep a pack on hand because it comes in a variety of colors which makes it suitable for every project.
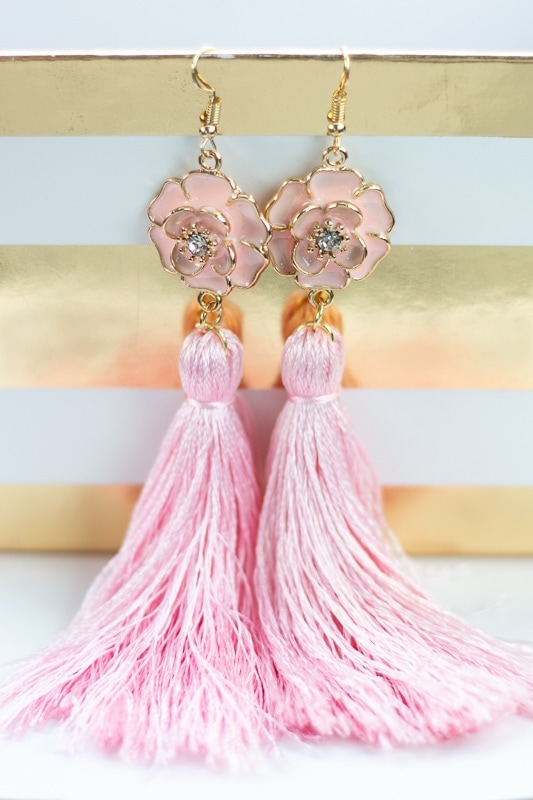
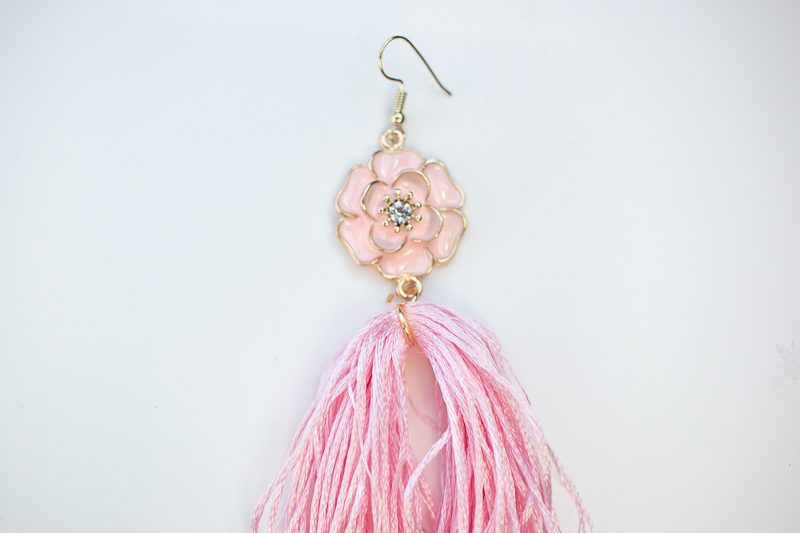
DIY Tassel Earring Tutorial
Learn how to make gorgeous statement tassel earrings with this easy tutorial!
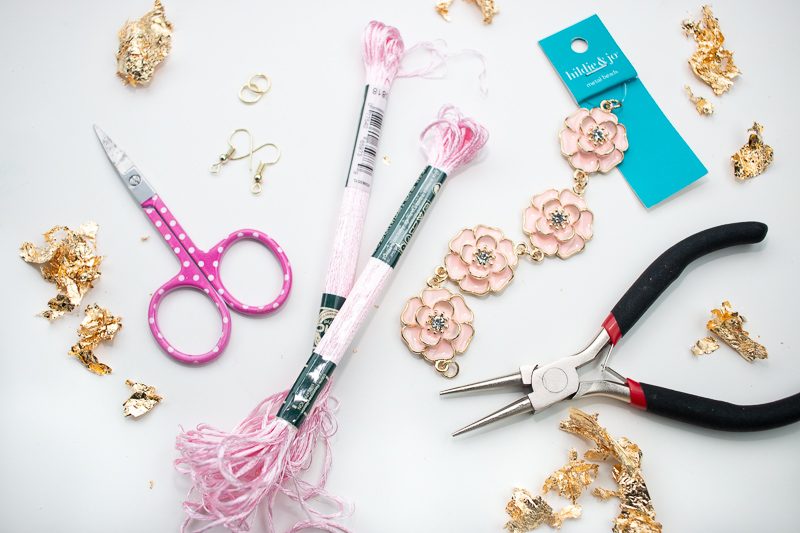
Supplies
Create the Tassel
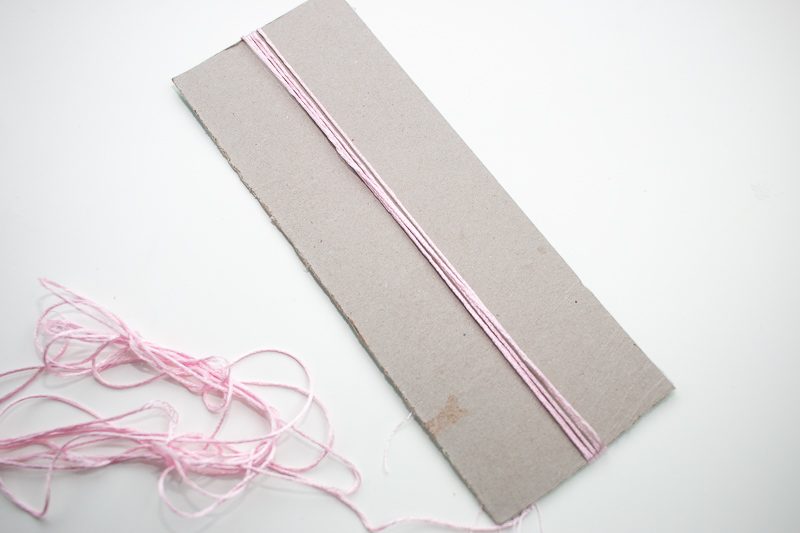
Cut a piece of cardboard into a rectangle. I cut mine 7 ½ inches long which results in tassels that are 3.75 inches long. I have a fairly long neck so you may want to cut yours slightly shorter.
Divide the three sets of thread into two piles, one for each earring. Wrap the thread around the cardboard maintaining the same amount of tension the entire time.
Wiggle the thread to the edge of the cardboard and pinch the middle of the thread on both sides with your left hand while you cut along the outer edge of the thread with your right hand. Repeat this on the opposite side. You should now have a pile of evenly cut threads. Use one of the pieces to tie a knot around the center of the bundle.
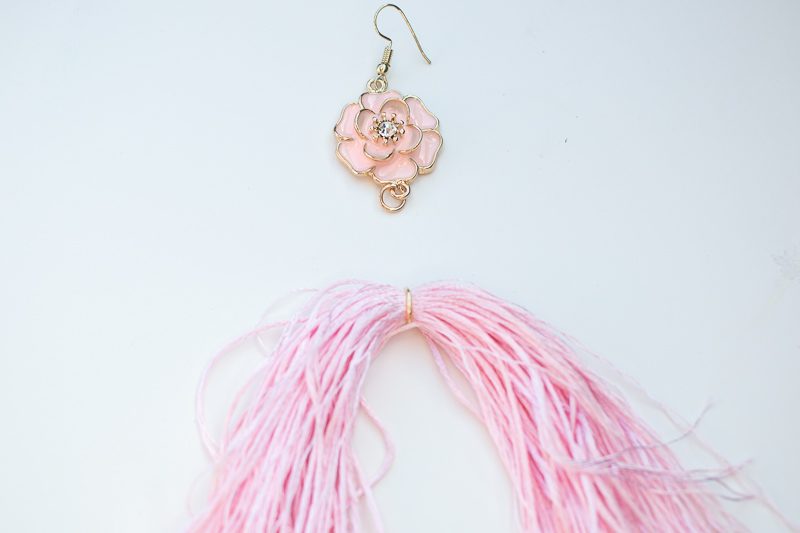
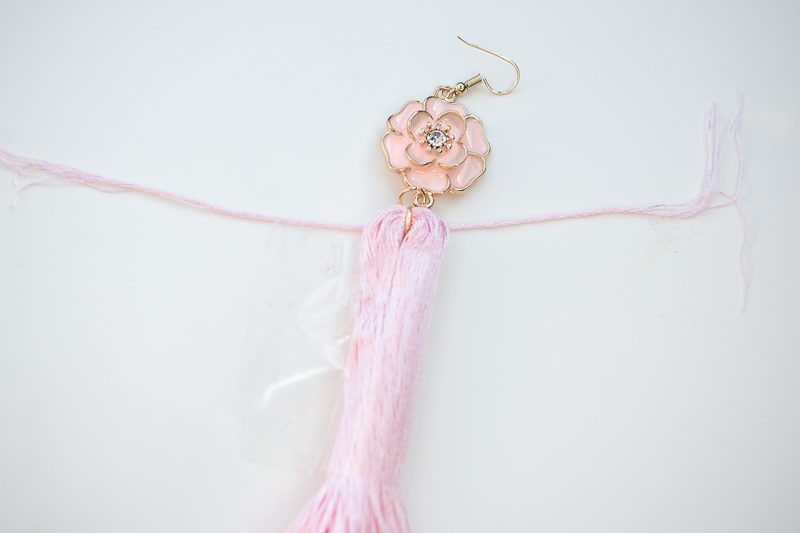
Using your jewelry tool open up the jump ring and slide it around the threads next to the knot you just created. Carefully cut the knotted thread from the bundle after tightening the jump ring.

Attach the earring to the flower charm, then attach the flower charm to the tassel.
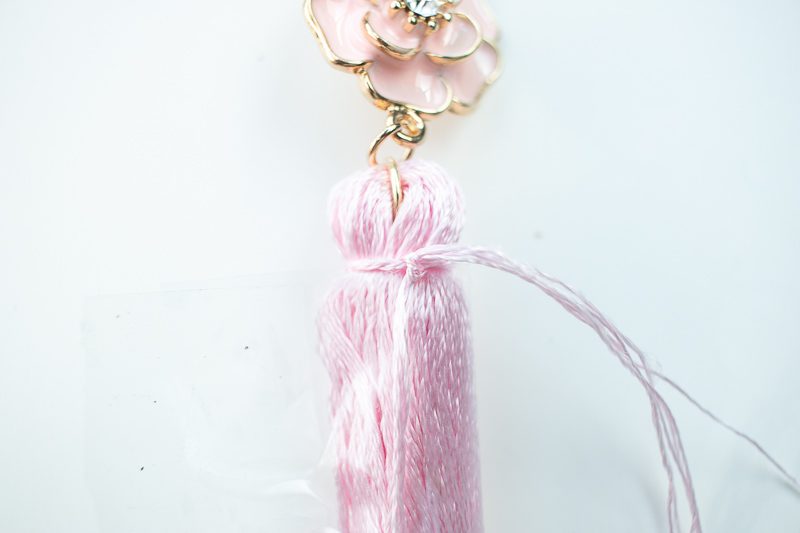
Tape the earring to the table and pull the tassel down on both sides with your left hand. Wrap it tightly with tape using your other hand. Tie a piece of thread around the top of the tassel ½ inch from the top. Make a double knot and pull the thread tightly. Leave the tails on and tuck them into the tassel.
Hold the earring up to your ear and decide how long you would like the tassel to be. Cut off the excess. If your threads are creased or wrinkled spray them lightly with water and let them dry hanging up.
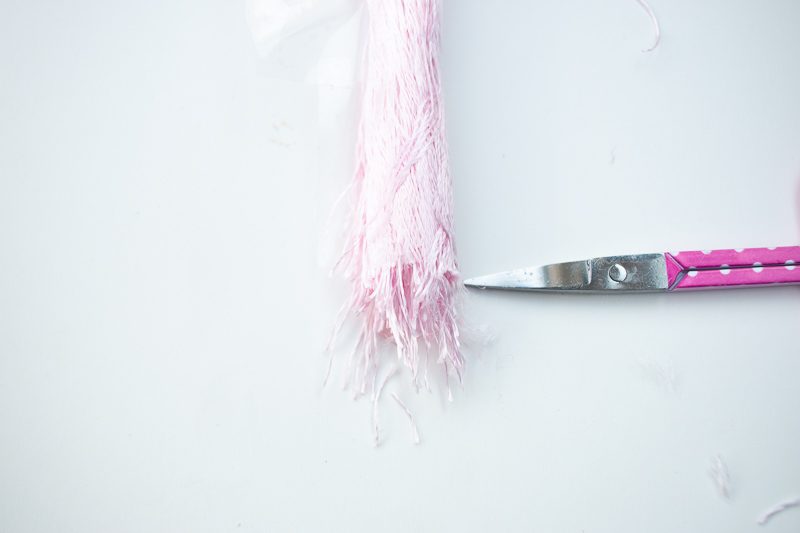
Trim the bottom of the tassel to even the threads.
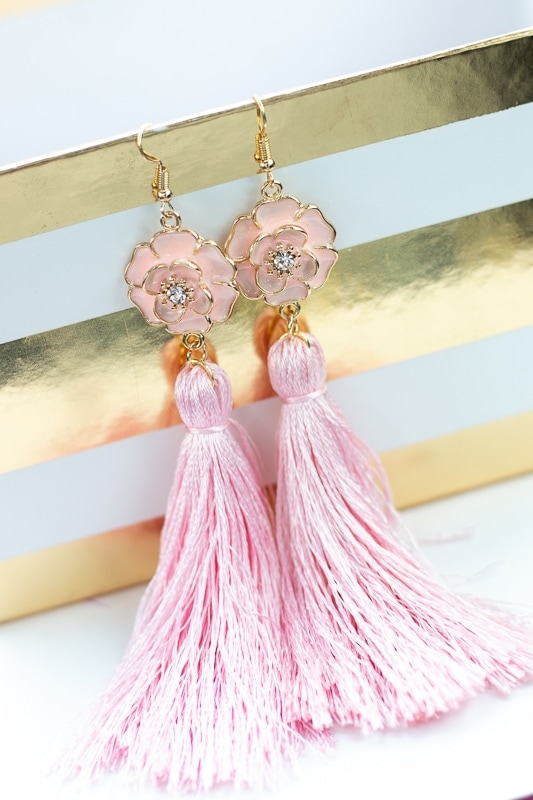
Now you have an adorable pair of earrings to wear! Learn how to make layered tassel earrings here. Wasn't that so easy?
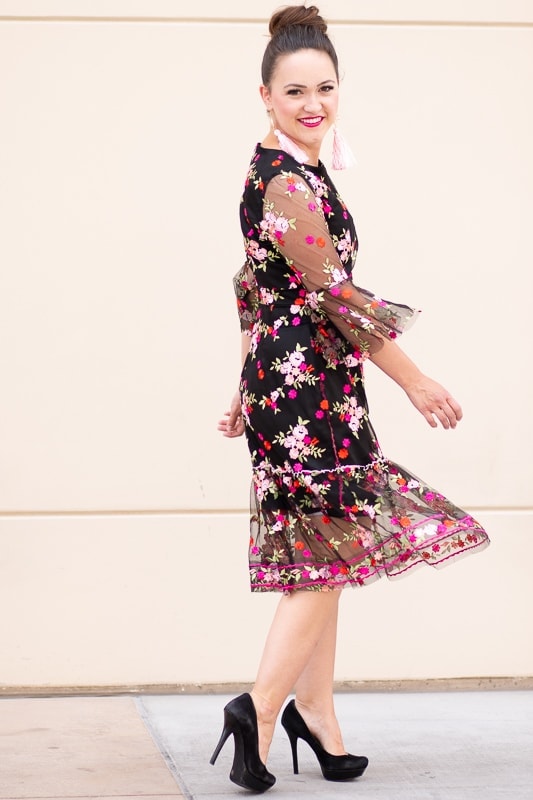
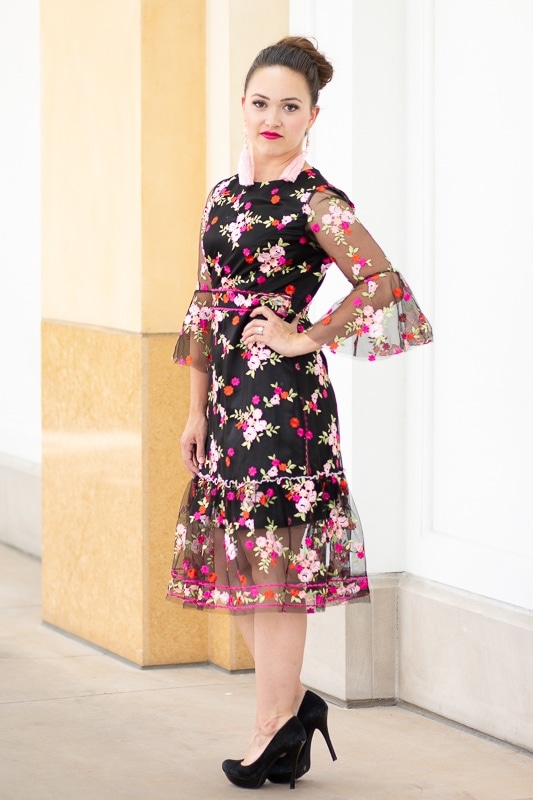
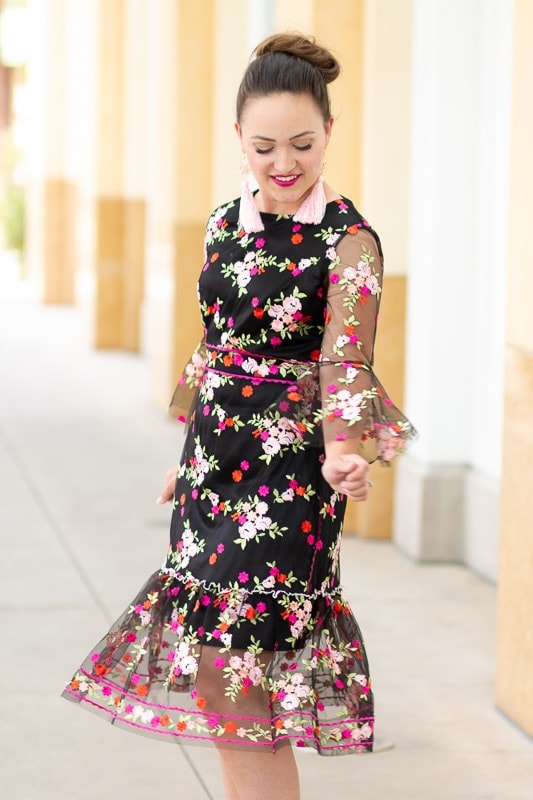
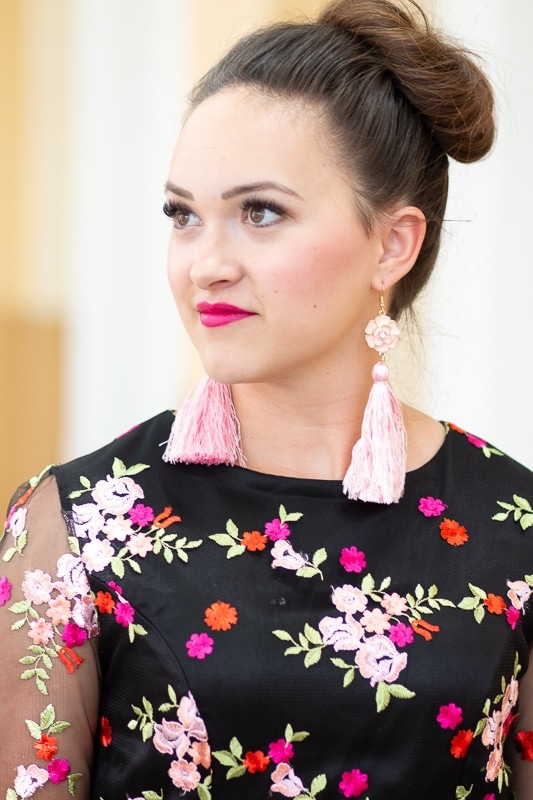
These tassel earrings are the perfect accessory for this fun dress! Now I'm off to plan a fun date night where I can get all dressed up and wear this dress again!
Love this tutorial! The tassel earrings look so cute and easy to make. Thanks for sharing such a fun DIY idea!
https://www.xanderkostroma.uk/ourshop/cat_1743928-Womens-Tassel-Earrings.html