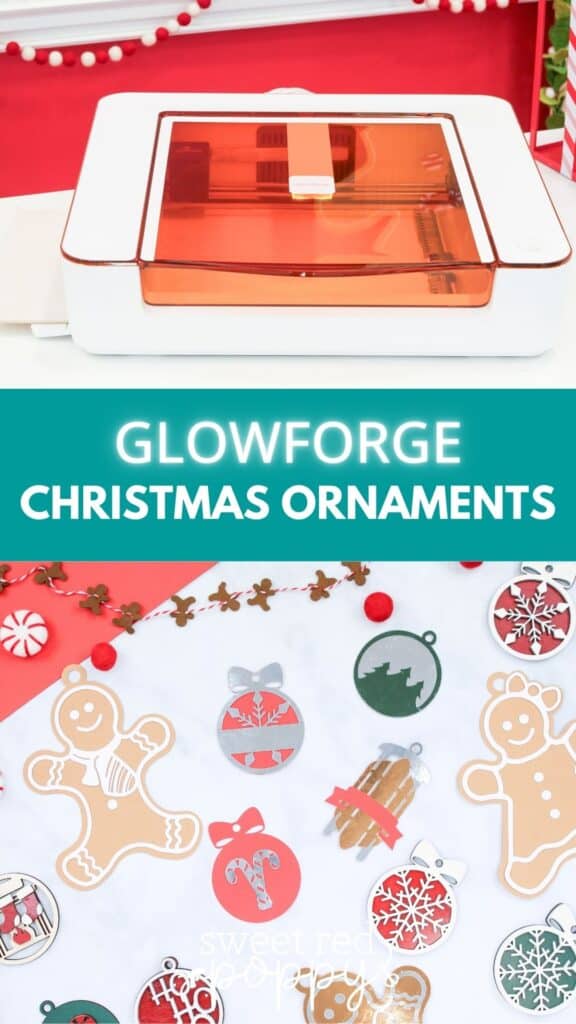
Make Personalized Family Christmas Ornaments With Glowforge Aura™ or Cricut With This Step-By-Step Tutorial and Free Editable Files.
Are you ready to make customized family ornaments for Christmas? Well, look no further! I’m sharing a bundle of free downloadable digital files so you can make your own personalized ornaments this year.
This bundle features 26 designs and editable files, so you can customize them to fit your needs perfectly!
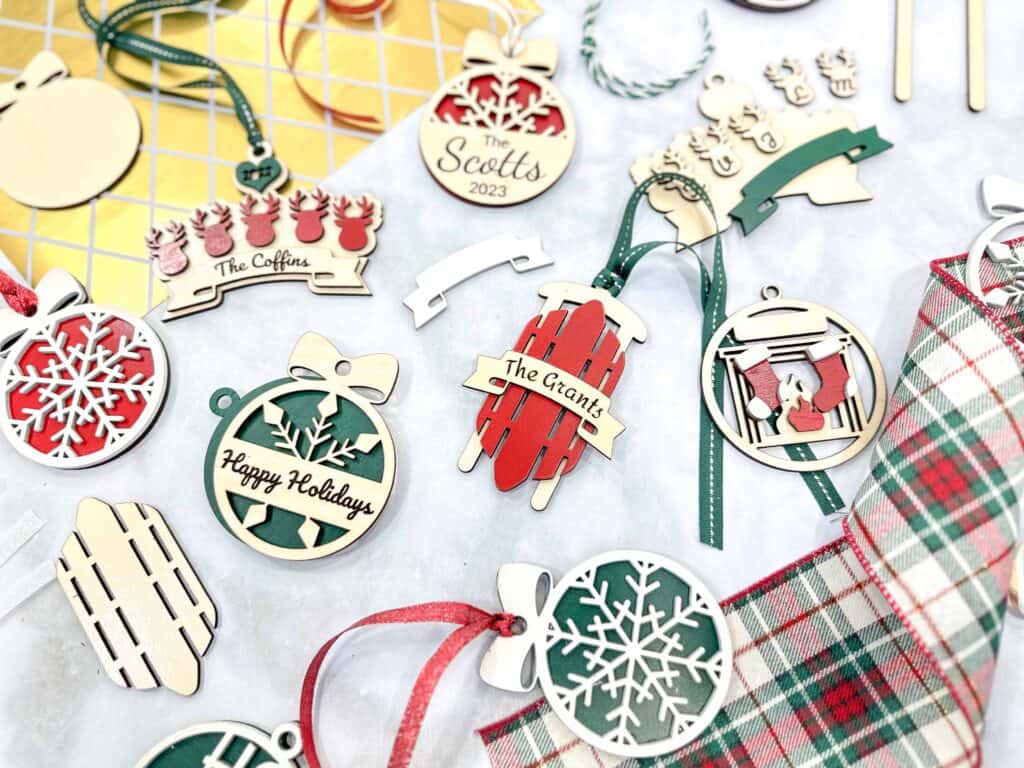
These ornaments can be hung from your Christmas tree, displayed on a mantel or used as gift tags to decorate a beautiful holiday present.
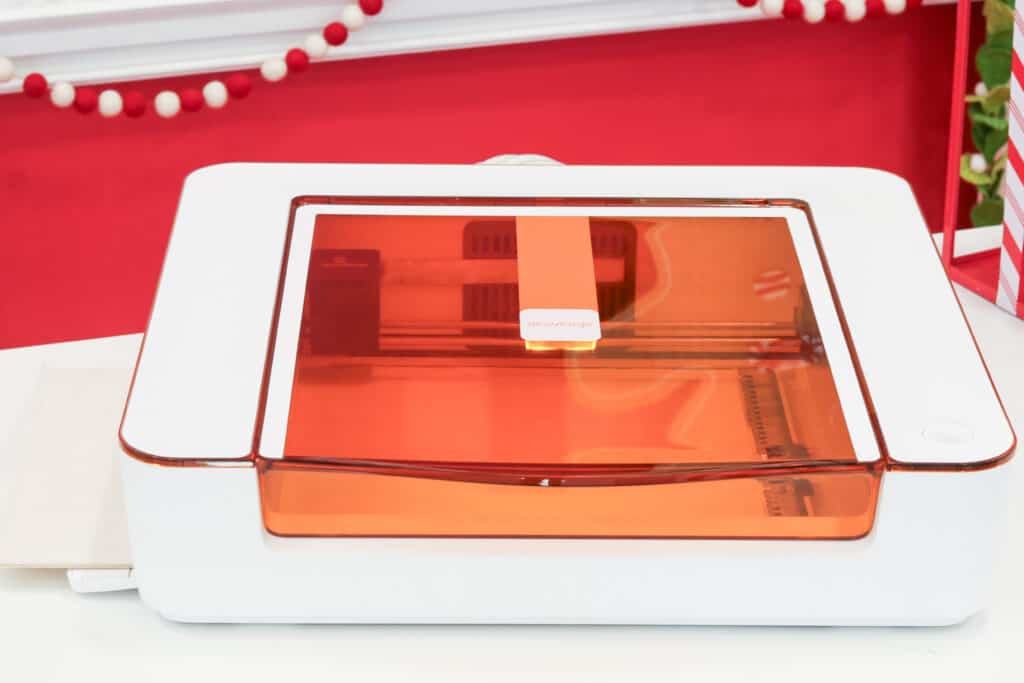
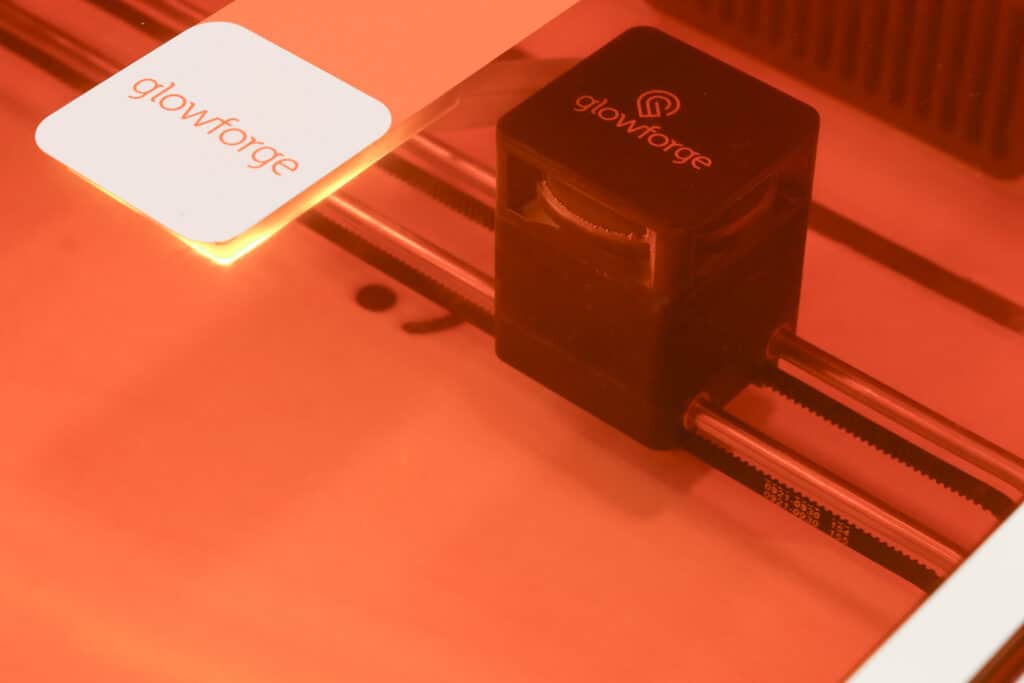
I made these Christmas ornaments using my Glowforge Aura. To learn more about the Glowforge Aura, click here.
These SVG files are also compatible with Cricut machines! I'll also go over the steps to take to make these out of Kraft Board with your Cricut machine later in this blog post!

Characteristics of Glowforge Christmas Ornaments
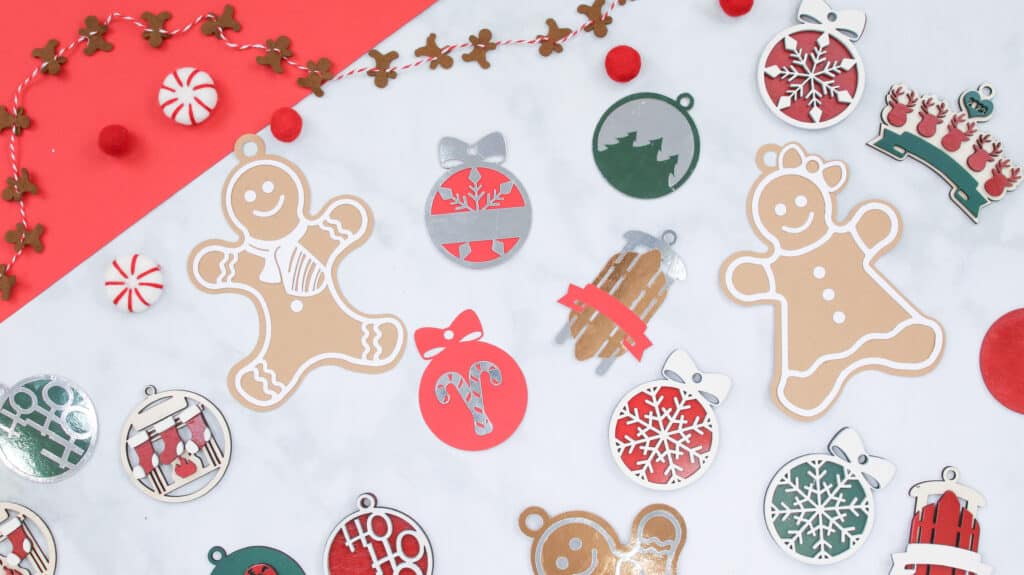
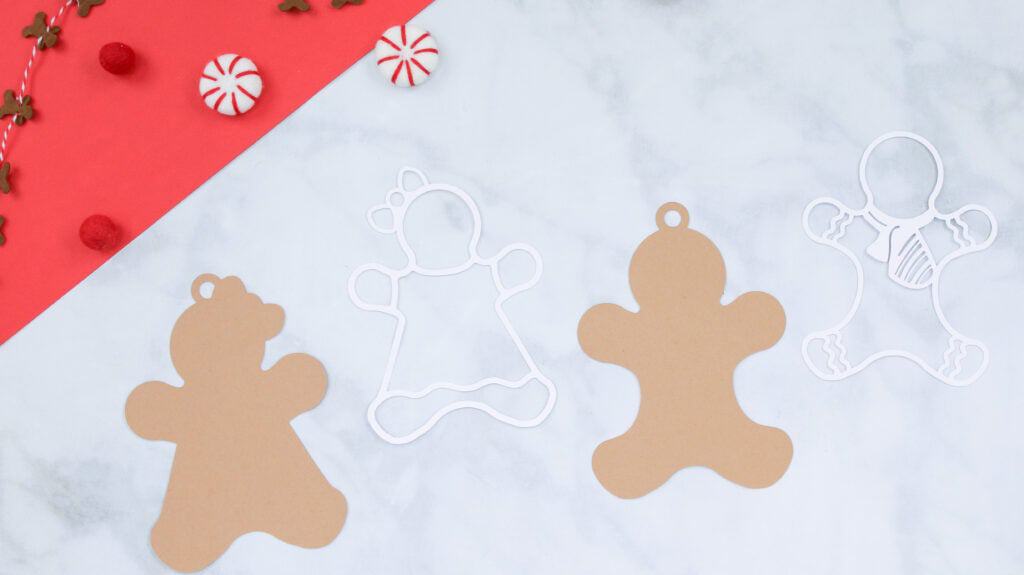
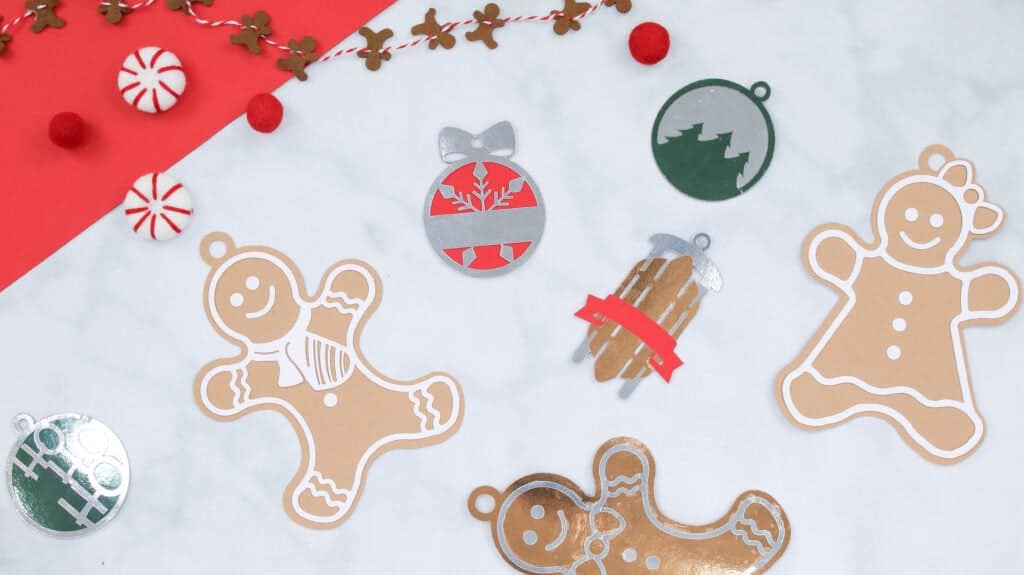
Gingerbread People
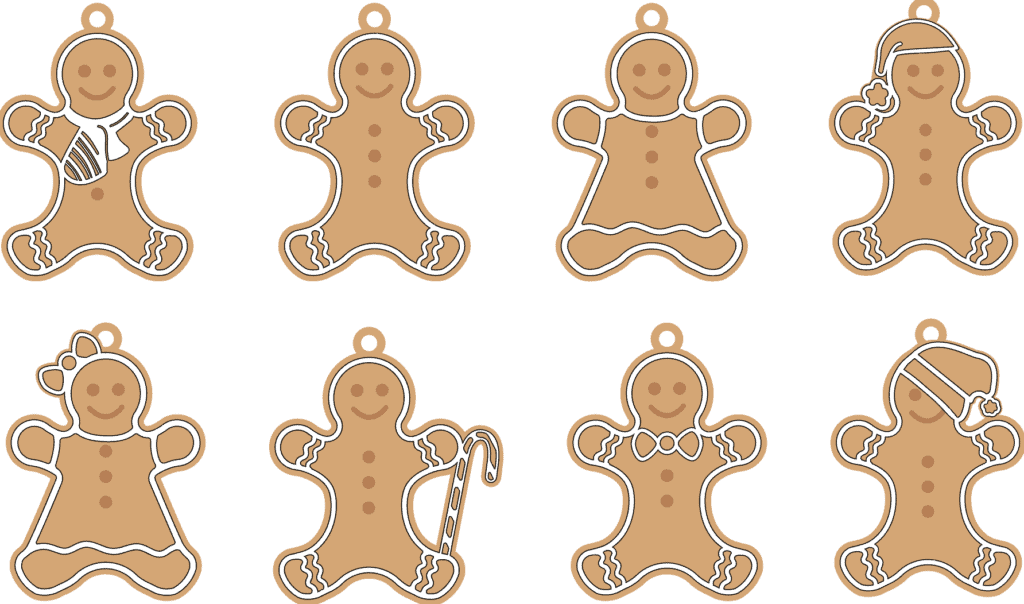
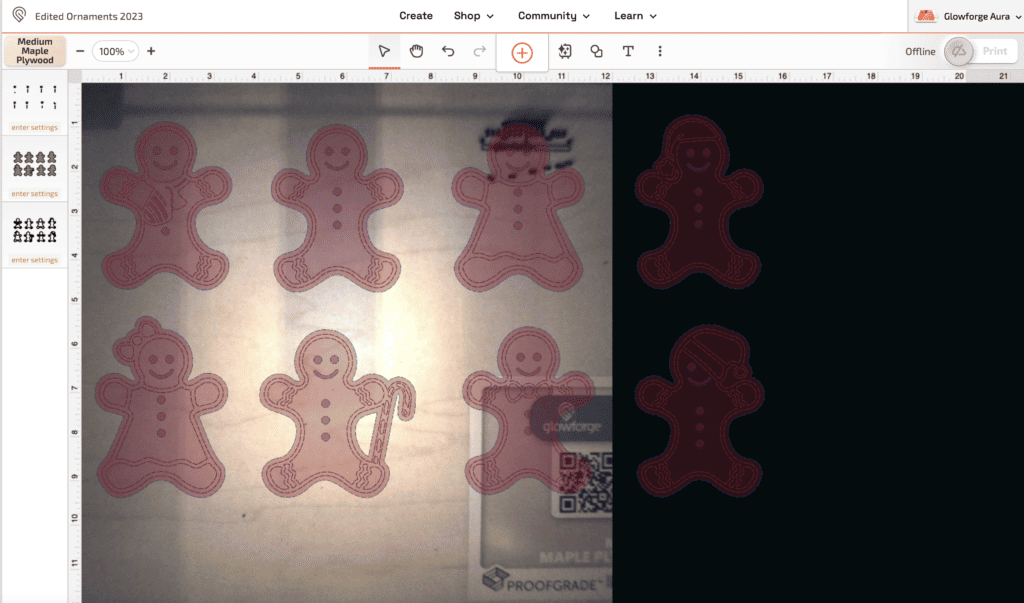
Each gingerbread person measures about 5.5 inches in height and about 4 inches in width.
The design features eight gingerbread people, and each one has two layers. The first layer, which serves as the base- will be cut. Also, it includes the eyes, smile, and buttons that will be engraved.
The second layer takes the place of frosting will go on top of the first layer.
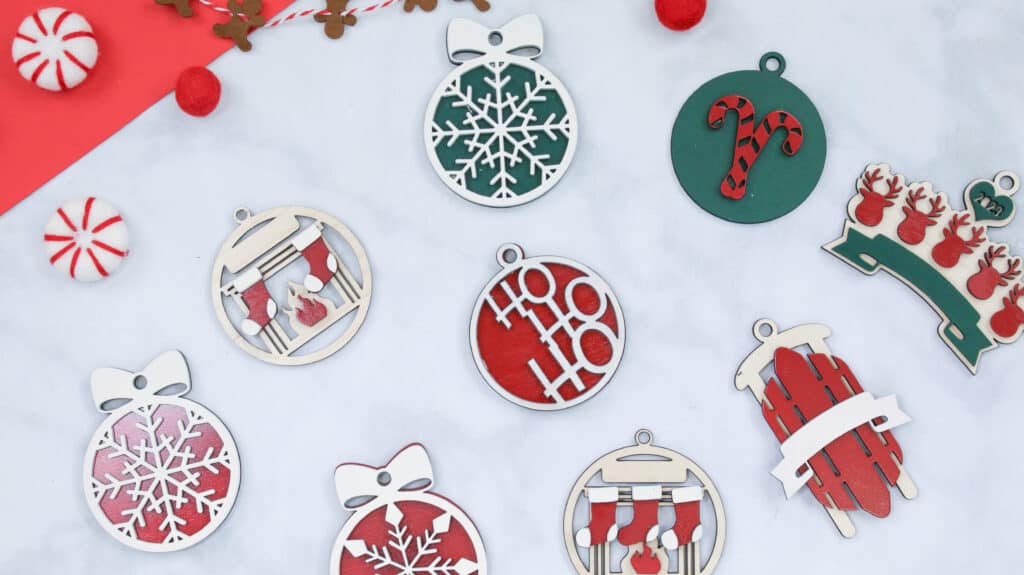
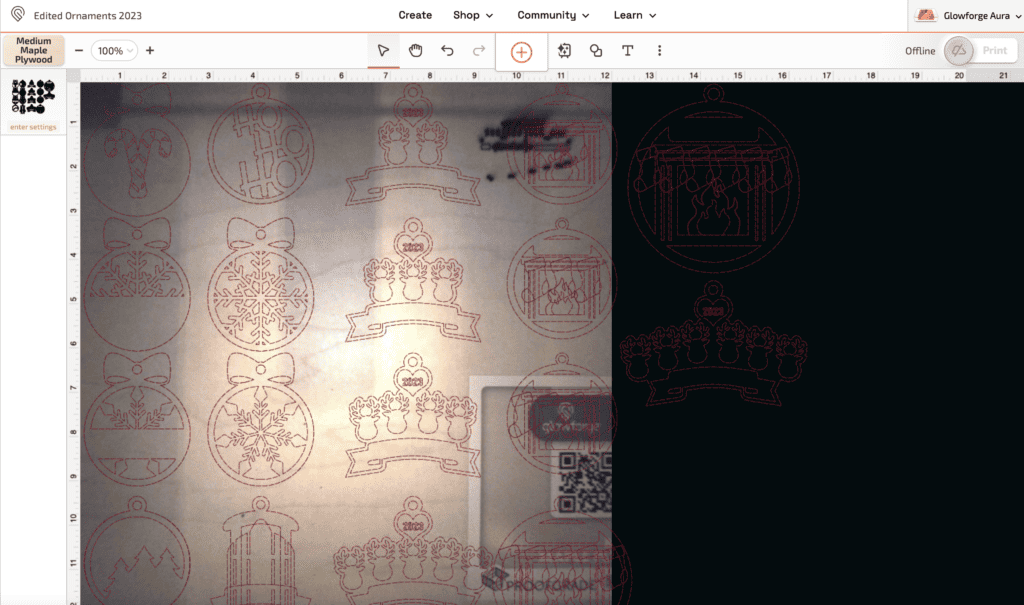
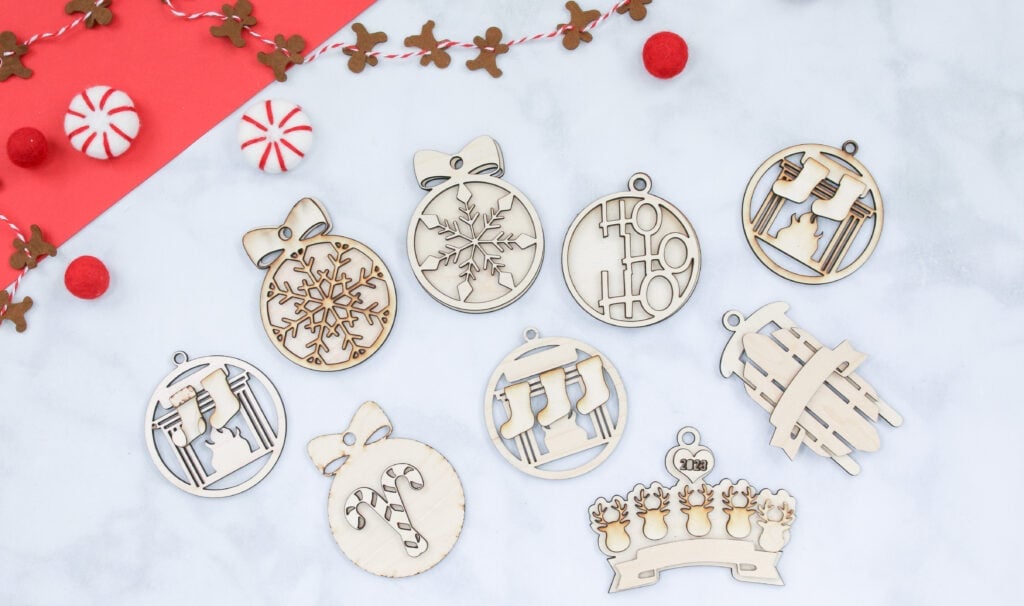
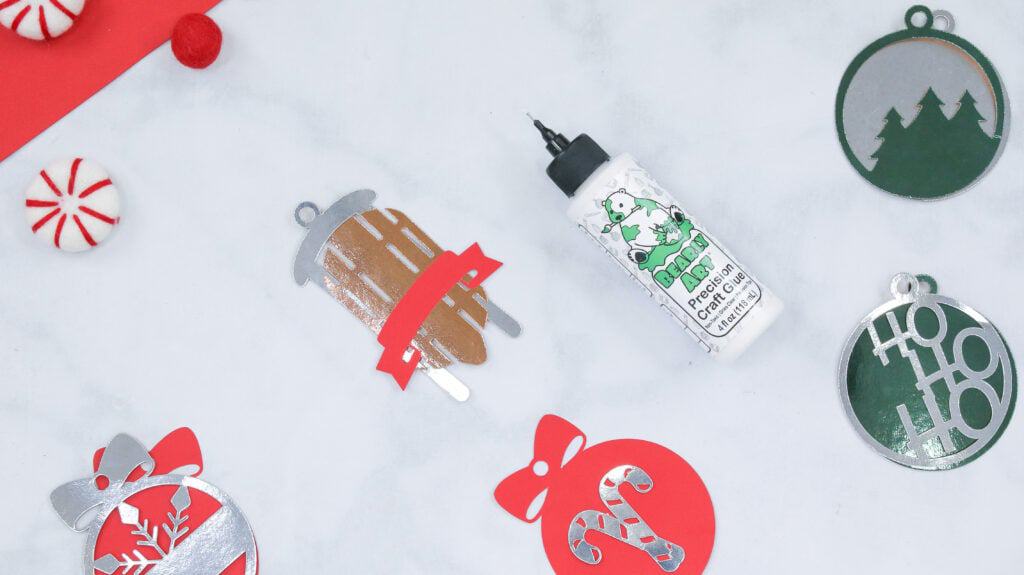
Christmas Ornaments
This design features an assortment of adorable, traditional Christmas ornaments. The sizes vary from 3-5 inches in height and width. Each one has 2-5 layers, depending on the one you create.
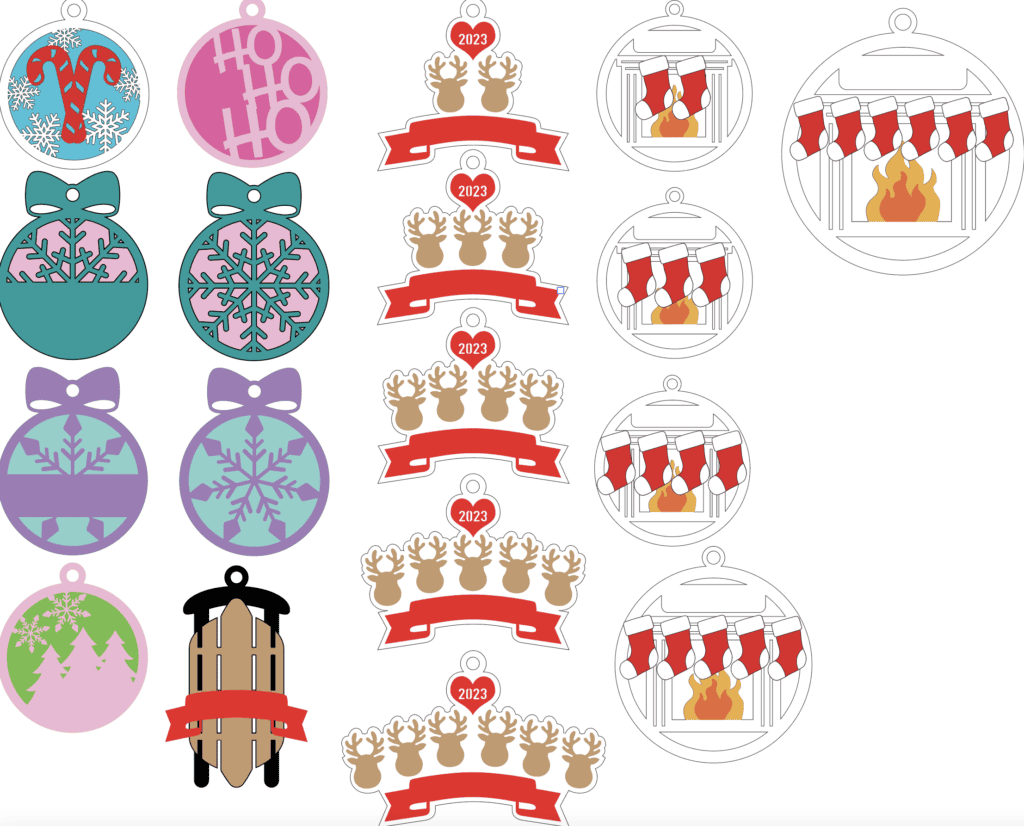
Table of Contents
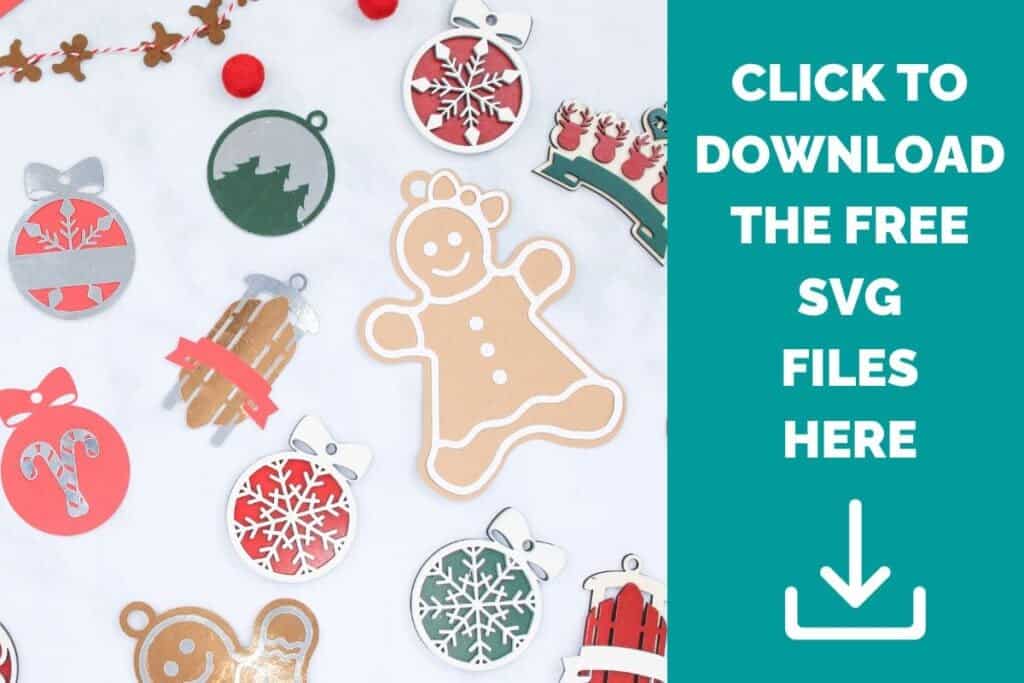
Download the Christmas Ornaments SVG Files Here!
What Do the SVG Files Include?
The Gingerbread Man Christmas Ornament SVG includes (8) unique Gingerbread people.
The traditional Christmas Ornaments SVG File includes 18 ornaments: (7) ball ornaments, (1) sleigh, (5) family of reindeer ornaments, and (5) stockings over a fireplace ornaments.
There are so many to choose from!
What Materials Did I Use?
I used light 12” x 12” Proofgrade® materials that Glowforge provides. I recommend that you use this material with your Glowforge Aura machine because you will get the best results.
Proofgrade materials are laser-ready and have a QR code in the bottom right corner- Glowforge will scan the smart-coded sheets and adjust your Glowforge settings in the App for you, so no need to manually adjust the settings!
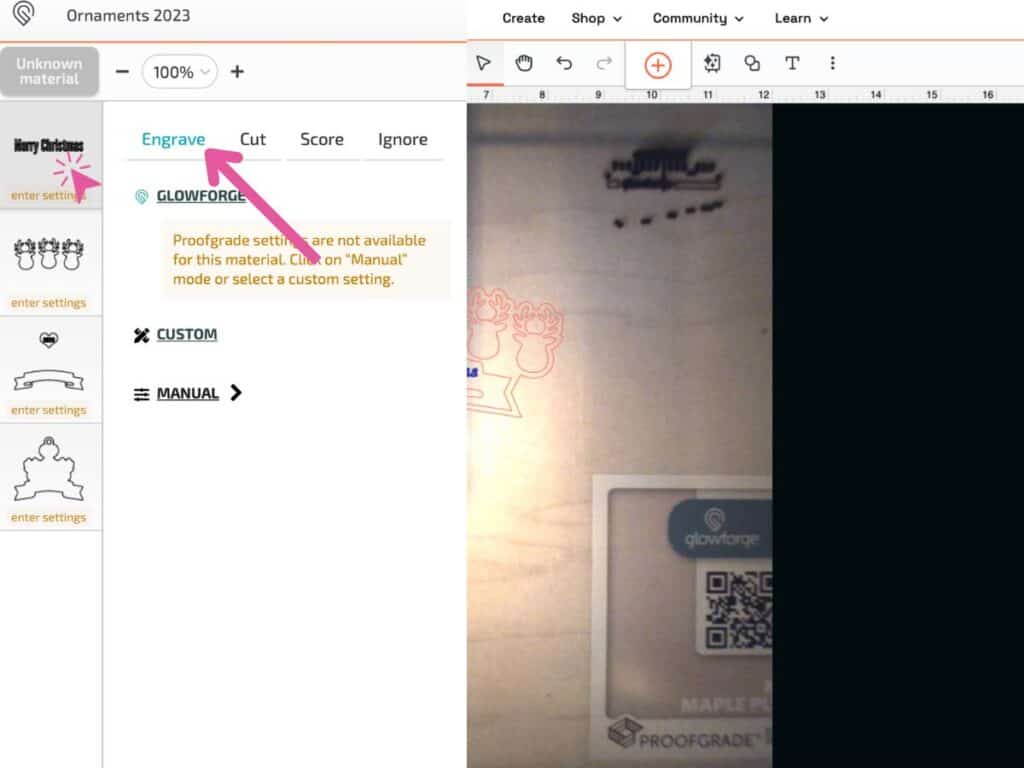
What if I'm Using Non-Proofgrade Materials?
If you are using non-Proofgrade materials, I recommend you do test cuts before cutting out these designs by manually changing the Engrave and Cut settings in the Glowforge App.
To do this, click on Unknown Material in the top left corner, select Use Uncertified Material, and enter the material thickness.
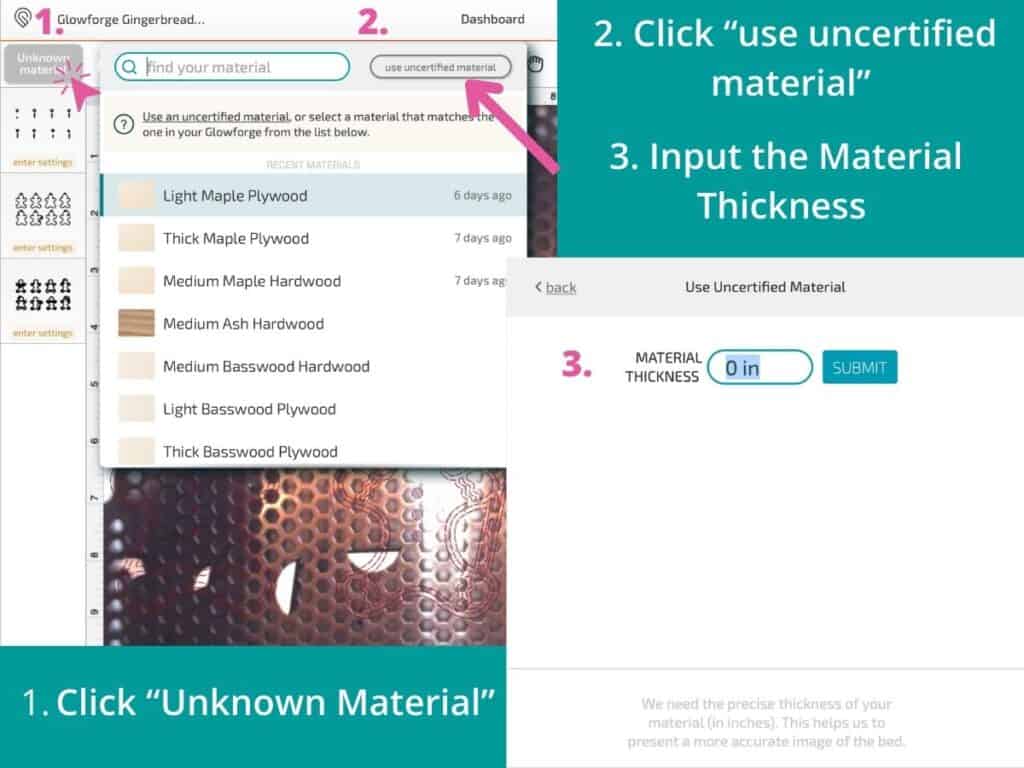
Then, click on each layer, select Manual, and change the Speed, Power, Lines Per Inch, number of passes, and keep testing it until you're satisfied with the results.
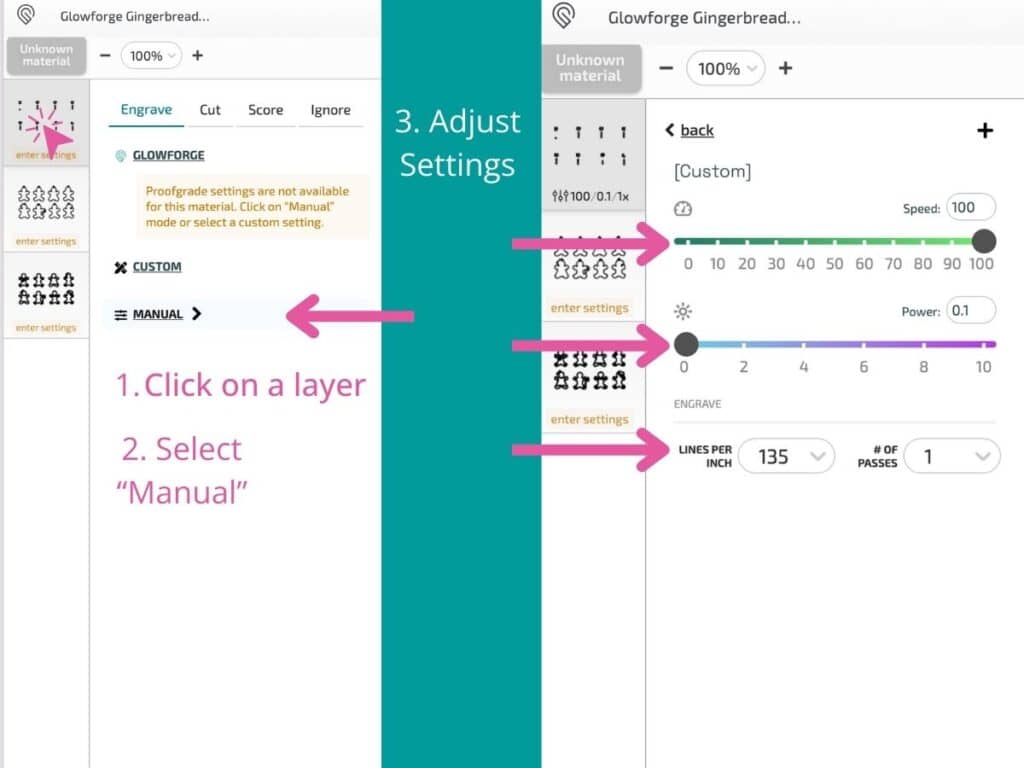
Read the Non-Proofgrade material FAQ by Glowforge here!
Before we start, look over the supply list.
Supplies Needed
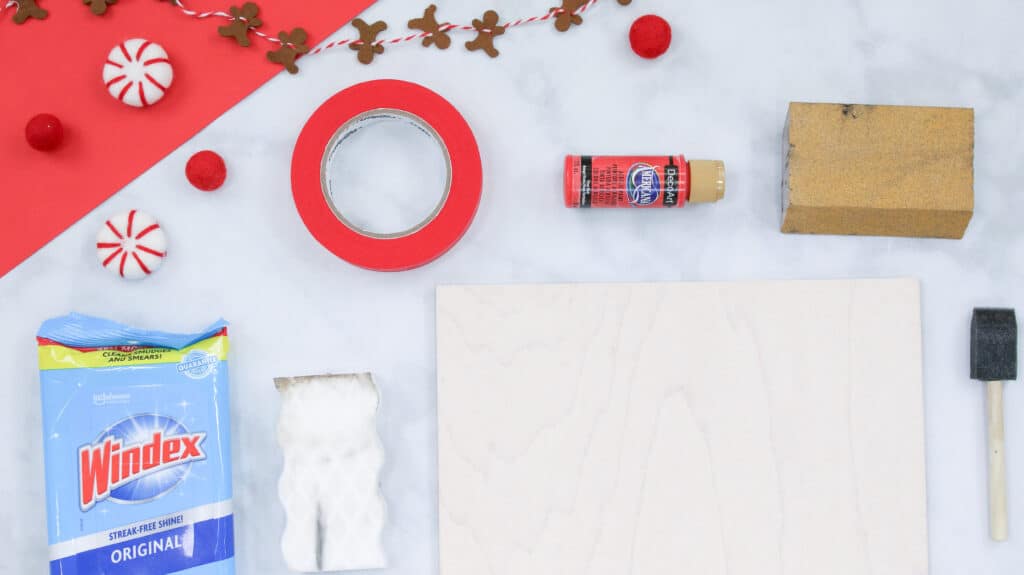
- Glowforge Aura
- 12” x 12” Proofgrade Materials
- 6" Pieces of Ribbon or String
- DecoArt Americana White Acrylic Paint
- Wood Glue
Optional Supplies
- Glowforge Personal Filter
- Duct Tape
- Sandpaper
- Windex Wipes
- Magic Eraser
- Paintbrush
- Spray Paint or Acrylic Paint
Click to Download the Christmas Ornaments SVG Files Here!
Uploading SVG files to Glowforge App
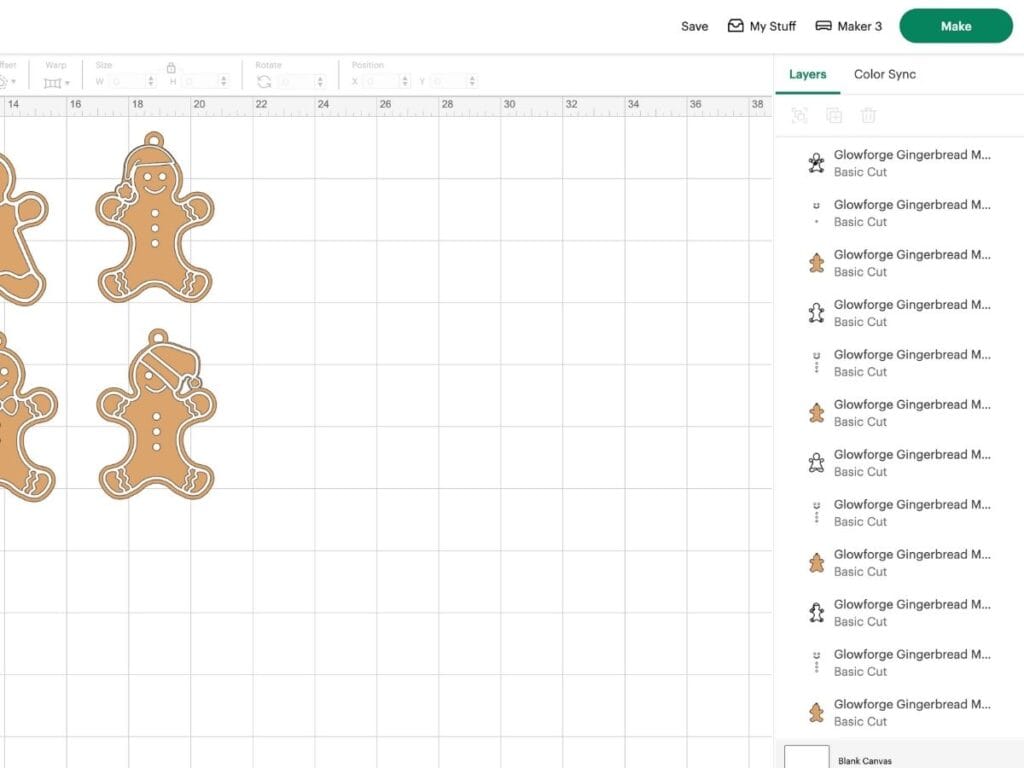
Download the Christmas Ornaments SVG files and open the Glowforge app (app.glowforge.com).
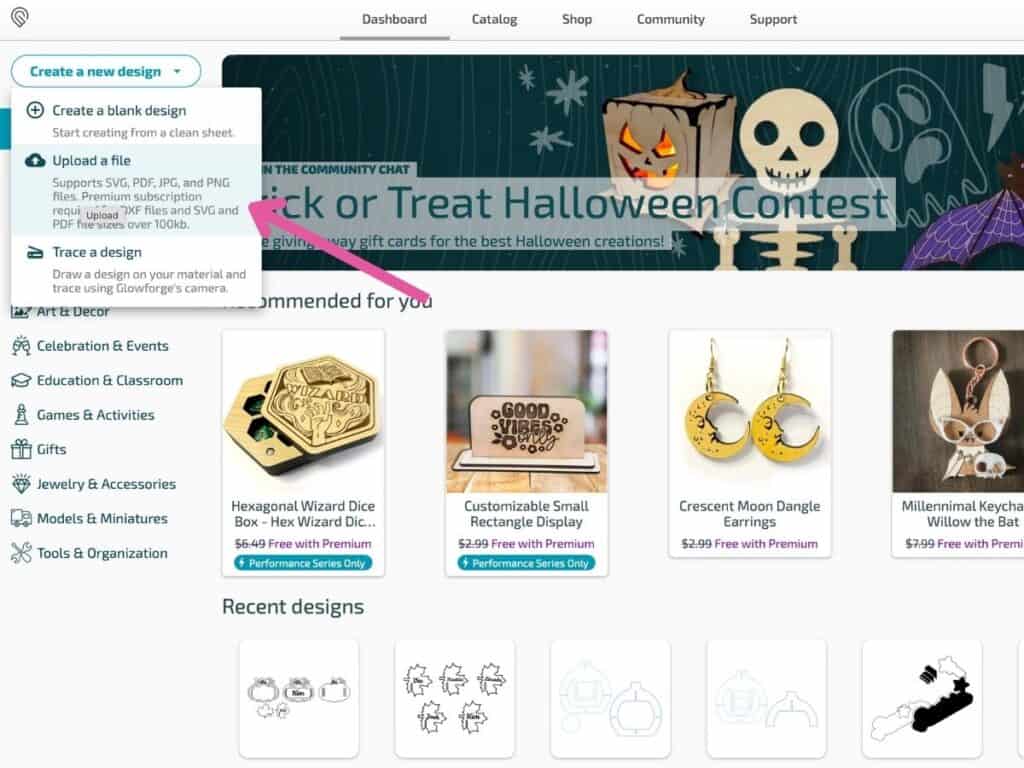
Click on Create a New Design in the top left corner of the window, select Upload a File, and upload with the gingerbread man or the traditional Christmas ornaments SVG file.
Gingerbread Christmas Ornaments
When you upload the Gingerbread Man Christmas Ornaments to the Glowforge App, you will notice three layers to the left of the workspace.
Thanks to Aura VisionTM, you can preview the designs on top of the material on your screen.
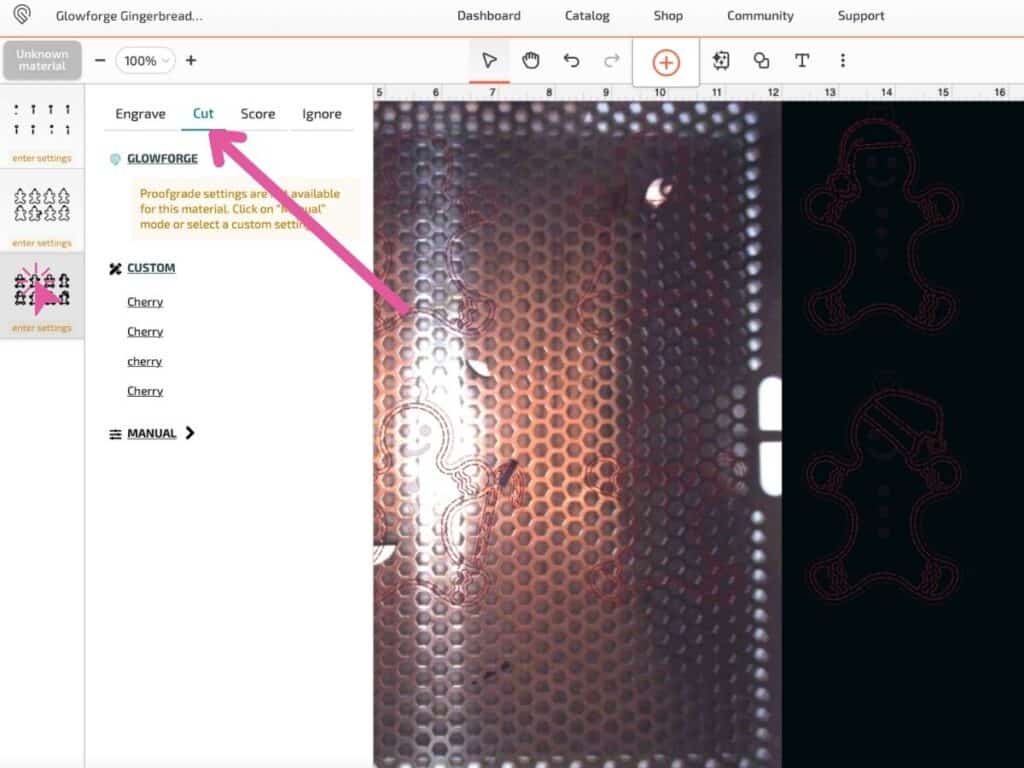
Click on the layer with the eyes, smile, and buttons, and make sure the layer type is on Engrave.
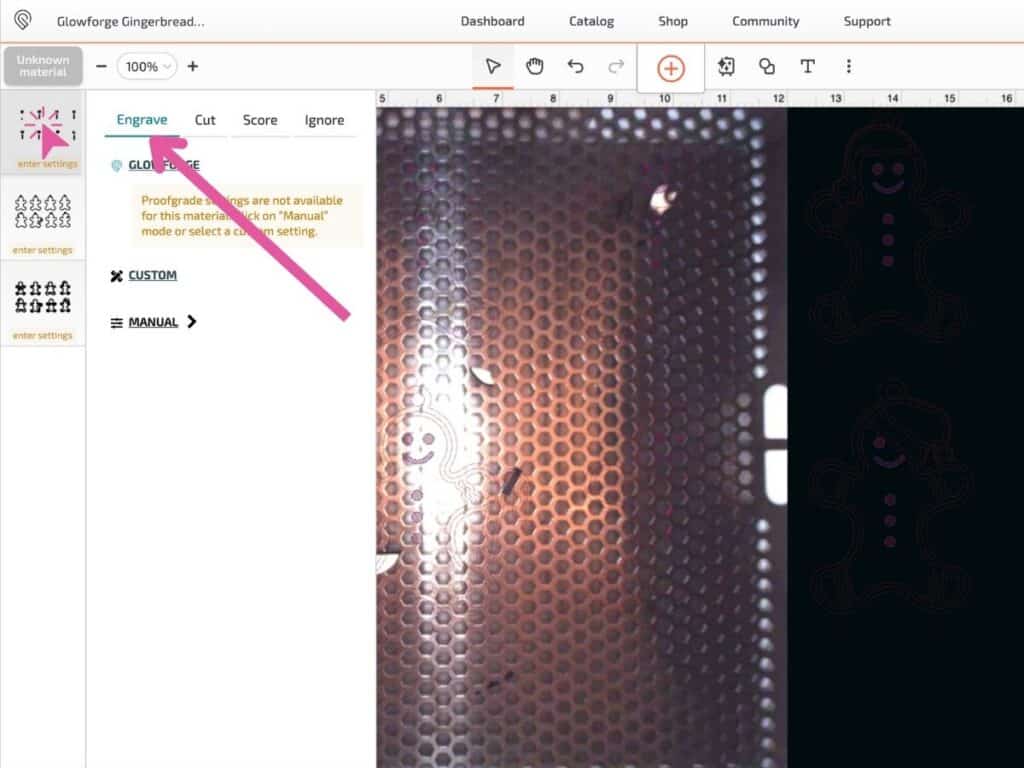
Click on a different layer and change it from Engrave to Cut. Do this to the last layer.
Pro Tip: Always have the layer you are engraving at the very top of the layers. The Glowforge will work in the order you put the layers in. For example, if you put a cut layer at the top, it will start with that.
I recommend you put the Engrave layer at the top so that the machine engraves first and then cuts around the etched design.
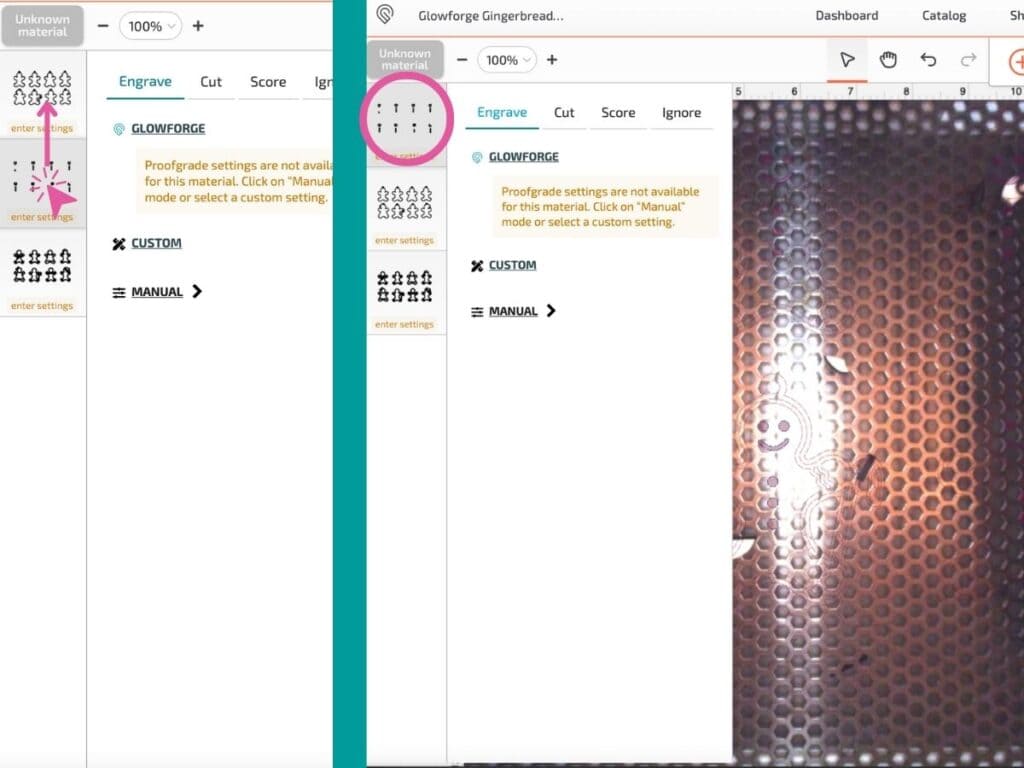
To move the Engrave layer to the top of the layers, all you have to do is click on the layer and drag it to the top.
Next, place your material inside your Glowforge Aura, close the lid, plug it in, and let your Glowforge machine connect and get ready to cut.

After the Glowforge calibrates, automatically adjusts settings and auto-focuses, it's time to cut!
Traditional Christmas Ornaments
After uploading the Christmas Ornaments SVG file, you can pick and choose the ones you want to cut and add text to engrave such as a last name or holiday quote.
To add text to engrave, all you have to do is select the "T" in the tool bar, click anywhere in the workspace, and type whatever you want in the "Your text here" box. You can change the font, weight, size, and more.
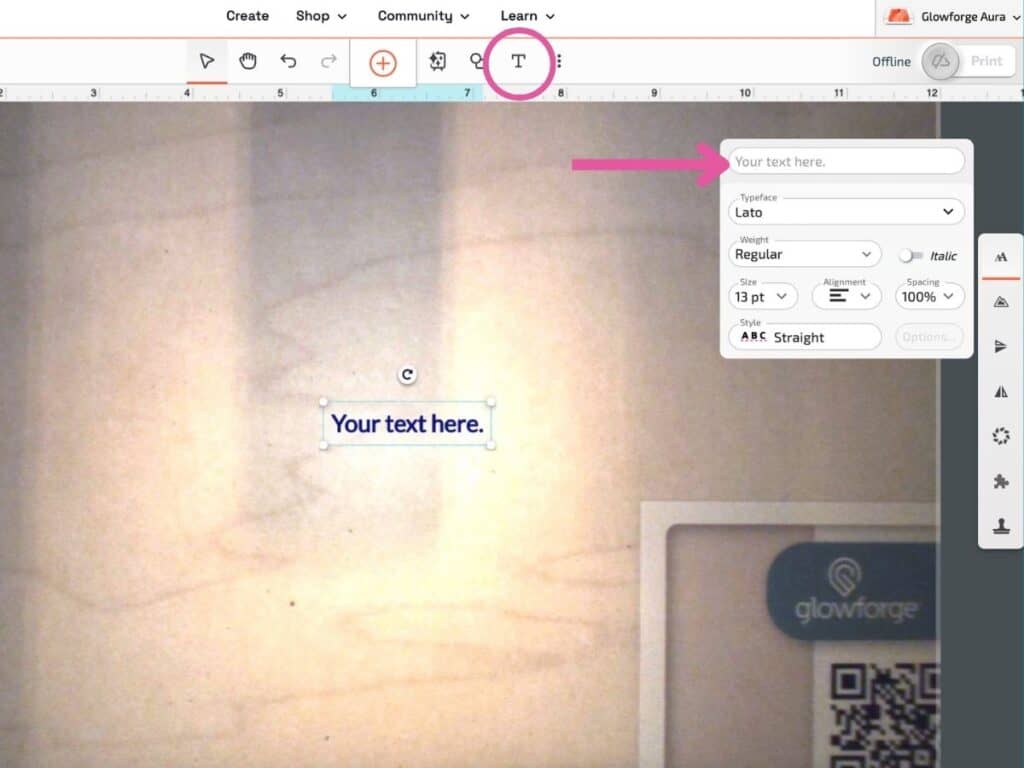
Then, change the layer type from Cut to Engrave and place the text on top of the design you want to engrave onto. Select both the text and design by holding down Shift, and group them by pressing Cmd->G on your keyboard.
Cut out Christmas Ornaments
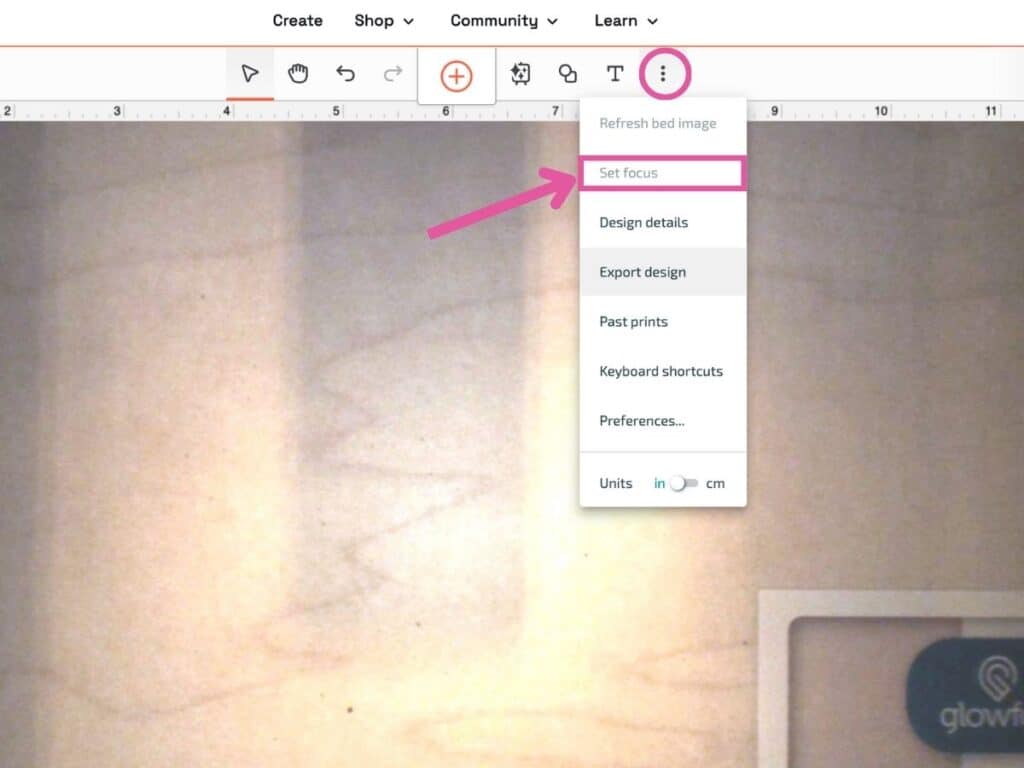
I always like to set the focus again before printing by clicking on the three dots above the workspace, selecting Set Focus, and clicking on an area of the workspace. Doing this will help with alignment, finding the precise distance, materials thickness, and more accurate and precise cuts.
Remove any scraps on or under the crumb tray before printing.
Finally, click Print in the top left-hand corner of the screen.

When a button starts flashing blue on your Glowforge unit, press it.
Let the Glowforge do all the work!
Afterward, wait a few minutes for the fumes to go down.
** If your Glowforge Unit isn't attached to a Glowforge Personal Filter, be sure the unit is exhausting outdoors when operating. Before doing so, please check your local air-quality regulations as well as with your neighbors. **
Assemble Christmas Ornaments
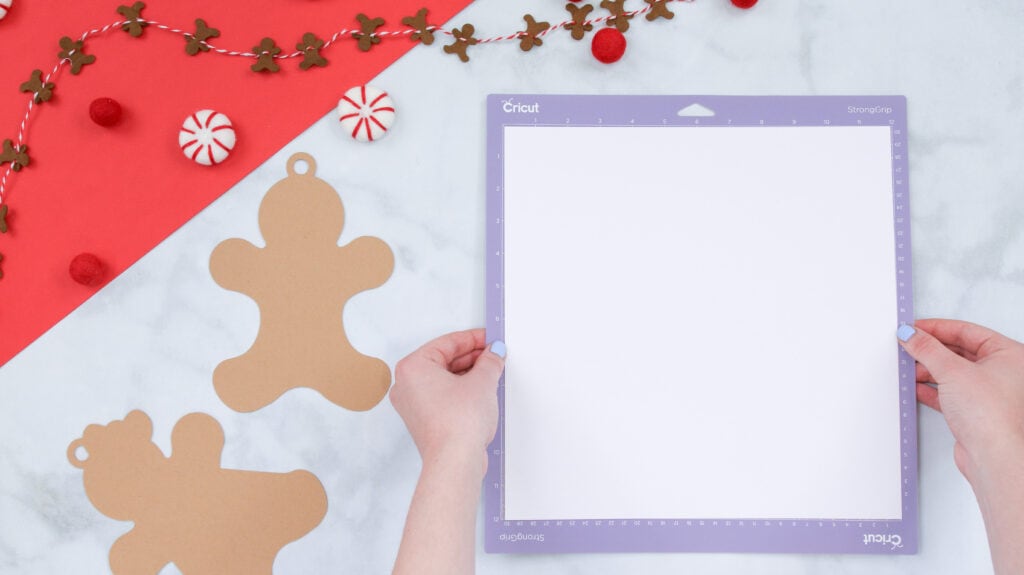
Open the lid, remove your cut material, and pull out all the pieces.
Pro Tip: To take off the masking of the Proofgrade material, grab a piece of duct tape, place it onto the material, and pull both away from the cut pieces.
Next, sand down the ornament pieces. Take a piece of sandpaper and gently sand the piece. I also like to take a Windex Wipe and wipe everything down to remove unwanted burn marks.

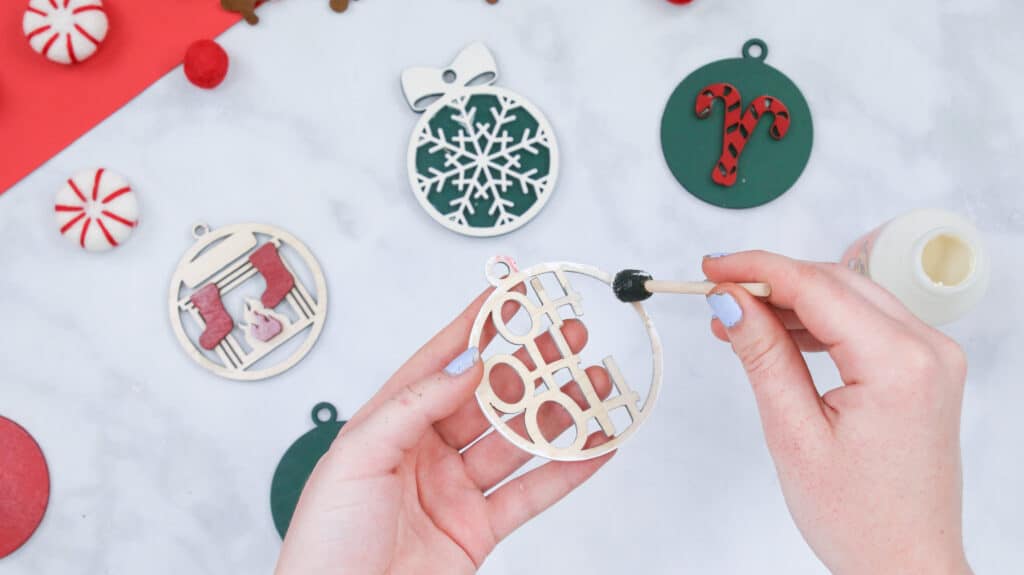
You can choose to paint your ornaments before or after assembling. I’m painting mine before I start gluing all of them together.
Pro Tip: Use a magic eraser to remove burn marks from your cut pieces.
Gingerbread Christmas Ornaments
For the gingerbread people, I’m painting the second layer white for the frosting and leaving the bottom layer as is (or you can stain it a darker color).
Then, I start gluing my pieces. Take the second layer, apply a wood glue to the bottom of it, and stick it in place on top of one of the gingerbread base pieces.
Finally, grab a 6-inch ribbon or string, loop it around the circle cutout at the top of the gingerbread piece, and tie the ends together.
And there you have it, a cute gingerbread character ready for the tree!
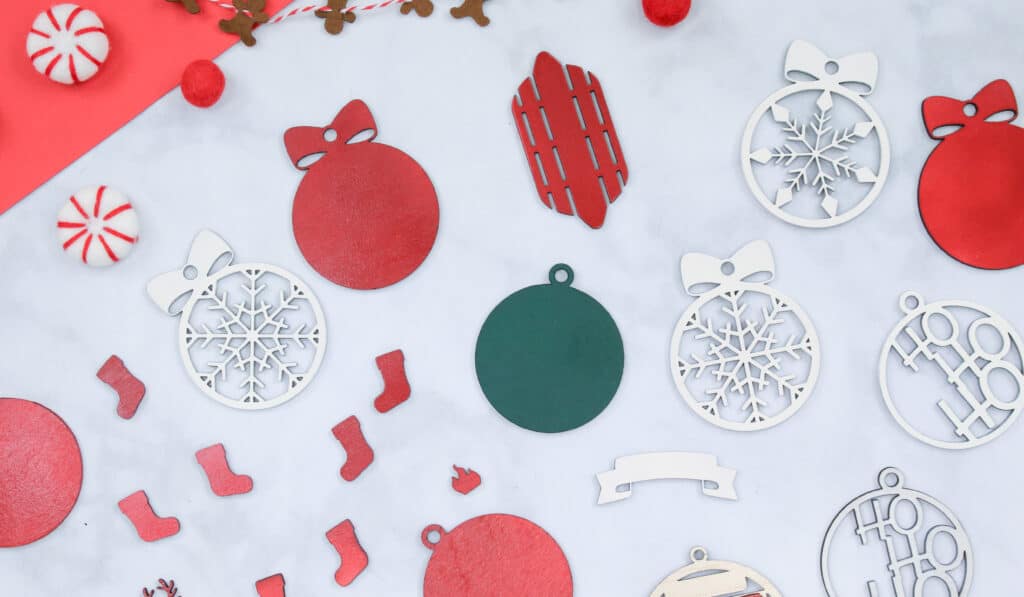
Traditional Christmas Ornaments
For the rest of the Christmas ornaments, feel free to paint or decorate them however you want! Basically, repeat the steps we took to assemble the gingerbread people.
I spray painted all of my traditional Christmas Ornaments- it's faster and I think the results are better. Here's a side-by-side comparison of spray painted vs pieces I painted with acrylic paint.
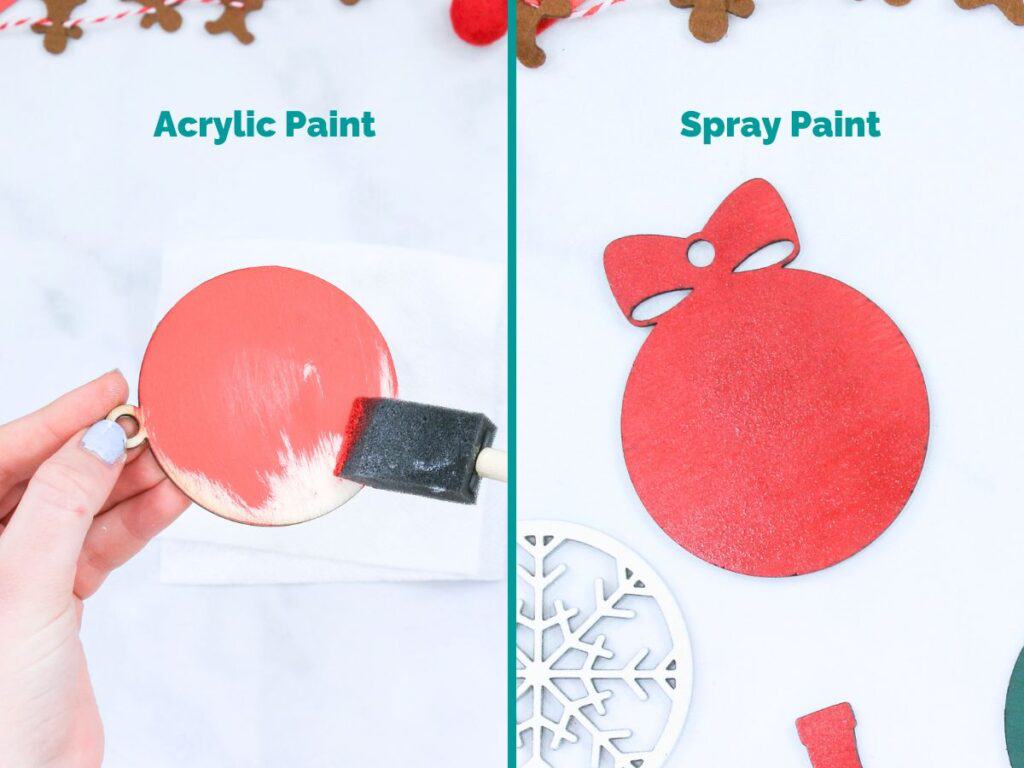
Paint your Christmas ornament pieces and let them dry.
Then, glue the layers with wood glue (I used Gorilla Wood Glue).
Then, grab a 6” piece of string or ribbon, pull it through the circle cut out at the top of the ornament, and tie the ends together.
Now, it’s a proper Christmas tree ornament.
Download Christmas Ornament SVG Files Here!

Cutting Out Christmas Ornaments with a Cricut Machine
Supplies Needed
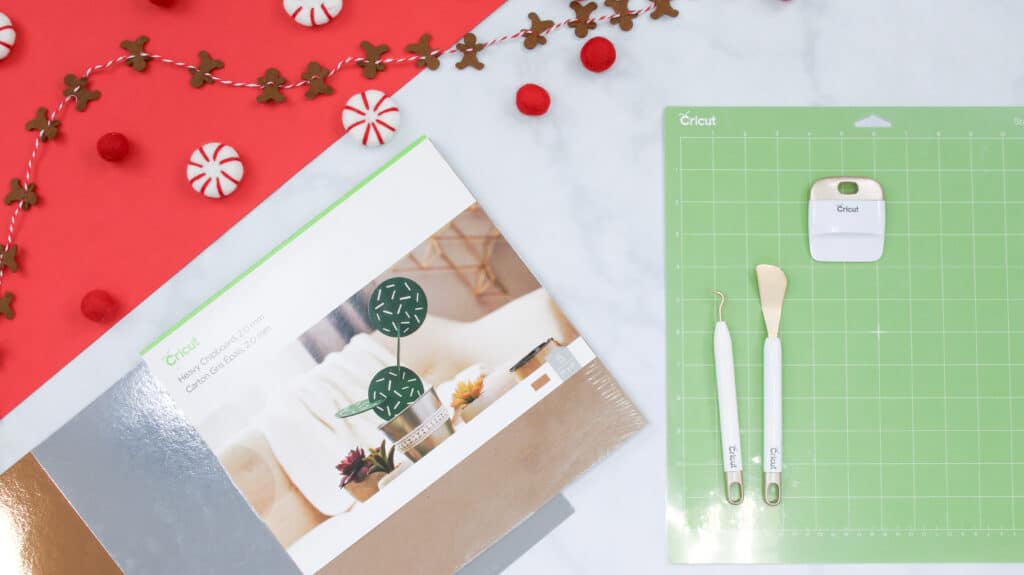
- Cricut Machine
- Strong Grip Mat & Standard Grip Mat
- Heavy Chipboard, Kraft Board, or Foil Kraft Board- Holographic, (Similar)
- Bearly Arts Craft Glue
- Scraper Tool
- Weeder Tool
- Spatula
- Tweezers
- Tape

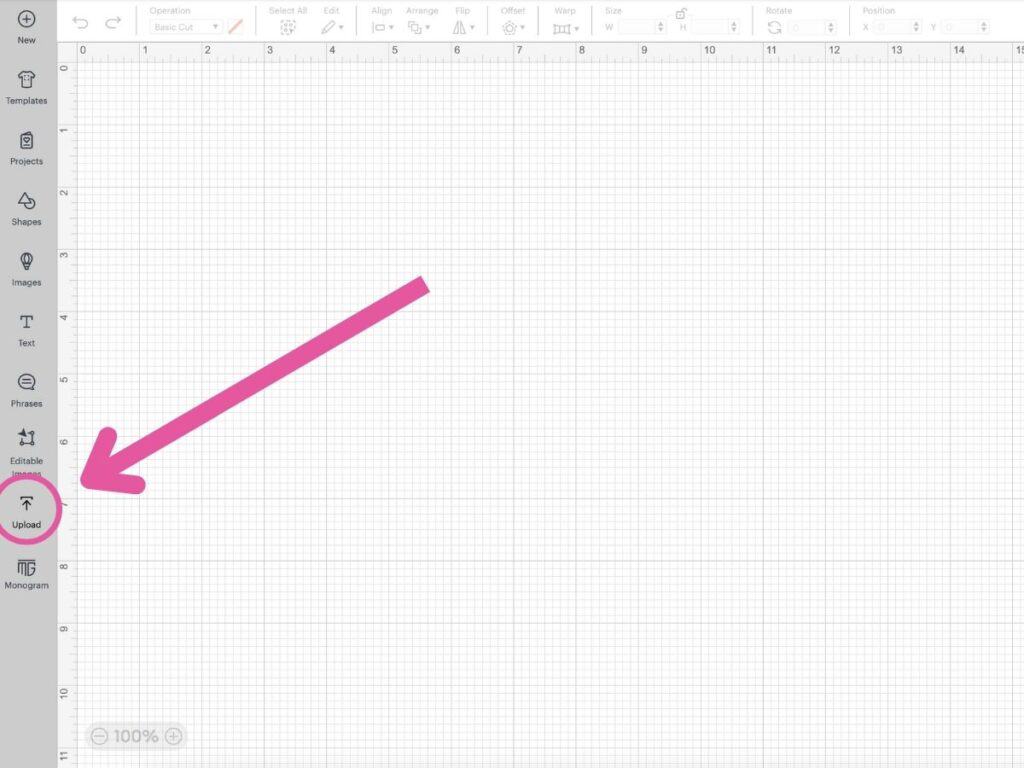
To get started, upload the SVG files to the Cricut Design Space app. Open the app and click New Project in the top right-hand corner of your screen.
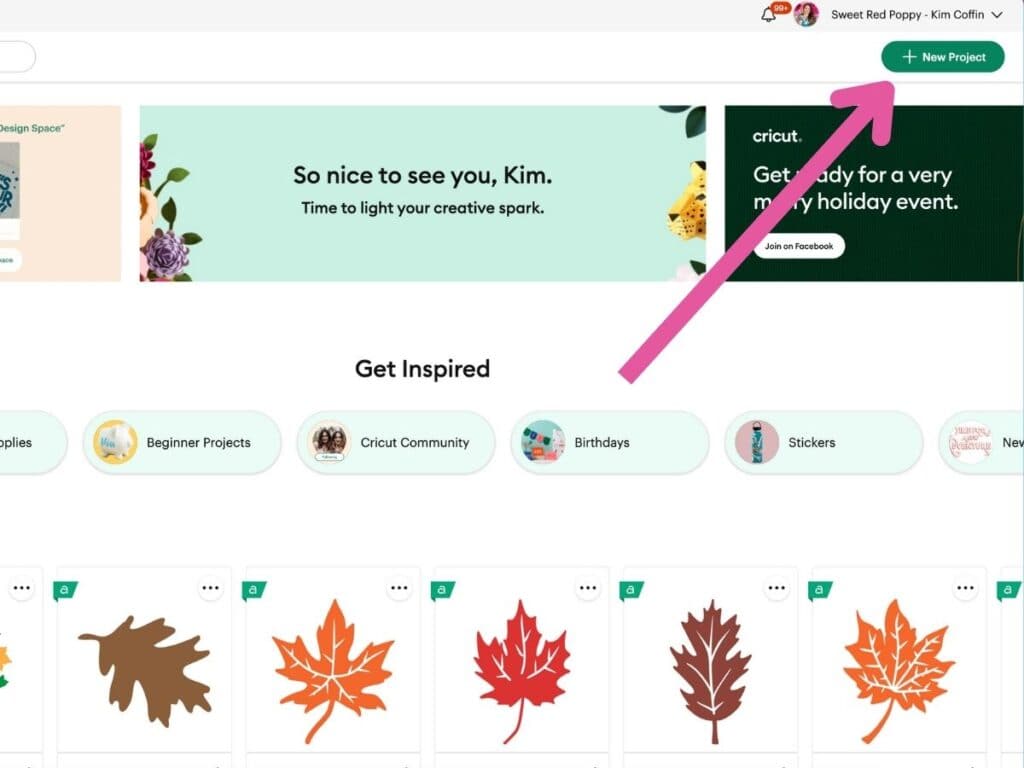
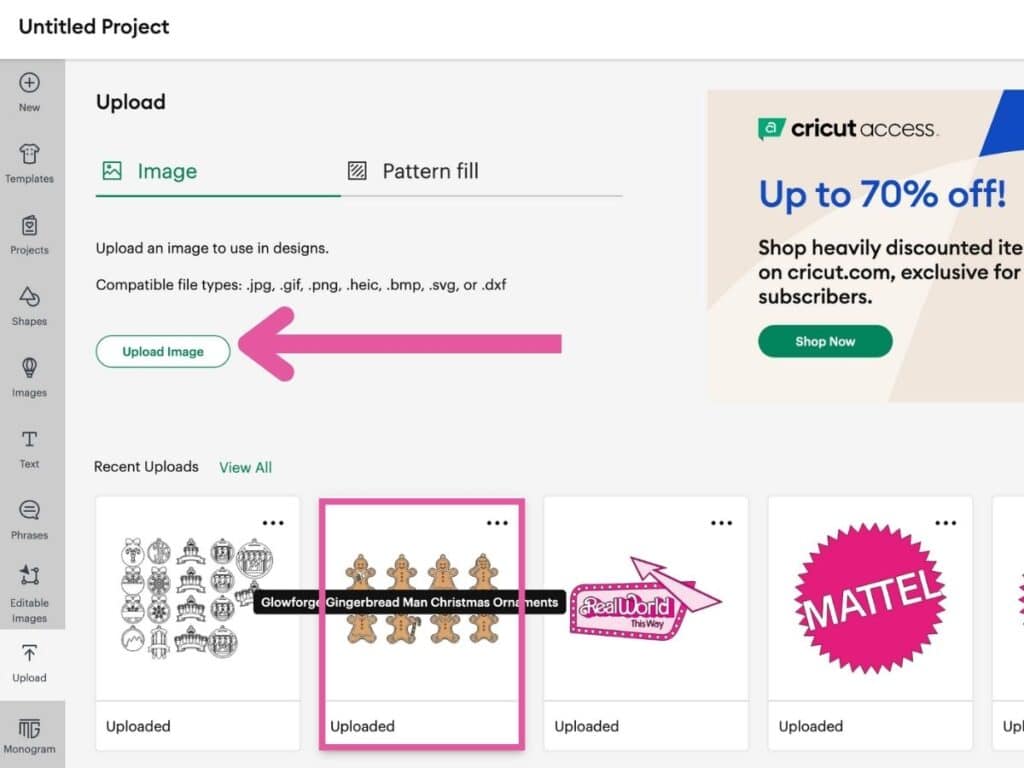
Click Upload in the bottom left of the workspace, and upload the SVG files by clicking Upload Image and selecting the files.
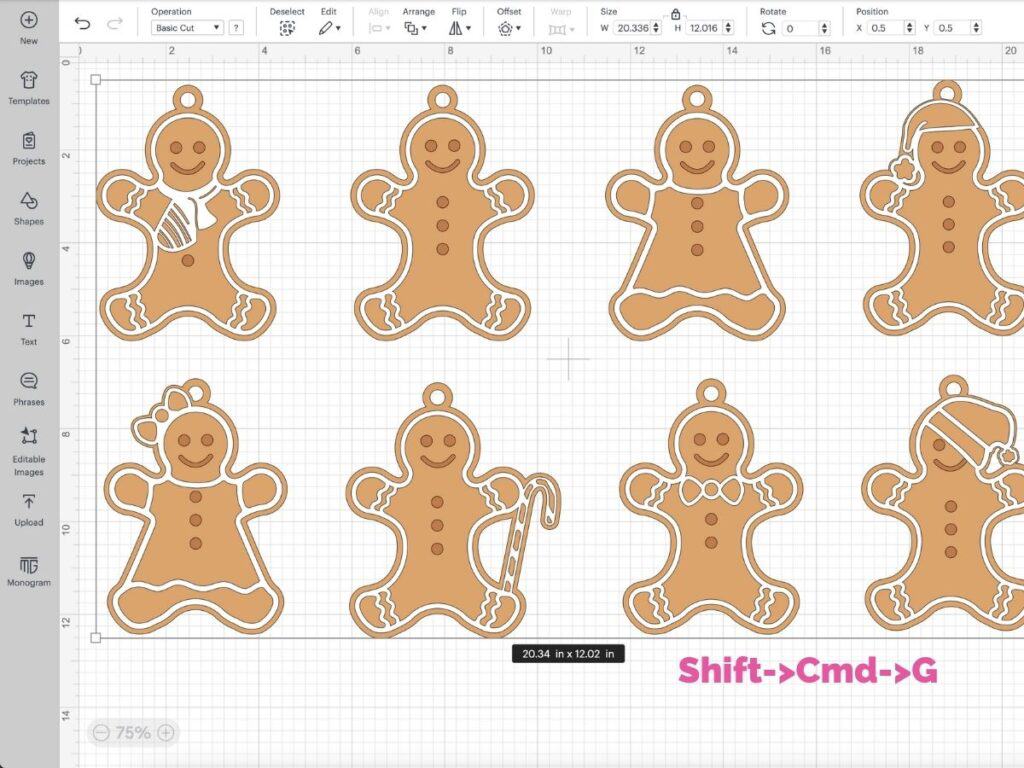
Next, ungroup the gingerbread people by right click on the design and select Ungroup or pressing Shift + Cmd + G (Mac) or Ctrl + Shift + G (Windows) on your keyboard.
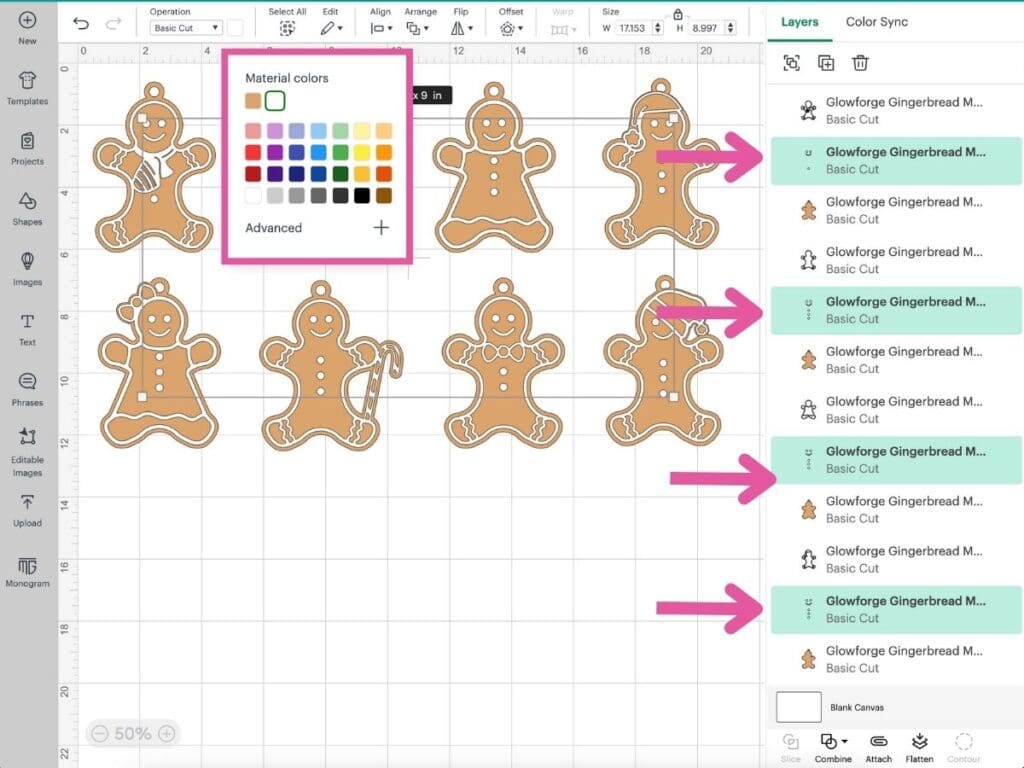
Then, I'm going to select all the layers that have the buttons and eyes, and change it to white. To do this, press Shift on your keyboard, select each layer, click on the color swatch above the canvas, and change the color to white.
Feel free to change the size and color of you gingerbread people. Once your happy, select Make in the top left-hand corner of your screen and follow the instructions.
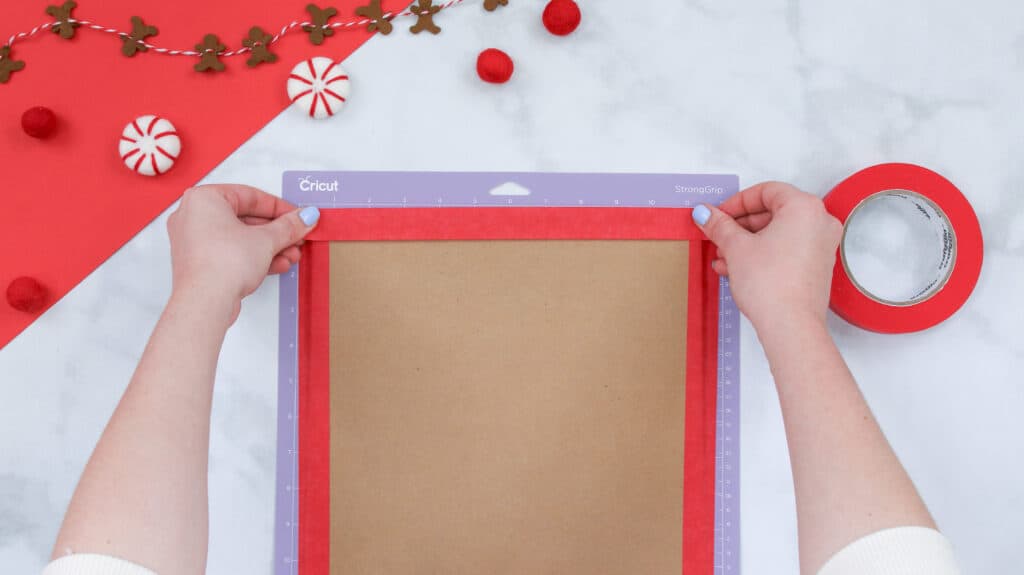
Place your material onto your mat. I used Kraft board and Foil Kraft Board. If you're using regular cardstock (light or medium) I recommend using a Standard Grip Mat; If using Heaving Chipboard or a type of Kraft Board- use a Strong Grip Mat.
When using Heavy Chipboard, tape all four corners of the material to the mat to keep it from moving while your machine cuts.
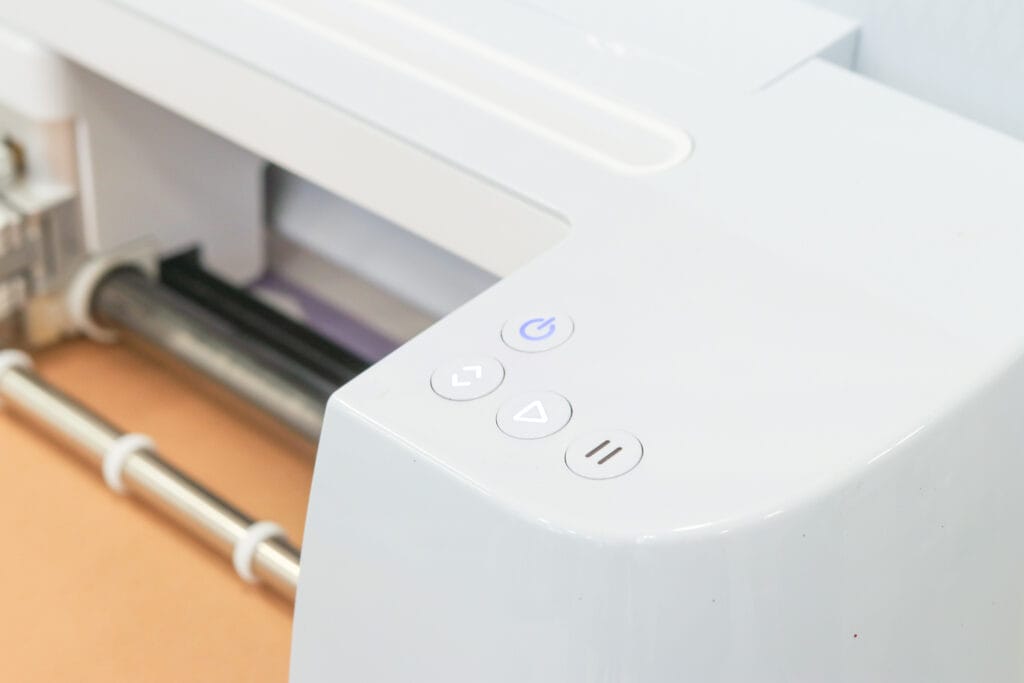
Load your mat into your Cricut machine by pressing the load button, and clicking the play button or Cricut button to start cutting.
Once your machine has finished cutting, unload the mat from the Cricut, gently peel the material away from the mat, and reveal the cut designs.
Now it's time to assemble the Christmas ornaments! Using some craft glue (I'm using Bearly Arts Craft Glue), and glue the layers together.

Pro Tip: Use a pair of tweezers to help attach small details onto the bases.
And that's it! You've made your own Christmas ornaments using your Cricut machine!
Finished Christmas Ornaments
Did you enjoy this tutorial? I’d love to see what you’ve made with it!

Join my crafting and sewing Facebook group where you can show us what you’re making, ask questions, and learn from others!
Don’t want to forget about this pattern? Save this project for later! Click here to save this project on Pinterest.
Do you have any questions about these Christmas Ornaments? Let me know in the comments below!
Can this file be used with other brands of laser cutter?
I would love to make the gingerbread ornaments on my cricut using Kraft board. My gingerbread shapes did not come in with a hanging "thing" at the top like yours did. How can I add this? Thank you. These are so cute!
ty for the files..huggzz
I would love to make these!
These are beautiful!!!
awesome as always
OBSESSED
These are so beautiful and would make great gifts
LOVE!!
Thank you so much for these freecbeautiful ornament designs! I love them. Merry Christmas too you and your family!
Love these!
the sled is just too cute!
These are really cute!
What an amazing amount of information.
nice ornaments. like that they can be made on glowforge and cricut with paper
Thank you for the detailed instructions!
Thank you, they are so cute.
cute
Those gingerbread characters would be great to make for a new family.
These will be great used as keepsake tags on gifts this year. Thanks for the idea and files!
Cute ornaments
I just love them
These ornaments are adorable.
Such cute ornaments.
Thank you for teaching how to make these they are so cute
Thanks for so many great files
I need to make these
Love these!
Would love these on my tree!!
What a collection!
Would love to make these!
Downloaded these cute files! Hoping to get a Glowforge in the future, but will make them out of cardstock from Joann's in the interim. Thank you!
These ornaments are amazing! It would be nice to be able to make items out of the heavy chipboard or wood .
So awesome. You are very talented.
This is exactly what I want!!!
Cute
So super cute and how you explain everything makes it so easy to do.
These are so lovely! Definitely one of my favorite projects you've made. If I had a Glowforge it would be on my make list. I probably would go a little crazy and make way more than I need and would have to give out to everyone I know lol.
I love all your tutorials, they’re always simple and concise!
These are just the cutest!
All your crafts are amazing! Thanks for a chance to win a prize. I love to craft.
Very cool.
What fun gifts these would make!
Love these!
Gift tags is a great idea, better than the "boring" usual stick ons.
I love these! I downloaded the file anyway. This machine is awesome.
So fun!
You can do amasing things with a glowforge. Love the ornaments.
Your ornaments are very pretty. Would love to decorate with ornaments like this.
Great tutorial!
great ornament ideas!!
The ornaments are lovely. The Glowforge does such a magnificent job. Thank you for this post.
so cute
Beautiful ornaments. Would love to try making these and many other items too.
What an awesome machine! And project! Thanks
I love making Christmas ornaments. Now all I need is a Glowforge! I didn't realize you do so much with a Glowforge, and its good to know for the future when I get one.
I just love all of the ornaments!
those are amazing
I like all ornaments. They make great gifts.
They would make awesome gifts!
Wow this is so helpful. Great ideas.
Great ornament ideas for a Glowforge!
These are so cute!
Great set of ornaments.
I just love the materials and designs you can use with this beauty.
What cute ideas.
I must try making these using my Cricut!
These are so cute
Whoever came up with these design's did a great job, these are all nice.
Love this tutorial and perfect for Christmas!
Hope for glowforfe ro use svgs
Is this competitively priced?
Those are all so cute!
Having a glowforge would be awesome. You make some pretty cute stuff!
Very cool Glowforge! Having the ability to make your own wooden ornaments would be awesome! All of the ornaments look great! The gifting possibilities are endless! Thanks for sharing! :0)
Very neat! Thanks for the article.
These ornaments are so cute!!!
That gingerbread man is so cute
Your break downs are so easy to follow and understand. Very thoughtful to the crafty community. These are so cute and so special to use as gifts or decorate your tree! Thanks for the wonderful ideas
I love using personalized ornaments as gift tags.
This is such a cute idea!
These are so cute and thank you for sharing!!!
these are awesome
Super cute ideas!
I love those gingerbread people! So stinking cute!!
Can't wait! Yes!
Thanks for the Files! These are awesome!
So cute for personalized ornaments !
Winner, winner, chicken, dinner
These would be a great memory.
Love the Christmas ornaments
These are amazing. Thank you
So cute
These are amazing.
The birth of a new Christmas tradition?
I want a glowforge
I love the idea of making personalized ornaments for the holidays.
I really need a glowforge. It would make things so much easier.
Great ideas for putting on wrapped gifts. A little something for them to keep and use on their trees
This made my Christmas list
These are cute. Nice they can be cut out via the Circuit and the Glowforge.