• Skip to primary navigation
  • Skip to main content
  • Skip to primary sidebar
Sweet Red Poppy logo
  • Cricut
    • Free SVG Files
    • Paper Flowers
    • Mandala
    • Iron-On
    • Vinyl
    • Maker
    • Explore Air 2
    • Joy
  • Sewing
    • Baby
    • Kids
    • Accessories
    • Christmas
    • Blankets
    • Womens
    • Learn to Sew Tips & Tricks
    • Face Masks
  • DIY Crafting
    • Paint
    • Paper
    • Food
    • Kids
  • Holiday Crafts
    • Valentine’s Day
    • Easter
    • 4th of July
    • Halloween
    • Thanksgiving
    • Christmas
  • Books
    • Cricut Printed Book
    • Cricut E-Book
    • Cricut Joy Printed Book
    • Cricut Joy E-Book
    • Sewing Printed Book
    • Sewing E-Book
    • Face Mask E-Book
    • Mandala E-Book Bundle
    • Mandala E-Book - Inkscape
    • Mandala E-Book - Adobe Illustrator
    • Mandala Printed Book - Inkscape
    • Mandala Printed Book - Adobe Illustrator
    • Baby Pattern E-Book
  • Courses
    • Cricut Course
    • Sewing Course
    • Serger Course
  • Shop
    • E-Books
    • Printed Books
    • Sewing Patterns
    • SVG Files
    • Baby Patterns
    • Subscribe to Emails
  • Search

No Sew Fabric Pouch With Craftables Heat Transfer Vinyl

Written by Kimberly Coffin · This post may contain affiliate links · 1 Comment

137 shares


Learn how to make this easy no-sew pouch with Craftables Iron-on vinyl.

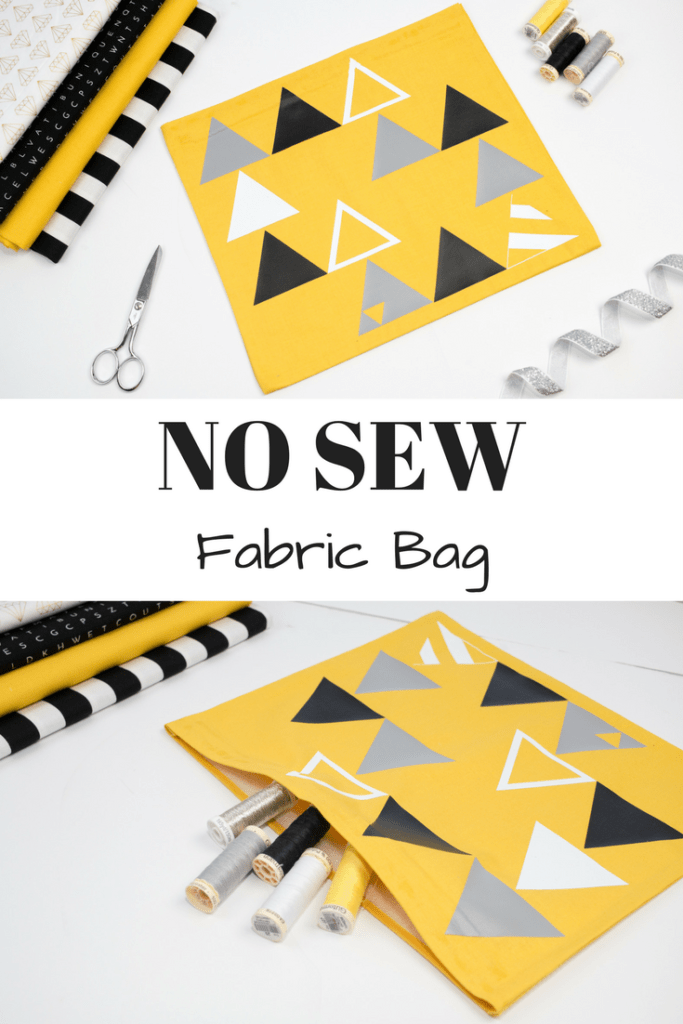
This tutorial is for those of you who don't sew! Just because you don't have a sewing machine or you don't know how to use it doesn't mean you can't make cute fabric projects! Since my sewing machine was in the shop for some TLC, I thought it would be fun to create a no-sew tutorial using a few of my favorite products! I wanted to create a fun modern looking fabric for this project and I knew Heat Transfer Vinyl would be the perfect way to customize my fabric so I could get exactly the look I was going for.

No Sew Fabric Bag Tutorial

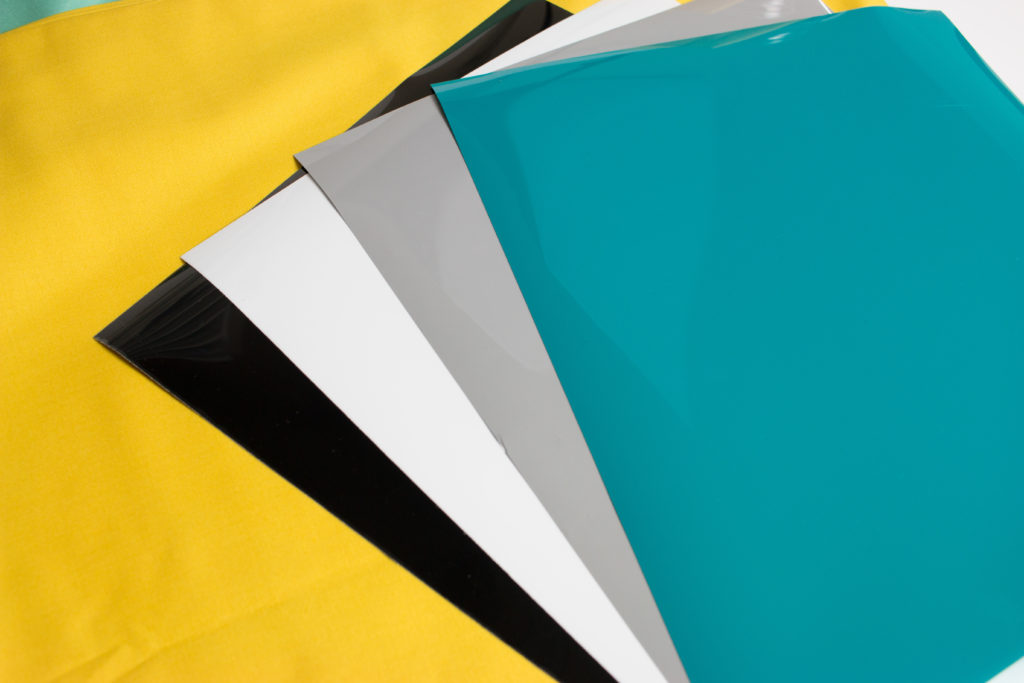
I chose to use Craftables newly-released Heat Transfer Vinyl. Craftables was kind enough to send me an assortment of their Heat Transfer Vinyl for me to test out! I really enjoyed working with this product and I loved the wide variety of colors that they offer!  I used my Cricut Easy Press with this vinyl to get perfect results!

If you're looking for affordable, high-quality Heat TRansfer Vinyl be sure to check out Craftables! They offer a full line of ultra-premium heat transfer vinyl including Glitter, foil, metallic, reflective, and flock.

Materials
Craftables Heat Transfer Vinyl
1/2 yard Riley Blake Quilting Cotton
1 Package of Iron-On Velcro
1 Bottle of Thermoweb Fabric Fuse
Cricut Cutting Machine

How To Make A Fabric Pouch Without A Sewing Machine Tutorial

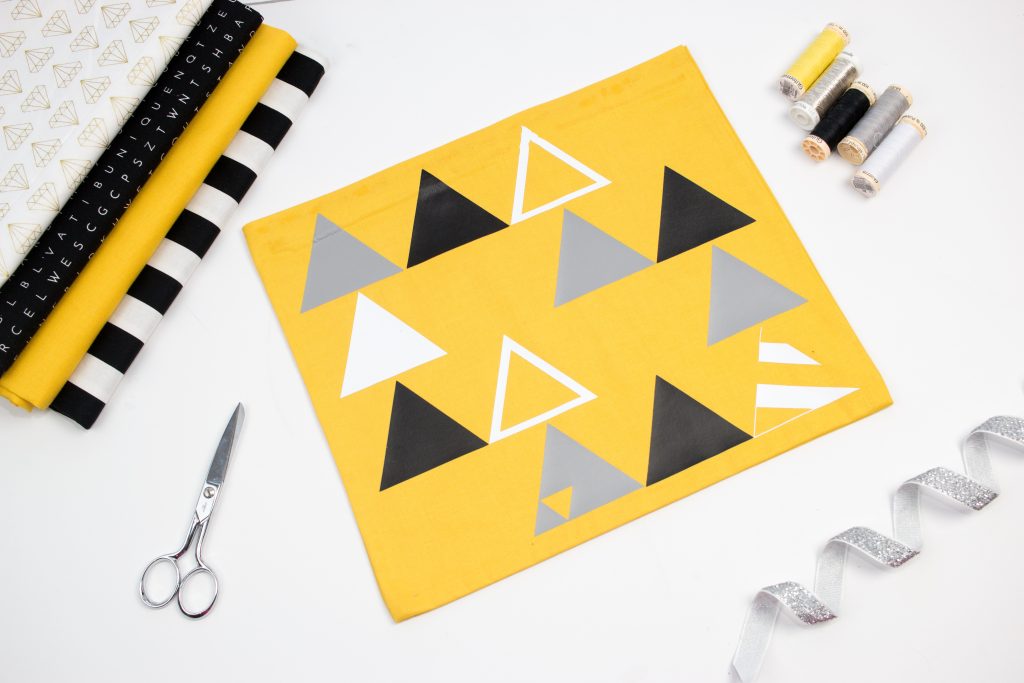
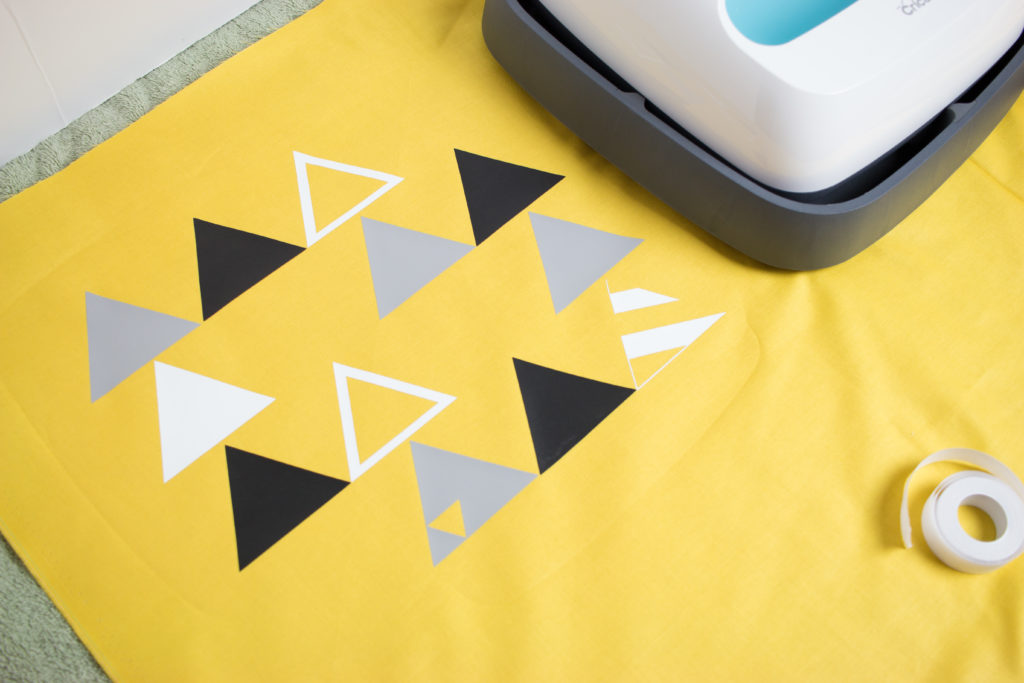
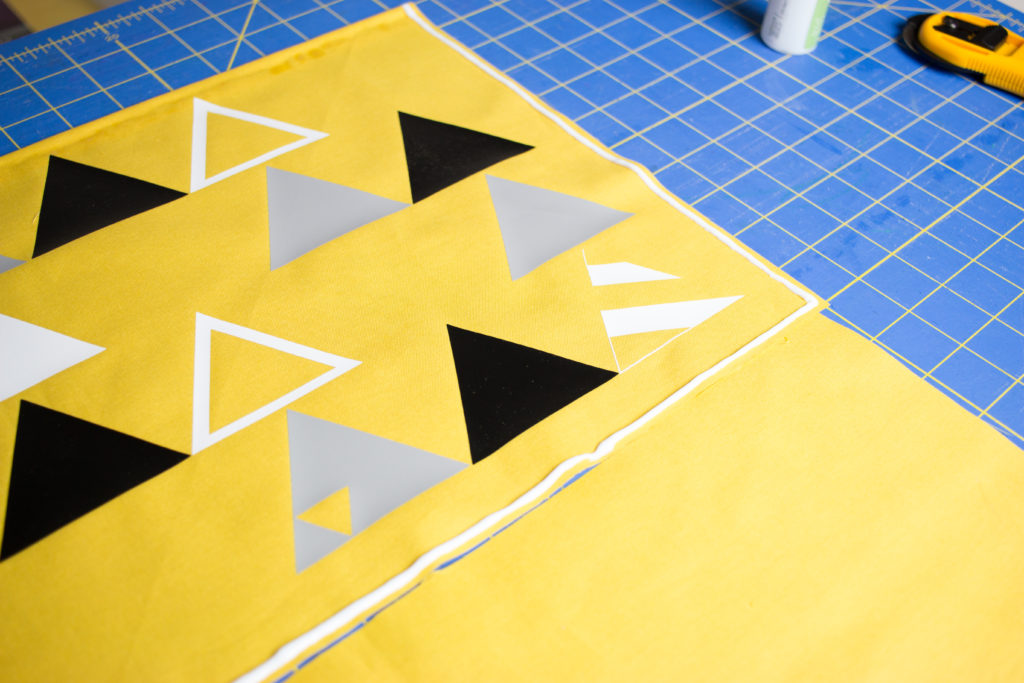
Begin by selecting your Heat Transfer Vinyl. I chose Black, White and Gray. Create a design in Cricut Design Space or use this one.

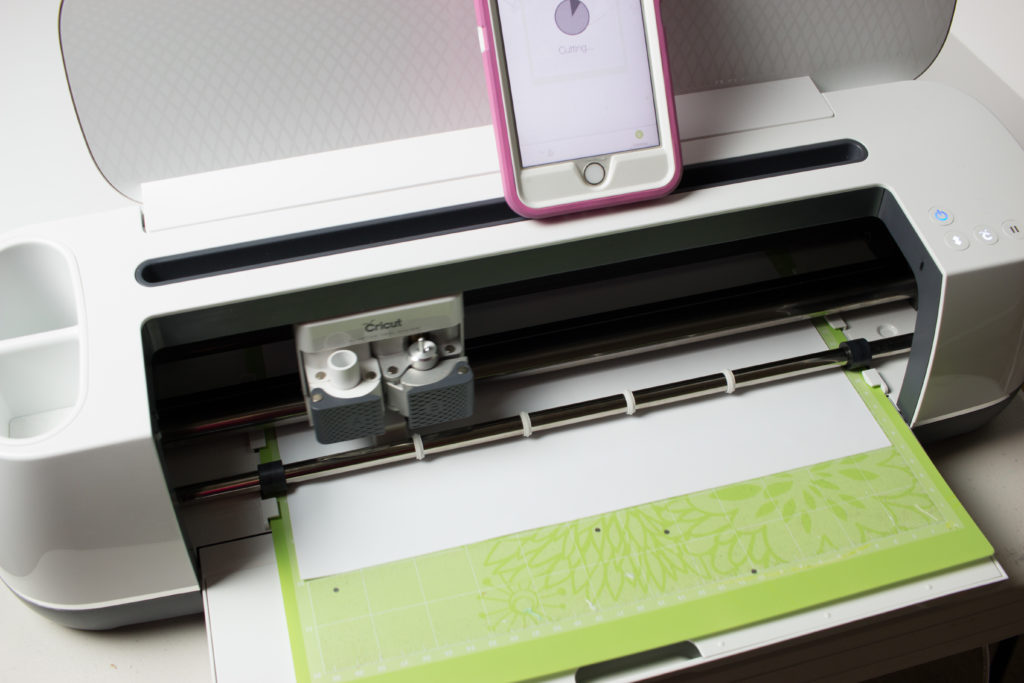
Load your Craftables Heat Transfer Vinyl into your cutting machine and cut out each design.

Weed the designs and place them on top of your fabric heating one layer at a time. Allow the fabric and Vinyl to cool completely in between each layer and remove the protective sheet.

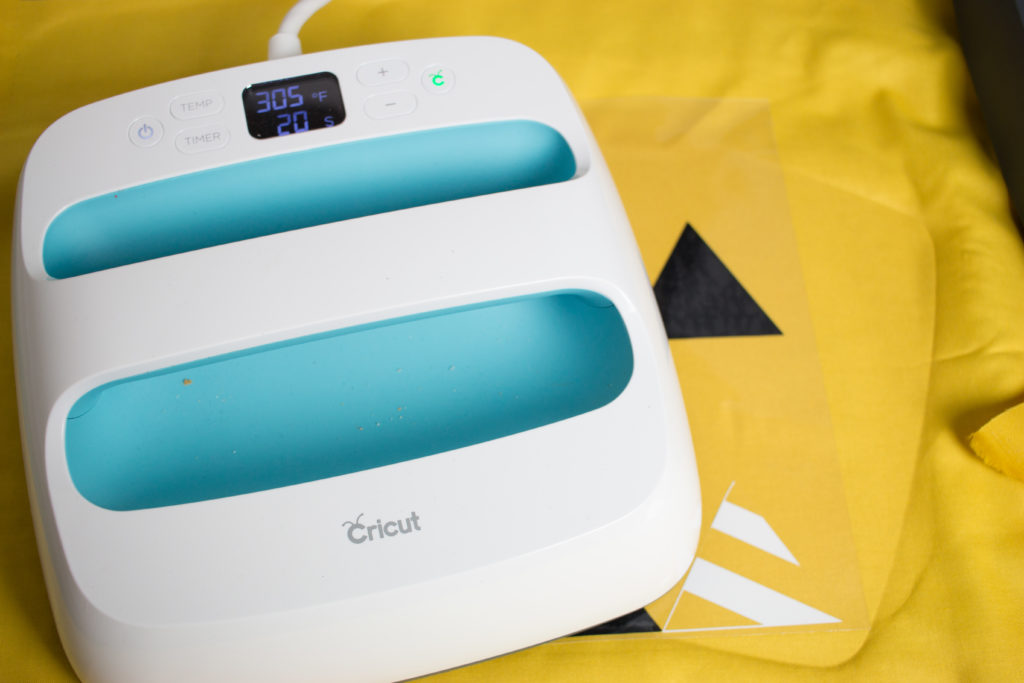
This Heat Transfer Vinyl works perfectly with a heat press or a regular iron.

No Sew Pouch Tutorial

Cut the fabric down to 13 inches wide by 11 inches tall.

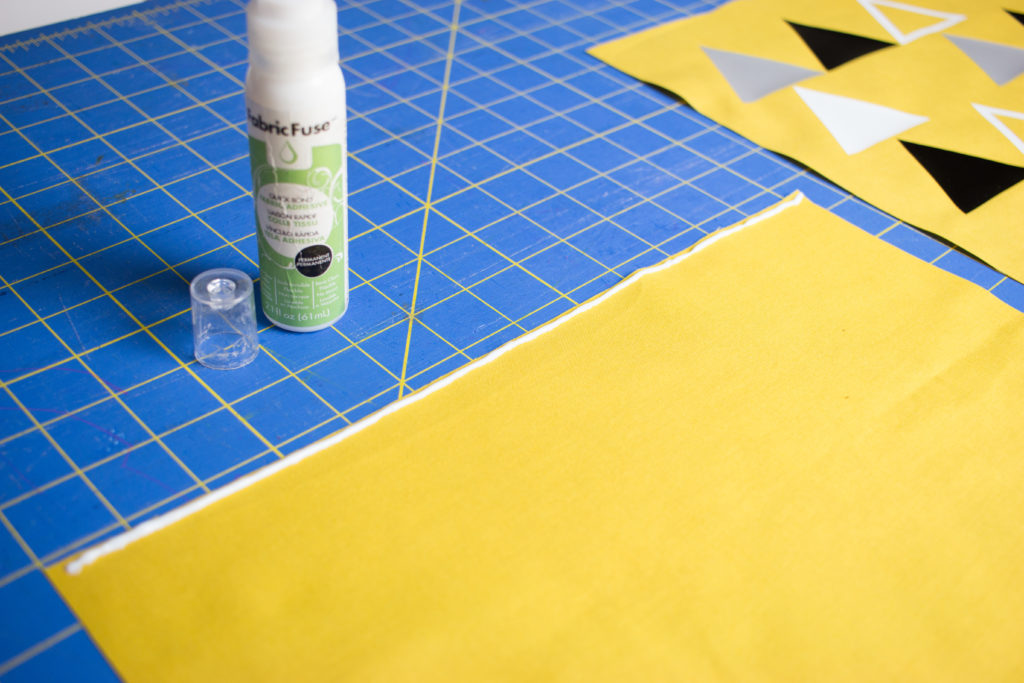
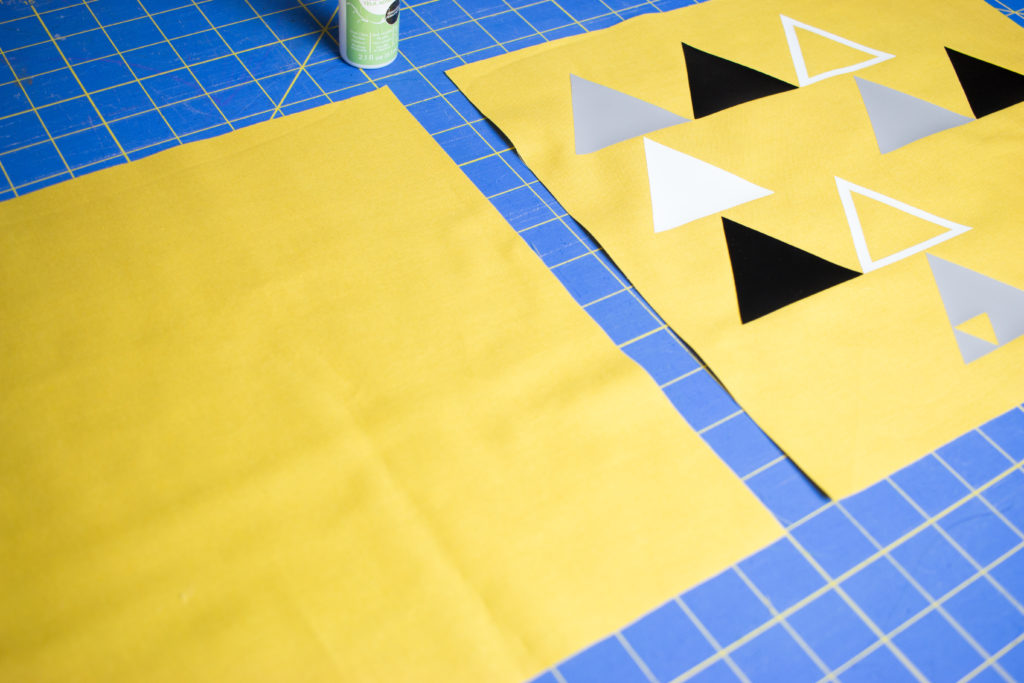
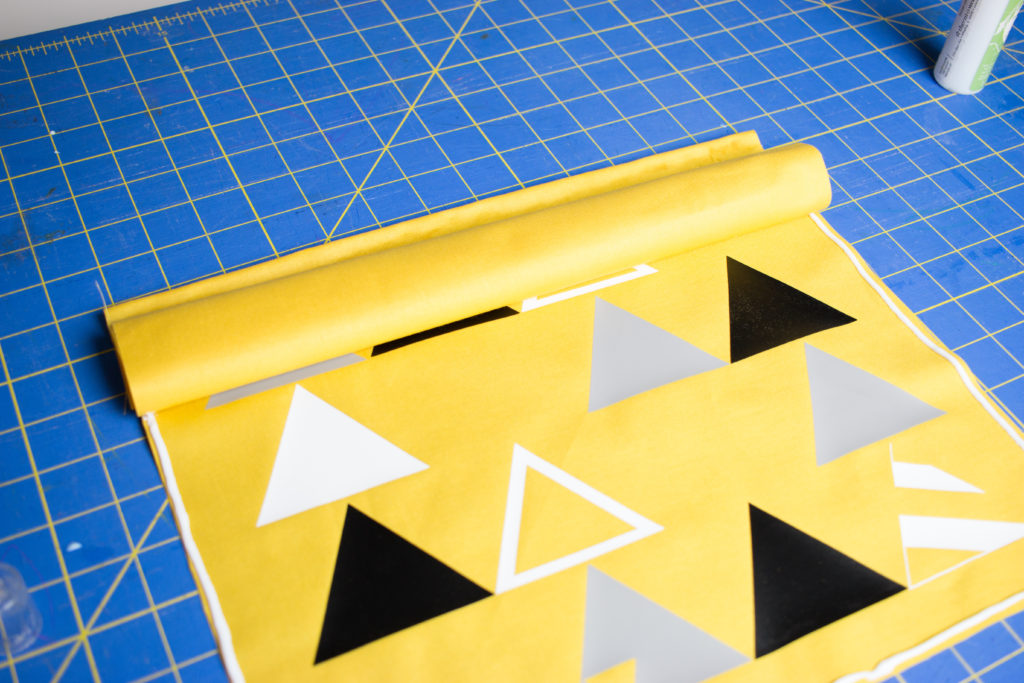
On the wrong side of the fabric draw a straight line of Thermoweb Fabric Fuse along the top of both pieces of fabric. Fold the fabric over 1 inch.

No Sew Pouch Tutorial

Press firmly and allow to dry

No Sew Pouch Tutorial

No Sew Pouch Tutorial

Draw a line of glue on the three remaining sides of the fabric.

No Sew Pouch Tutorial

Place the other piece of fabric on top and slowly unroll it to perfectly align it. Place a heavy book over the bag and allow to dry overnight.

No Sew Pouch Tutorial

No Sew Pouch Tutorial

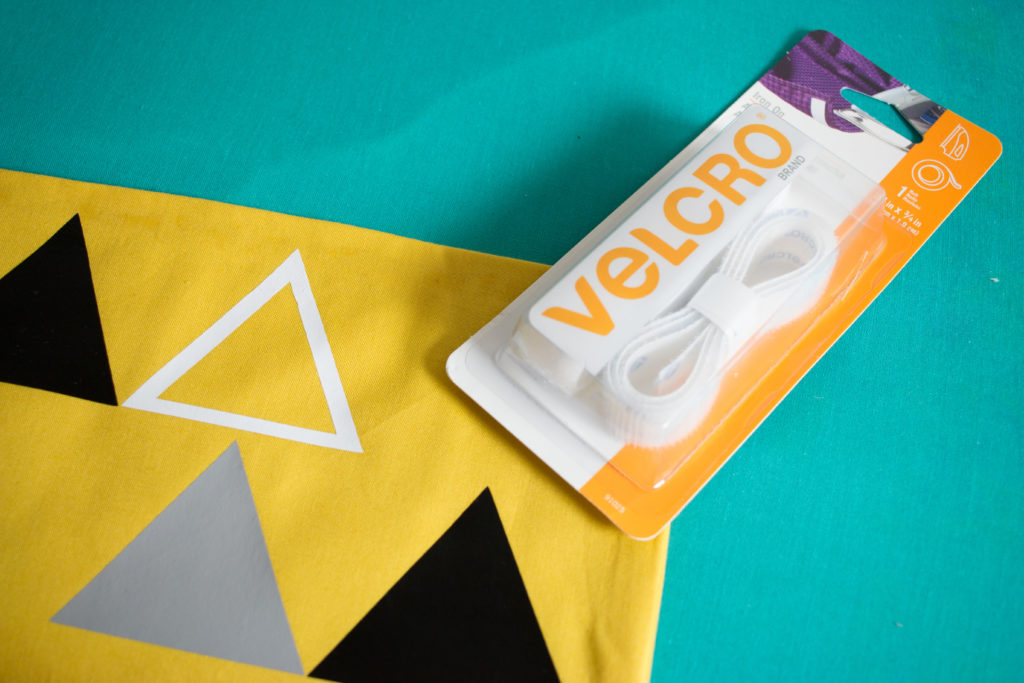
Cut a piece of velcro that is the 12 inches long. Follow the instructions on the back of the packaging to properly adhere the velcro to the bag.

No Sew Pouch Tutorial

Shop all Craftables Heat Transfer Vinyl HERE

Learn how to make this easy no-sew pouch with Craftables Iron-on vinyl.

SaveSave

SaveSave

SaveSaveSaveSave

SaveSaveSaveSave

SaveSave

SaveSave

SaveSave

SaveSave

SaveSaveSaveSave

« DIY Teal Pumpkin Project
BOO It Forward »

Reader Interactions

Comments

  1. Lorianne says

    June 13, 2022 at 1:20 pm

    Could you tell me if you put the glue on the right side of the fabric or back side? If the front, do you turn it inside out after drying? Your instructions look like you put the vinyl on the inside.

    Reply

Leave a Reply Cancel reply

Your email address will not be published. Required fields are marked *

This site uses Akismet to reduce spam. Learn how your comment data is processed.

Primary Sidebar

Ready, Set, Sew! An online sewing course for beginners by top US sewing blogger, Sweet Red Poppy.

Hello, I’m Kimberly, the creator of Sweet Red Poppy!

I’m a wife, mother to 3, seamstress, and lover of all things crafty! Sweet Red Poppy is my creative outlet where I find and create inspiration. It’s a place where I can share my never-ending sewing projects and my love of learning!

Read more about me →

The Latest

  • 5 Useful Tools to Help You Organize After the Holidays with JOANN
  • How to Make Christmas Gift Tags with Your Cricut Machine
  • How to Make Sock Gnomes
  • How to wrap a gift step by step
    How to Wrap a Gift - Four Ways
  • How to Make Perfectly Painted Wood Signs with Cricut Vinyl Stencils
  • 5 Cricut Gift Box Template SVG Files

Footer

↑ back to top

Legal

  • Privacy Policy
  • Disclosure

Newsletter

  • Sign Up! For Emails and Updates

About

  • Contact
  • About
  • Home

Copyright © 2022 Sweet Red Poppy