Money Gift Card Holders are the perfect thoughtful gift to give for any occasion! I've designed a variety of different styles to fit any occasion.
These money cards are a clever way to gift cash, and they leave plenty of room inside for a handwritten note. And if we're being honest, who doesn't love receiving cold hard cash with a thoughtful note? This gift card is sure to be well received!
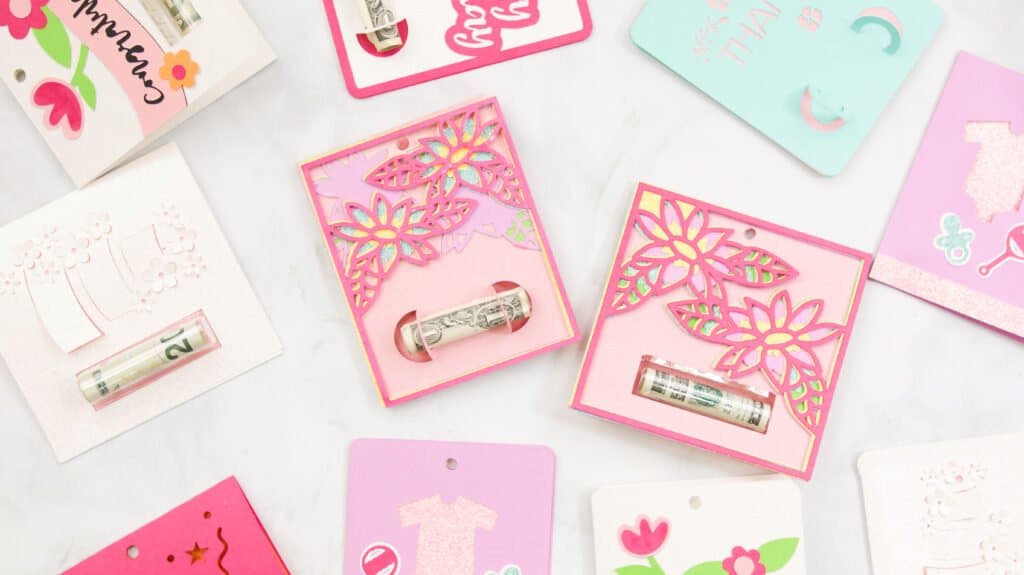
There are six themes to choose from: Congratulations, Wedding, Birthday, Baby Shower, Flower, and Thank You.
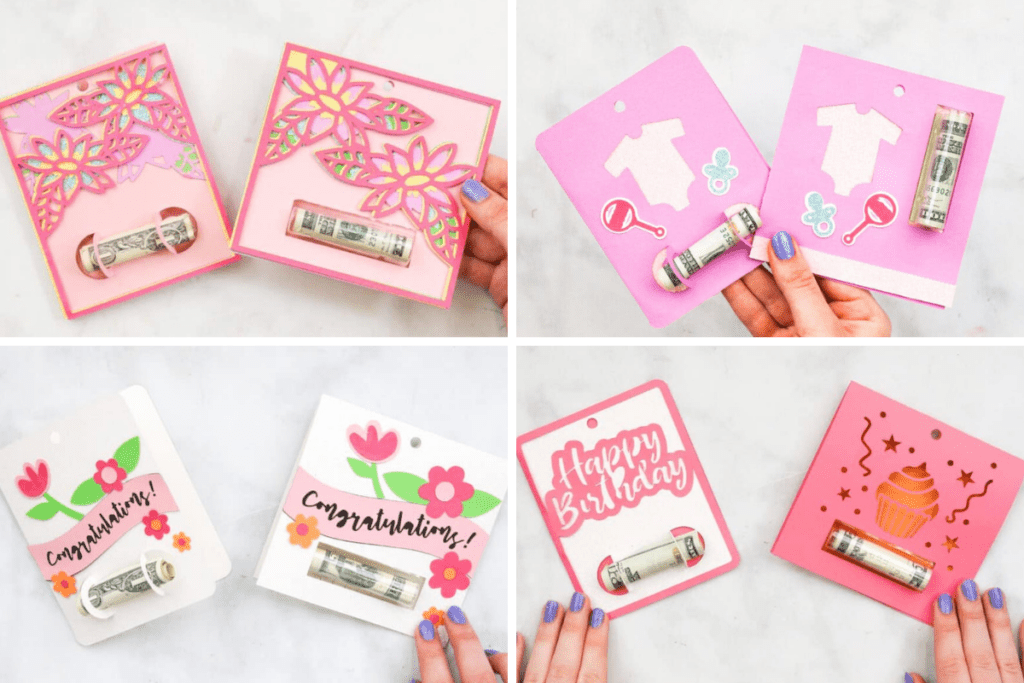
Each card comes in two styles and a couple of different designs- you can choose whether you want the card to hold a roll of money on the front of the card or be enclosed in a clear plastic slot with a pull tab on the back.
I like to keep a few of these cards on hand for last-minute gifts!
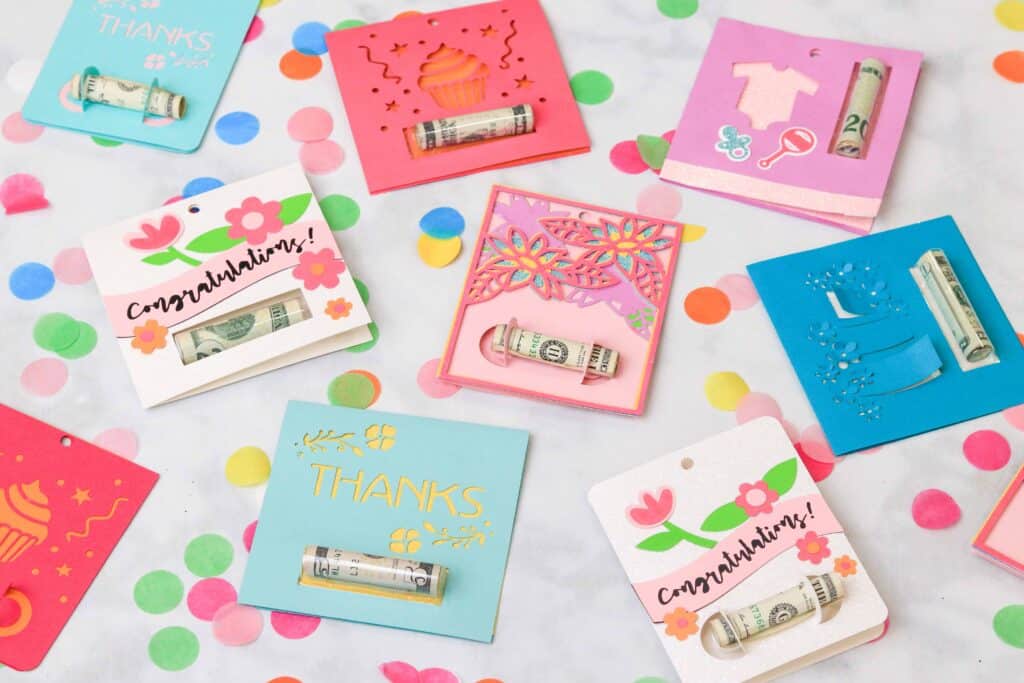
Table of Contents
What Type of Paper Should I Use?
I recommend using 65-80lbs card stock because it's a lighter weight card stock, but heavy enough to be used for these card designs.
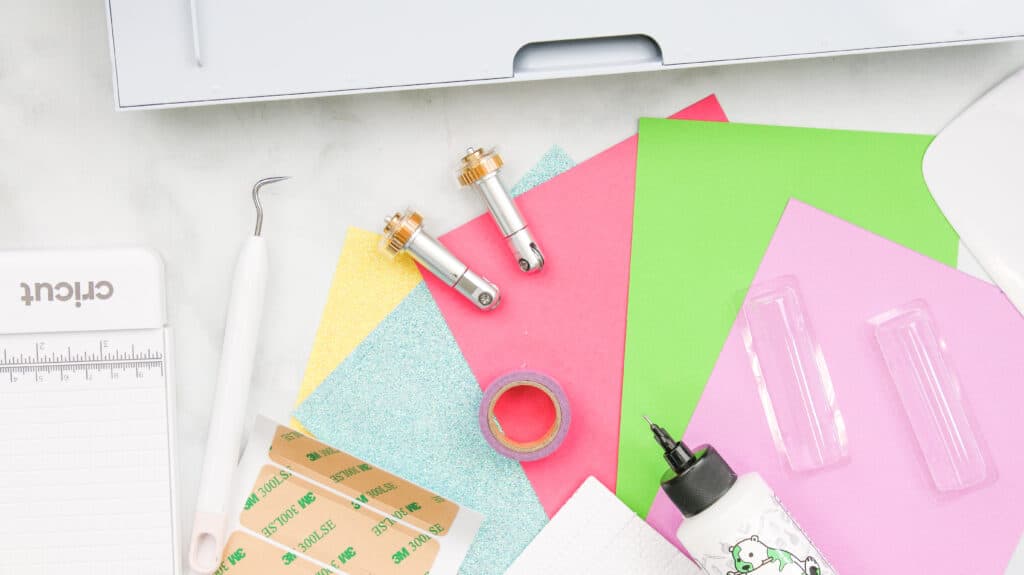
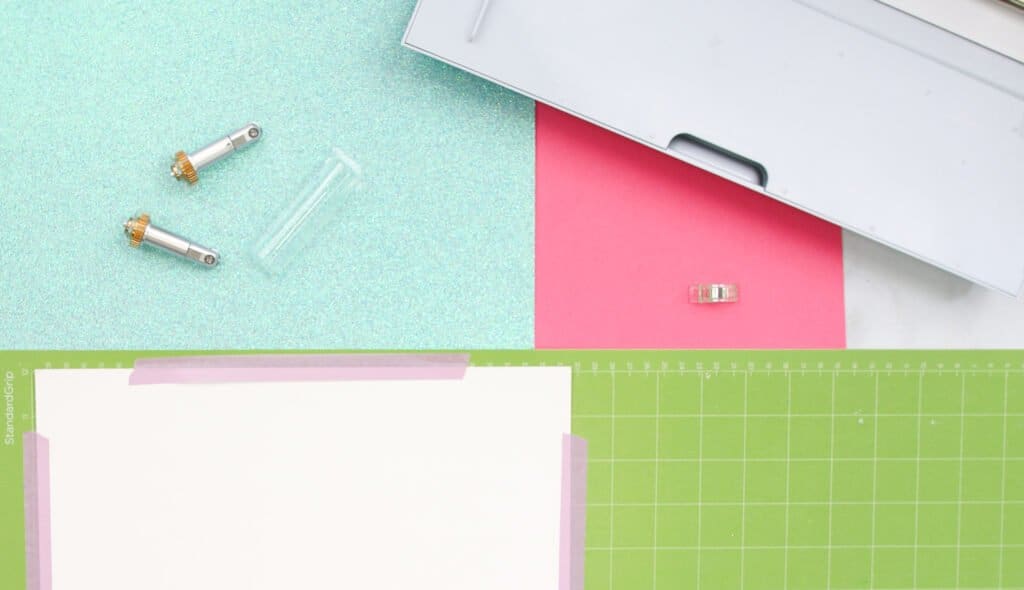
Supplies Needed:
- Cricut Maker, Cricut Explore, or Other Cutting Machine
- StandardGrip Mat
- Cardstock 65-80 lbs
- Fine-Point Blade
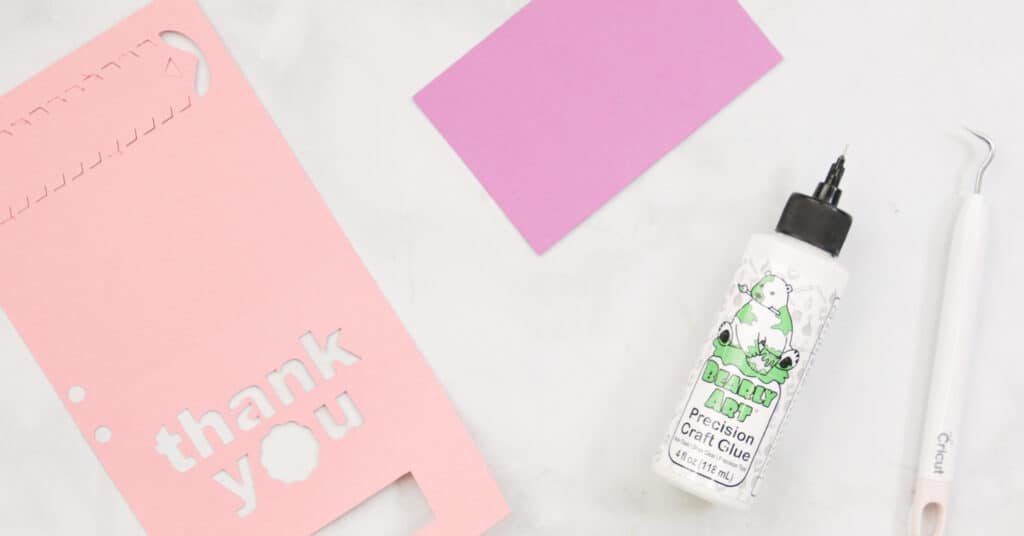
- Bearly Art Craft Glue (Use code SRP10 to save 10%)
- Scoring Wheel Tip & Housing or Scoring Stylus
- Craft Clips
- Chapstick Plastic Pouches
- Cricut Pen
Download SVG Files Here
Upload SVG Files
To start, download the SVG file to your computer, create a new project, and Upload it to your Canvas in Design Space.
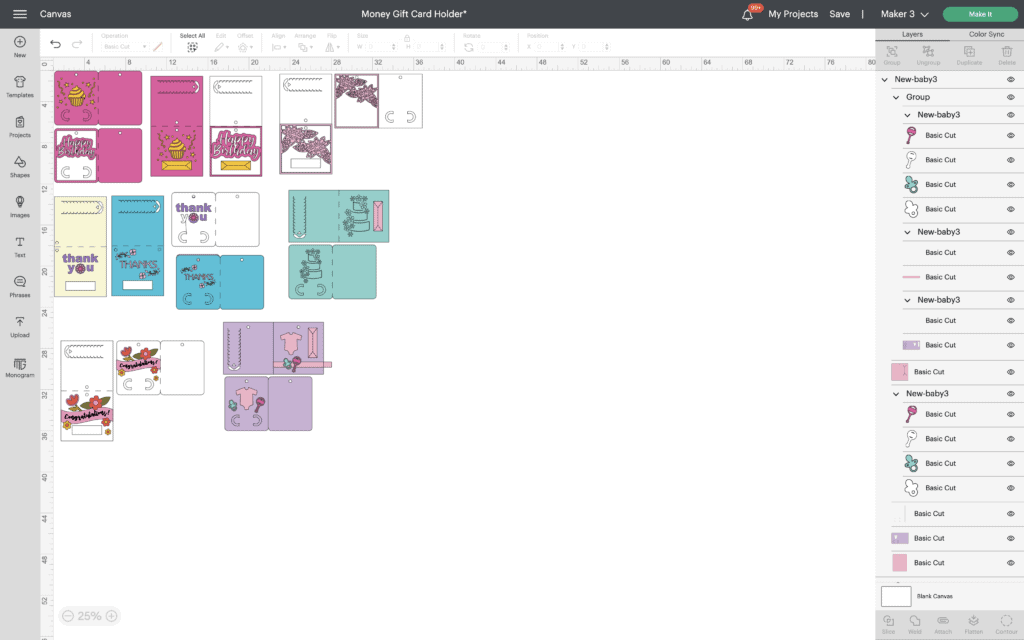
Once uploaded to your canvas, ungroup the designs. You'll want to change the lines in the middle of the card to score lines by going into the top left corner. Then, click on the dropdown menu where it says Basic Cut, select Score, and attach to their respective pieces in the right-hand menu.
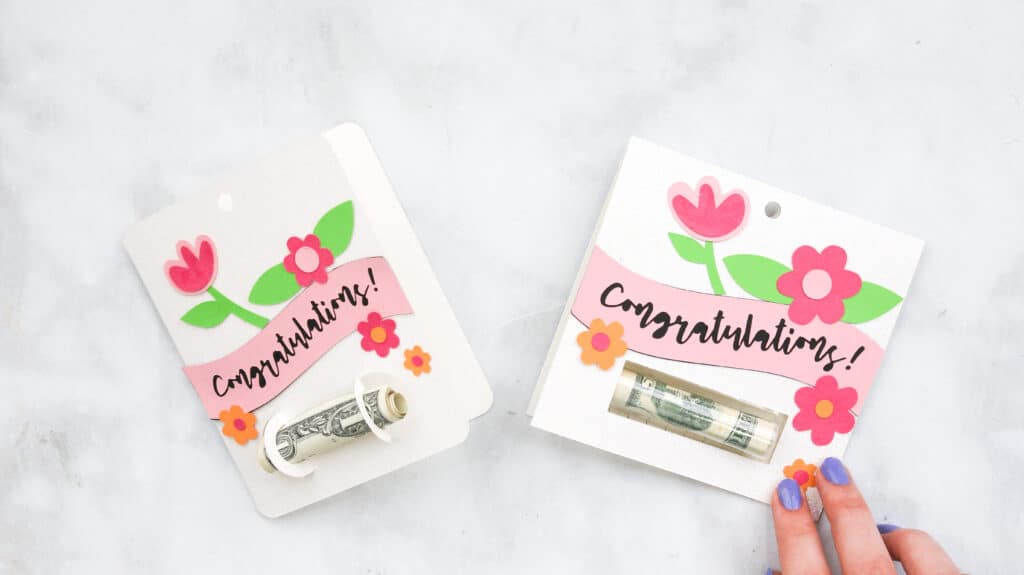
Congratulations Money Gift Card Holders
The congratulations card has a congratulations banner with flowers and leaves surrounding it.
How Much Paper Do I Need?
Congratulations Card Bases: 1 12 x 12” Cardstock or 1 8.5 x 11” Cardstock
Details (Banner, Flowers, Leaves): 1 12 x 12” Cardstock or 8.5 x 11” Cardstock
The Card Design Consists of:
- Two Congratulations Card Styles: One with a pull tab and one without.
- Each design comes with:
- 6 Flower Pieces
- 4 Flower centers
- 2 Leaves
- 2 Banners
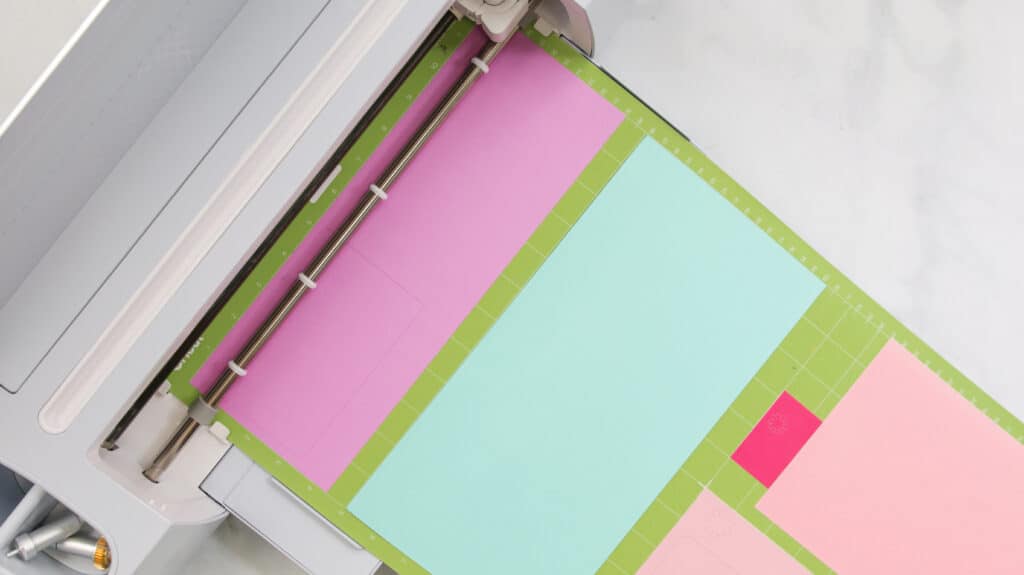
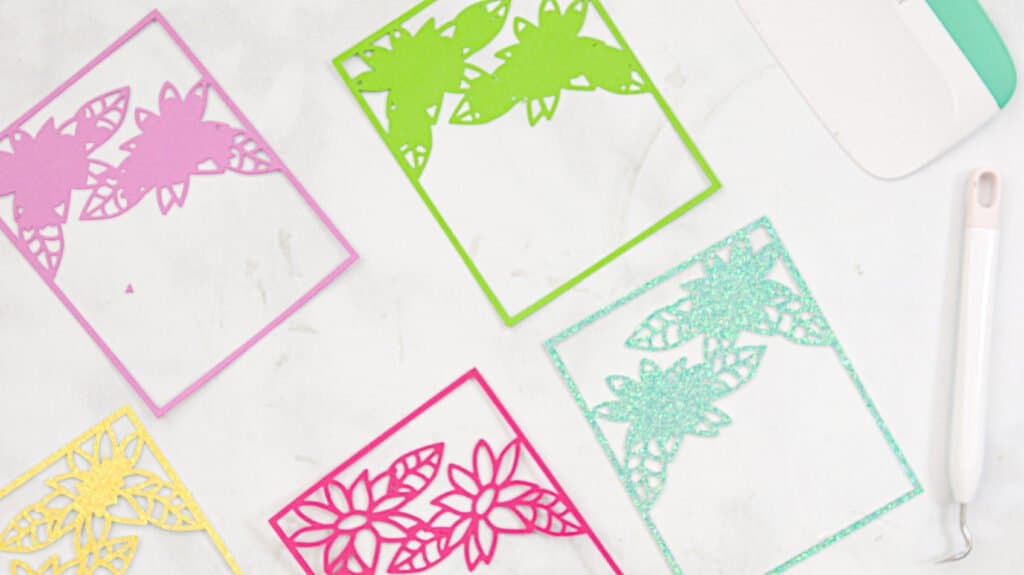
Step One: Cut Out Congratulations Card
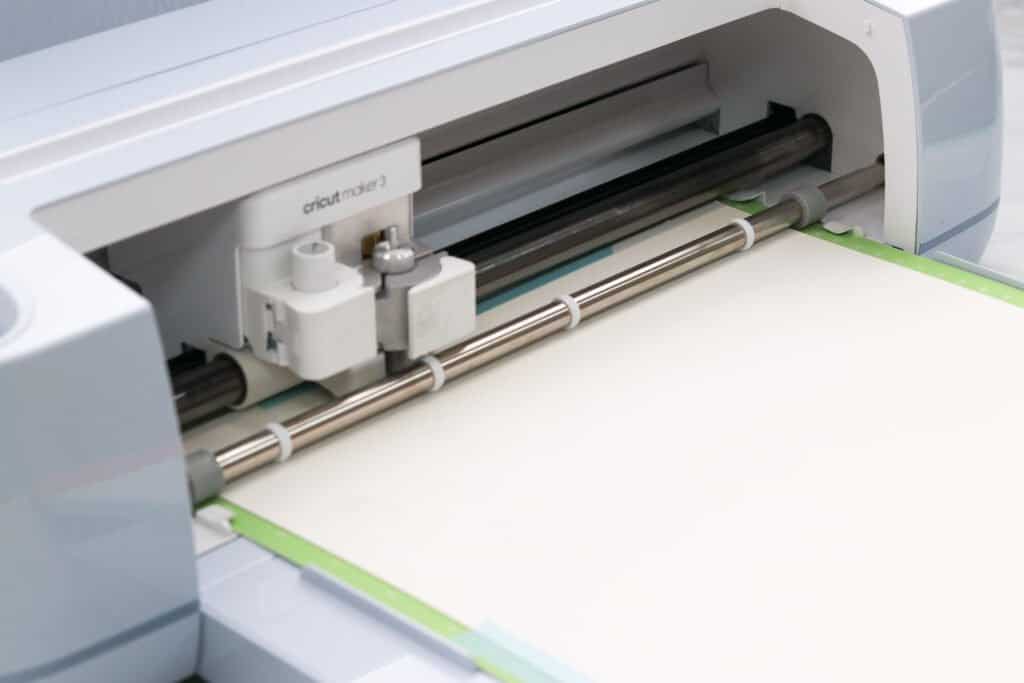
Let's start by cutting out all the pieces for this design. First, load the mat with card stock and cut out all card pieces with a cutting machine.
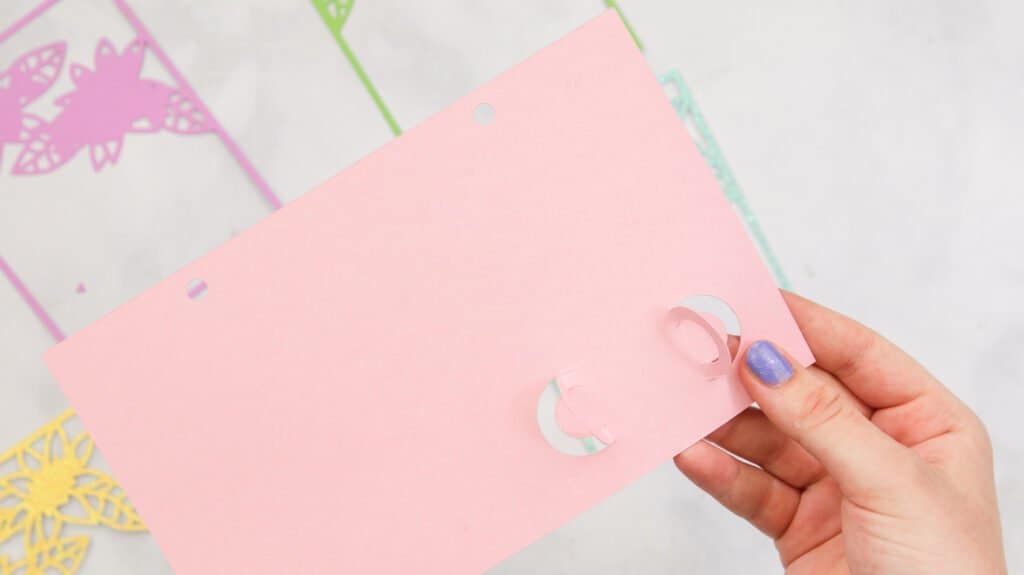
Step Two: Fold Score Lines
Next, fold the score lines along the middle of the card and the two slot tabs that will eventually hold a roll of money.
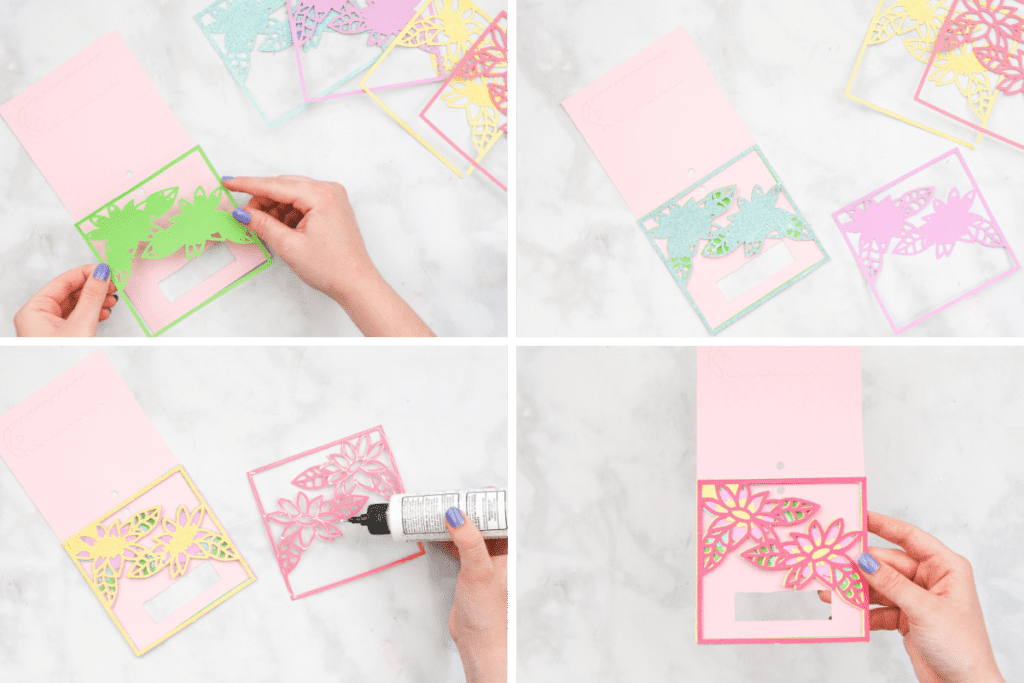
Step Three: Glue on Details
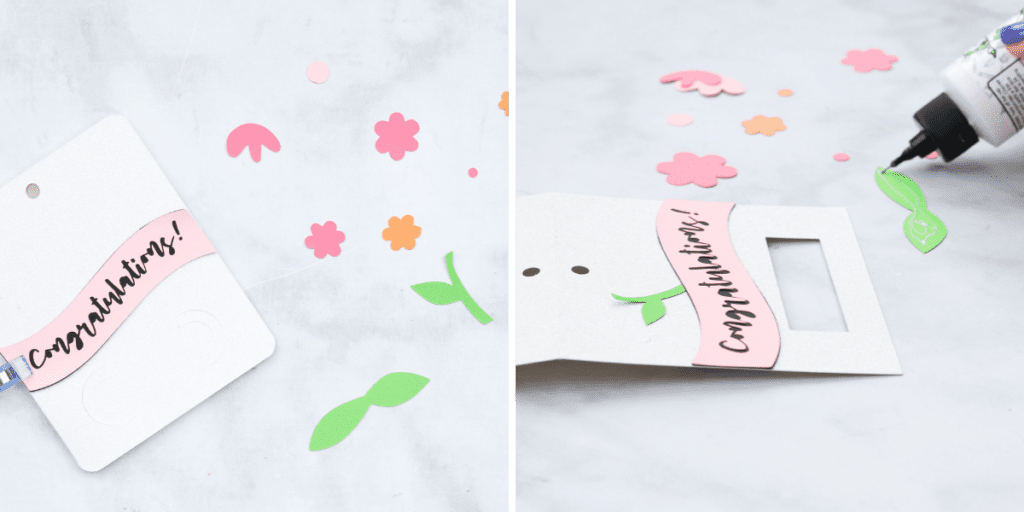
After folding the score lines, it's time to glue on the details. Place the solid banner in the middle of the card, then glue the Congratulations banner on top. Lastly, glue the leaves, flowers, and centers around it.
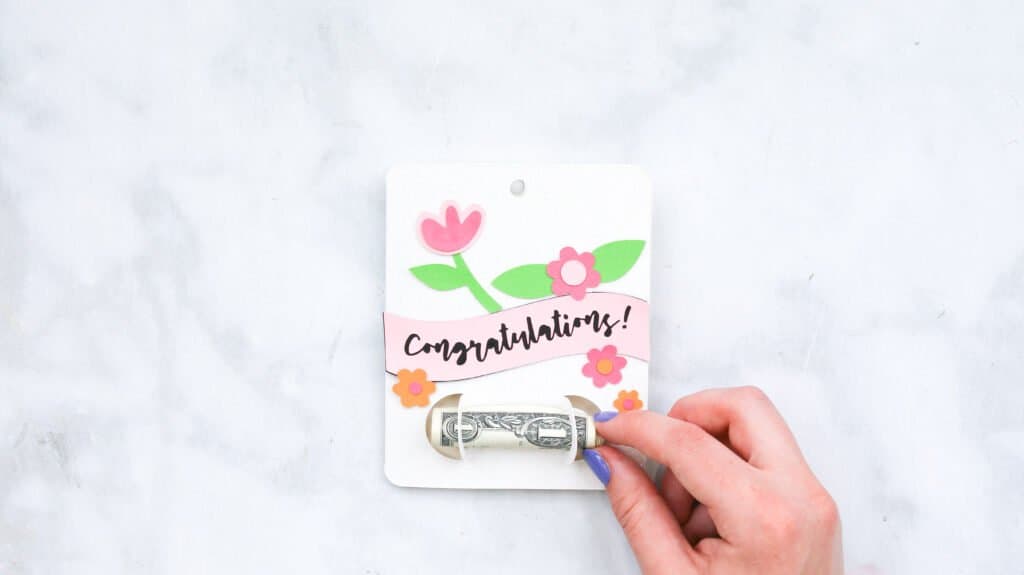
Step Four: Add Gift
The final step to making this congratulations card is to add your gift.
If you're making the card with the holder on the front, slip a roll of money between the slots, and you're done!
If you're making the card with the pull tab on the back, the final step is to add the plastic pouch. Before adhering the plastic tube to the card, place your money inside and then align it with the pull tab.
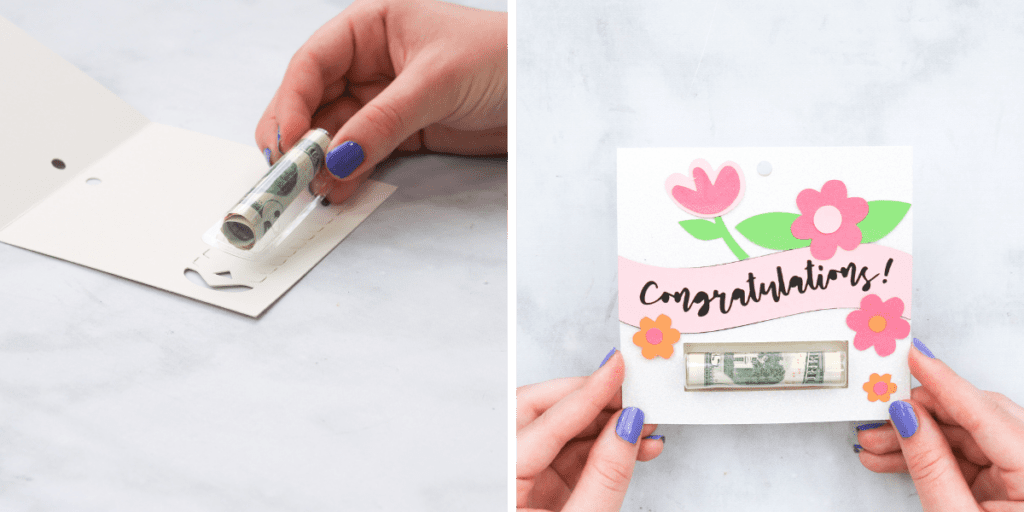
Once you've placed your gift, this "Congratulations" money card holder is finished!
Wedding Money Gift Card Holders
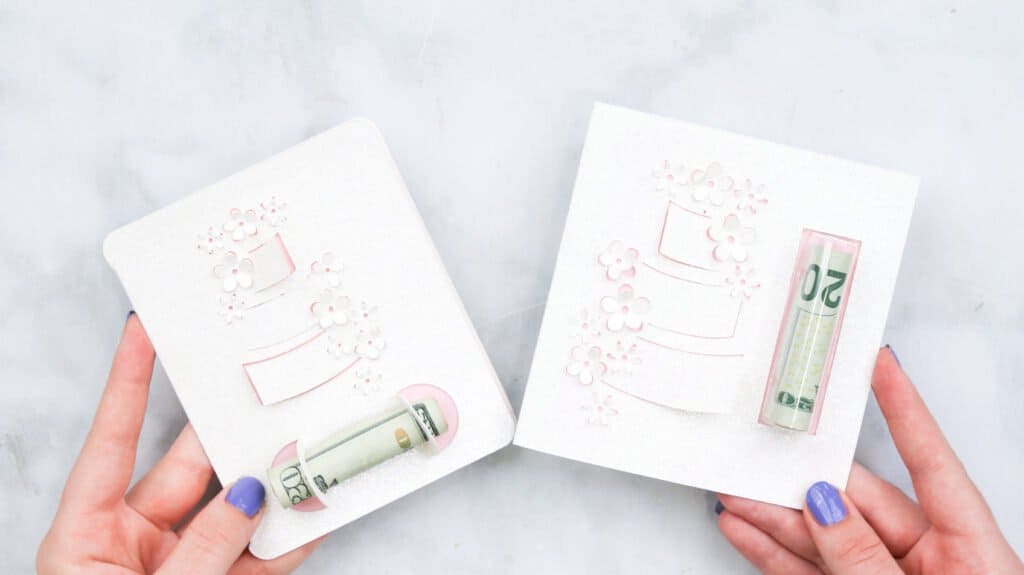
This elegant wedding money card holder has a cake cutout with flowers around it.
How Much Paper Do I Need?
Wedding Card Bases: 1 12 x 12” Cardstock or 1 8.5 x 11” Cardstock
Card Cut-Outs: 1 12 x 12” Cardstock or 1 8.5 x 11” Cardstock
The Card Design Consists of:
Two Wedding Card Styles: One with a pull tab and one without.
Each design comes with:
1 Card Base with Cake Cutout
1 Card Piece
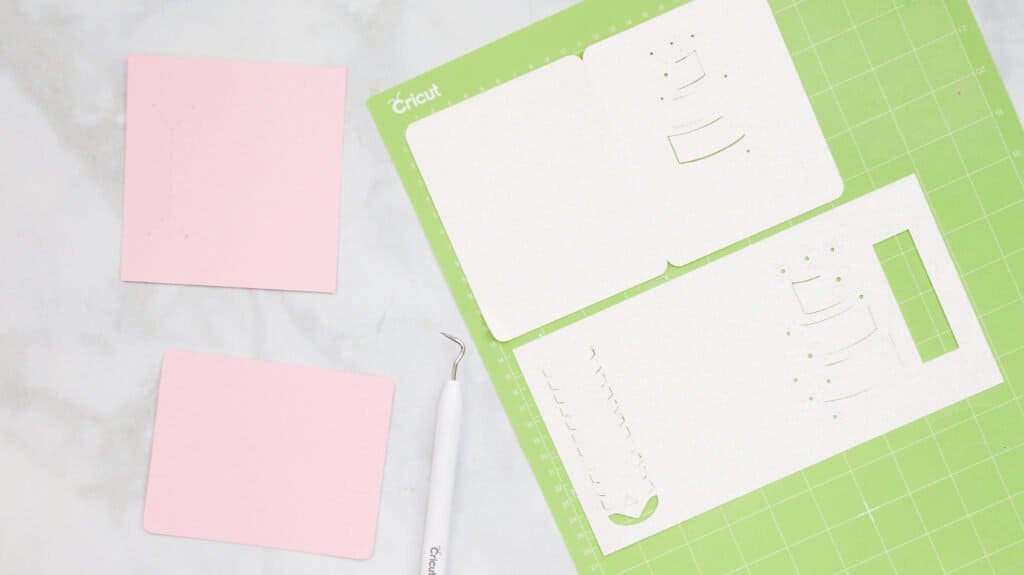
Step One: Cut out Wedding card pieces
Start by loading your mat with card stock and cutting out all pieces with your cutting machine.
Step Two: Fold Score Lines
Next, fold score lines on the card along the middle, and fold up the cake and flower cutouts with a weeder tool or your fingernail.
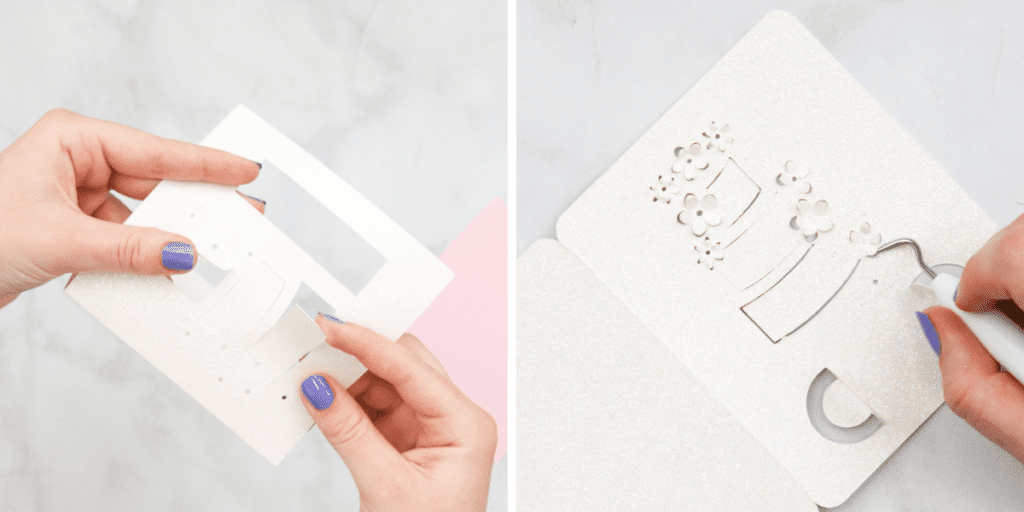
Step Three: Add Card Piece
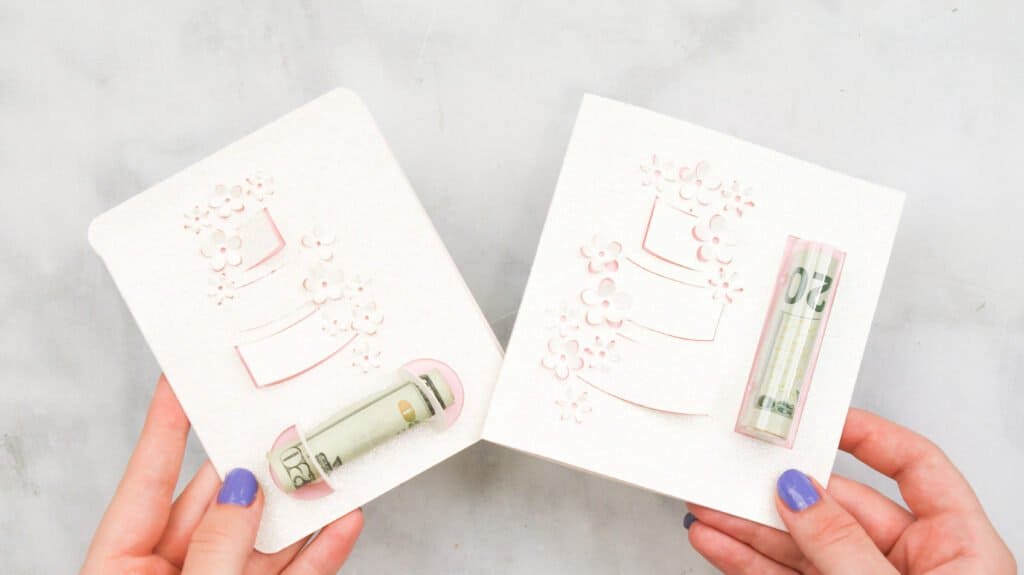
If you're making the card with the holder on the front, this is the final step! Glue the card piece to the inside of the card base, then slip a roll of money between the slots.

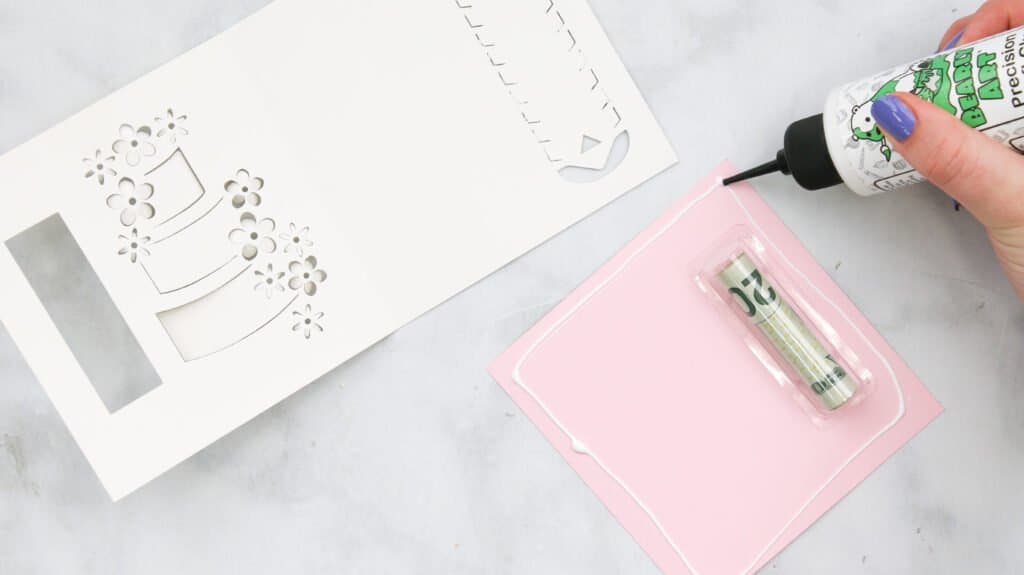
If you're making the card with the pull tab on the back, the final step is to add the plastic tube to the card piece with guide cutouts. Before adhering the plastic pouch to the card piece, place your money inside, then align it with the guides.
Finally, glue the card piece to the inside of the card base.
After gluing, your wedding money card holder is finished!
Birthday Money Gift Card Holders
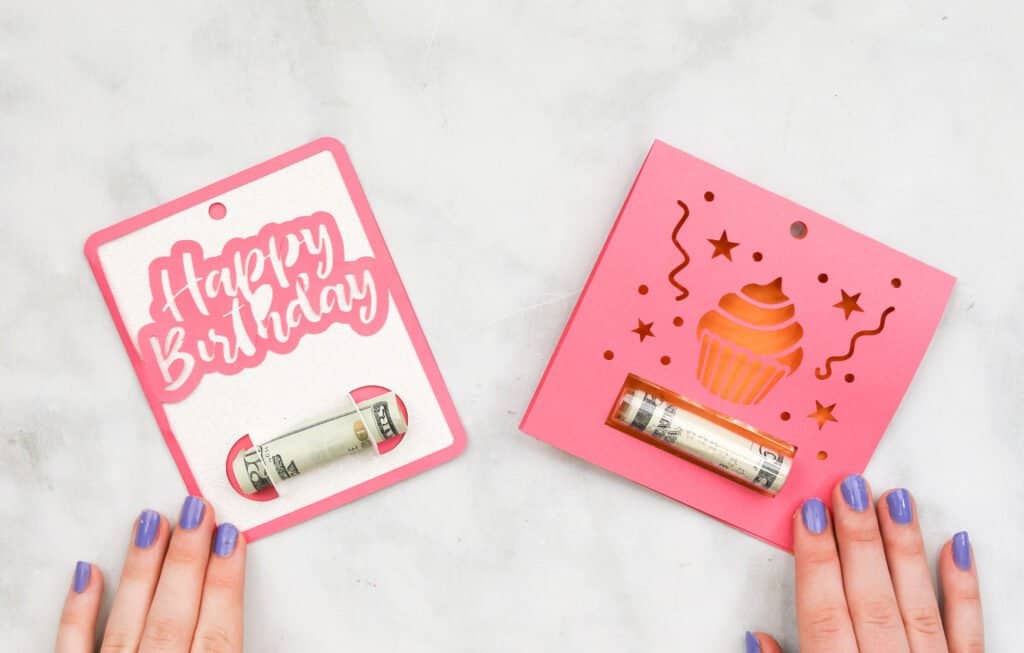
The Birthday card has a Happy Birthday or cupcake design you can choose from.
How Much Paper Do I Need?
Birthday Card Bases: 1 12 x 12” Cardstock or 1 8.5 x 11” Cardstock
Card Cut-Outs: 1 12 x 12” Cardstock or 1 8.5 x 11” Cardstock
The Card Design Consists of:
2 Birthday Card Styles & designs: Two Happy Birthday Designs and Two Cupcake Designs
Each design comes with:
1 Card Base with Happy Birthday or Cupcake Cutout
1 Card Piece

Step One: Cut Out Happy Birthday Card Pieces
Load your mat with card stock and cut all Happy Birthday card pieces out with your cutting machine.
Before folding the score lines, I suggest using a weeder tool to remove all the detailed negative spaces from the project.
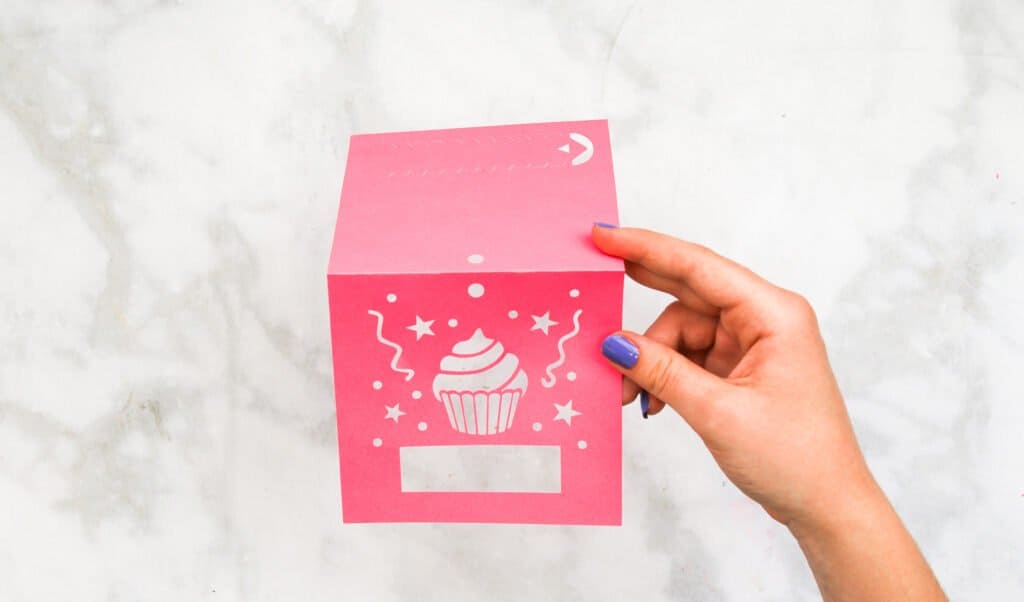
Step Two: Fold Score Lines
Begin folding your score lines down the middle of each card.
Step Three: Add Card Piece
If you're making the card with the holder on the front, this is the final step! Glue the card piece to the inside of the card base, then slip a roll of money between the slots.
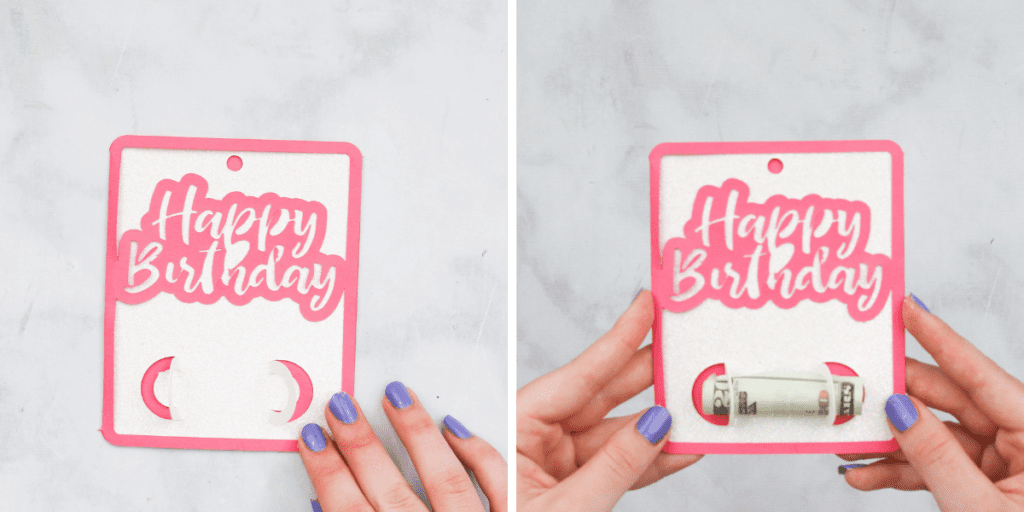
If you're making the card with the pull tab on the back, the final step is to add the plastic pouch to the card piece with guide cutouts. Before adhering the plastic pouch to the card piece, place your money inside, then align it with the guides.
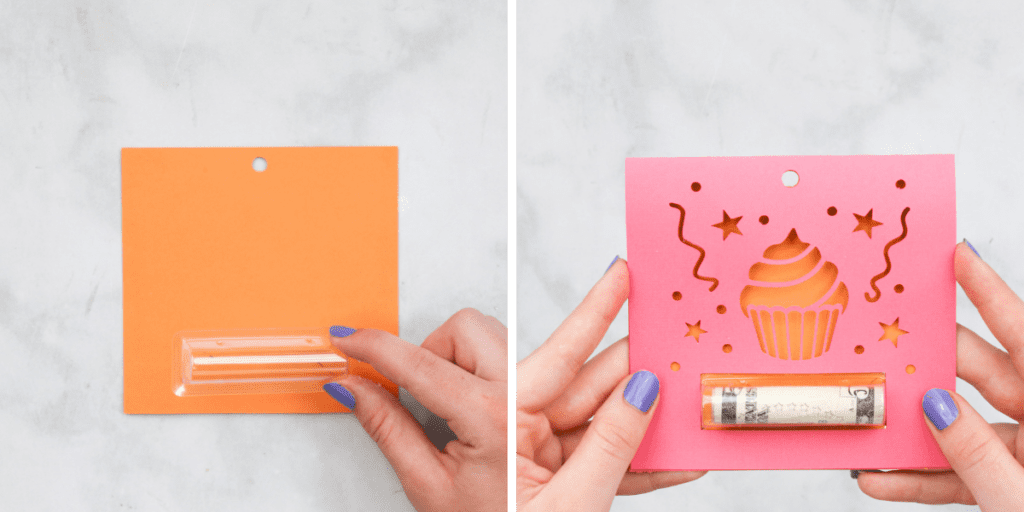
Finally, glue the card piece to the inside of the card base, and this cute Birthday money card holder is done!
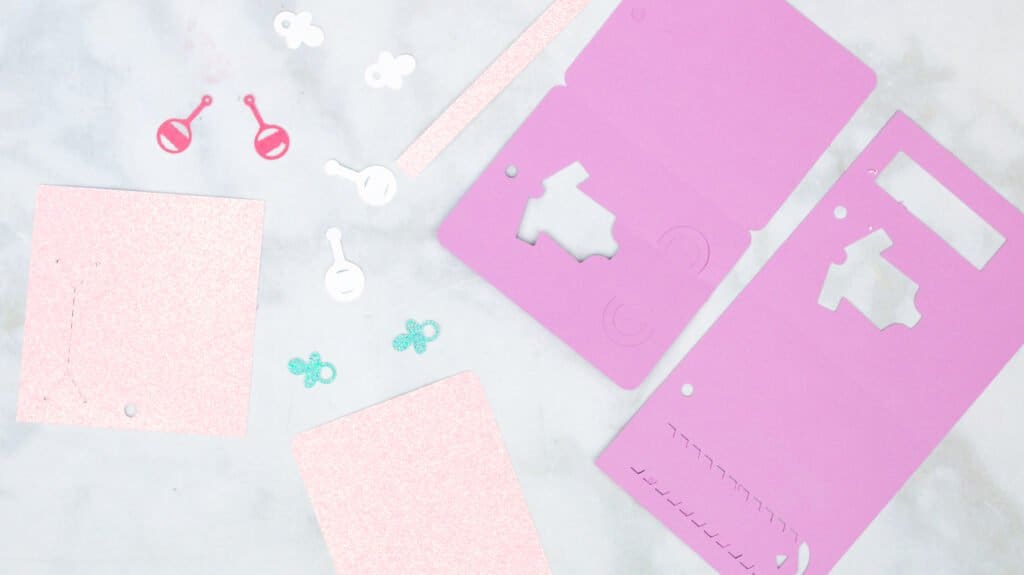
Baby Shower Money Gift Card Holders
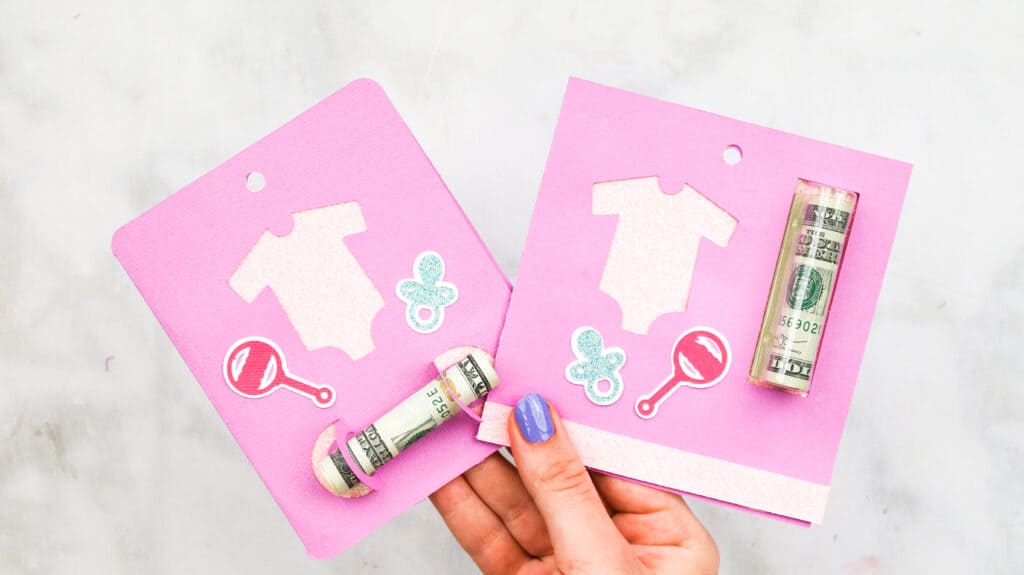
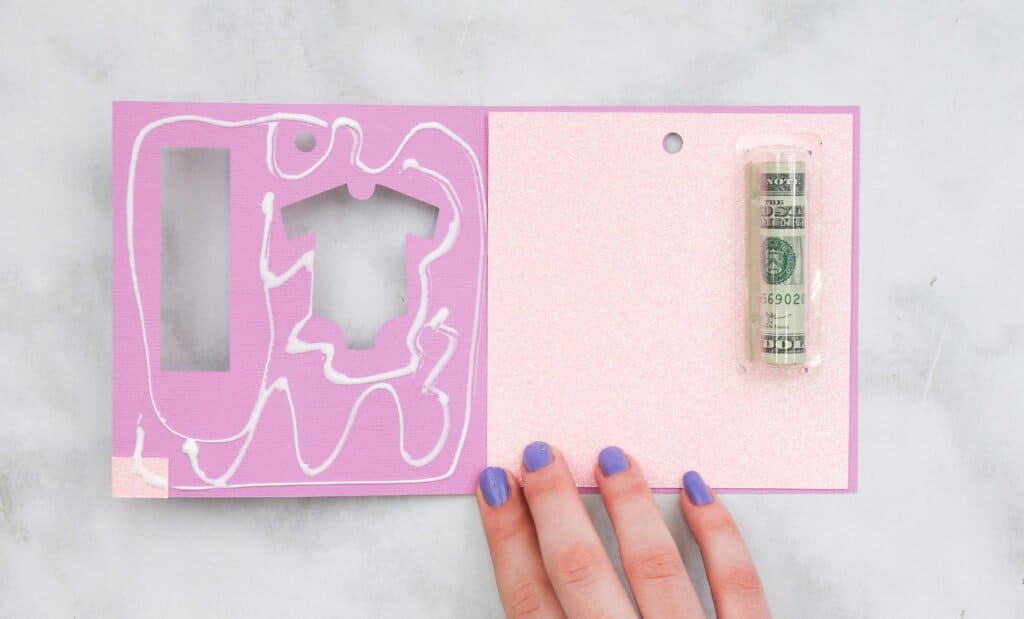
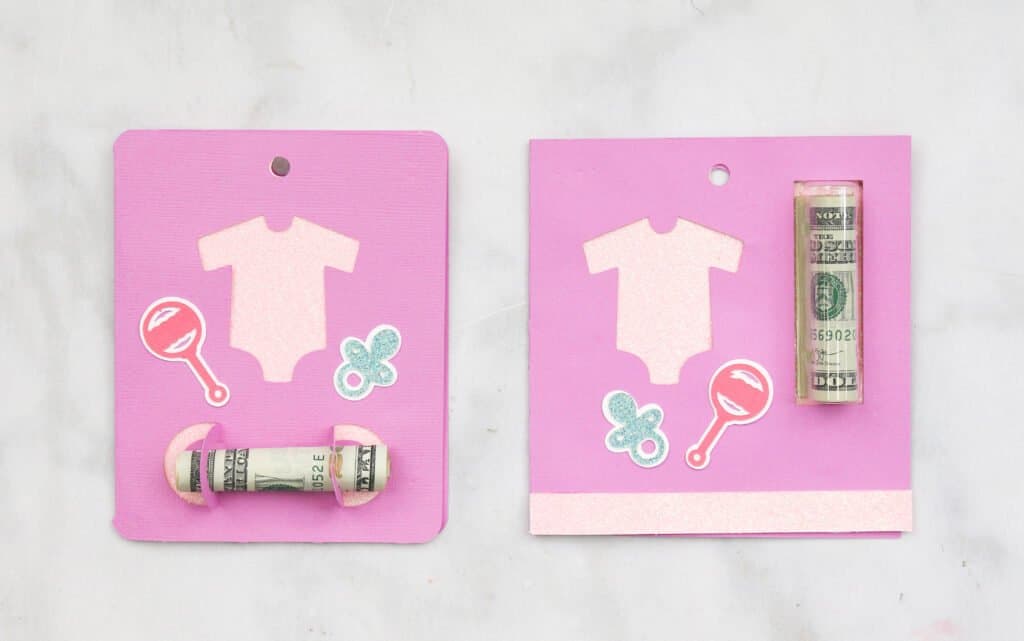
The Baby Shower card has a cute onesie cutout with a rattle and a pacifier.
How Much Paper Do I Need?
Baby Shower Card Bases: 1 12 x 12” Cardstock or 1 8.5 x 11” Cardstock
Card Pieces: 1 12 x 12” Cardstock or 1 8.5 x 11” Cardstock
Details (Pacifier, Rattle, and Onesie Pieces): 1 12 x 12” Cardstock or 1 8.5 x 11” Cardstock
The Card Design Consists of:
Each design comes with:
Two Baby Shower Card Designs: One with pull tab and one without.
1 Card Piece
1 Strip
2 Pacifier Pieces (One with details & One Without)
2 Rattle Pieces (One with details & One Without)
1 Baby Onesie Piece
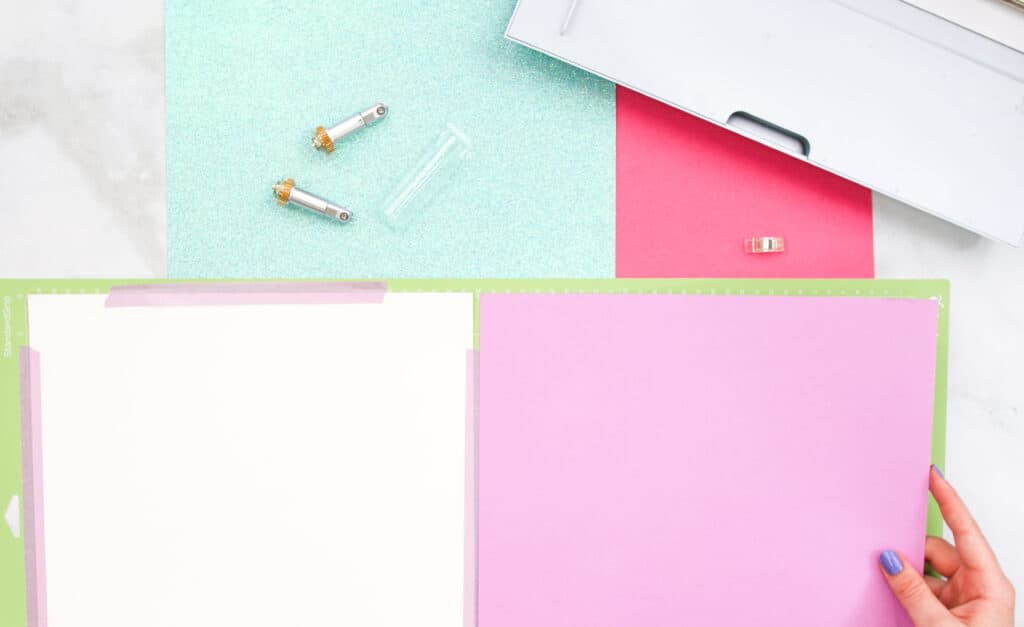
Step One: Cut Out All Baby Shower Card Pieces
Take your mat and load it with card stock and cut out all the card pieces.
Step Two: Fold Score Lines
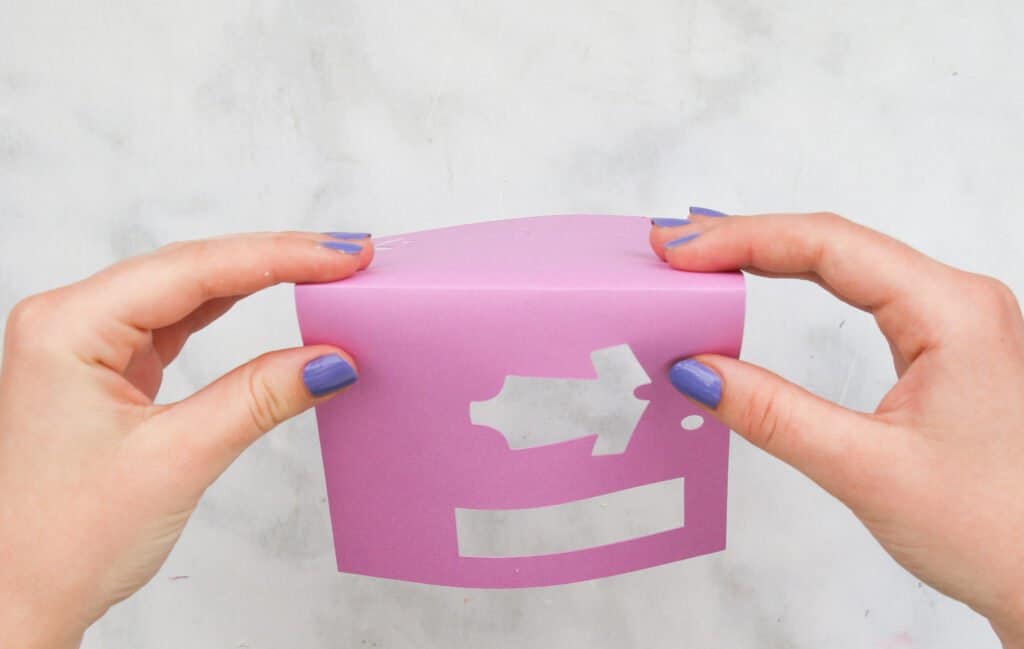
Once all the pieces have been cut out, fold the score lines down the middle of the cards.
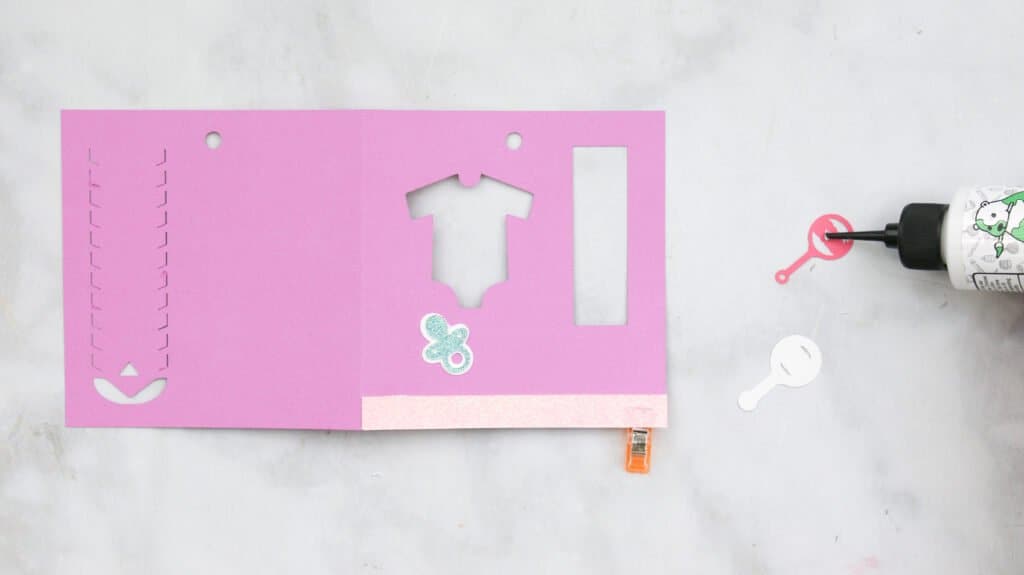
Step Three: Add Details
After you've folded the score lines, glue the pacifier and rattle pieces to the front of the card. You want to glue the more detailed pieces on top of the ones without. Then, glue the strip along the bottom of the card.
Step Four: Add Card Piece
Now, we are going to add the card piece.
If you're making the card with the holder on the front, this will be the final step! Glue the card piece to the inside of the card base, then slip a roll of money between the slots.
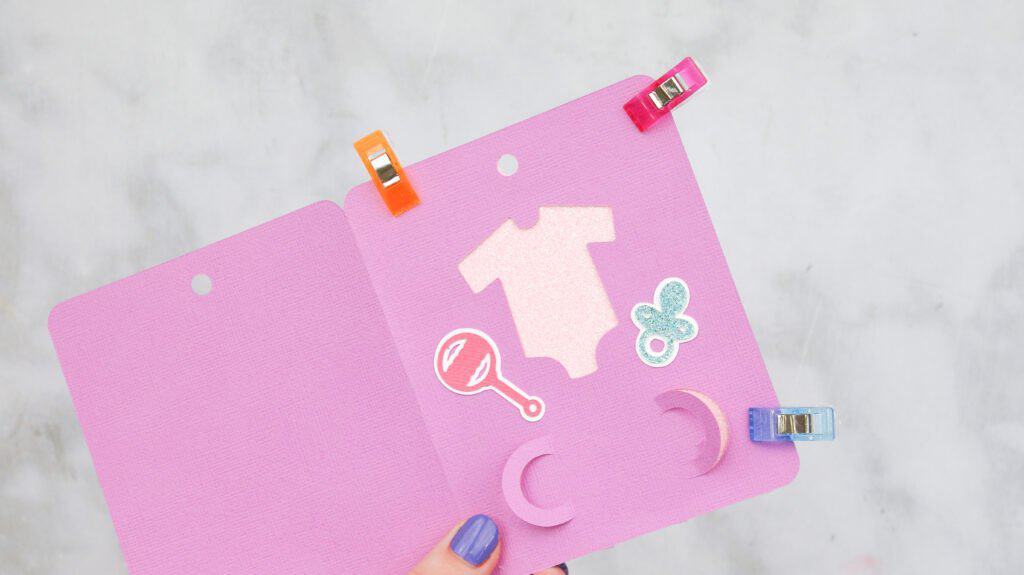
If you're making the card with the pull tab on the back, the final step is to add the plastic pouch to the card piece with guide cutouts. Before adhering the plastic pouch to the card piece, place your money inside, then align it with the guides.
After that step, your baby shower money card holder is done!
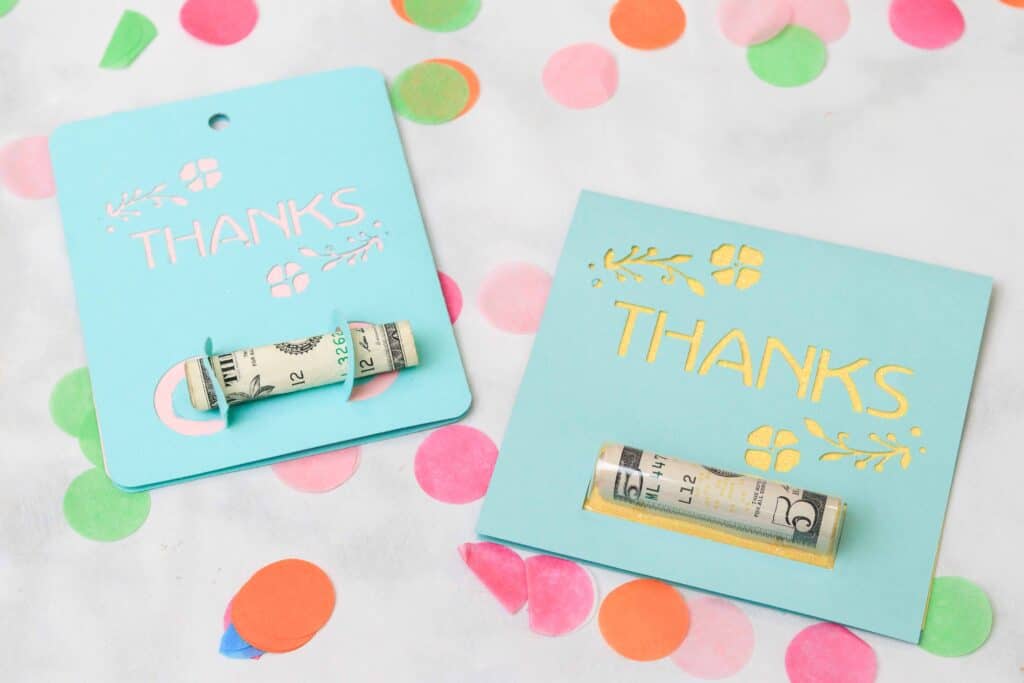
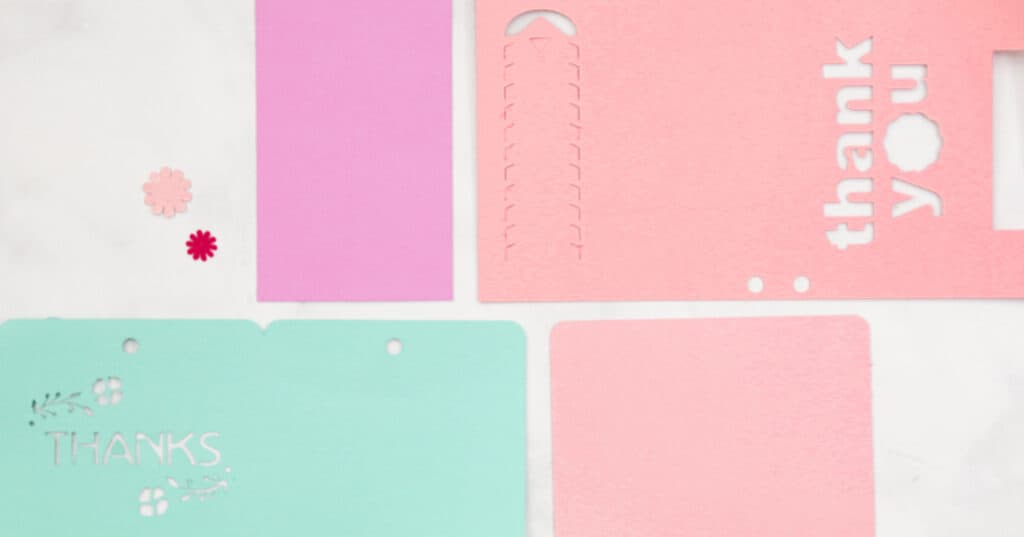
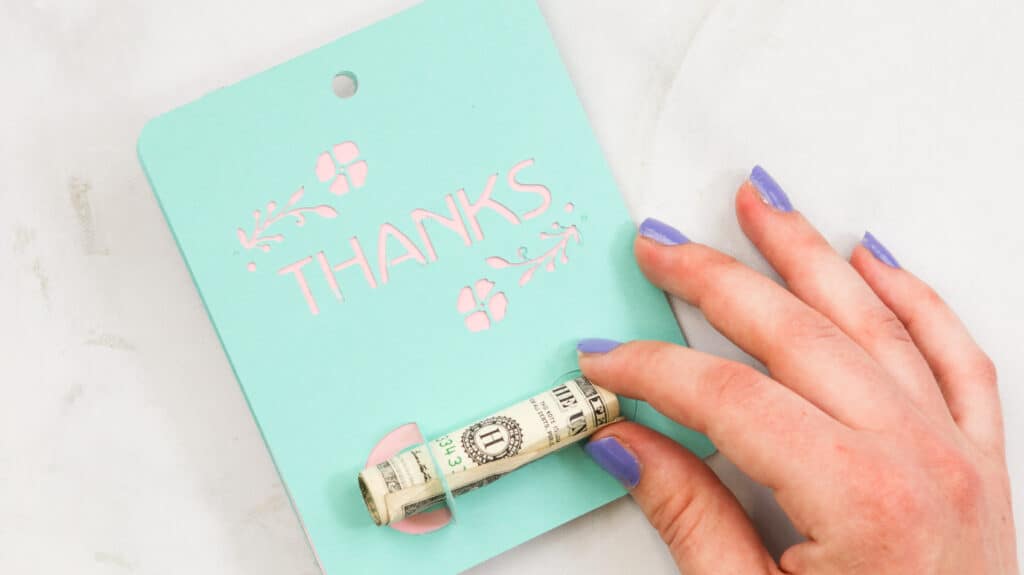
Thank You Money Gift Card Holders
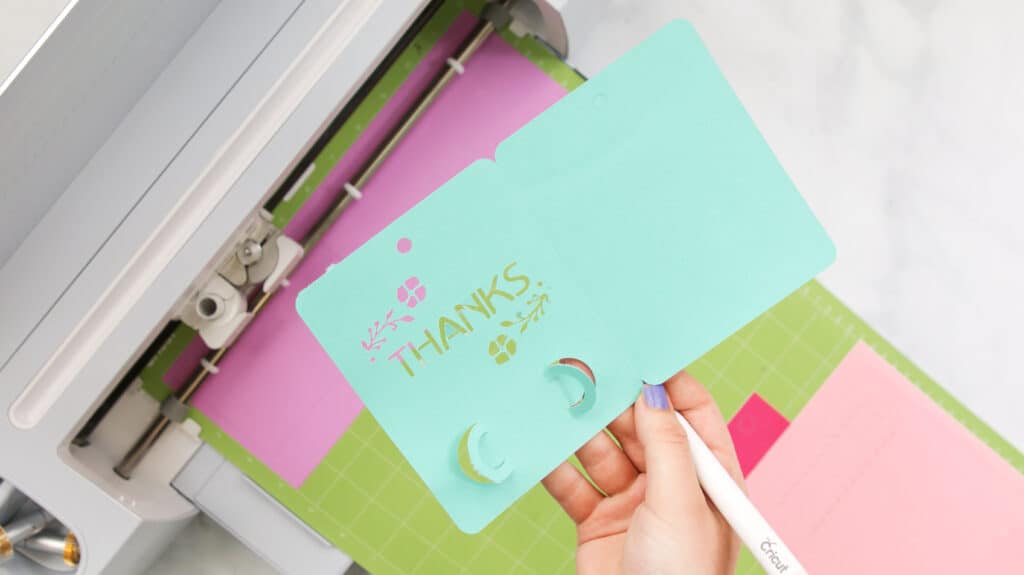
The Thank You card comes in two designs; There’s a design that has a flower replacing the “O” in “You” or a design with flower cutouts around Thank You.
How Much Paper Do I Need?
Thank You Card Bases: 1 12 x 12” Cardstock or 1 8.5 x 11” Cardstock
Card Pieces: 1 12 x 12” Cardstock or 1 8.5 x 11” Cardstock
Accent Pieces: 1 12 x 12” Cardstock or 1 8.5 x 11” Cardstock
The Card Design Consists of:
- Two Congratulations Card Styles: One with a pull tab and one without.
- Each design comes with:
- 1 Card Piece
- 2 Flower Pieces (1 Medium & 1 Small)
Step One: Cut Out All Thank You Card Pieces
Load your mat with card stock and start cutting out all the thank you card pieces.
Step Two: Fold Score Lines
Once you're done cutting out all card pieces, go ahead and fold along the score lines.
Step Three: Add Card Piece
If you are making the card with the pull tab on the back, glue the card piece to the back of the thank you and glue the two flower pieces to the inside of the "O" cutout. Then, take your plastic pouch with pre-applied adhesive, align it with the cutout guides on the card piece, place, and you've finished a pretty thank you card!
If you're making the card with the holder on the font, all you have to do now is slip a roll of money between the two slots and you're done!
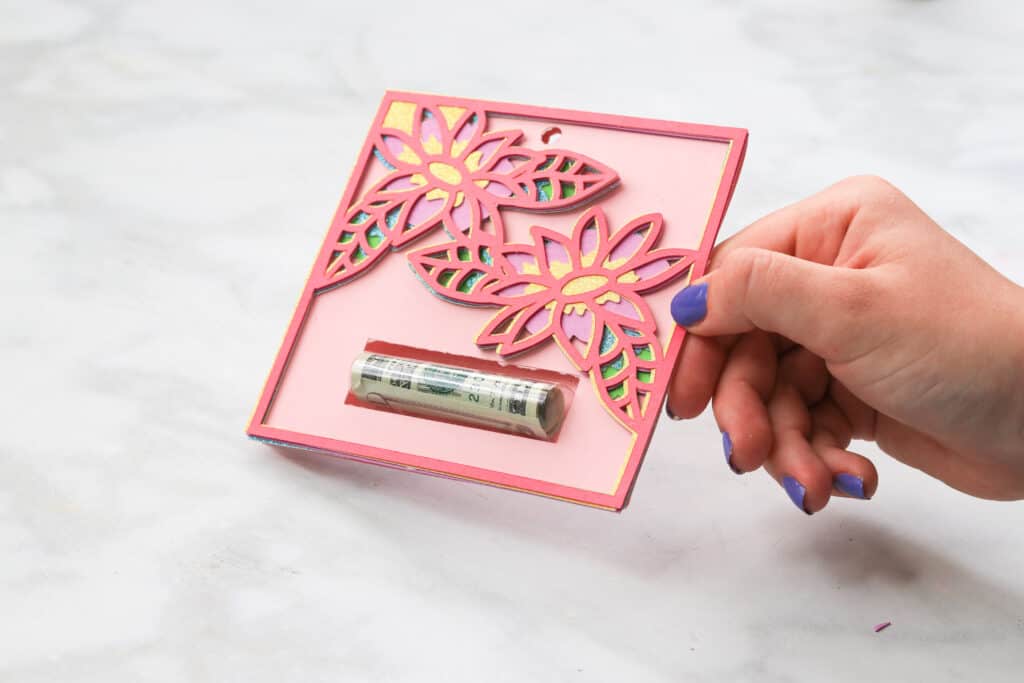
Layered Flower Money Gift Card Holders
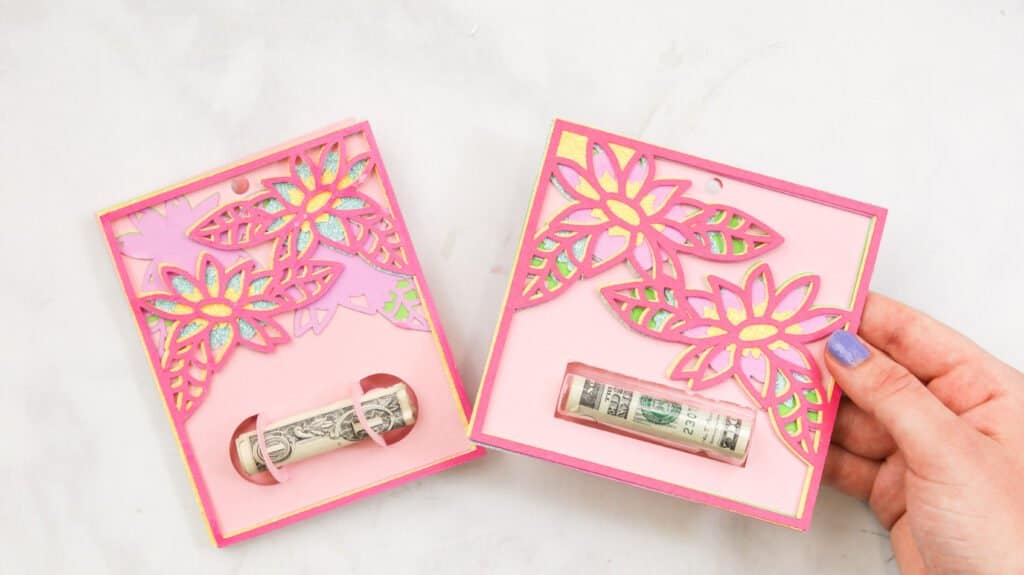
The Flower card has 5 layered flower pieces ontop of the card base.
How Much Paper Do I Need?
Flower Card Bases: 1 12 x 12” Cardstock or 1 8.5 x 11” Cardstock
Card Pieces: 1 12 x 12” Cardstock or 1 8.5 x 11” Cardstock
Layered Flower Design: 1 12 x 12” Cardstock or 1 8.5 x 11” Cardstock for Each Layer
The Card Design Consists of:
Two Flower Card Designs: One with a pull tab and one without.
Each design comes with:
5 Layered Flower Designs
Step One: Cut Out Flower Card Pieces
The first step is to cut out all the flower card pieces with a cutting machine.
Step Two: Fold Score Lines
Next, fold the cards down the middle.
Step Three: Add Flower Layers
After folding the score lines, the next step is to add the flower designs. Start with the layer that has the least amount of detail, then keep layering until you glue on the last layer with the most amount of detail. Instead of glue, you could use small foam adhesive tape squares and it will give the design a more 3-D effect.
Step Four: Add Gift
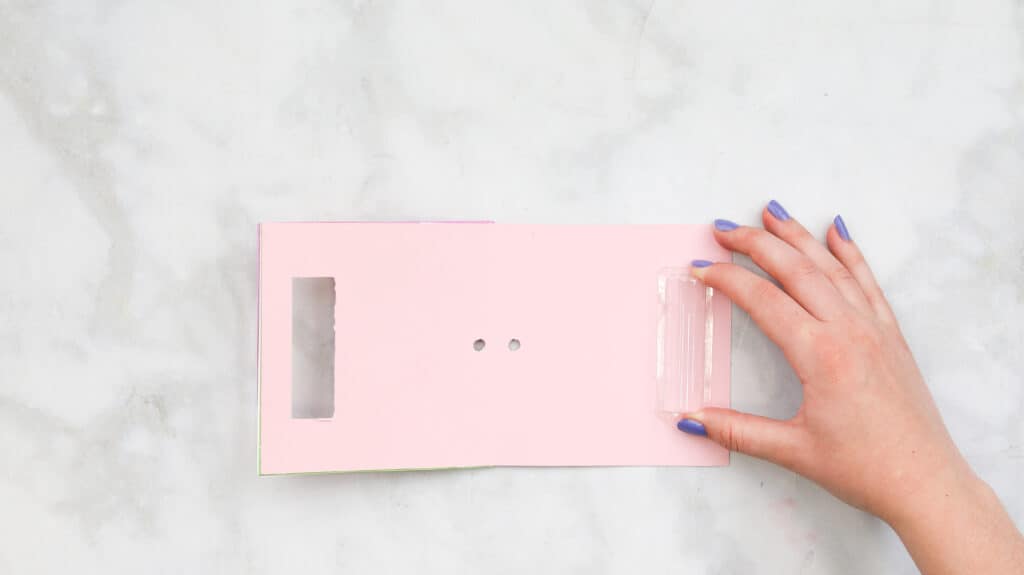
Once you've glued all the layers on, It's time to add your gift. If you're making the card with the holder on the front, this will be the final step just slip a roll of money between the slots.
If you're making the card with the pull tab on the back, the final step is to add the plastic pouch to the inside of the card. Before adhering the plastic pouch to the card piece, place your money inside, then align it with the guides.
After placing the plastic pouch, your beautiful layered flower card is done!
I hope you enjoy these money gift card holders. I would love to see what you make with these files.
Join my crafting and sewing Facebook group where you can show us what you’re making, ask questions, and learn from others!
Don’t want to forget about this free template? Save this project for later! Click here to save this project on Pinterest.
I am unable to download your money gift card holders. Can you send them directly to my email address?
These are adorable! Love your designs!
I cnanot download the money gift card holders either. Can I have them sent to me directly?
Julia
Click the pink underlined "Download your files here" for the ability to add your name and email address.
The "click here" doesn't allow us to download..
The "click here" doesn't allow us to download..
above the photo there is an underlined link in Pink above it. If you click on that it will download for you.
These files are adorable! Thanks so much!
I can’t get pattern to download. I’ve tried several times. Also, looked in junk.