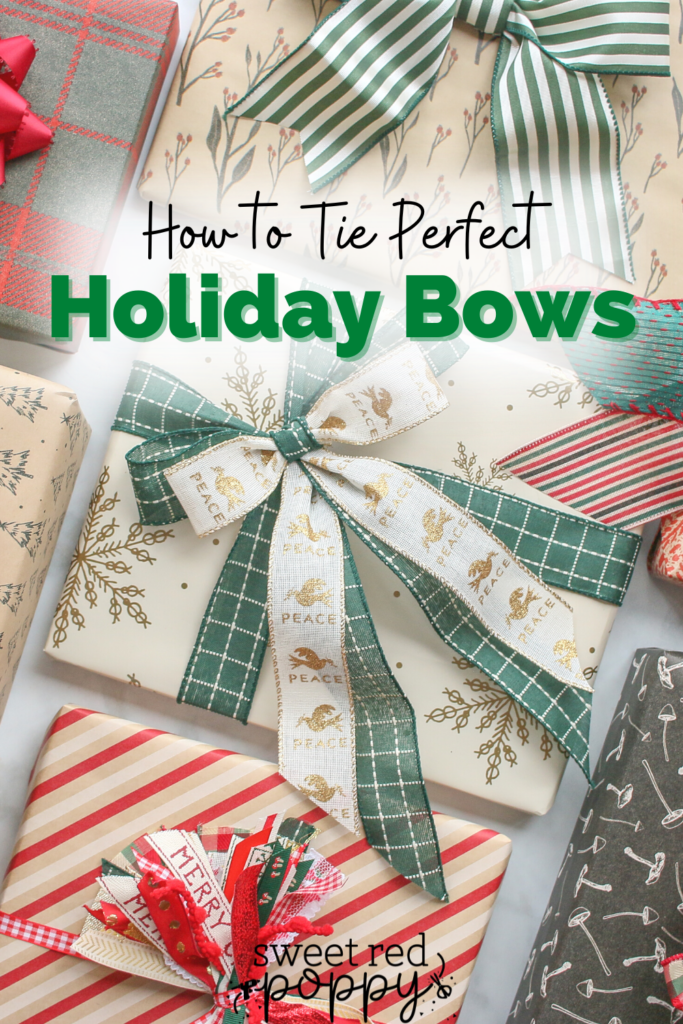
Learn How to Tie a Perfect Bow with Ribbon - Seven Different Ways - Free Printable Guide
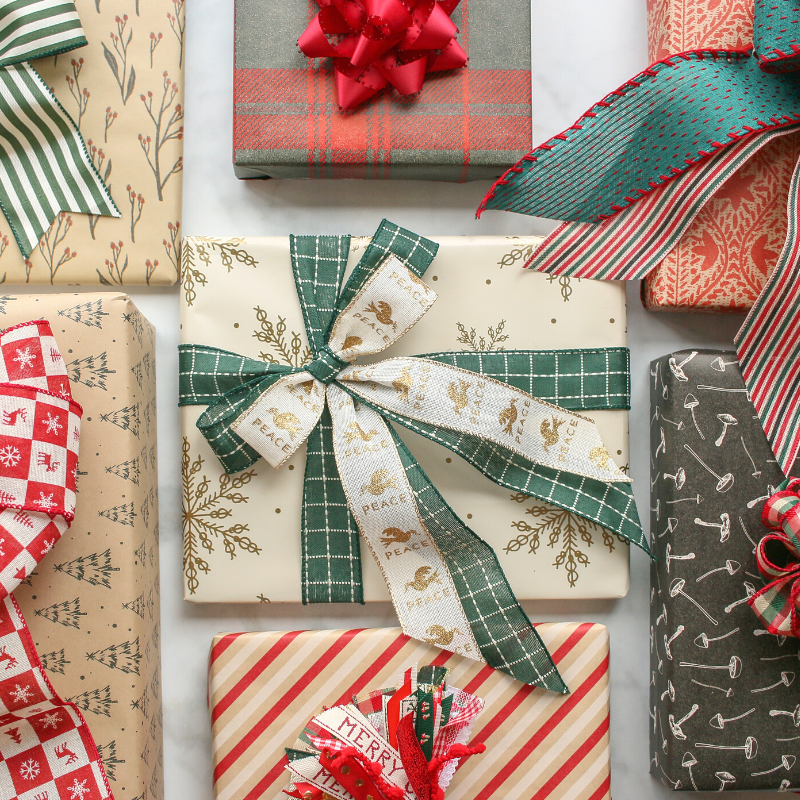
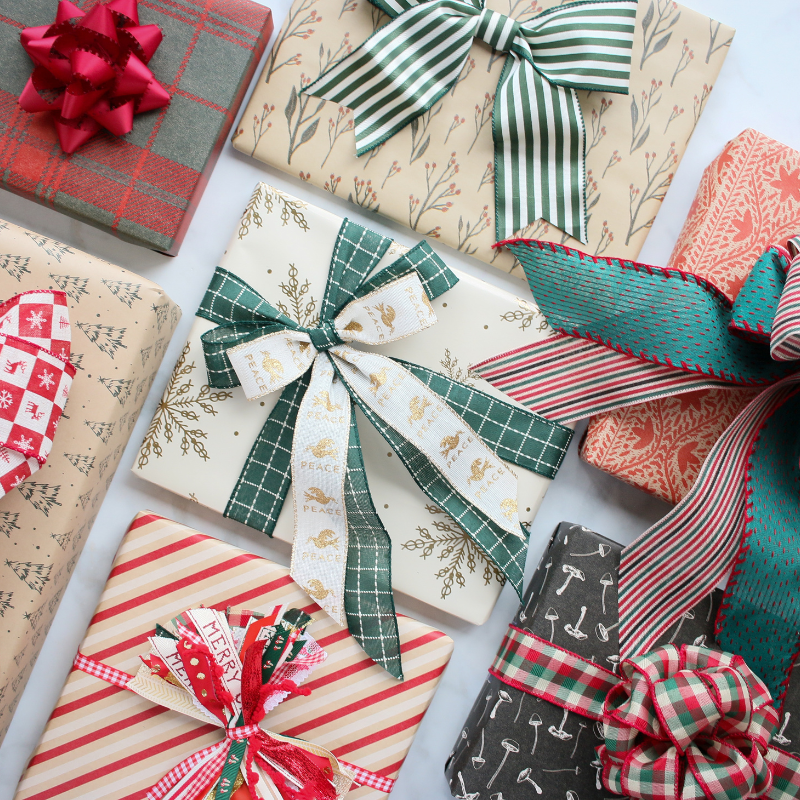
Learn to tie a beautiful ribbon bow for the perfect gift, wreath, or tree topper. If finding the perfect gift seems to be an impossible task, at least you can rest assured that your present will look incredible!
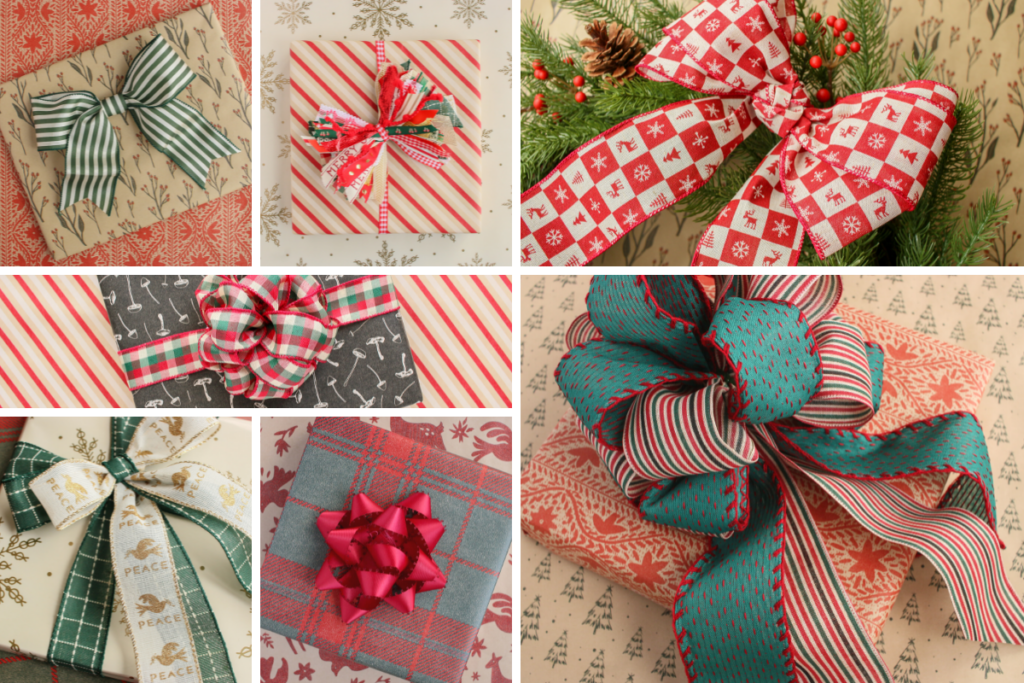
Between gift wrapping and decorating, there are lots of occasions where a beautiful bow provides the perfect finishing touch. So I'm making it easy on you!
I've created a list of 7 of my favorite holiday bows and I'm going to show you how to make each one. I'm breaking down the steps so you can easily follow along and customize each design for your needs.

From a simple, no-tie bow, to a double-layer tree-topper bow, this guide has it all!
I'll share step-by-step written instructions along with photos, and a video guide. I've even included a free 43-page printable guide filled with everything you need to know to create the perfect bows this holiday season!

This blog post is jam-packed with everything you need. Just imagine how gorgeous your presents will look under the Christmas tree!
Table of Contents
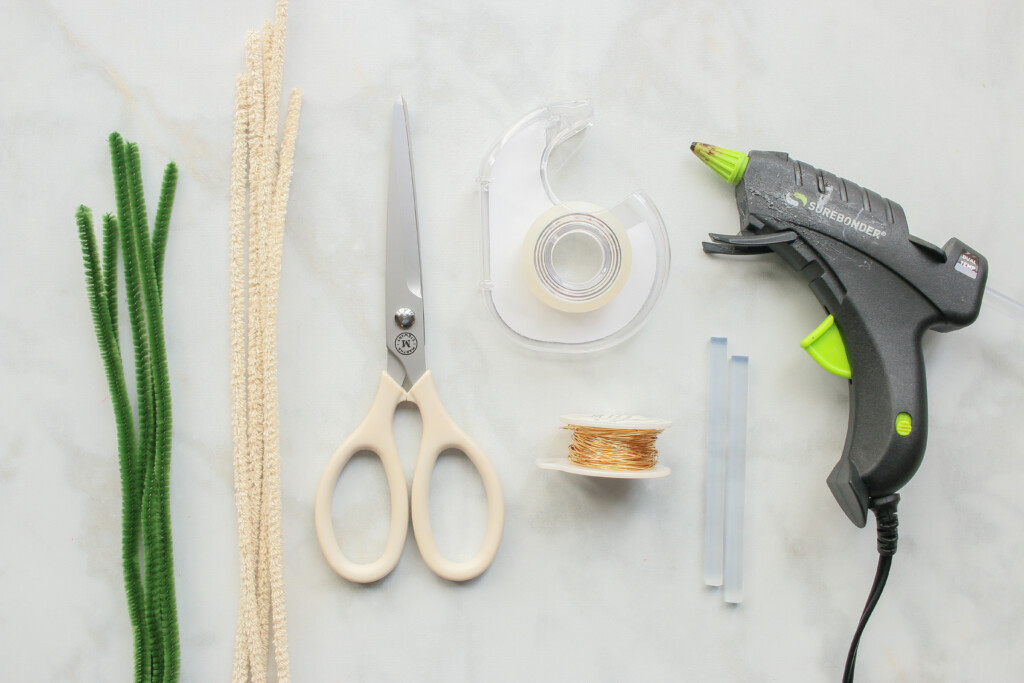
Perfect Ribbon Bow Supplies
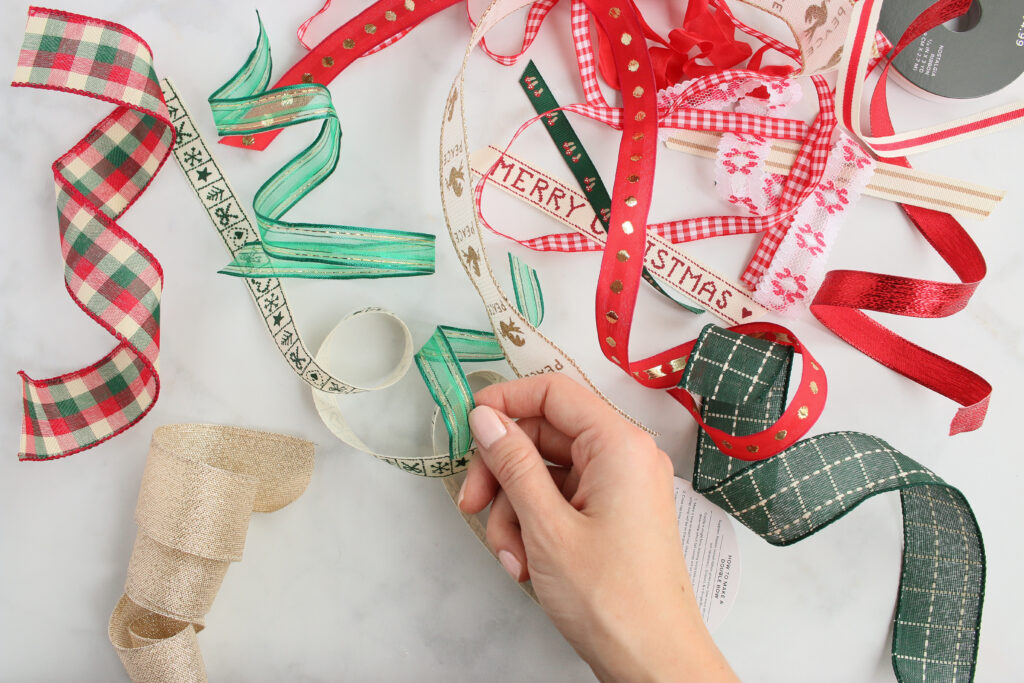
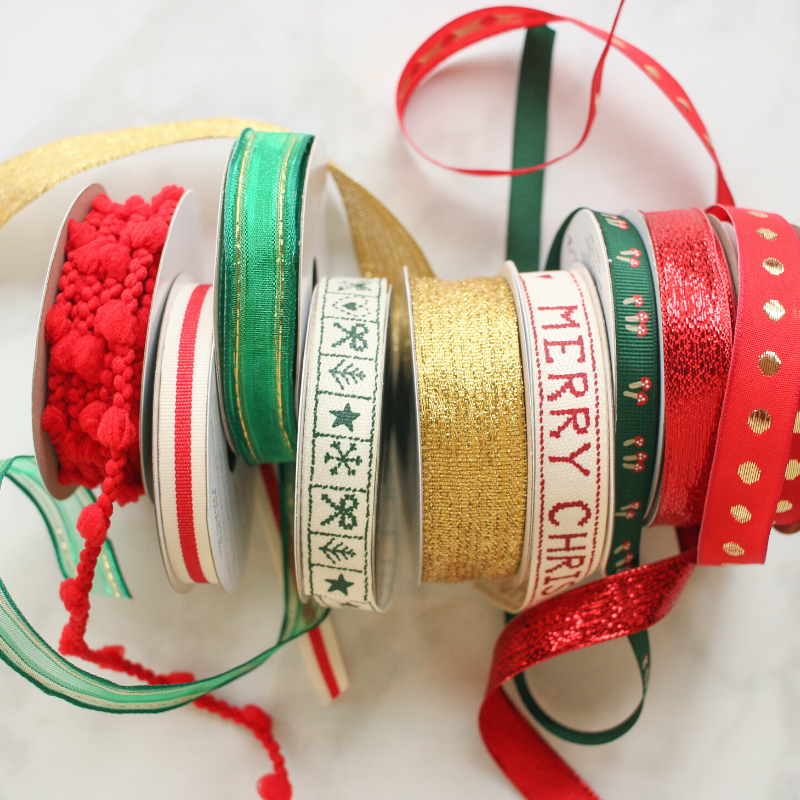
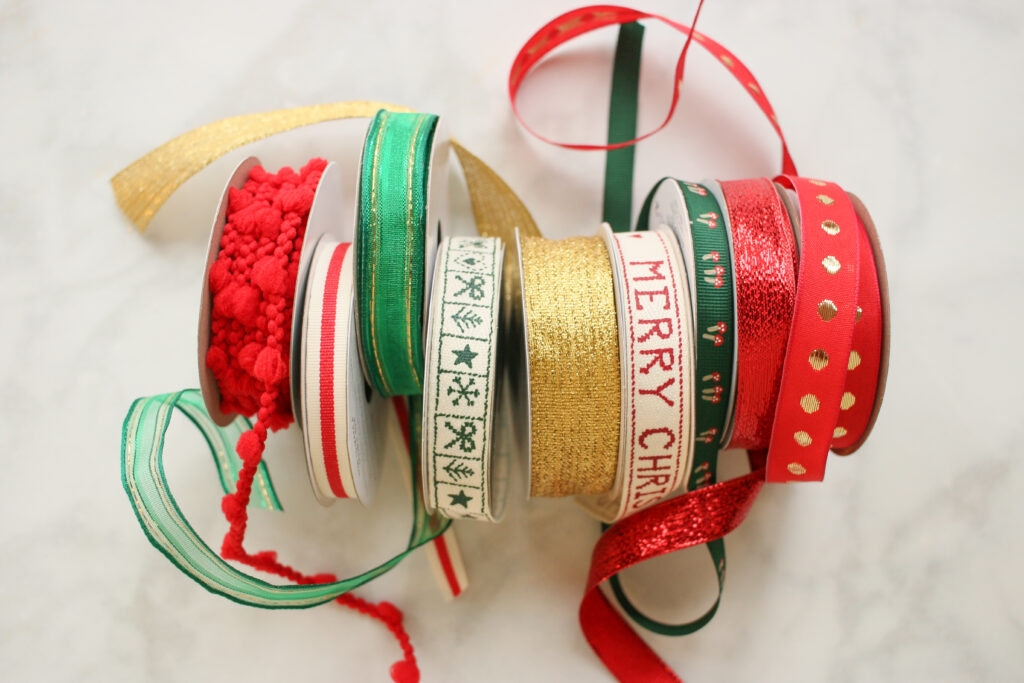
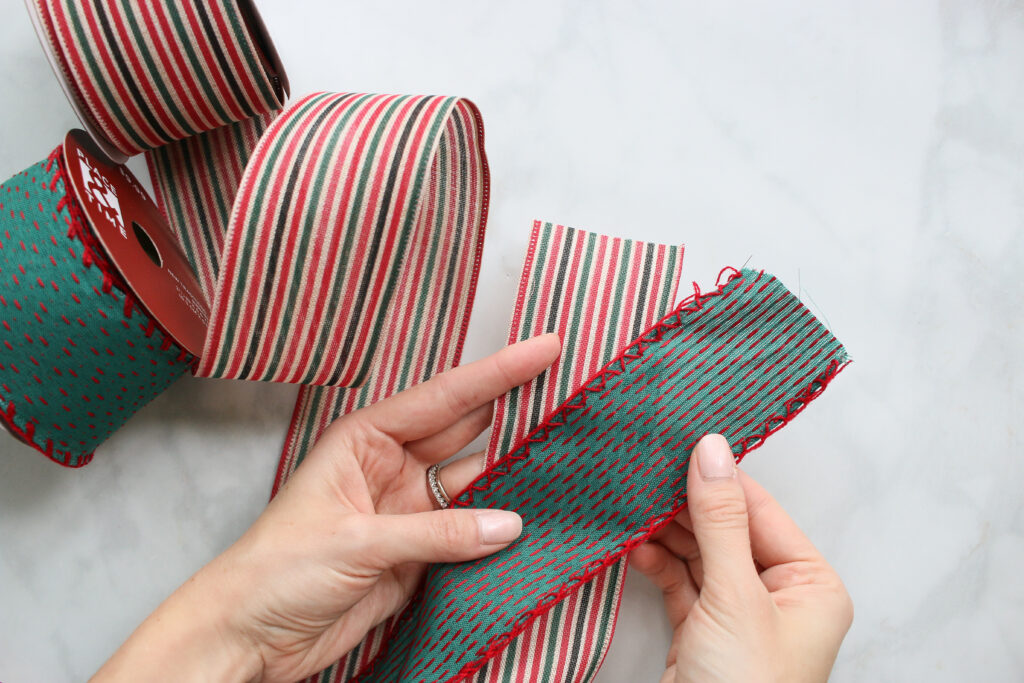
Having the right supplies on hand for each bow makes a huge difference! In each tutorial, I'll tell you what I'm using and what I recommend for the very best results. I'd recommend stocking up on a variety of different wired ribbons. Have a few different colors, and widths on hands makes is easy to get creative.
*Pro Tip - Purchase all of your ribbon and gift wrap in a coordinating color palette. This makes it each to mix and match different ribbon and gift wrap combos, and you can easily use any of the leftover scraps on my scrappy bow tutorial.
- Ribbon - I use a variety of different kinds of ribbons in this tutorial. I'll specify each kind I use for each bow in the instructions below.
- Scissors
- Hot Glue Gun
- Hot Glue Sticks
- Double-Sided Tape
- Wire, Pipe Cleaners, or Zip-Ties
- Gift Wrap
- Wire
Additional Present Wrapping Supplies
Ready to wrap the perfect present this holiday season? You'll need a few supplies on hand for the very best results!
When purchasing wrapping paper, look for wrapping paper that features a printed grid on the backside of the paper for quick and easy cutting.
- Tape
- Double-sided tape
- Wrapping Paper - I love paper with a printed grid on the underside for easy straight cuts.
Click Here to Shop my favorite Craft Supplies Here!
Why Shop Through My Links?
When you shop through my affiliate links, it doesn't cost you anything extra, but it helps me out in a big way! I earn a small commission from those purchases, and that support allows me to continue creating and sharing free tutorials and patterns for you. Thank you so much for helping me keep this creative community going!
CLICK HERE TO DOWNLOAD THE FREE PRINTABLE BOW GUIDE!

Ready to get started on your bow-making journey? Be sure to download and print off my Ultimate Bow Making Guidebook or download it to your tablet or phone for easy reference!
This 43-page guide is great for keeping on hand during the holidays as you wrap your presents.
Let's get started with one of my very favorite bow tutorials. It's easy to make and looks stunning on every present!
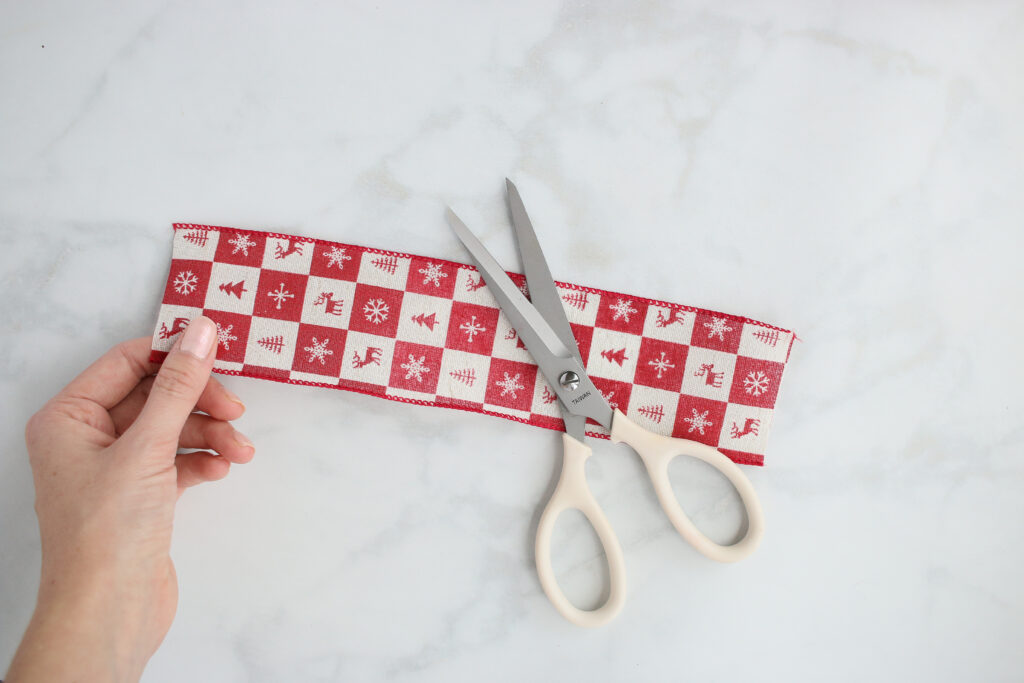
How to Make a Simple No-Tie Ribbon Bow
*I'm using a 2 1/2 inch wired ribbon for this bow
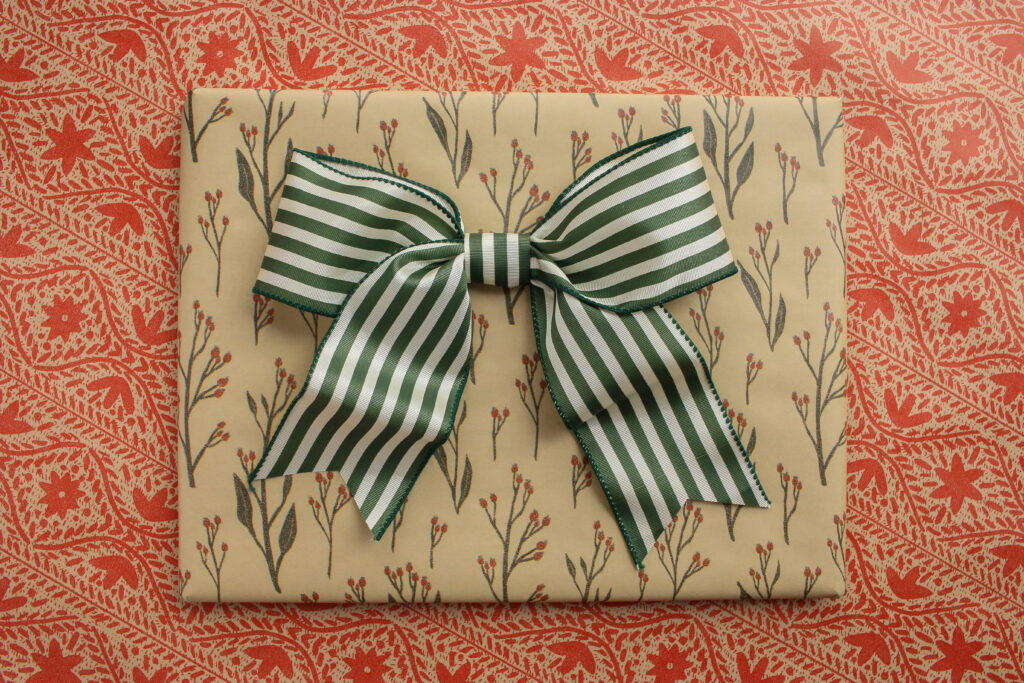
Create one large loop your desired size, making sure the pretty side of the ribbon is facing up for the full loop.
Adjust both loops and tails to equal size and trim off excess ribbon.
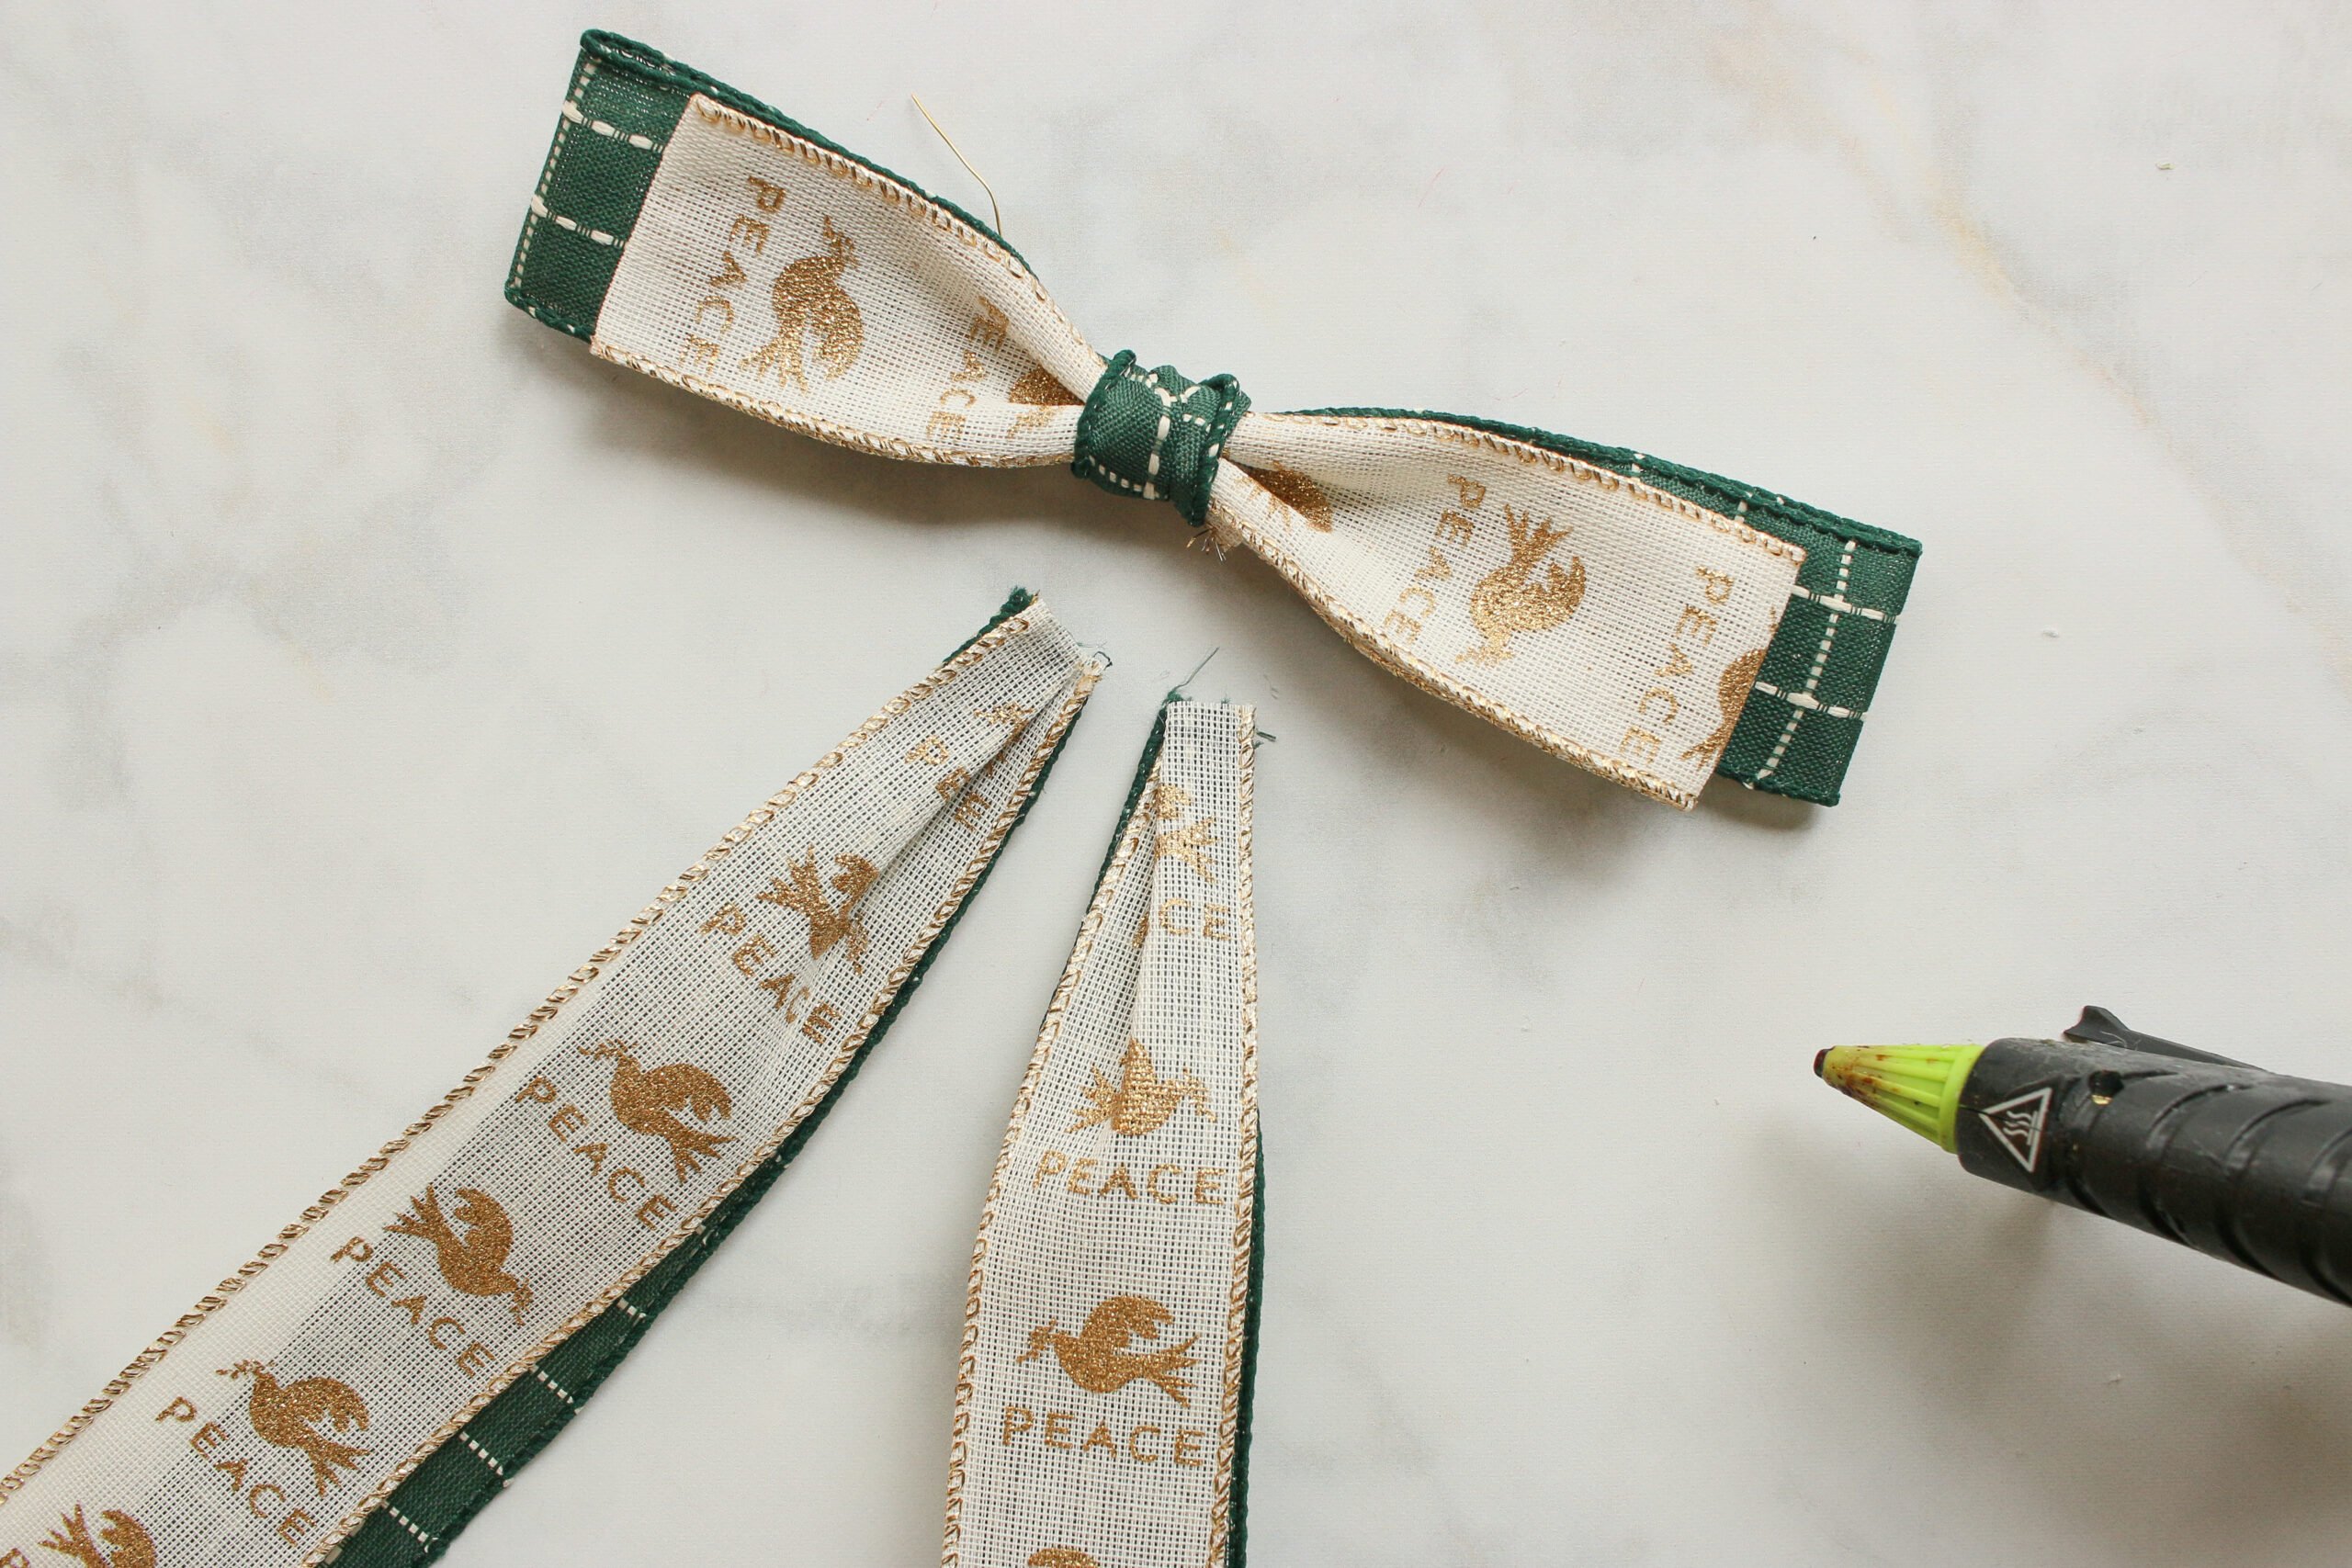
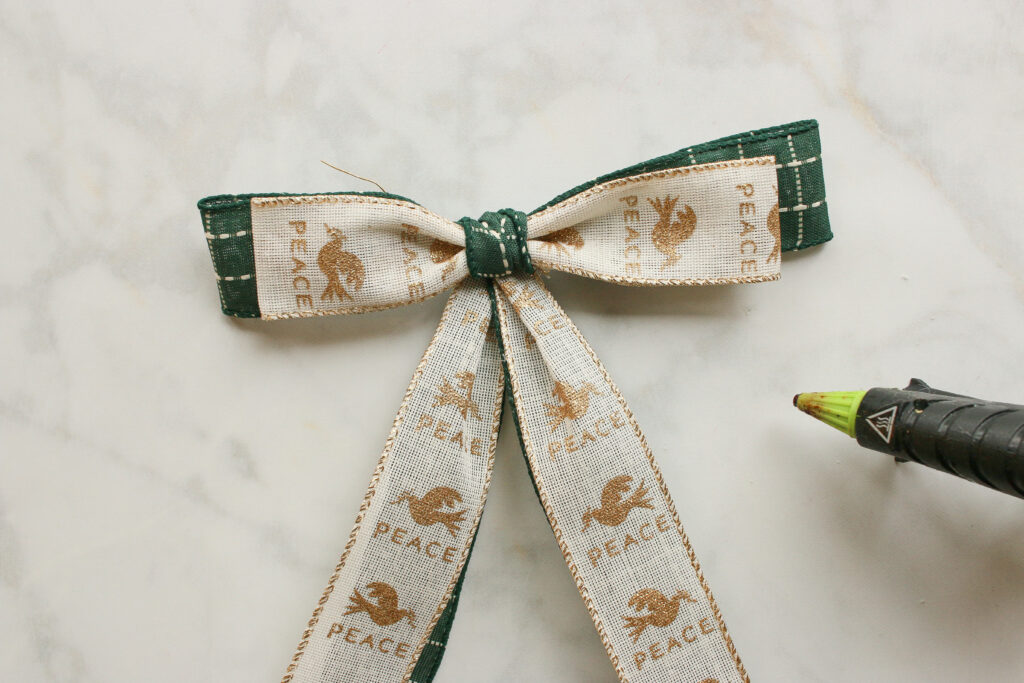
Use a pipe cleaner, piece of wire, or zip tie to pinch and secure the center.
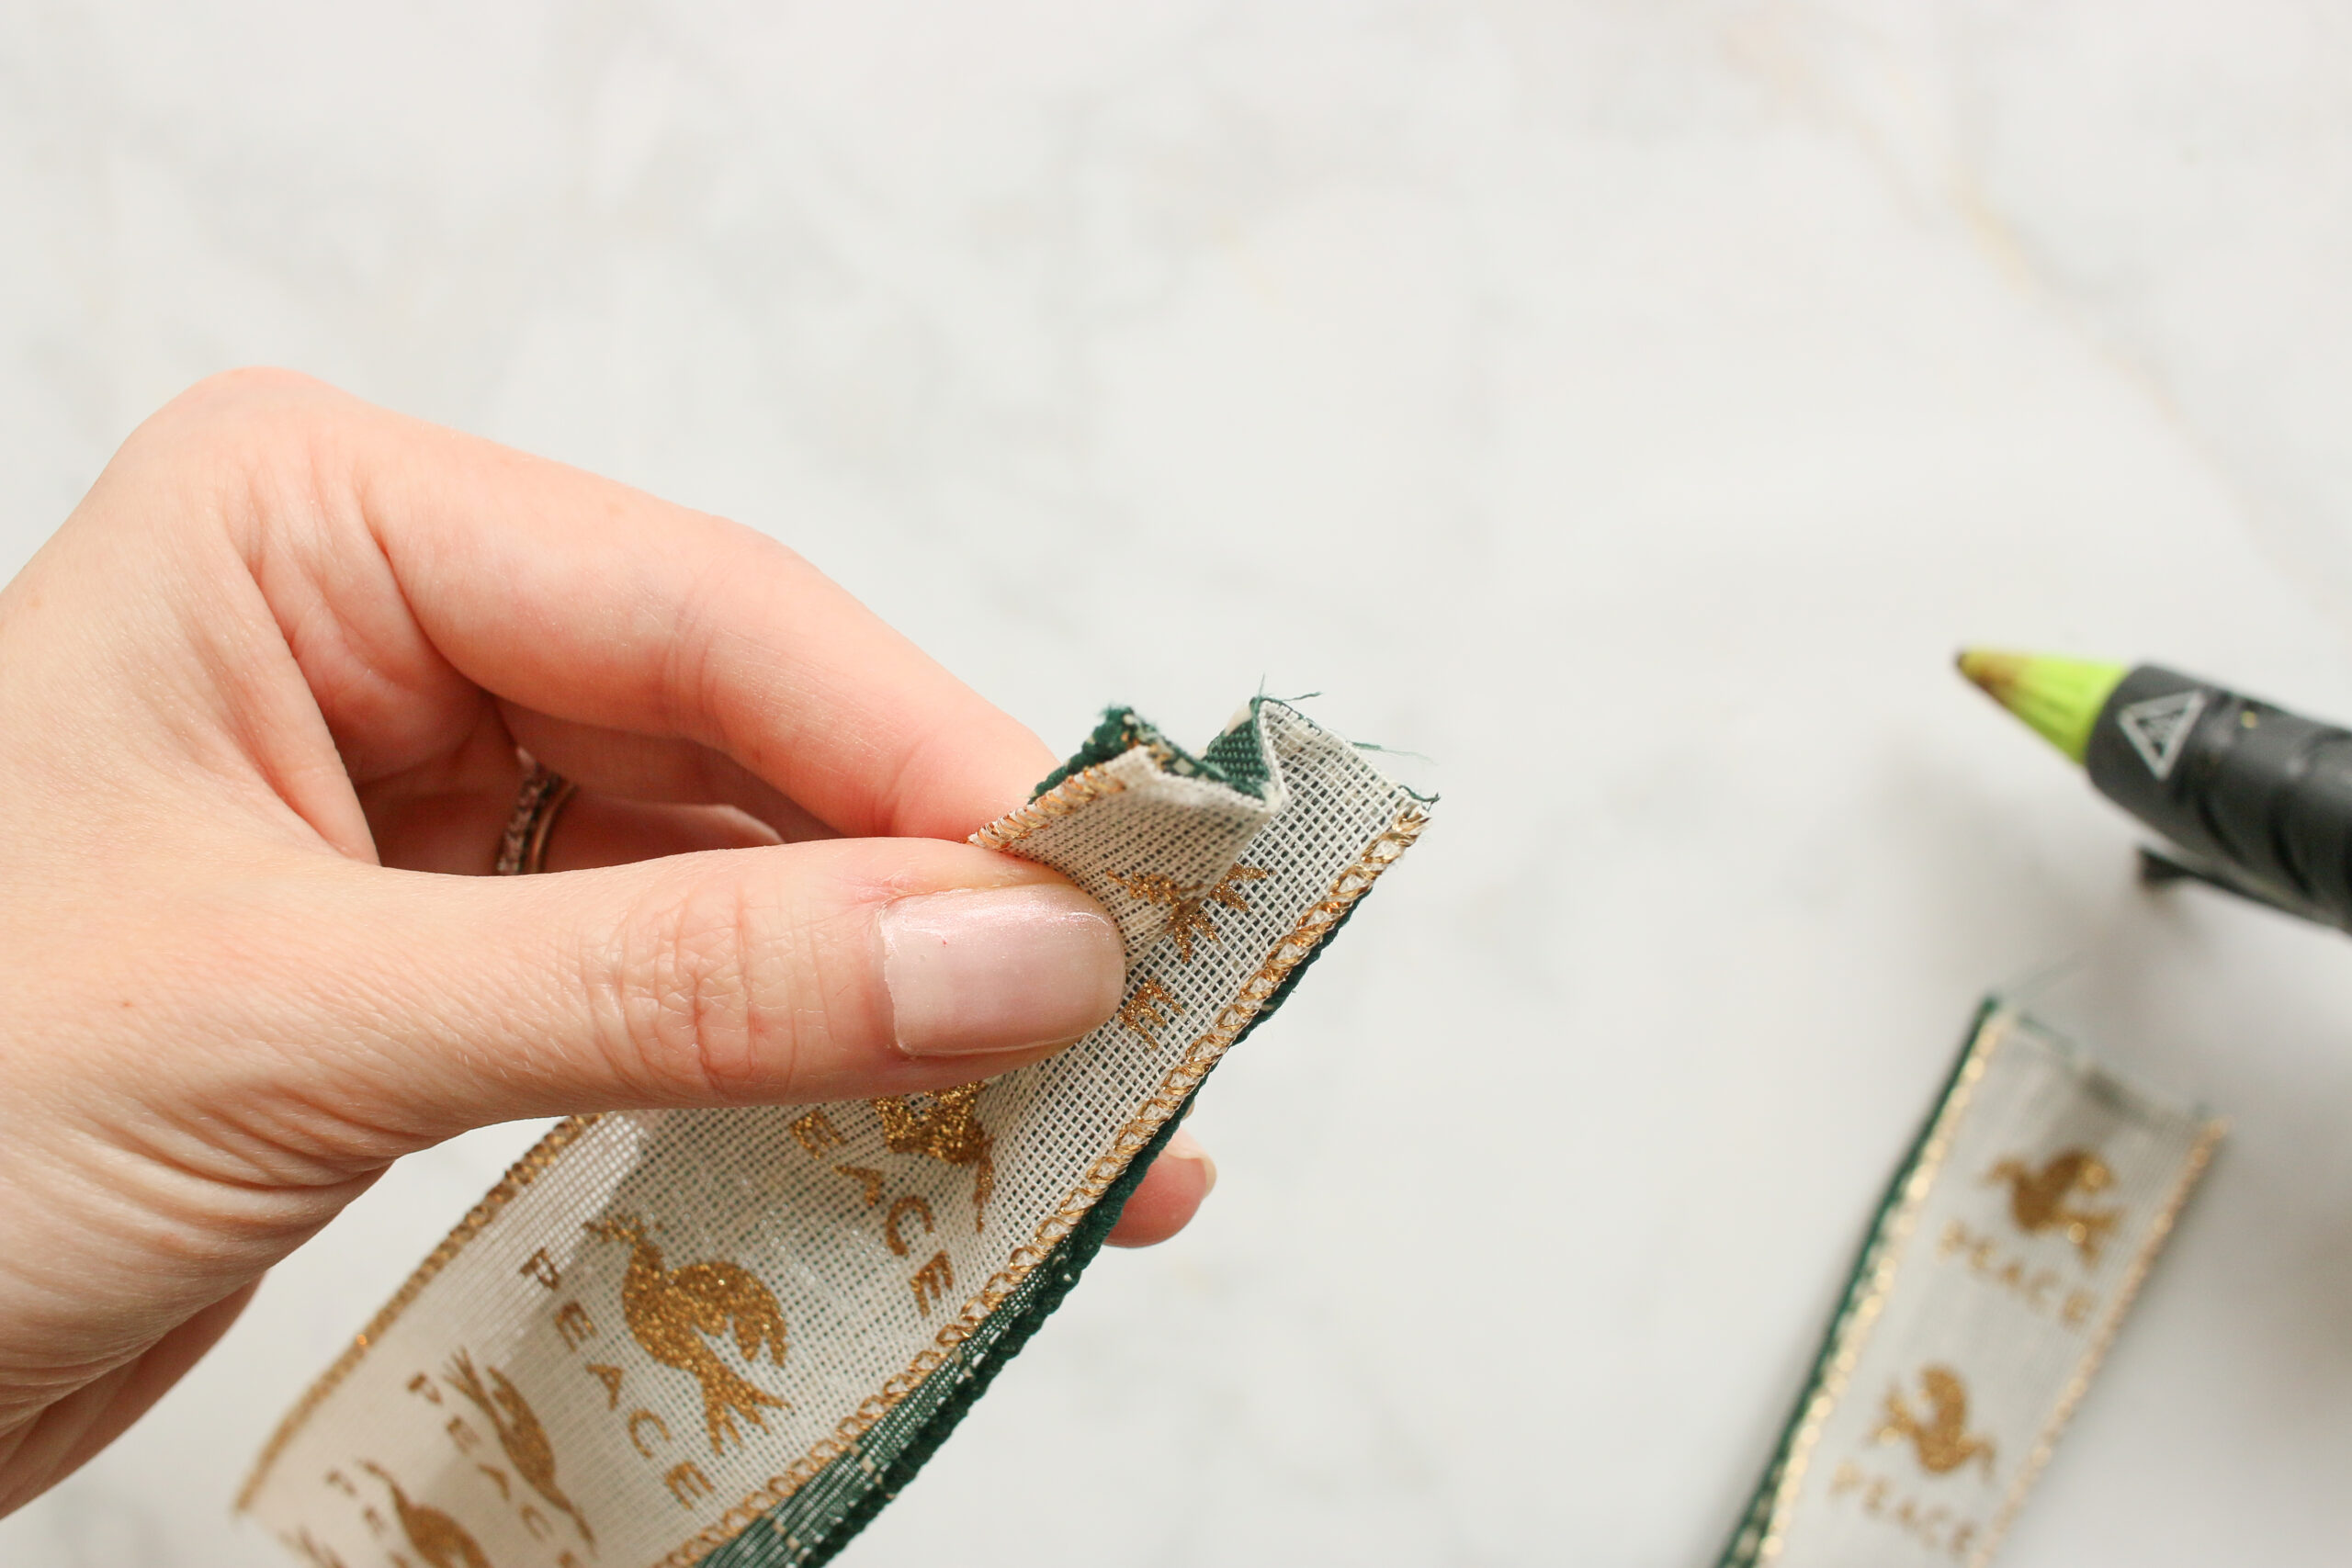
Then take a small piece of ribbon, fold both long edges towards the center and secure them with glue to create a more narrow piece of ribbon.
Wrap it around the center of the bow, covering the wire. Secure with hot glue.

Fold your ribbon tail in half and make a diagonal cut, creating a "dove-tail" finish.
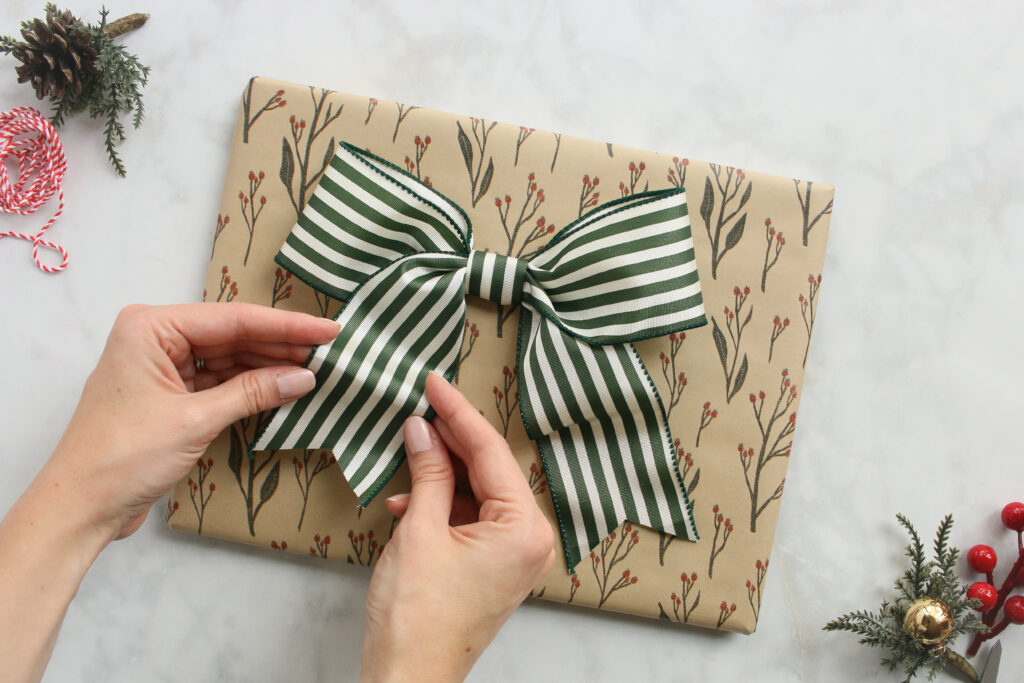
Use a dab of glue to secure to your present. I like to bend the tails a bit to create some volume, but that's optional!
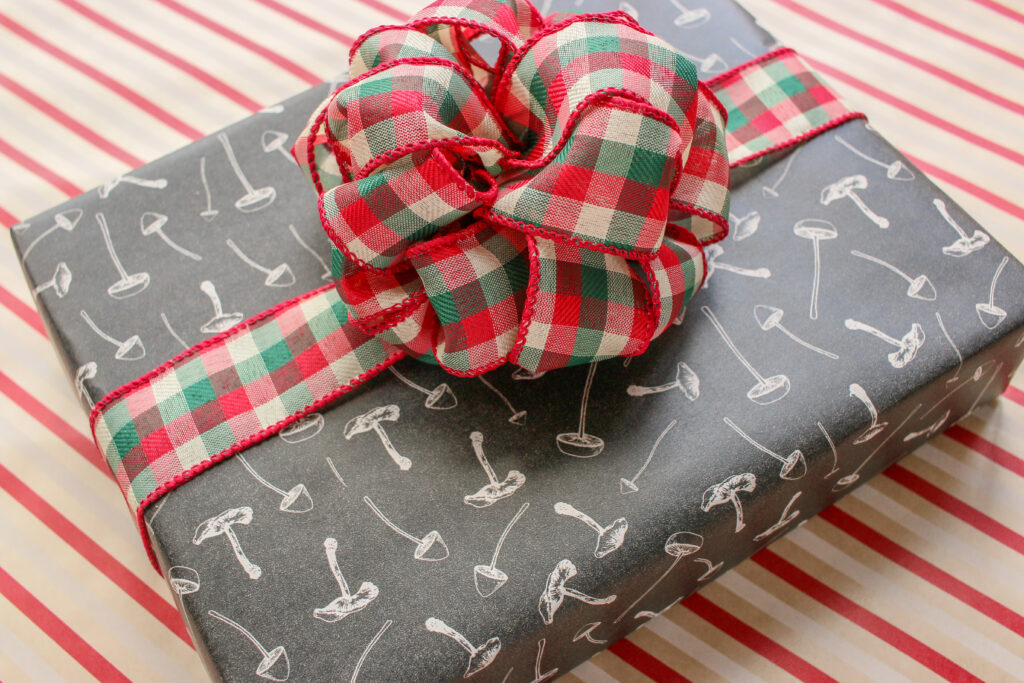
How to Tie a Pom Pom Bow
*I'm using a 1 1/2 inch wire ribbon for this bow
Take your ribbon in your hand and create a loop of your desired diameter. I'm doing about 5 inches in diameter.

Flatten your loop and continue wrapping around this loop until you have about 8 loops total. The more loops, the more full your bow will be.
Trim off the excess ribbon.
Now cut shallow notches on each corner of your bow. This will reduce the bulk when we secure the bow.
Next, bring the notched ends of the ribbon loop together in the center.
Secure the notched center with a piece of string or wire and tie it tightly. Leave enough wire or string so you can use that to attach to your gift.

Working on one side of the bow, pull out the innermost loop, and twist it to the right. Pull out the next innermost loop, and twist it to the left.
Continue in this way until all loops on one side have been twisted. Repeat for the other side of the bow.
Now fluff and adjust the bow loops until you're happy with the end result.
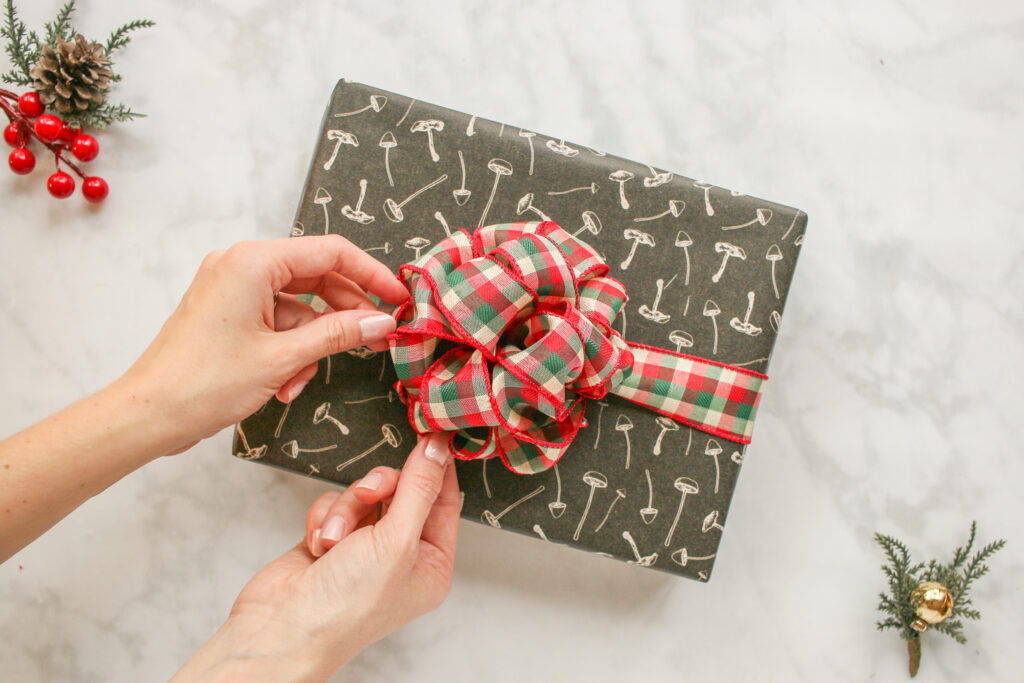
Use your string tails to secure your bow to a ribbon already tied around your package. Voila!
How to Make a No-Tie Layered Bow
Create a ribbon loop the desired width of your finished bow.
Secure this loop with hot glue.
Then create a second loop, slightly smaller than the first and secure this one with hot glue.
Layer the loops on top of one another, with the larger one at the base. Identify the center of the loops and pleat or pinch them together.
Secure tightly with a piece of wire.
Then take a small piece of your base ribbon and wrap this around the center portion of your bow. Secure with hot glue.
To make the tails of the bow, cut two pieces of the base ribbon to your desired length.
Then cut two pieces of the top ribbon slightly shorter than the other two ribbons.
Layer a shorter ribbon on top of each longer ribbon and glue the flush edges together.

Pleat the tops if desired.
Position the two ribbon tails at the center back of your bow loops and secure them with glue.
Cut the ribbon ends at a slight angle.
You can keep the bow as is, or you can fluff the bow loops and create some waves in the tails of the bow. Whatever look you prefer!
Attach to your package and it's ready for gifting!
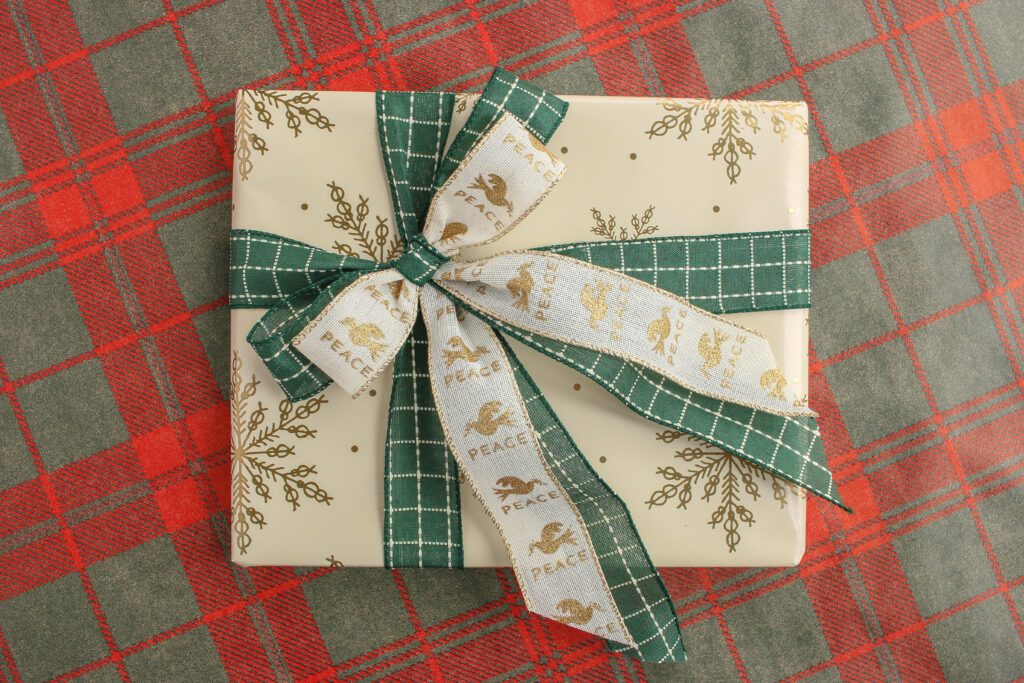
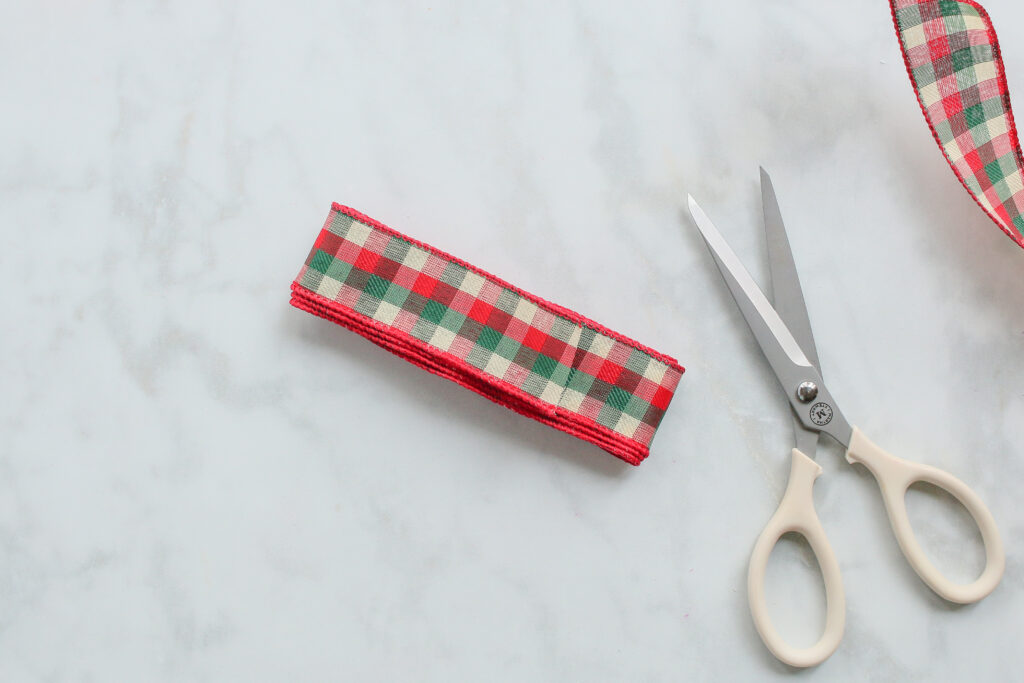
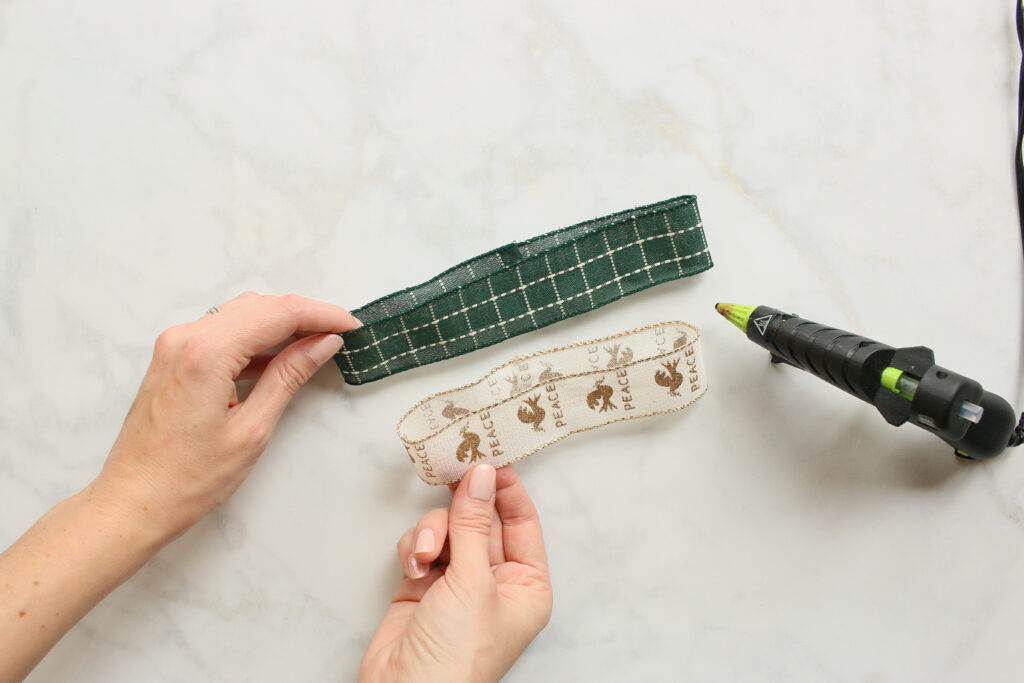
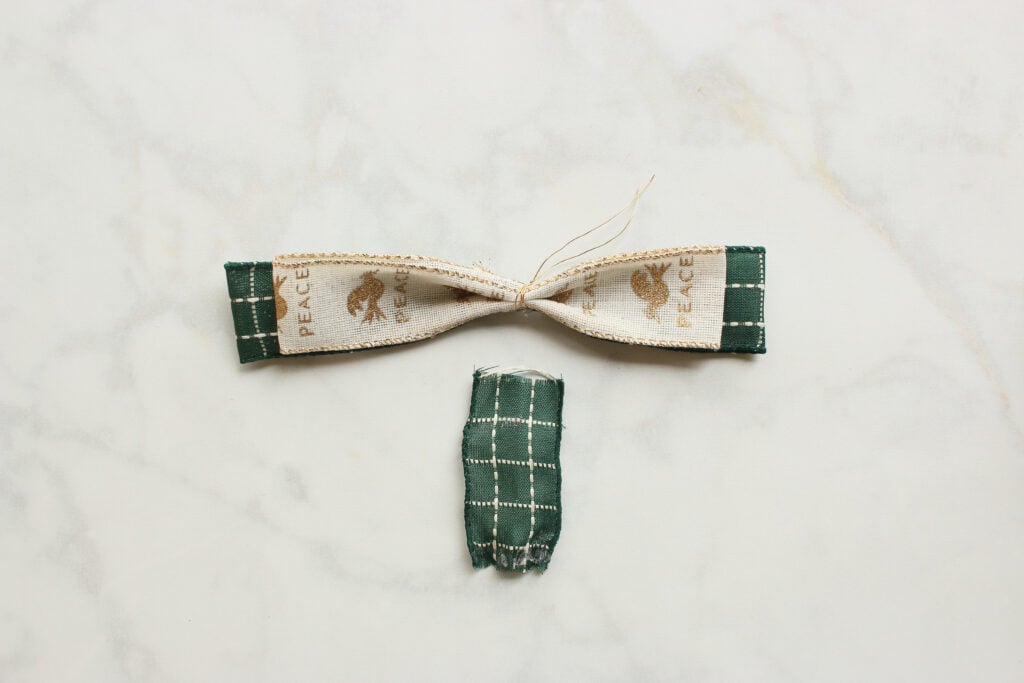
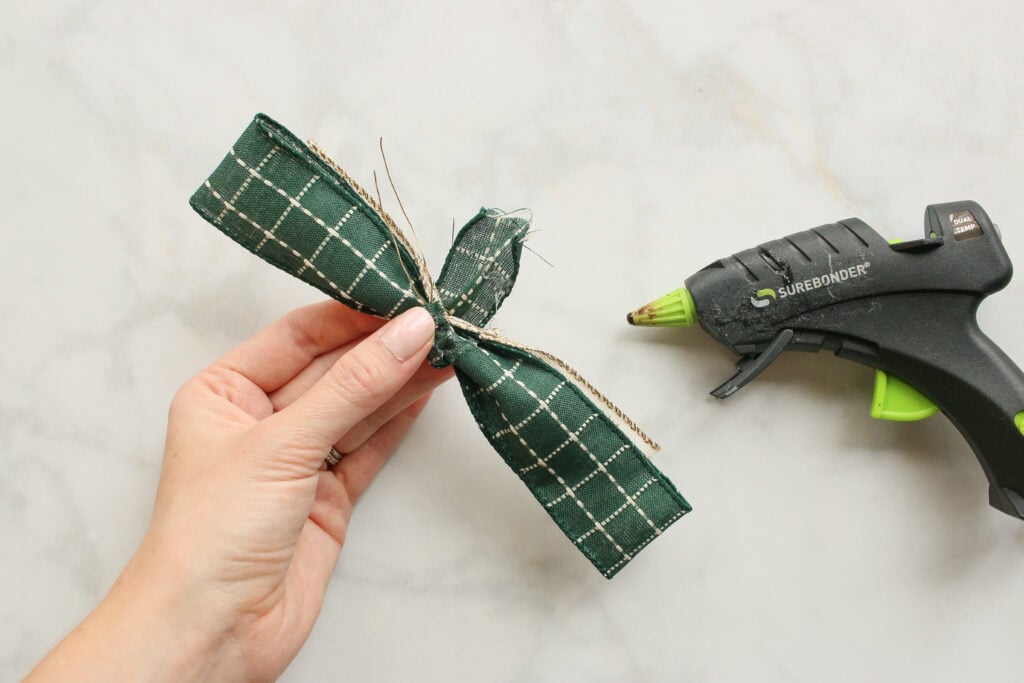
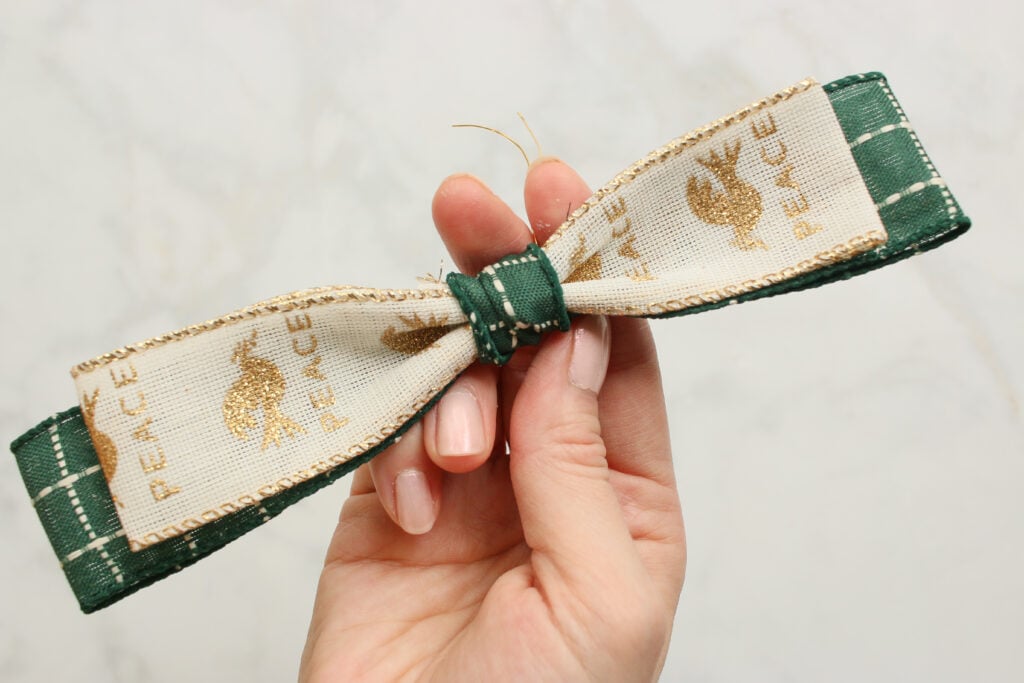
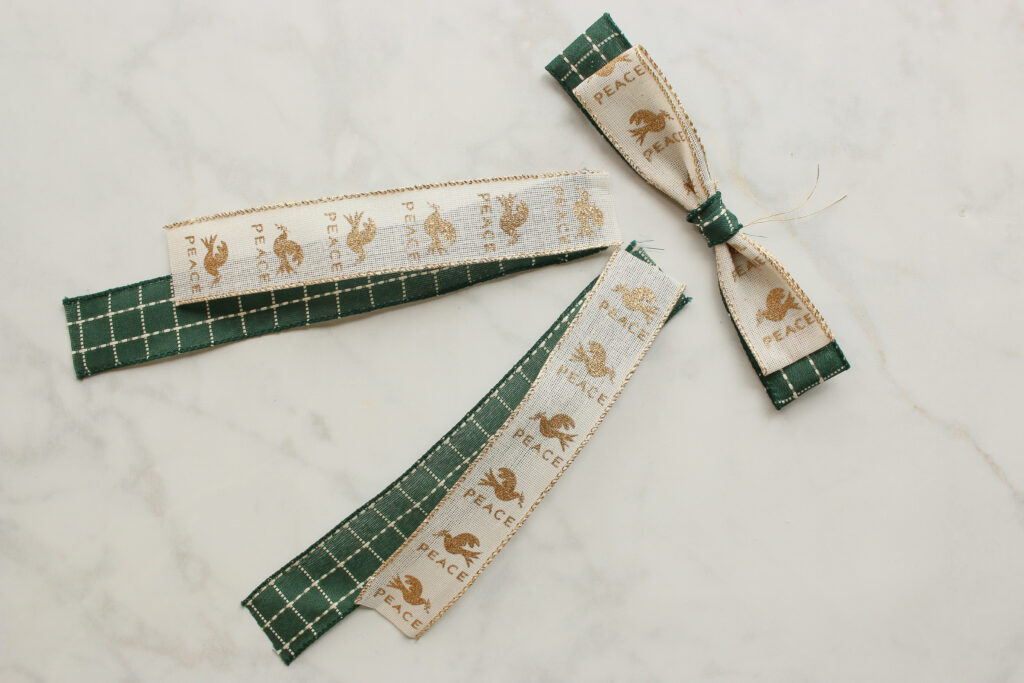
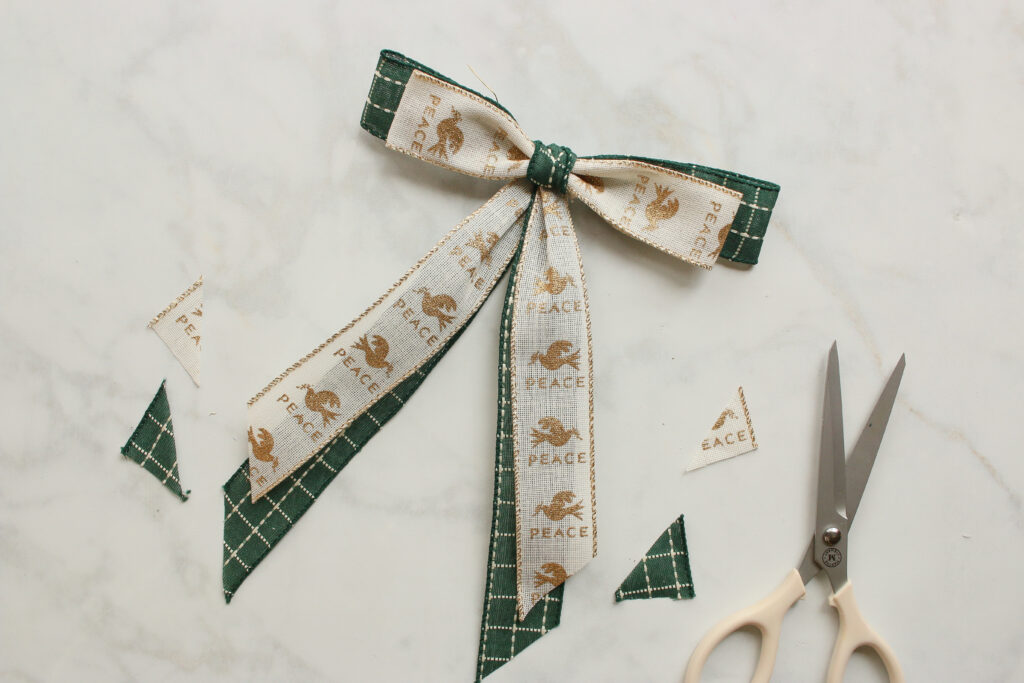
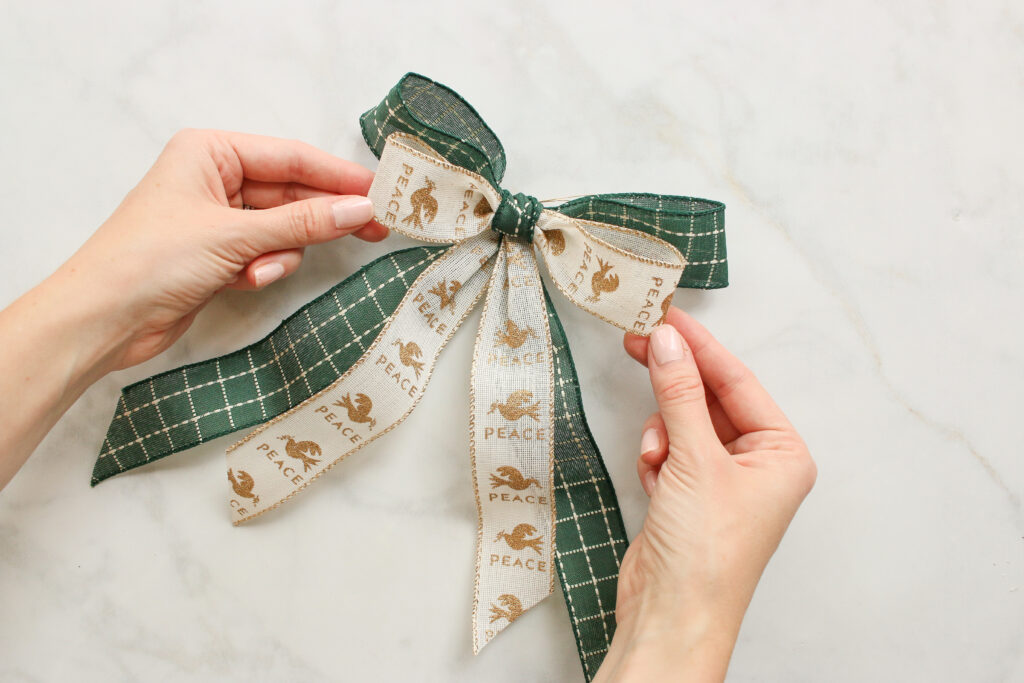
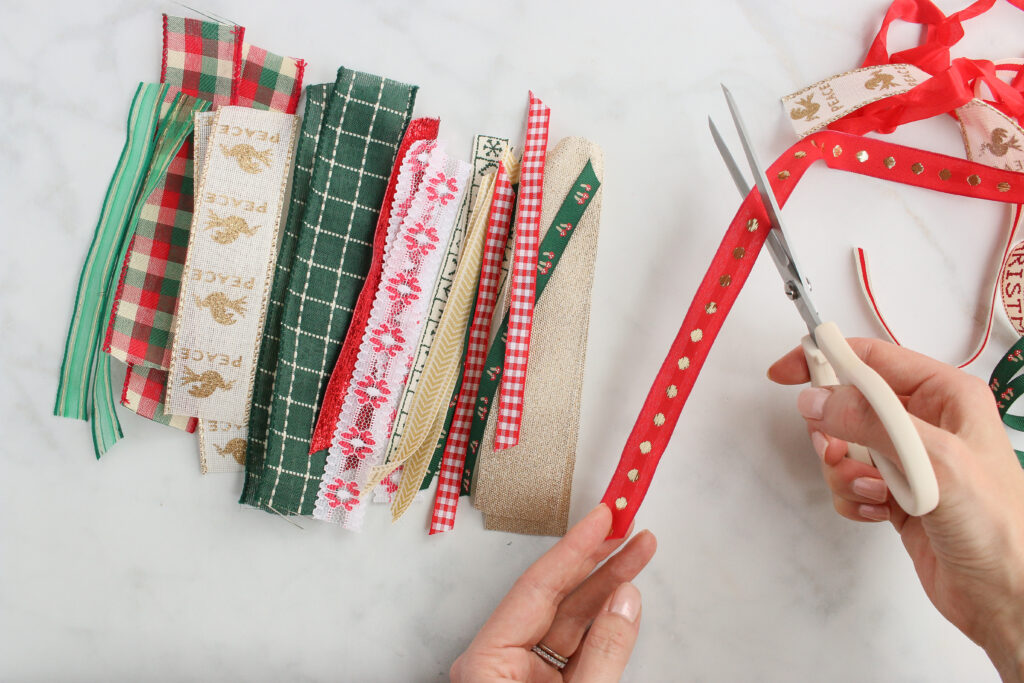
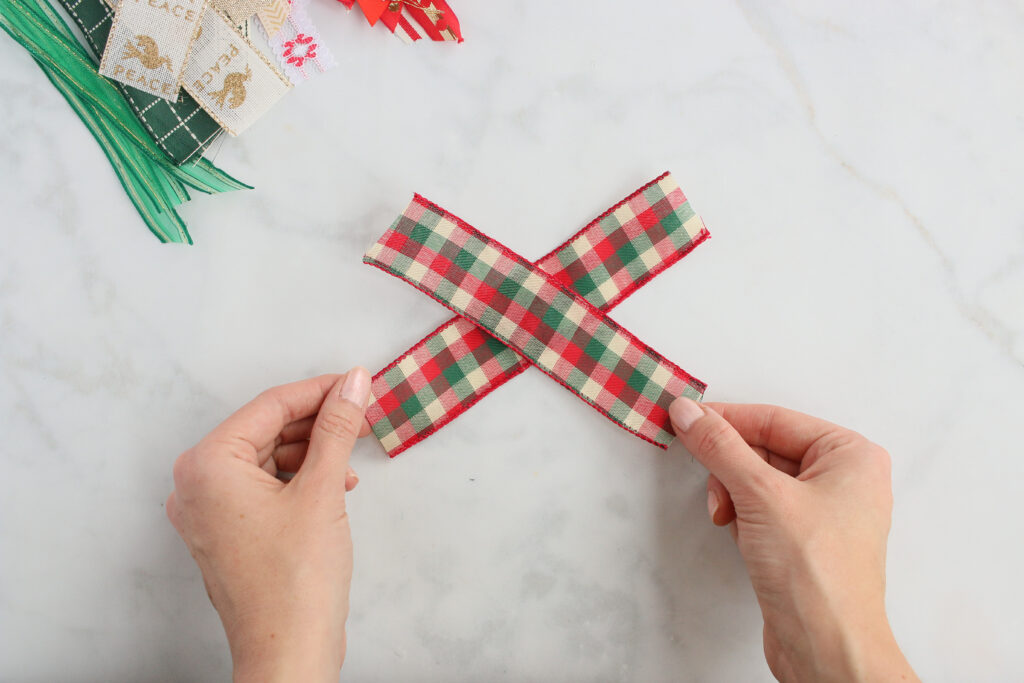
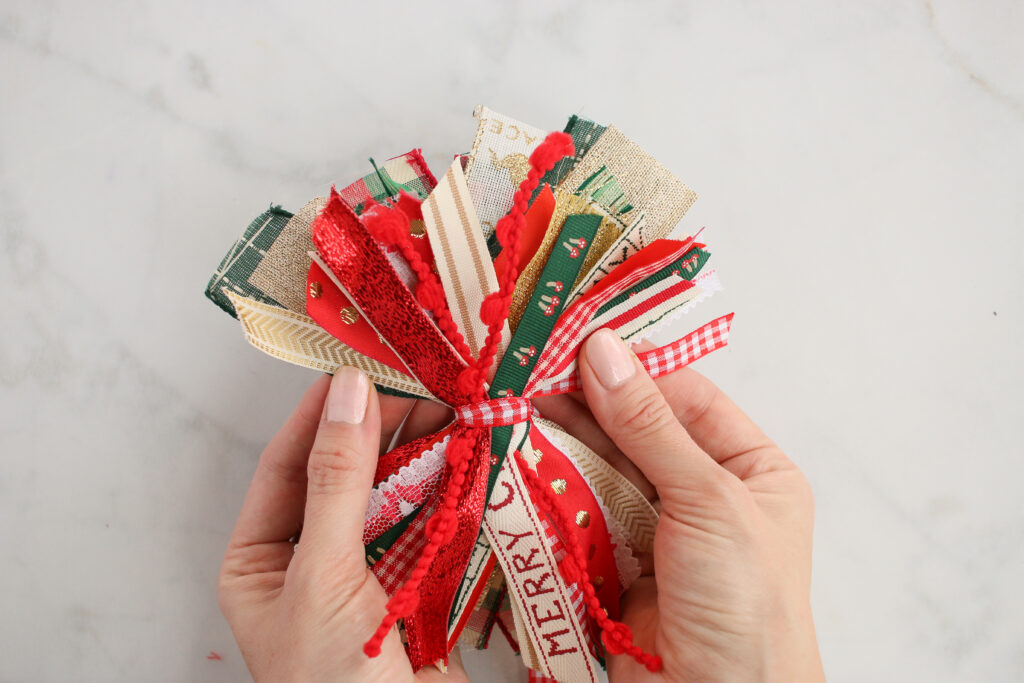
How to Tie a Ribbon Scrap Bow
I'm using a variety of ribbons for this bow. This is a great way to use up all those ribbon scraps! Anything goes as far as thickness, texture, color and patterns.
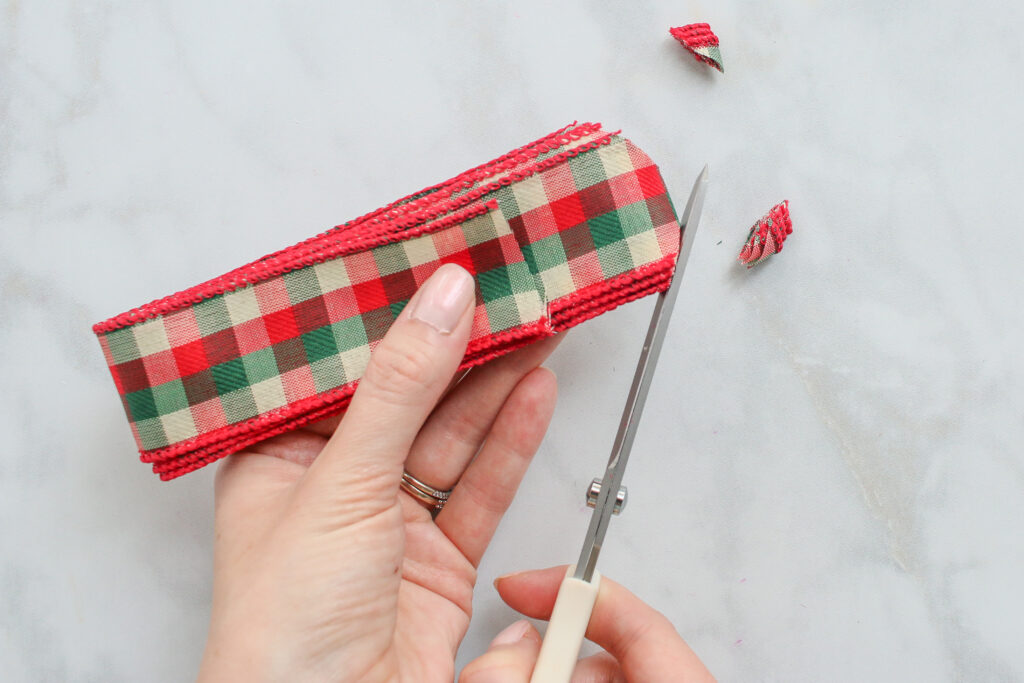
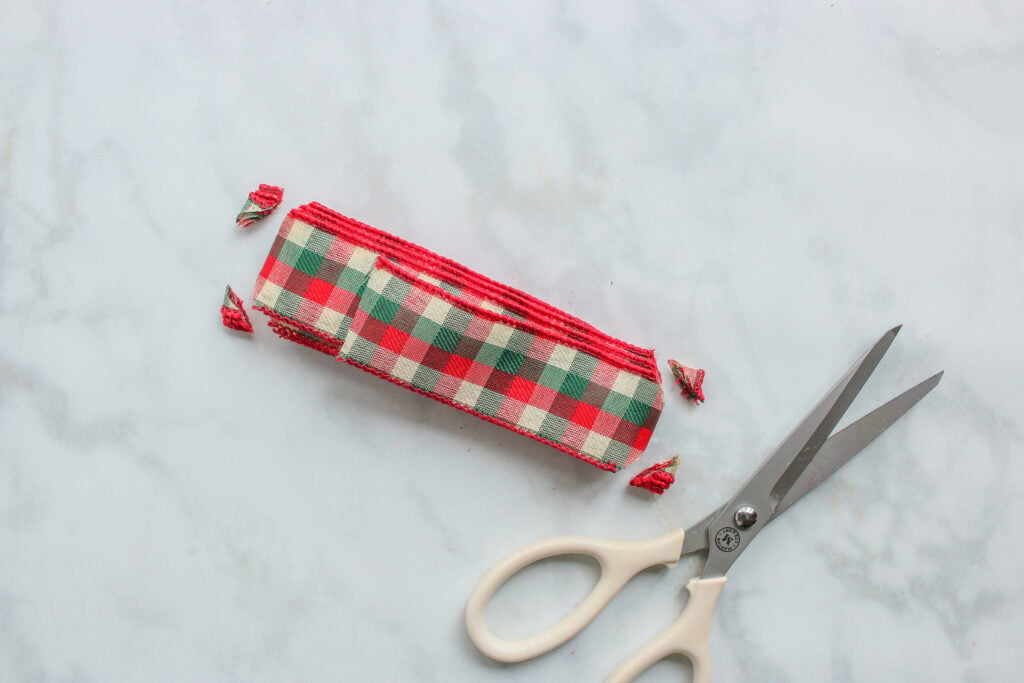
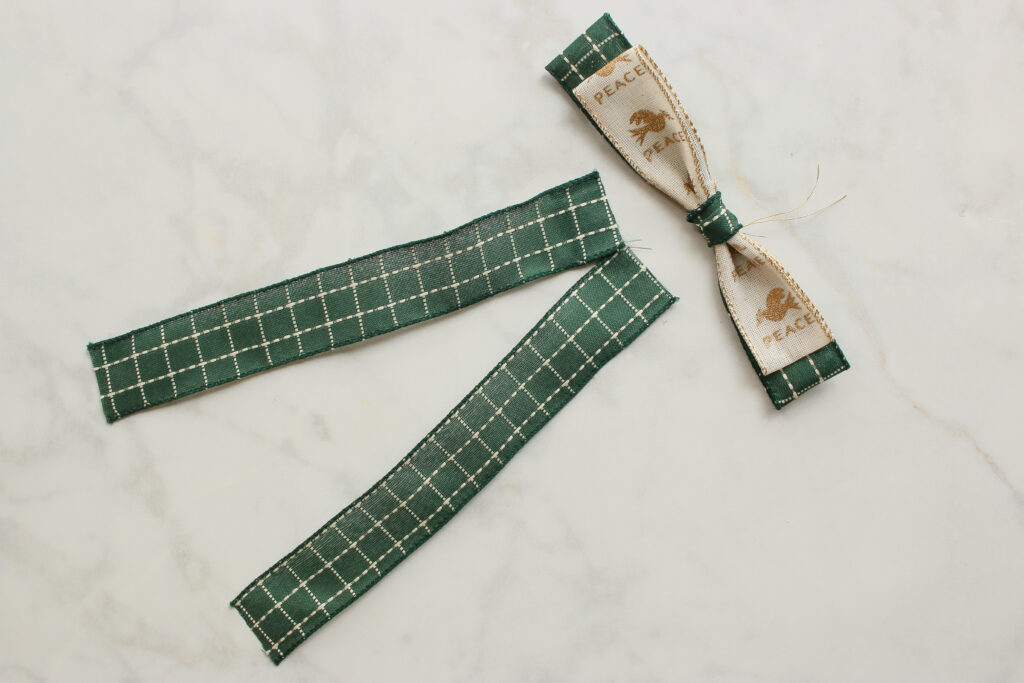
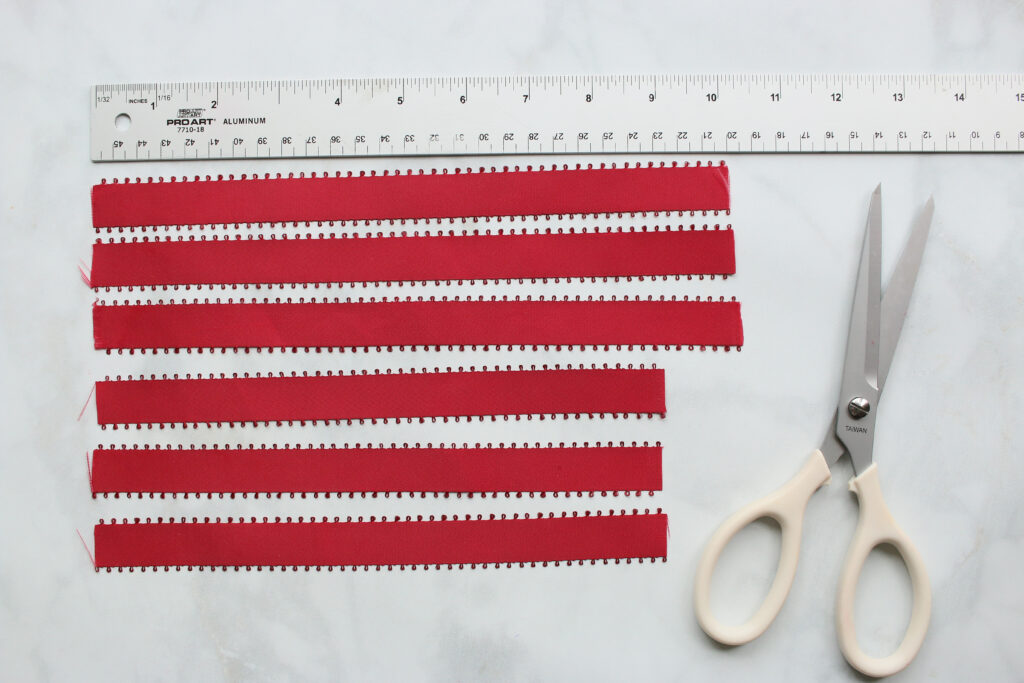
Take various ribbons and trims and cut them all approximately the same length. The length of the ribbons will be the diameter of your finished bow. I'm doing about 6 inches in diameter.
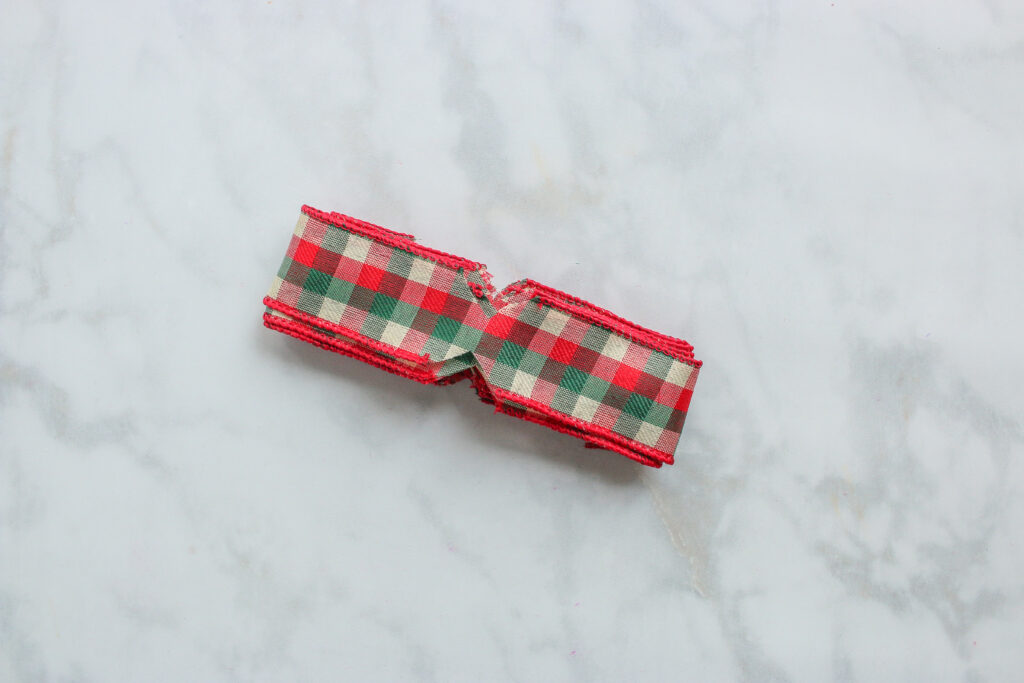
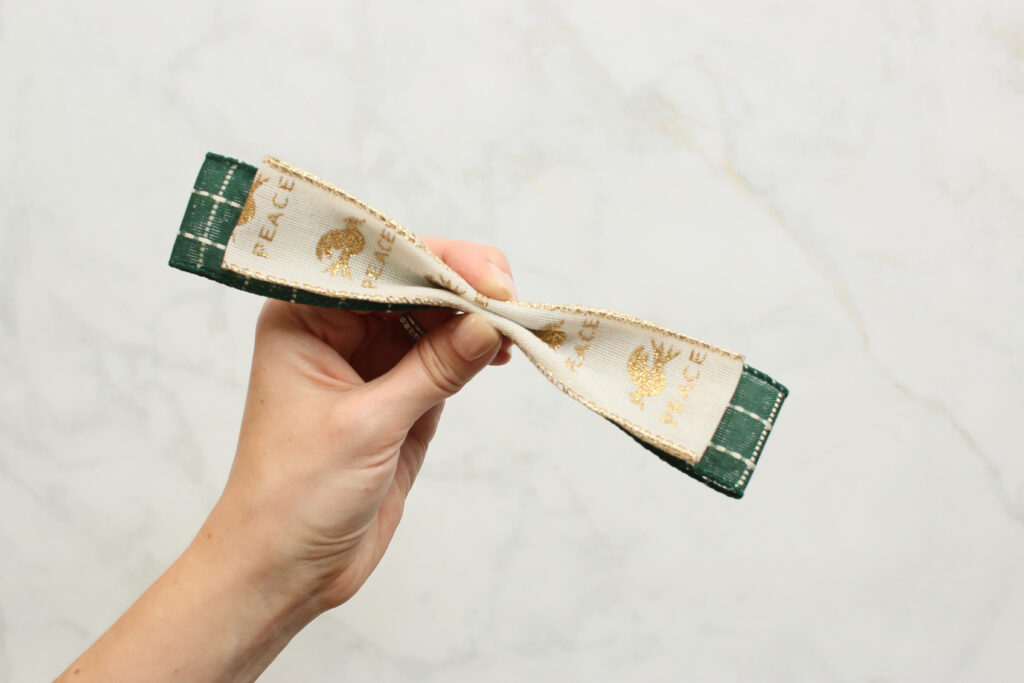
Beginning with your thicker ribbons, create an x-shape with two ribbons. Then continue to layer on all your ribbons, continuing in the x-formation, working with the thicker ribbons first and then moving to the thinner ones.
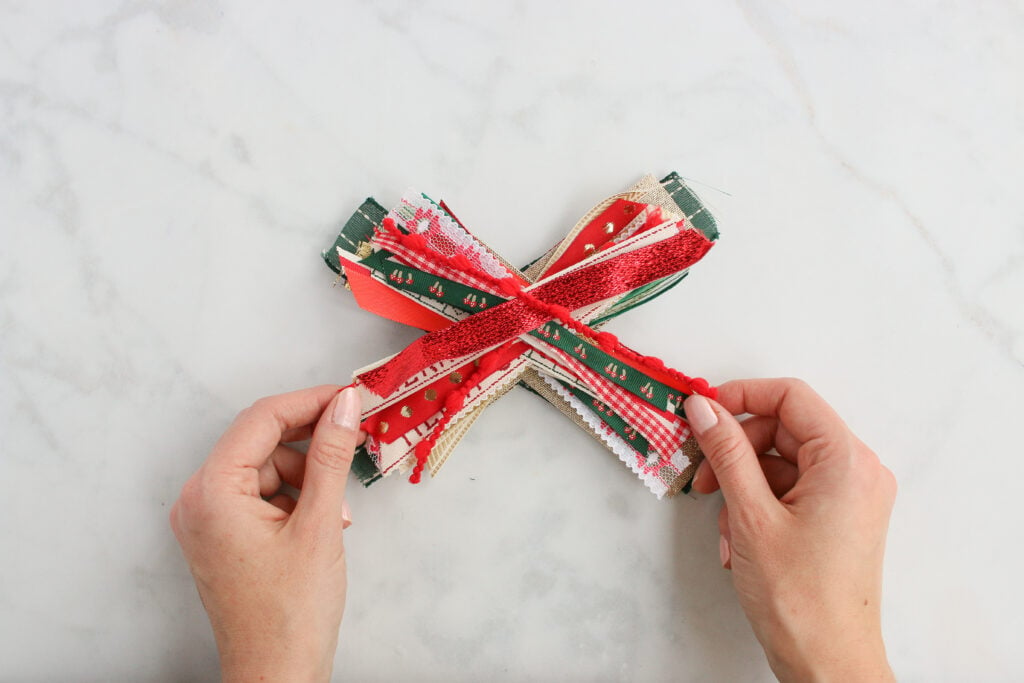
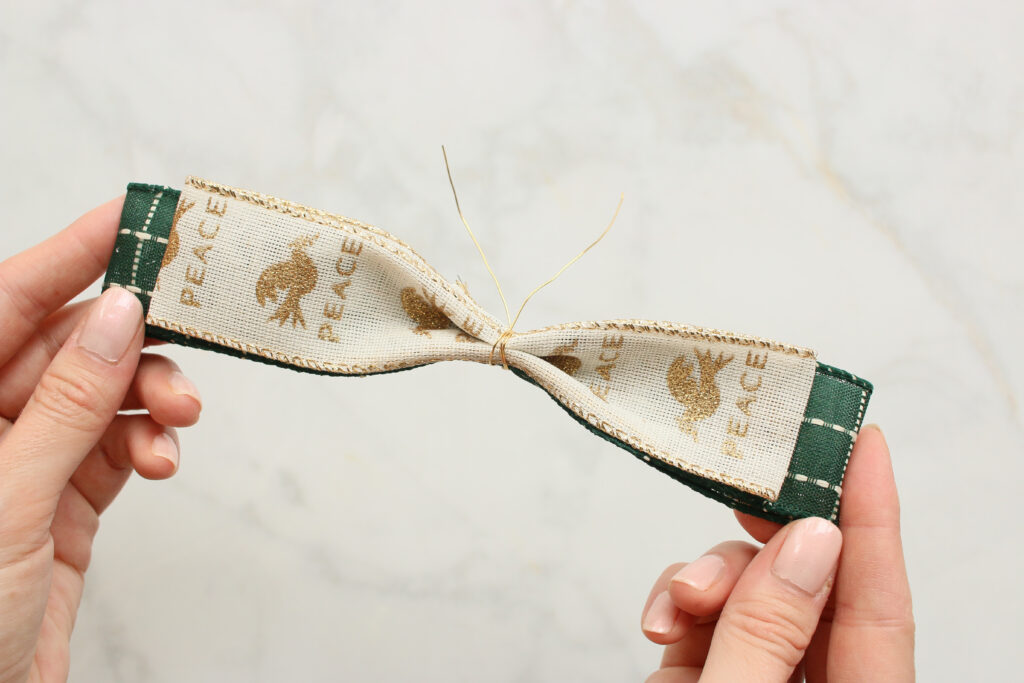
Take a thin piece of ribbon or string and tie your ribbons tightly in the center. I'm leaving these tails long so I can use it to wrap around my gift.
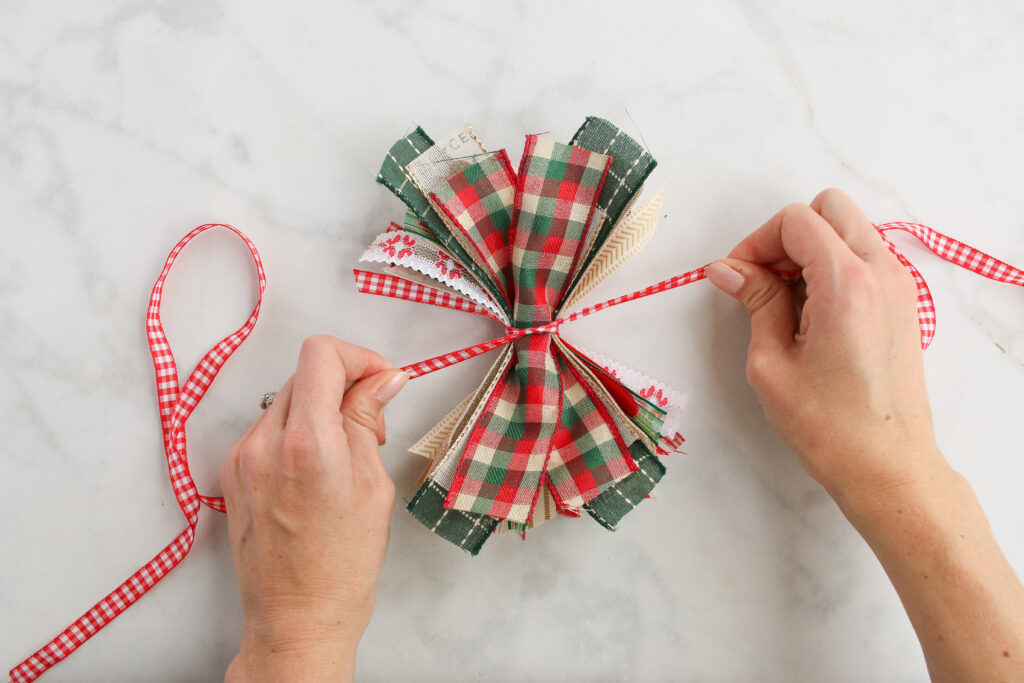
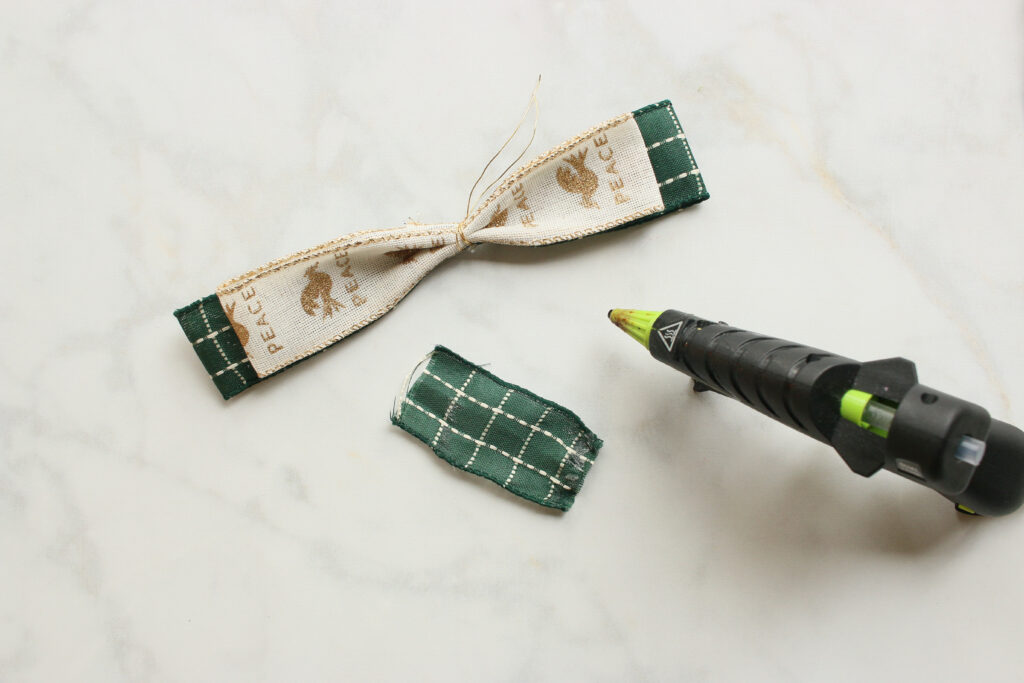
Fluff out the bow by gently pulling all the ribbons outwards from the center.
Trim your ends at angles or straight across.
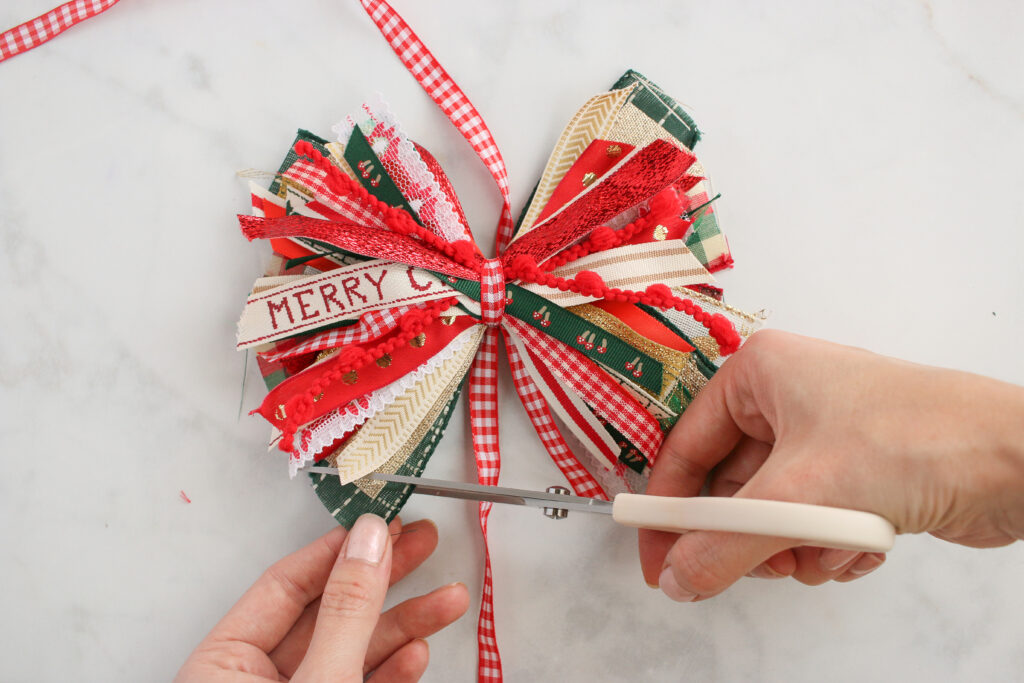
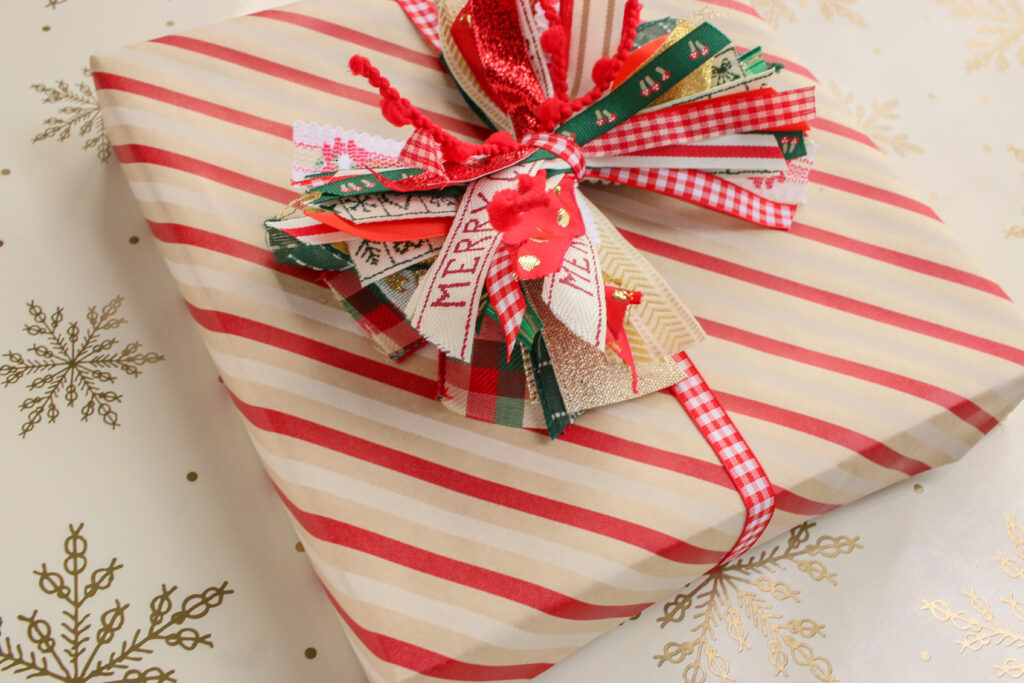
Tie onto your package for a show-stopping bow!
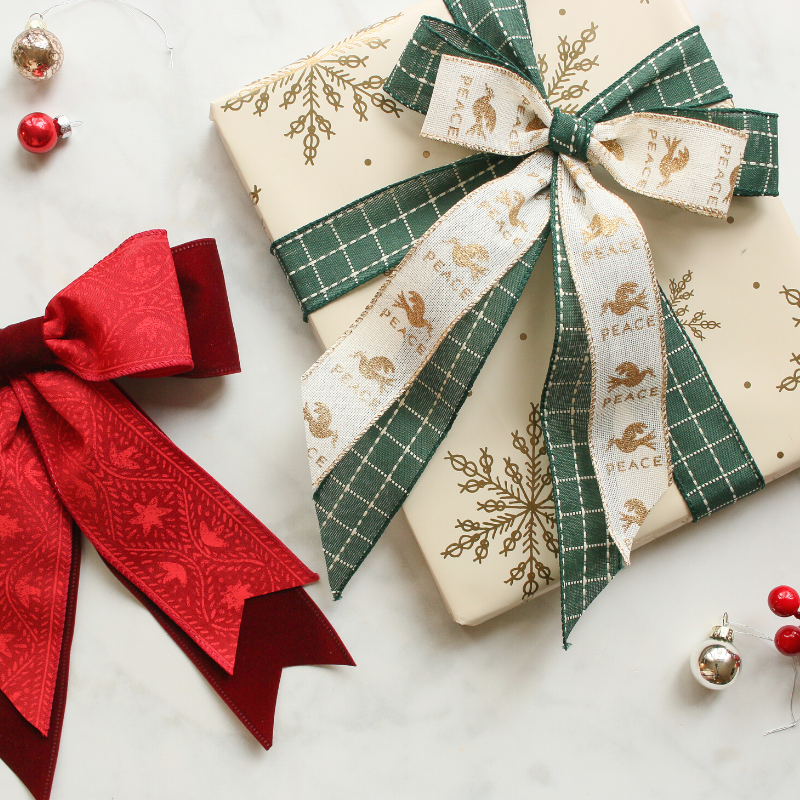
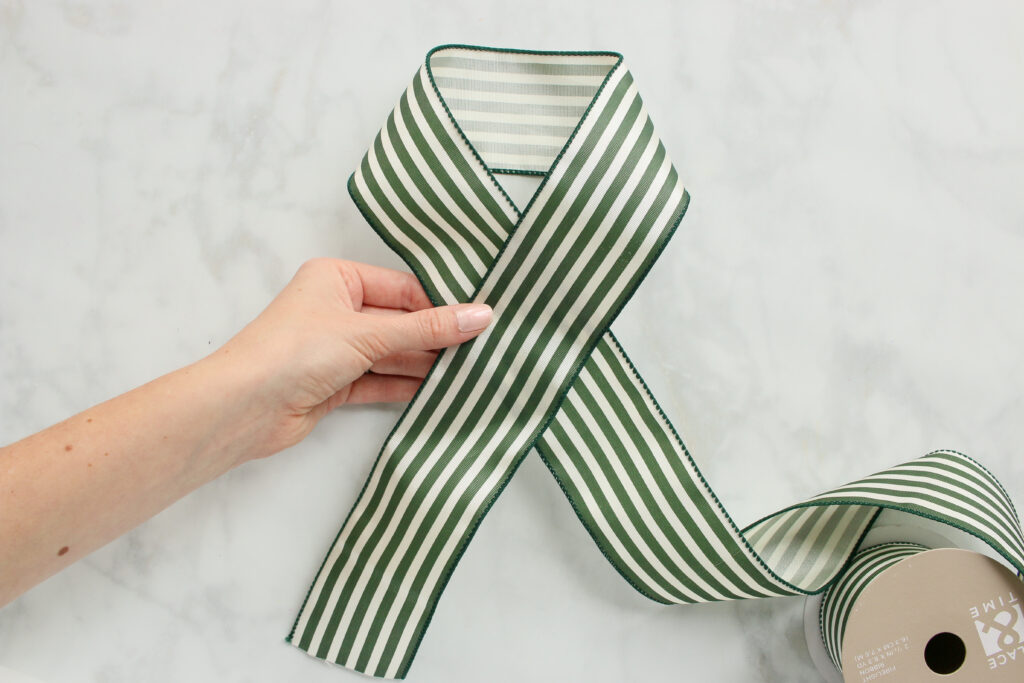
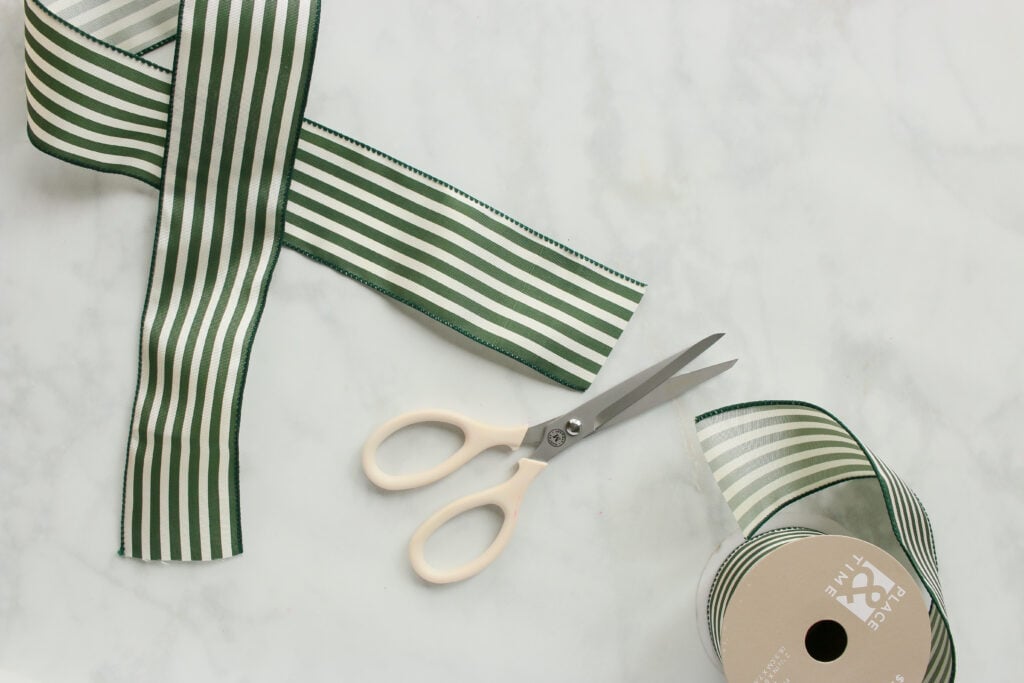
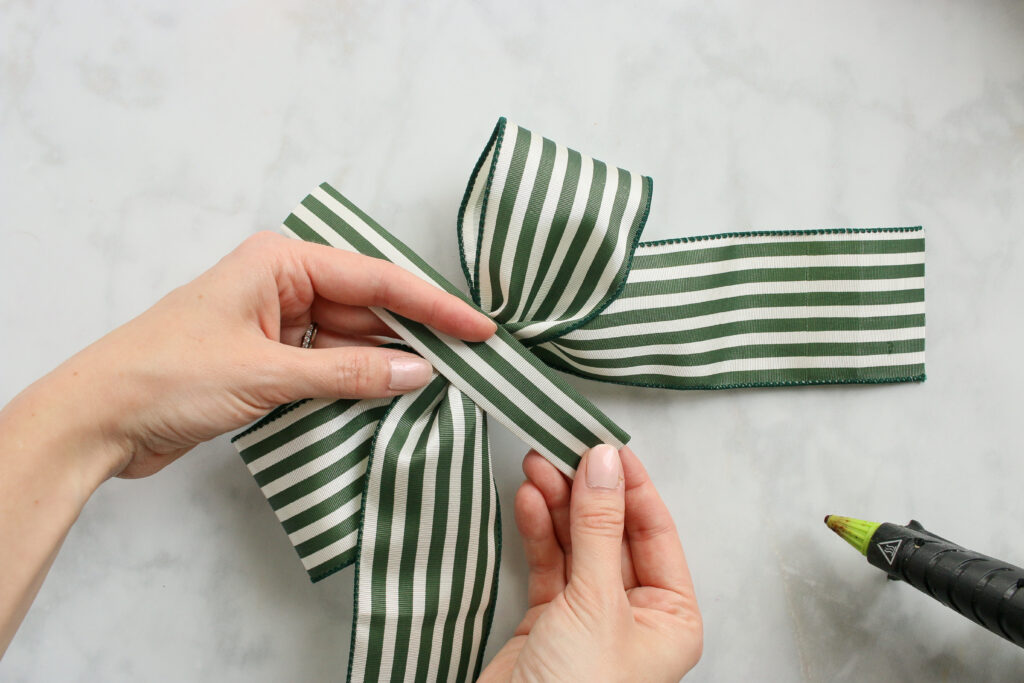
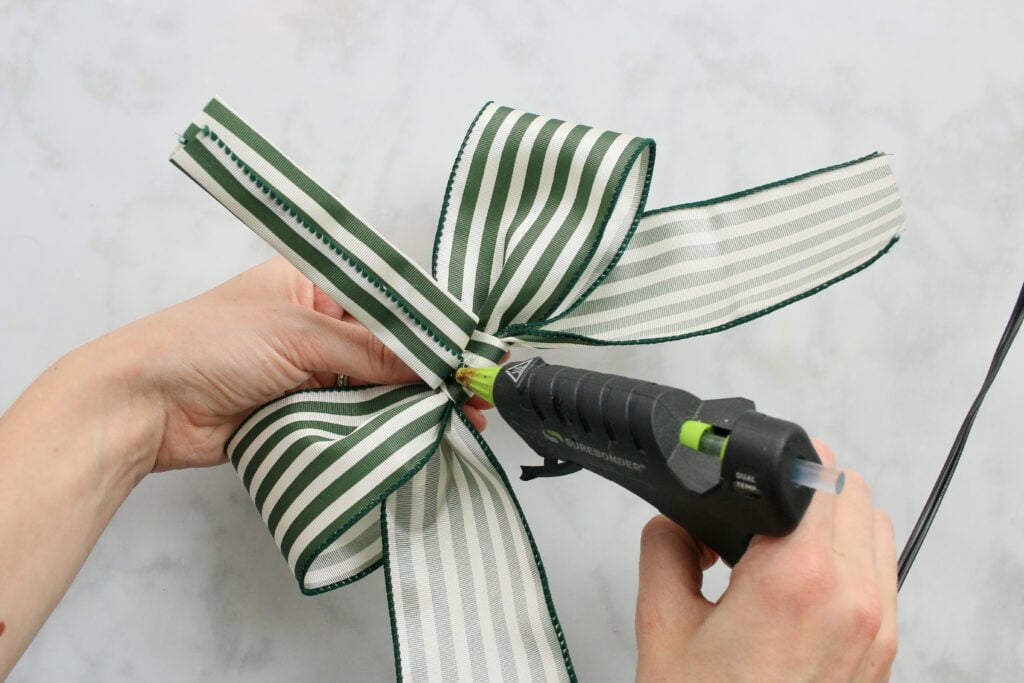
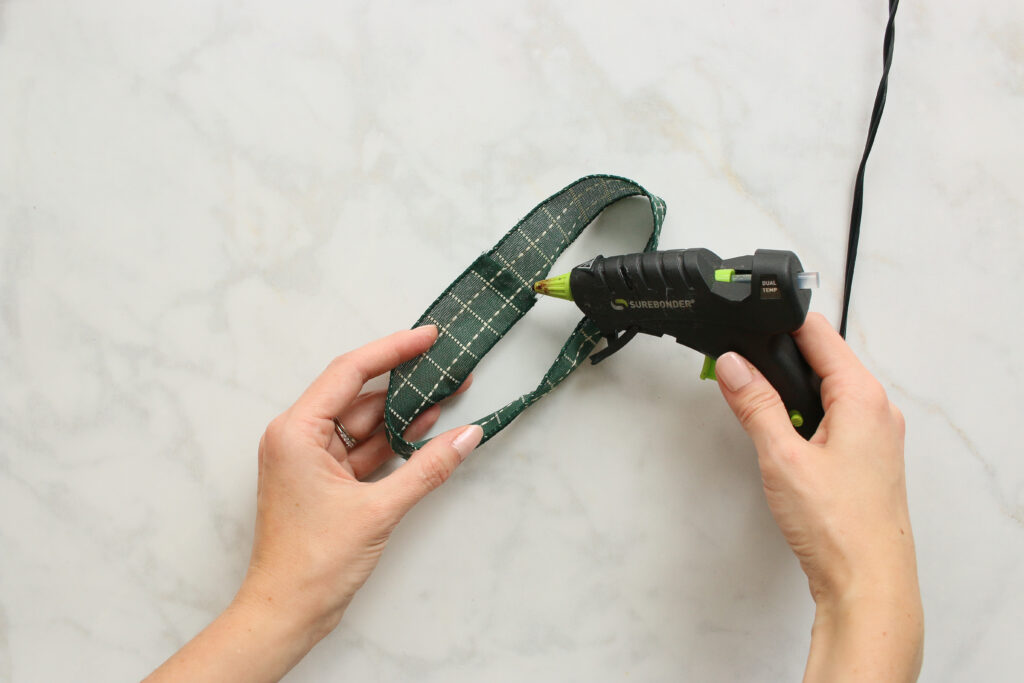
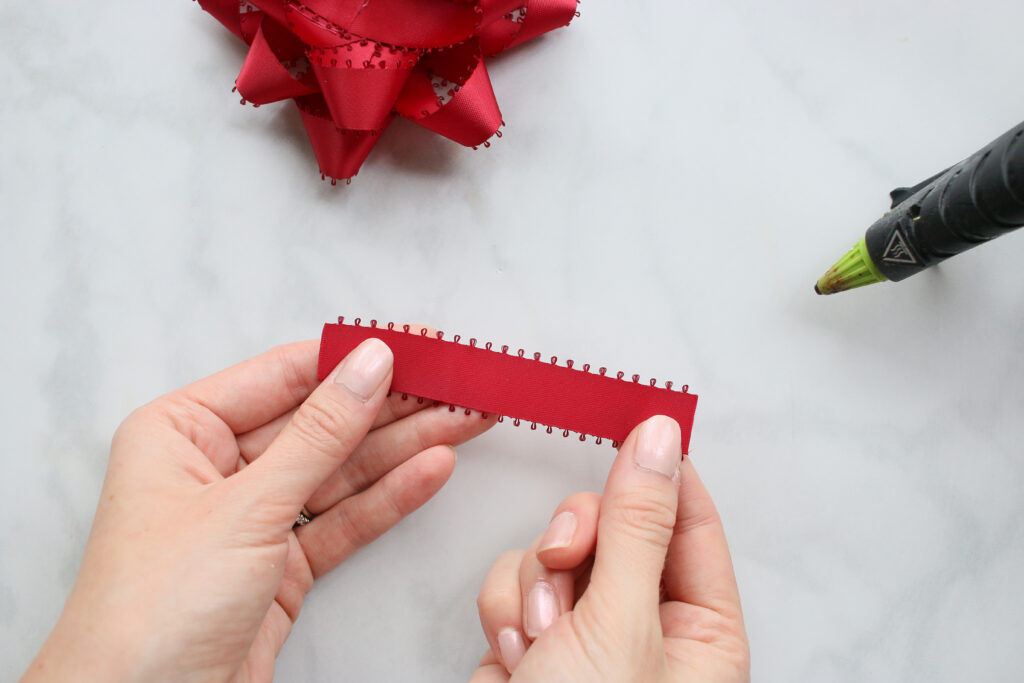
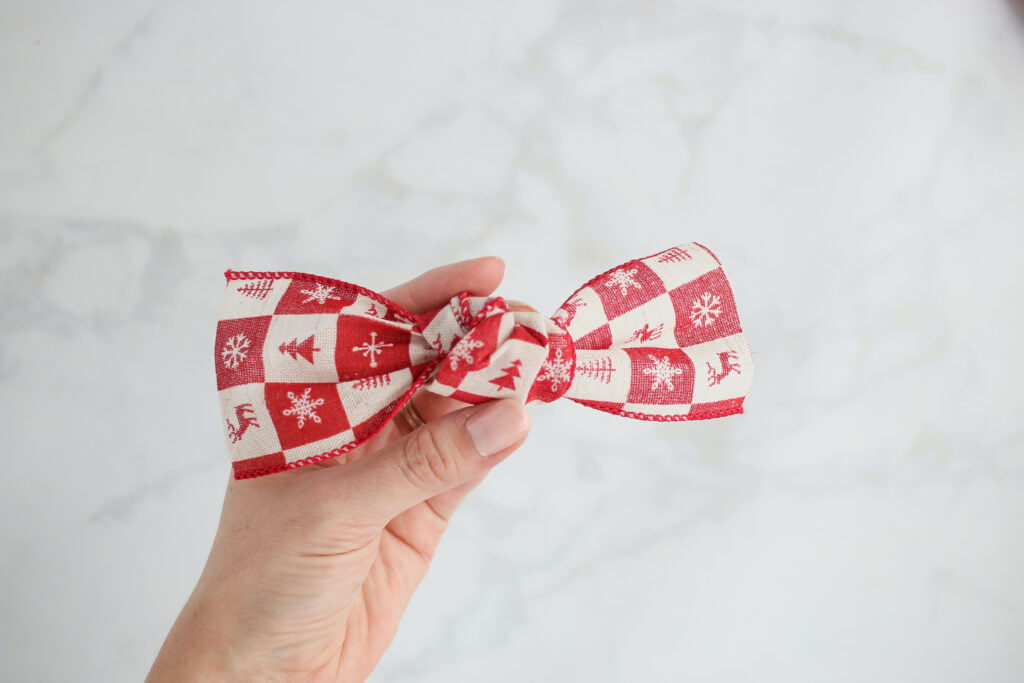
How to Tie a Classic Ribbon Gift Bow
I'm using a 1-inch silk ribbon for this bow. You can use a slightly thicker ribbon for this and/or a wired ribbon for a stiffer bow.
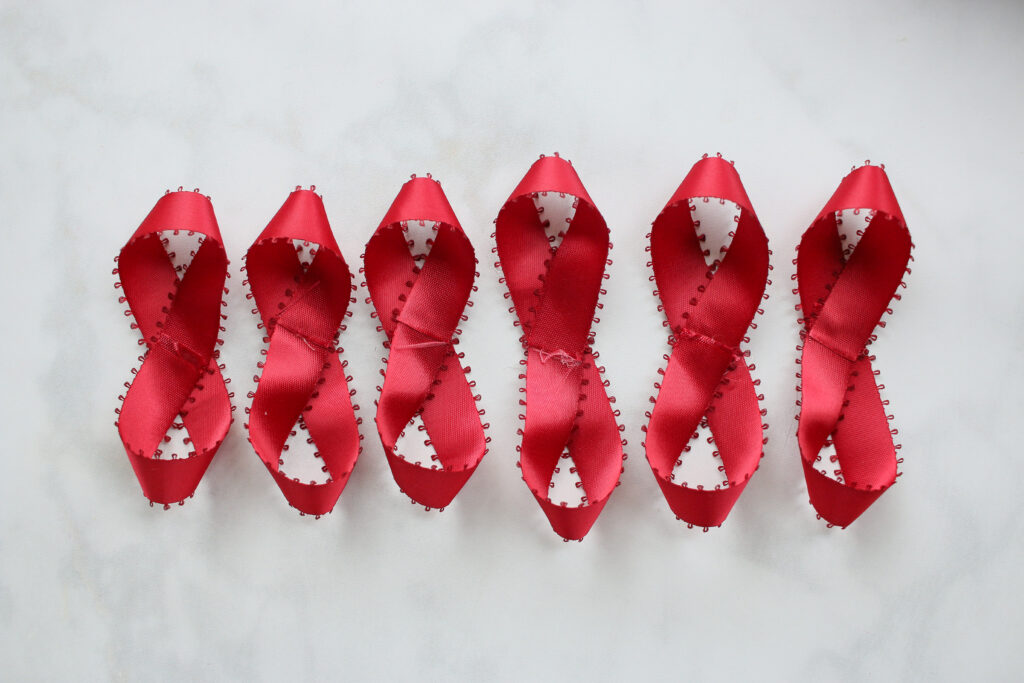
Cut 3, 10-inch long ribbons and 3, 9-inch long ribbons.
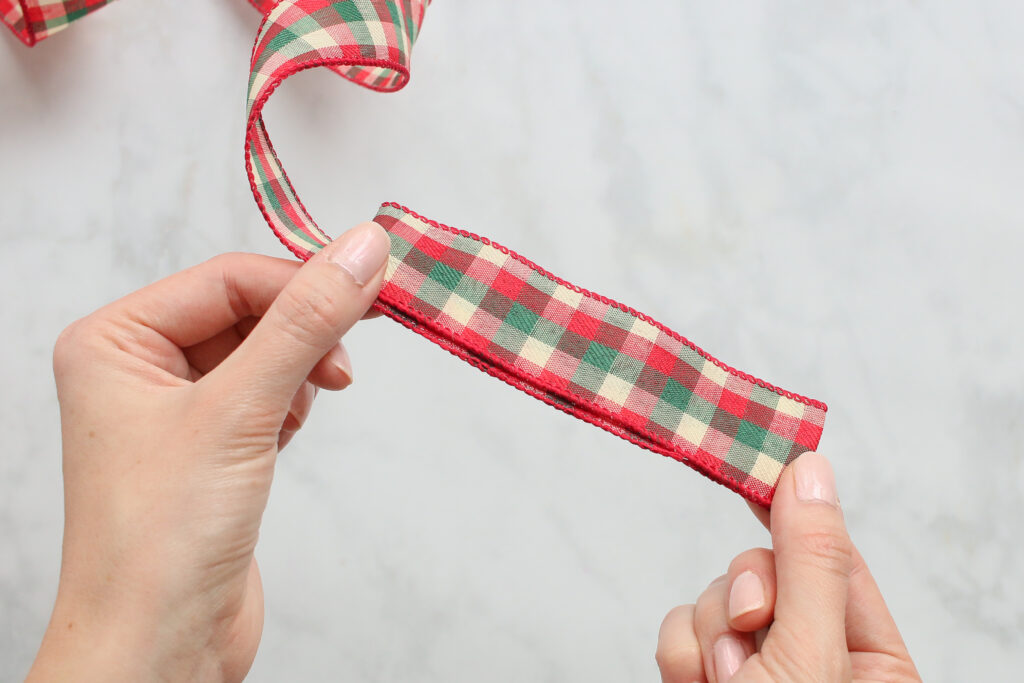
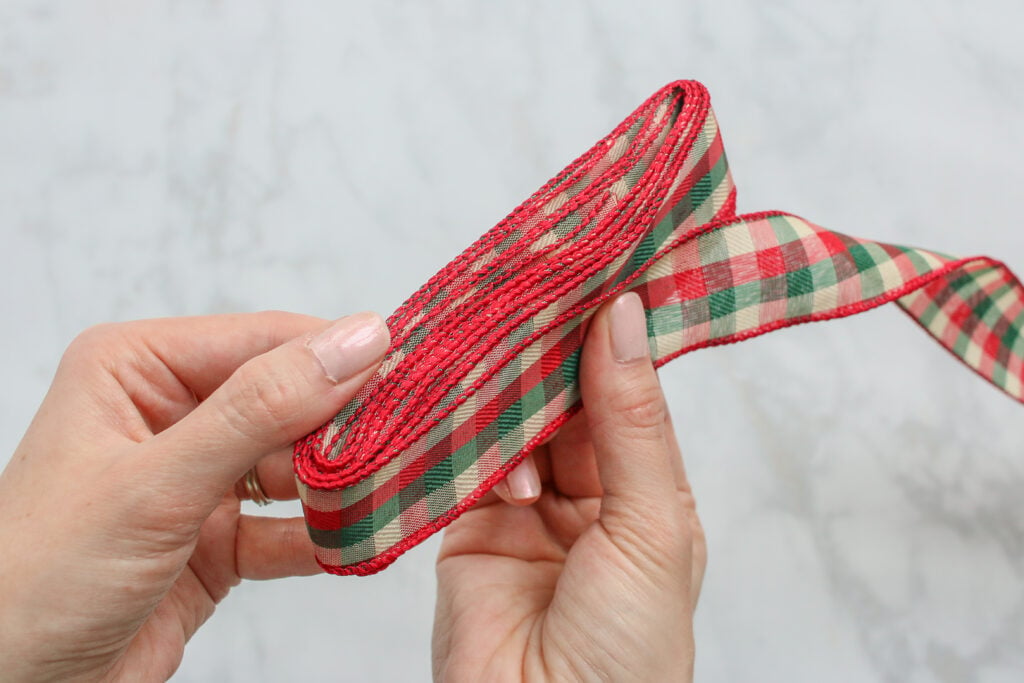
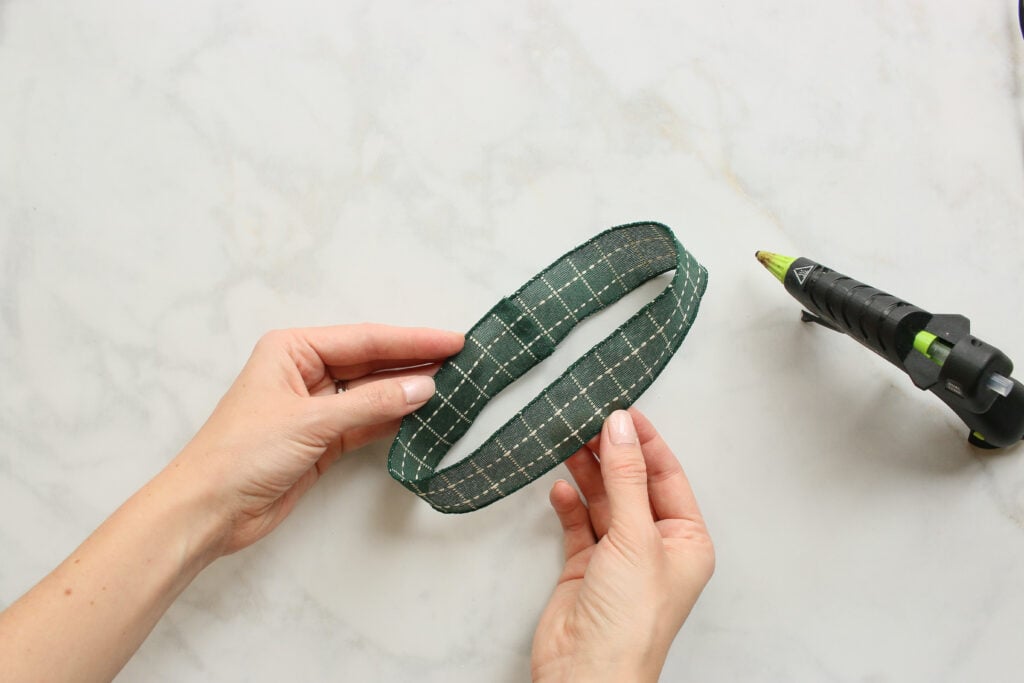
Once your ribbons are all cut, take one end of your ribbon and fold it toward the center of your ribbon, creating a little arch.
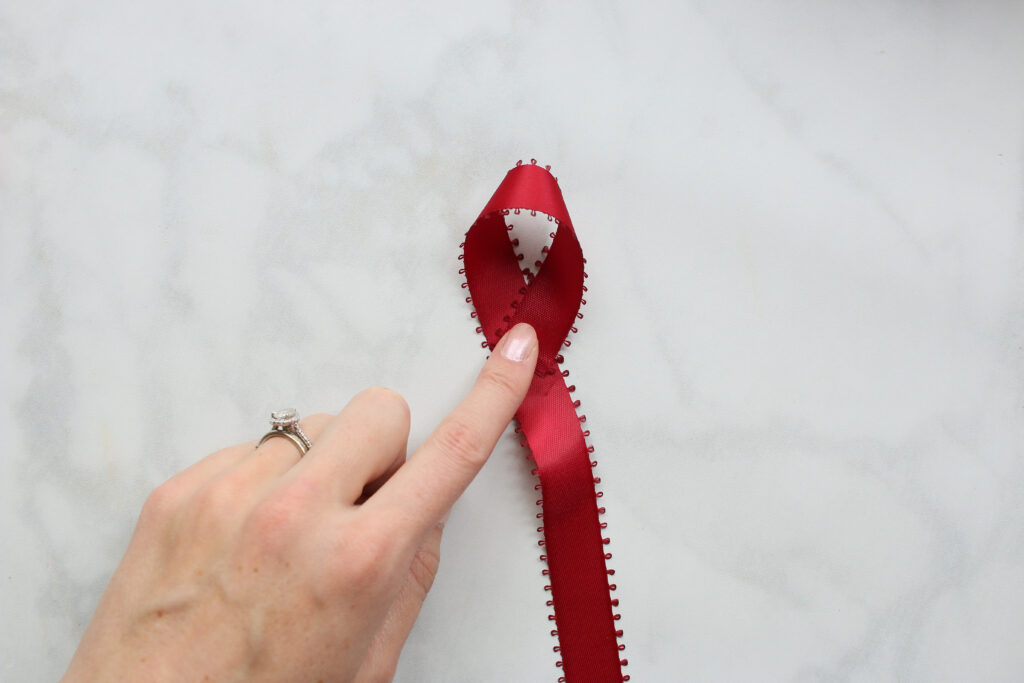
Now bring the end toward the center to create a loop. Now repeat with the other end of the ribbon. You're creating a little infinity or figure-8 symbol.

Overlap the edges just slightly and glue the edges to the center of the ribbon to hold the loops in place.
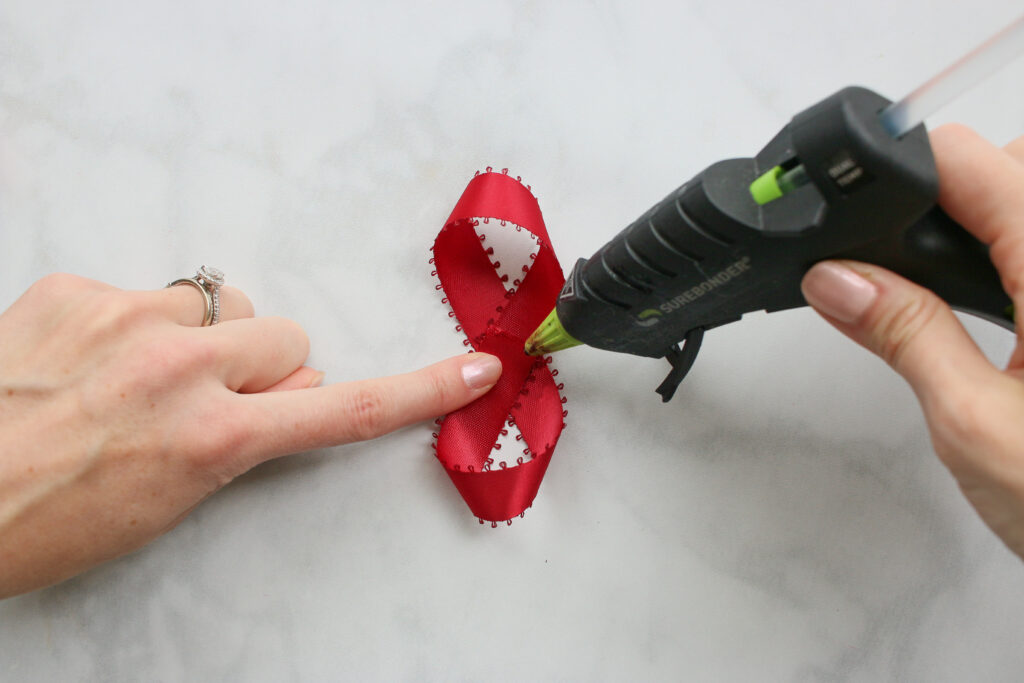
Repeat this process for all your pieces of ribbon.
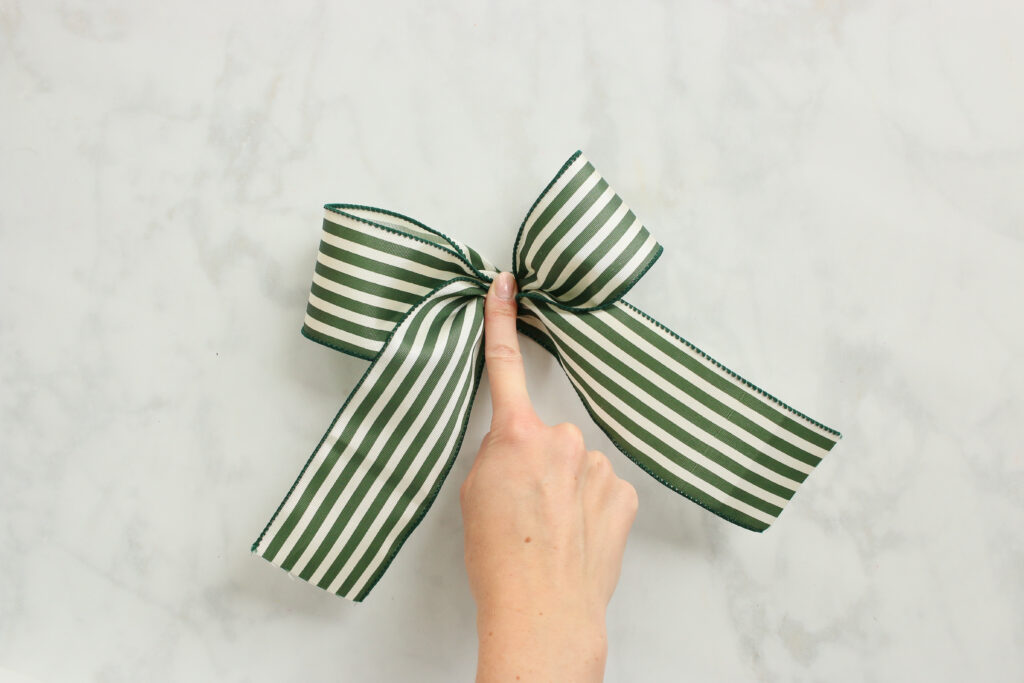
Begin by layering two of your largest loop pieces in a cross-shape and glue them in place.
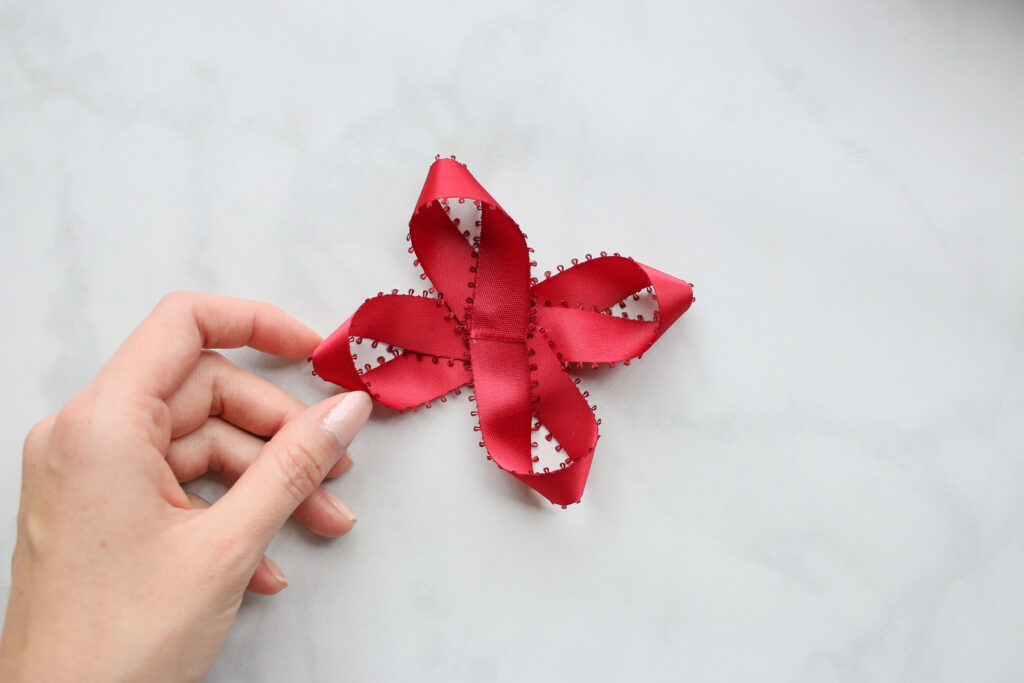
Glue the last large loop piece in an x-shape on top of those.
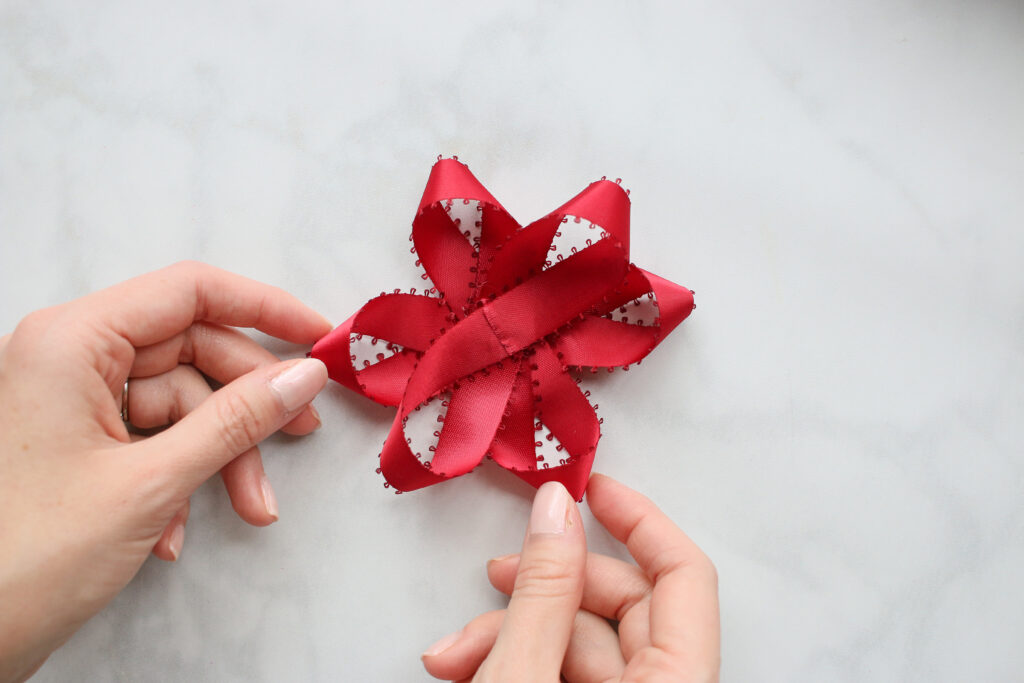
Now add the smaller loops, one at a time. The first small loop should fill the last gap in the star formation.
Now add the last two ribbons. These two small loops should overlap the position of the first two large loops.

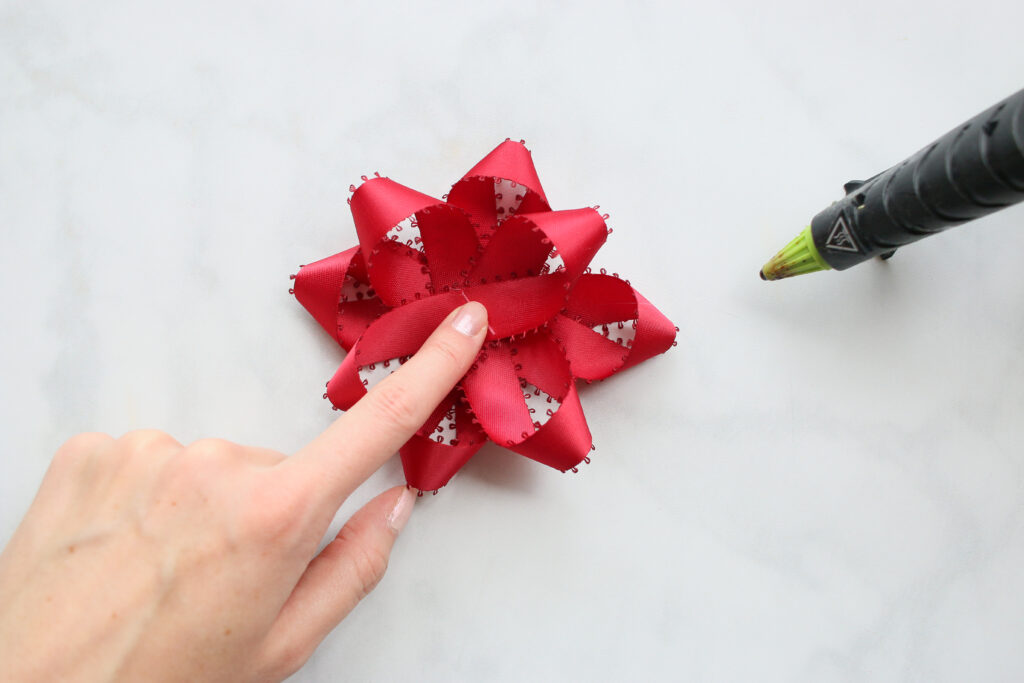
Once you have all 6 loops arranged and secured, you can create one last singular loop to place in the center.
Cut a small piece and fold one small loop and secure it with glue.

Then glue in the very center of your bow to finish.
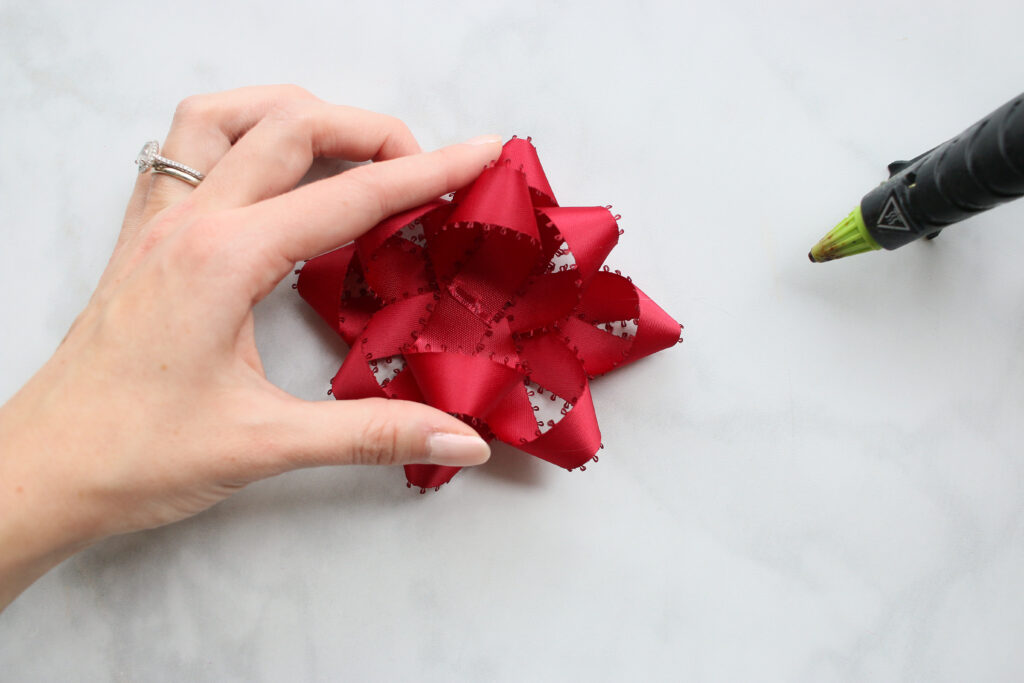
Glue or tape onto your gift.
These bows are super versitile and can look so different depending on the ribbon you choose, so have fun with it!
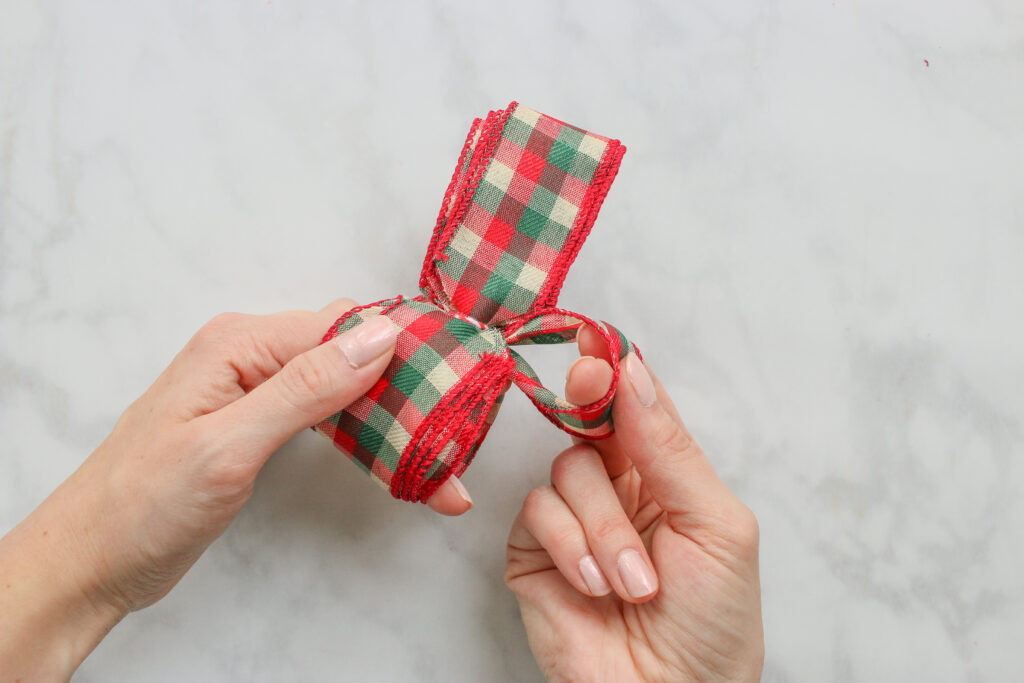
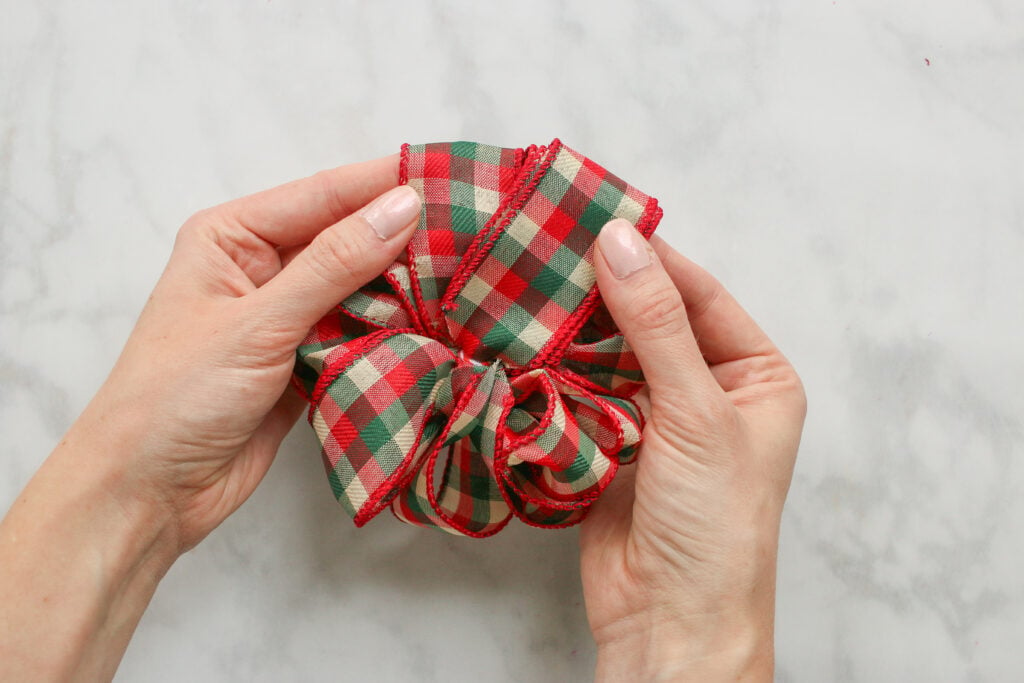
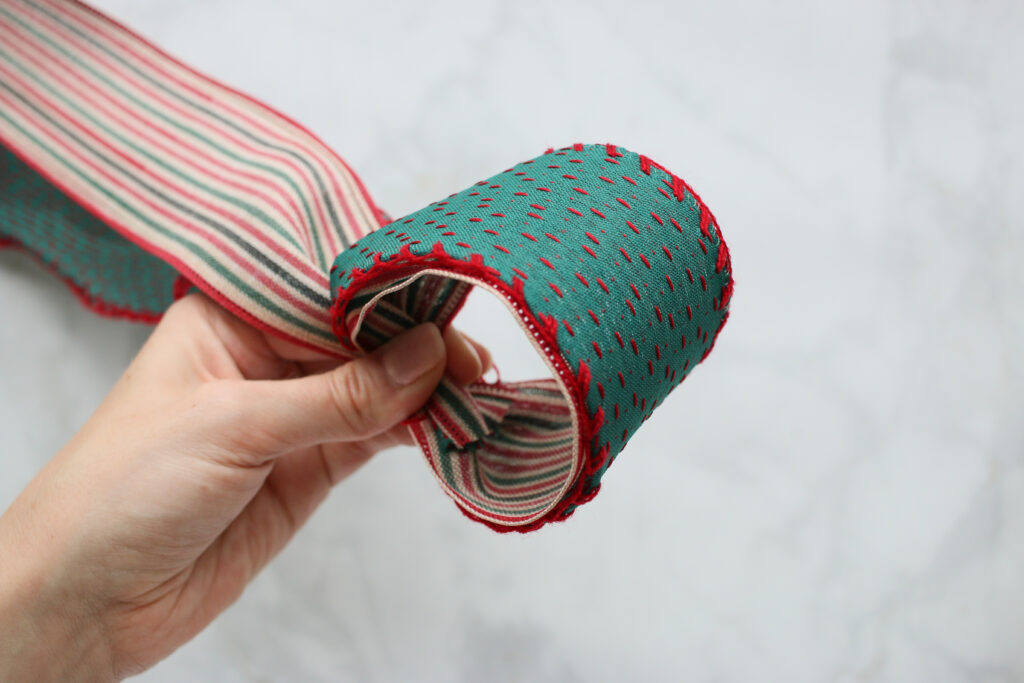
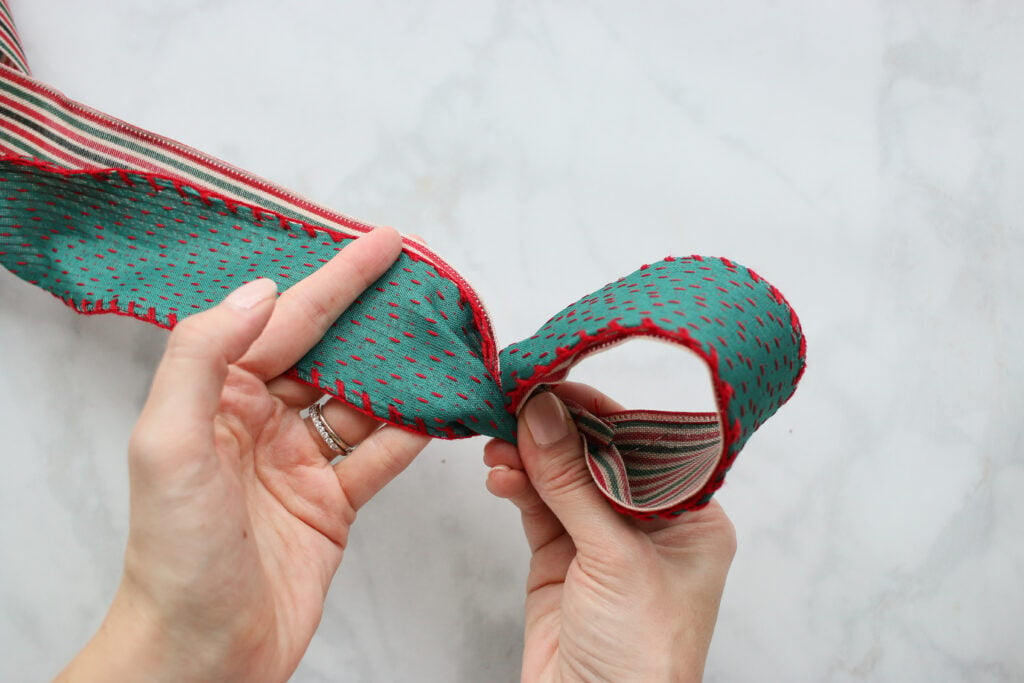
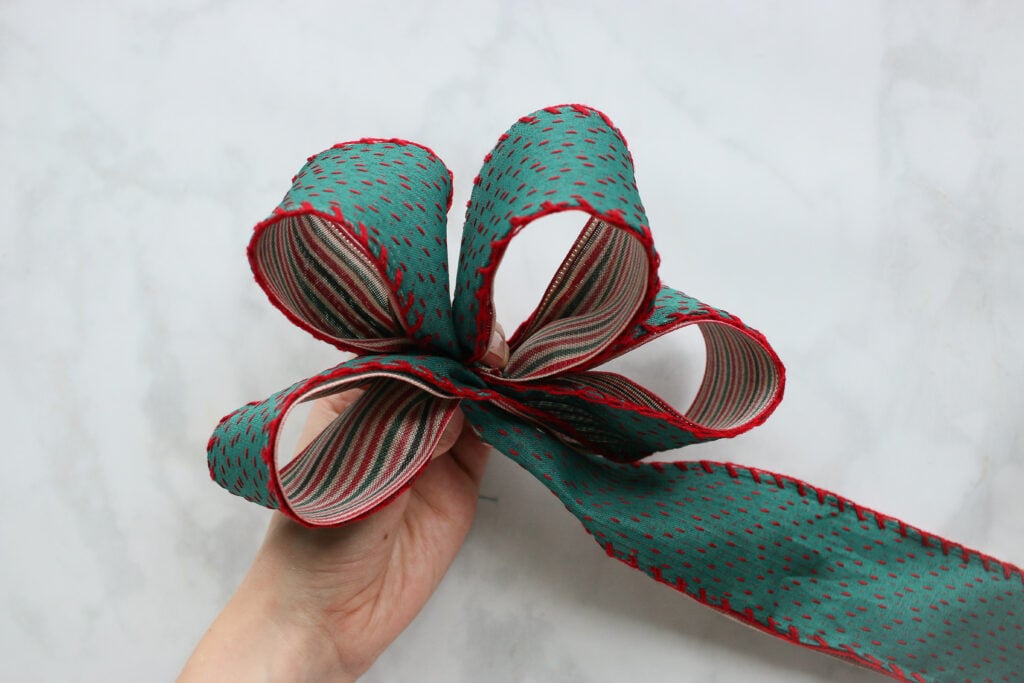
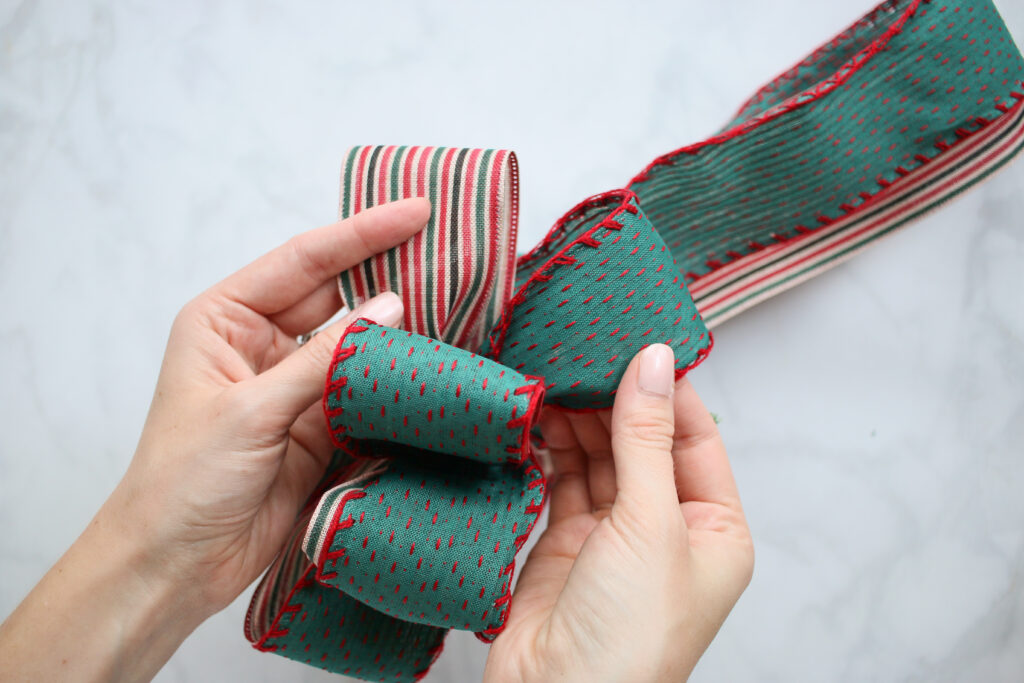
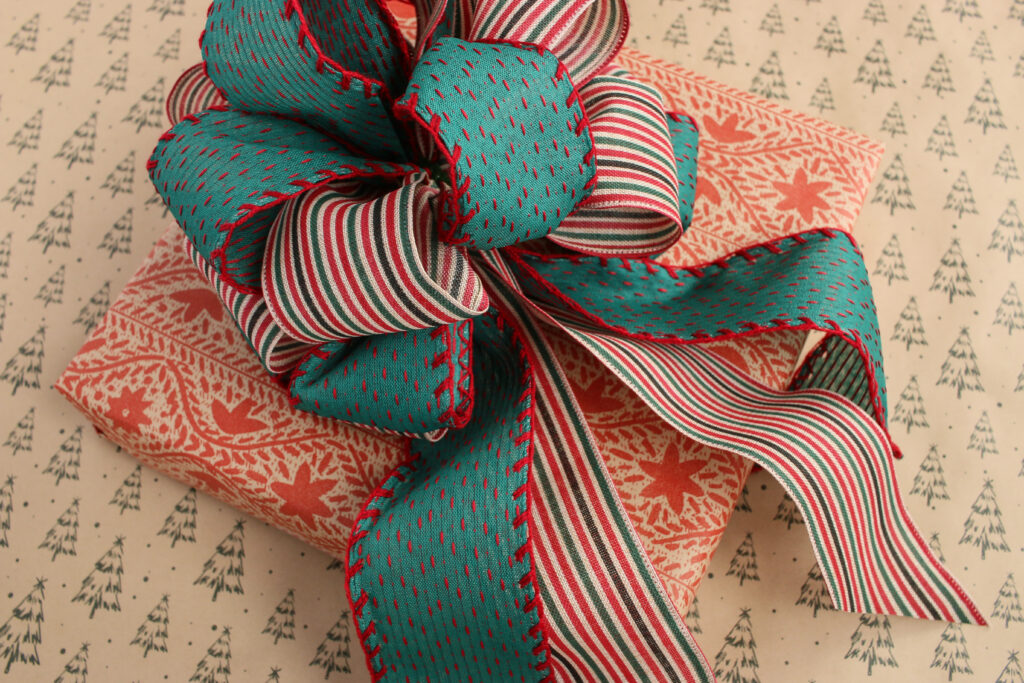
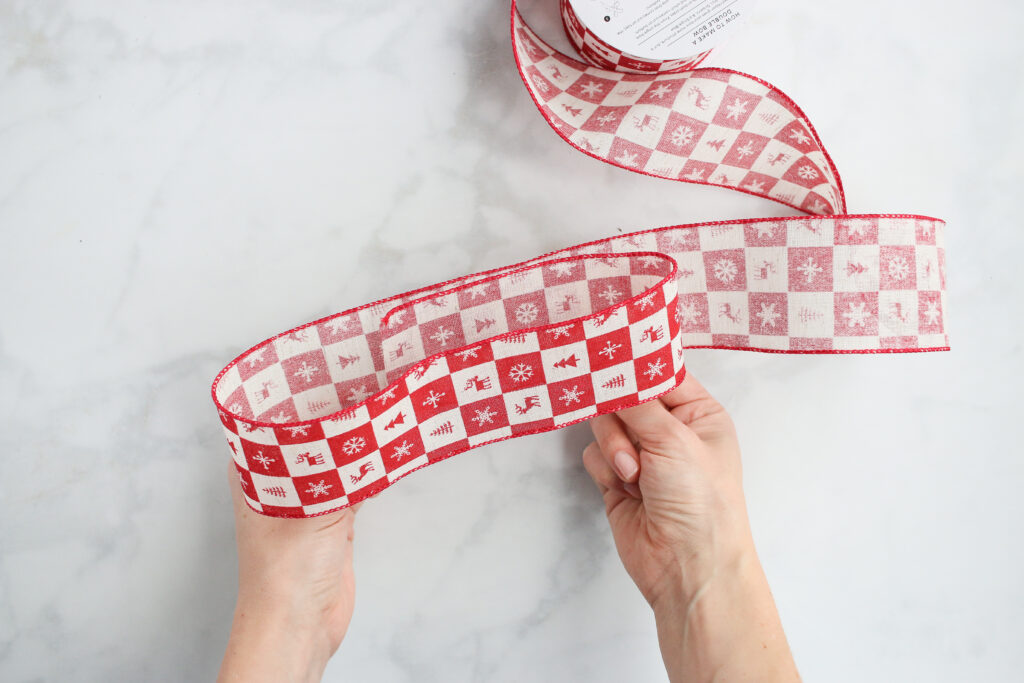
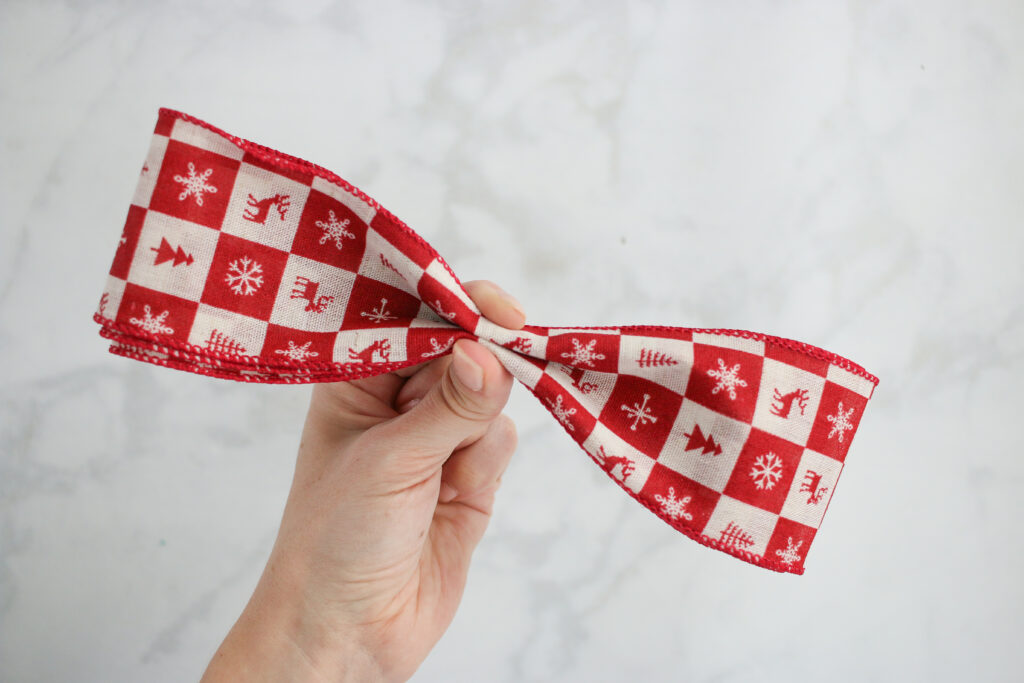
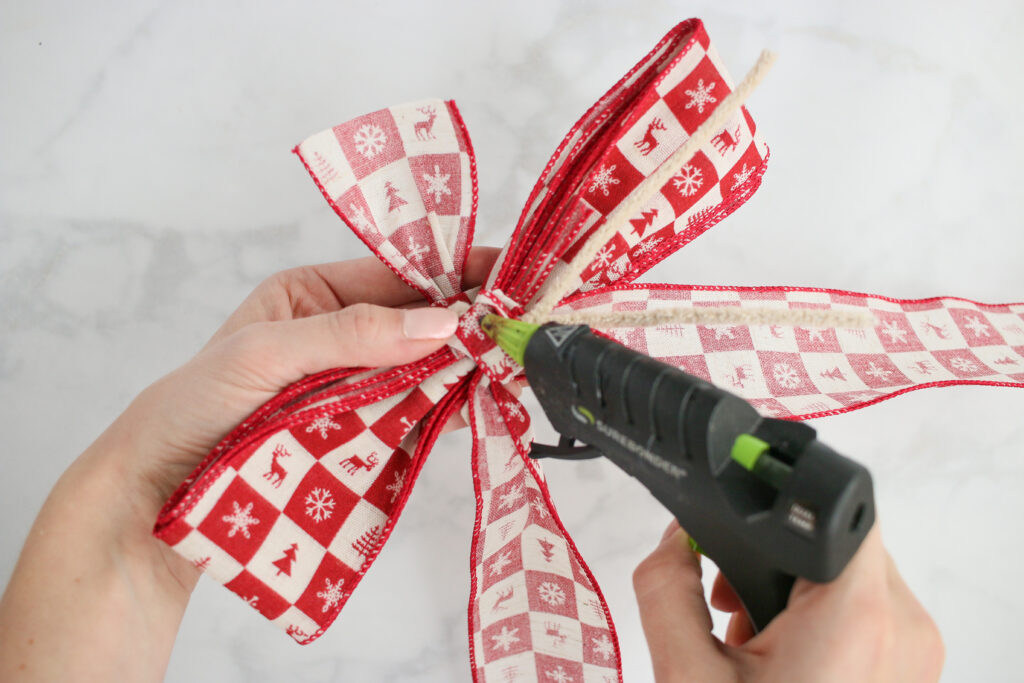
How to Tie a Double Ribbon Loopy Bow, or Christmas Tree Topper Bow
I used two varieties of 2 1/2-inch wired ribbon for this bow.
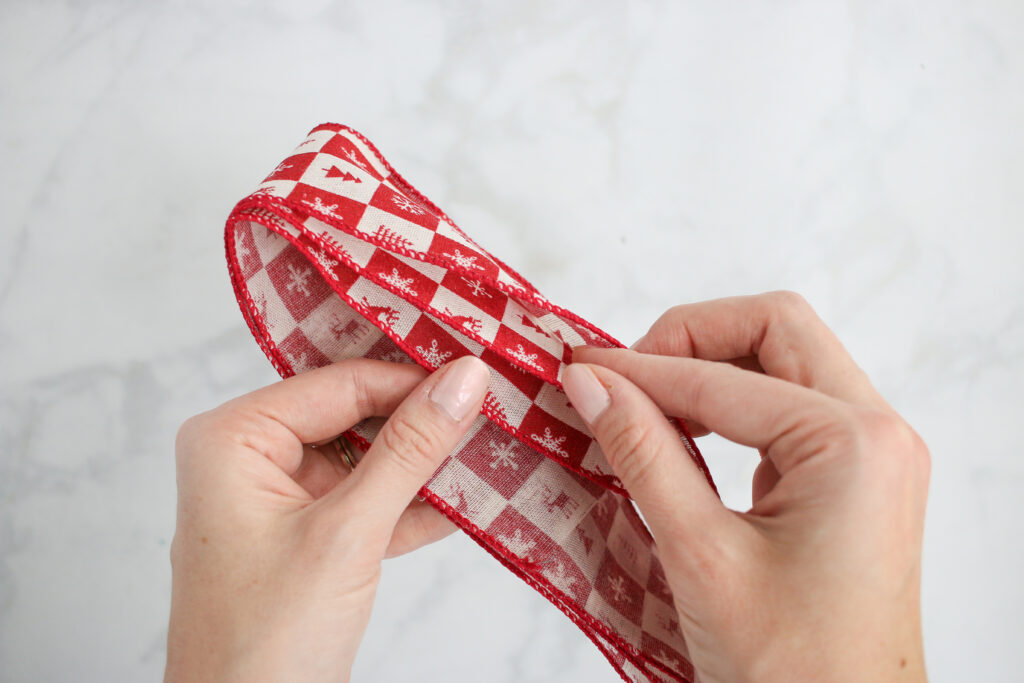
Take your two ribbons, layer them, and treat them as one.
Start by making one loop in your hand, the desired fullness you want all your loops to be.
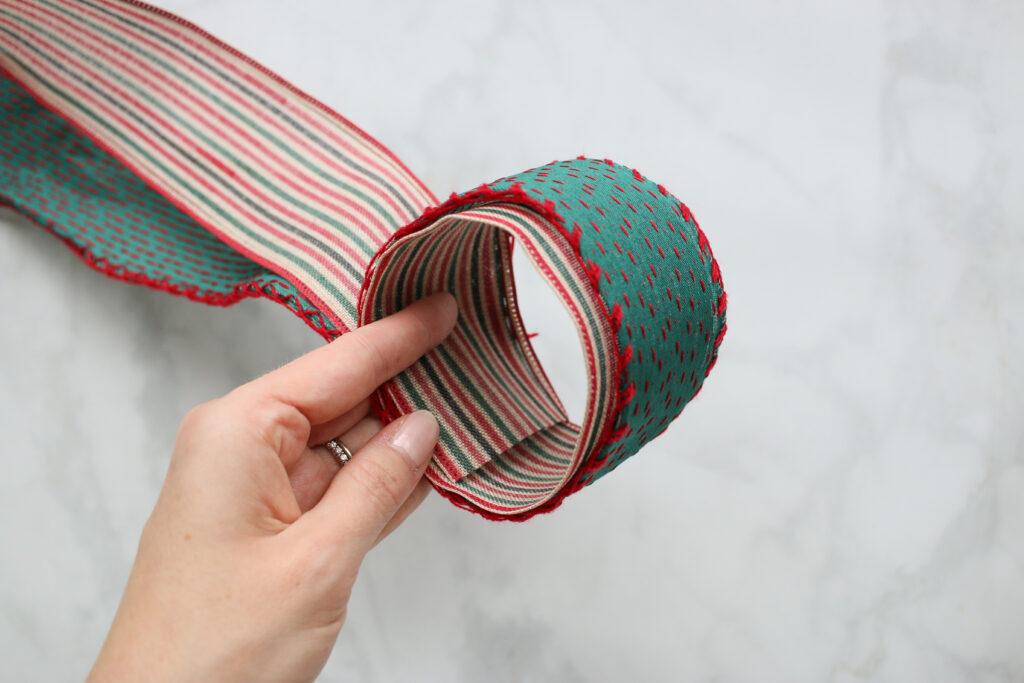
Since these ribbons have one "pretty side" we need to always make sure that the right side is always facing up. So after we make our first loop, we're going to make a little twist in the ribbons so the right side is facing up.
Now create another loop and twist again.

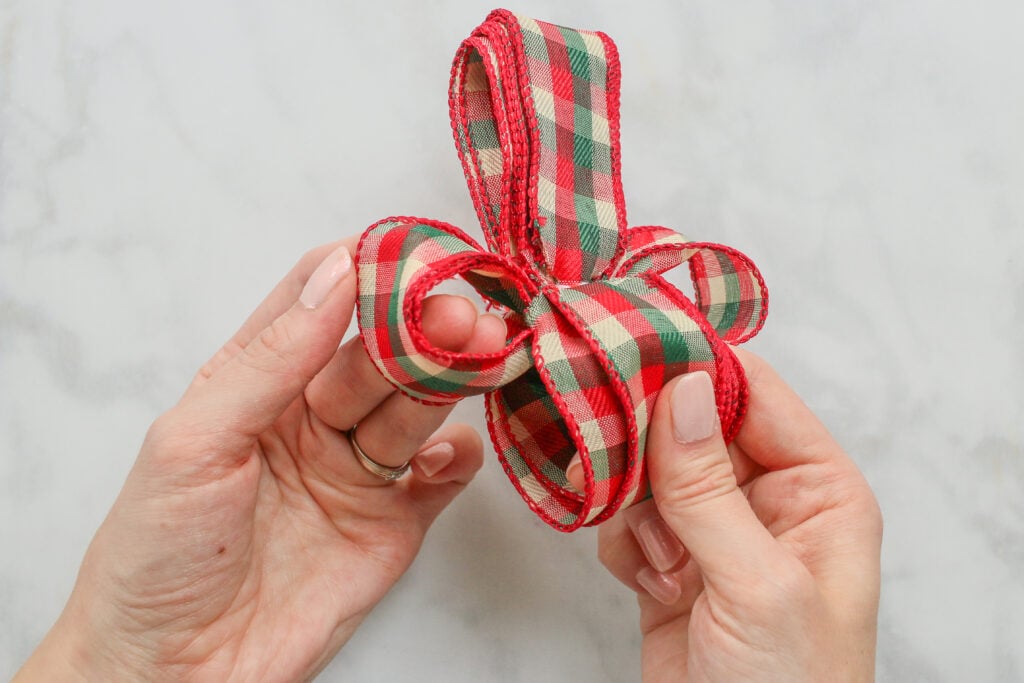
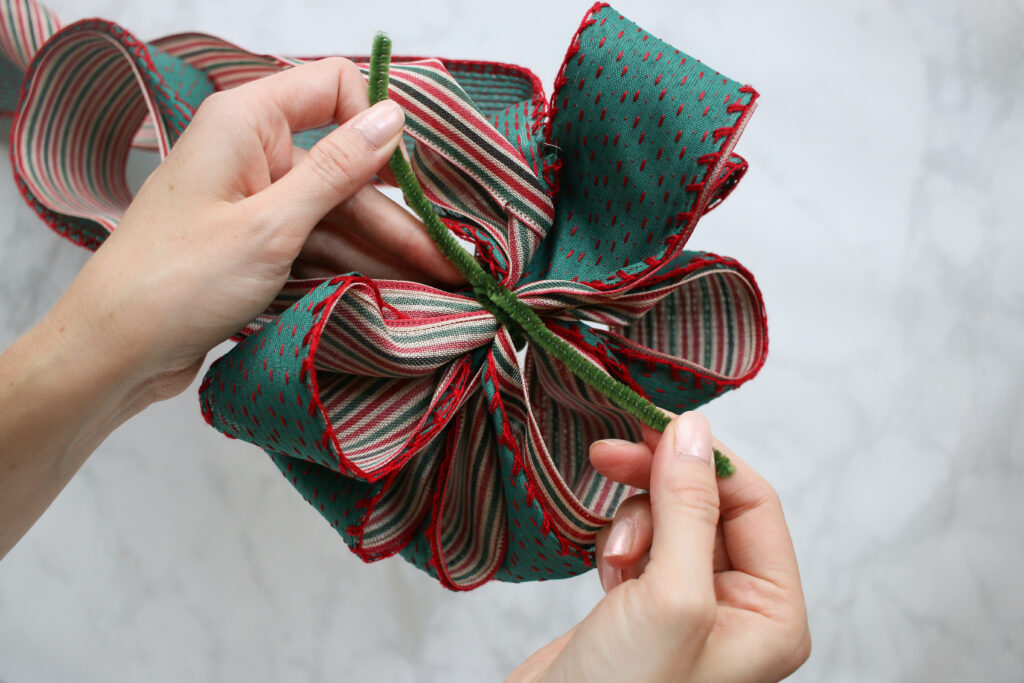
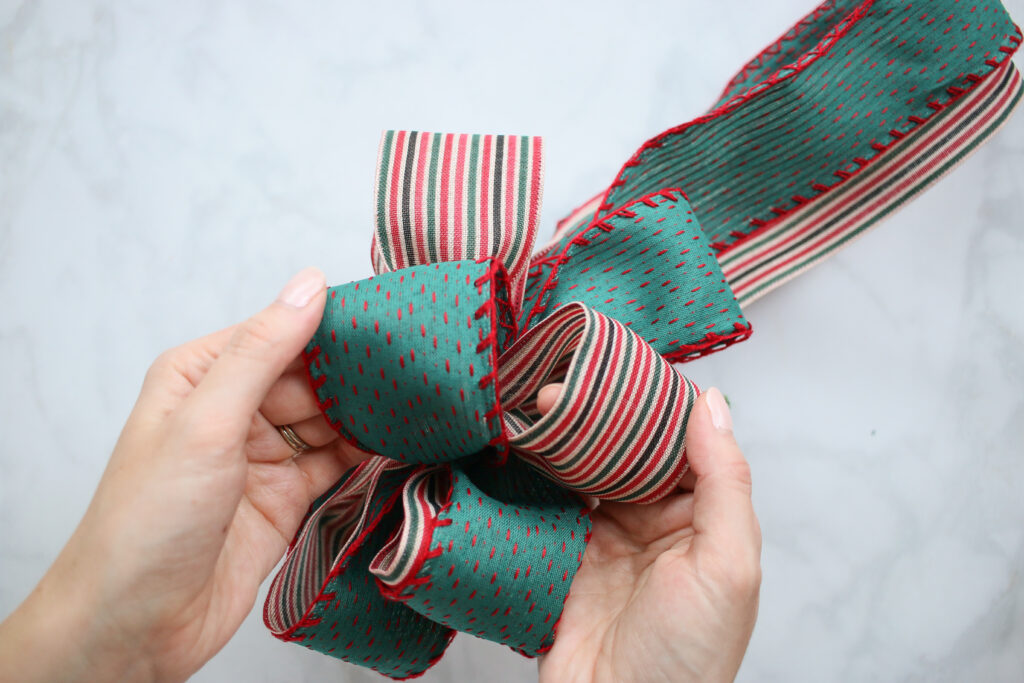
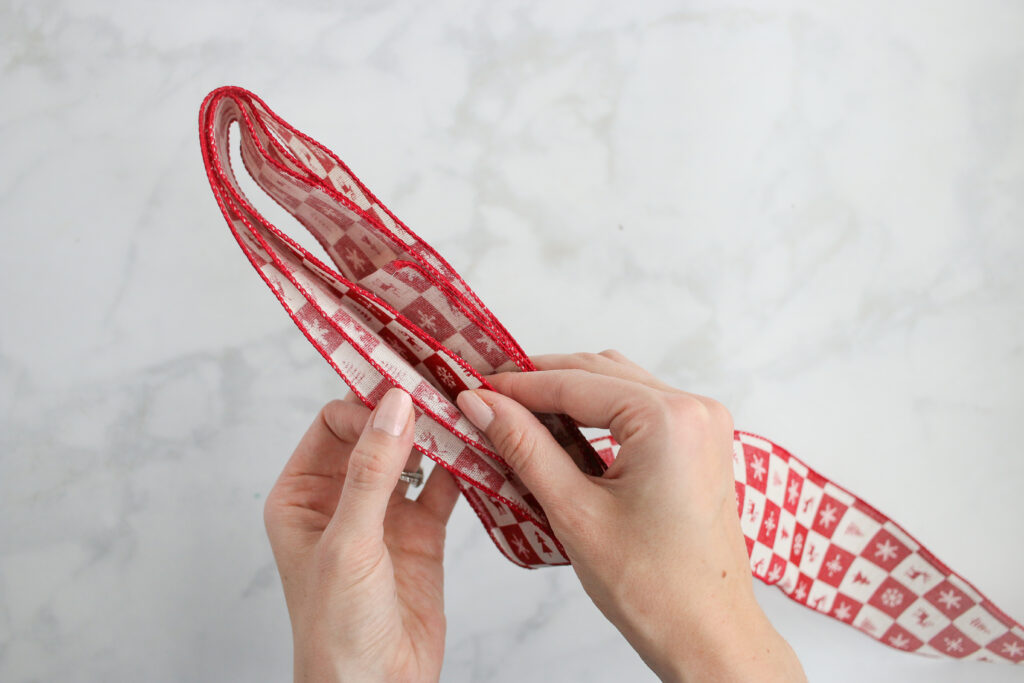
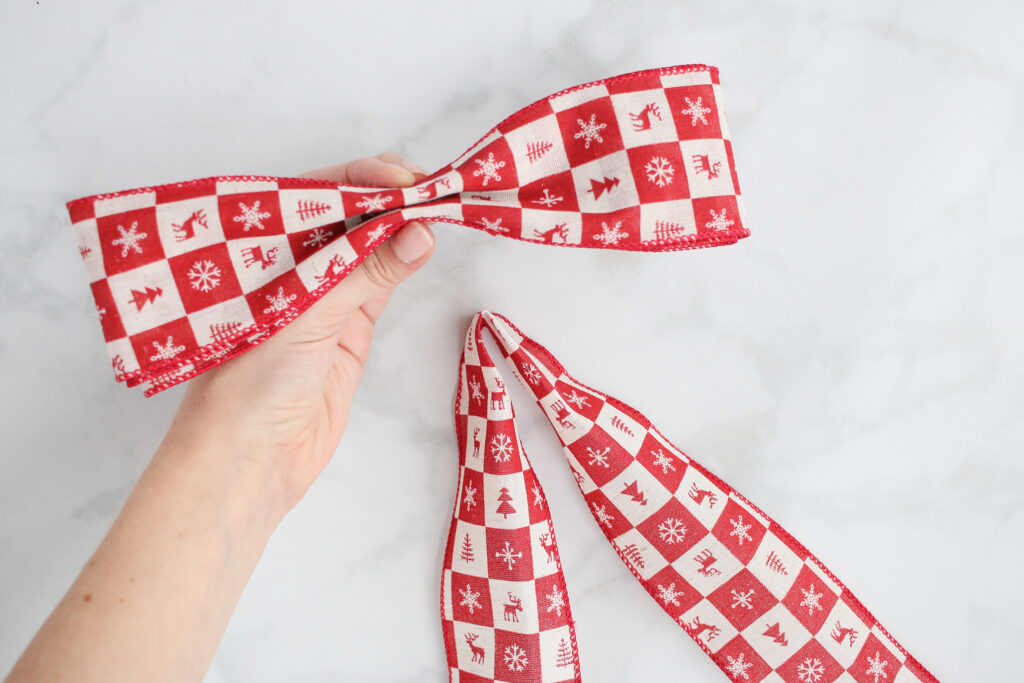
Continue making loops and twisting your ribbon until you have a total of 8 loops, 4 on each side.

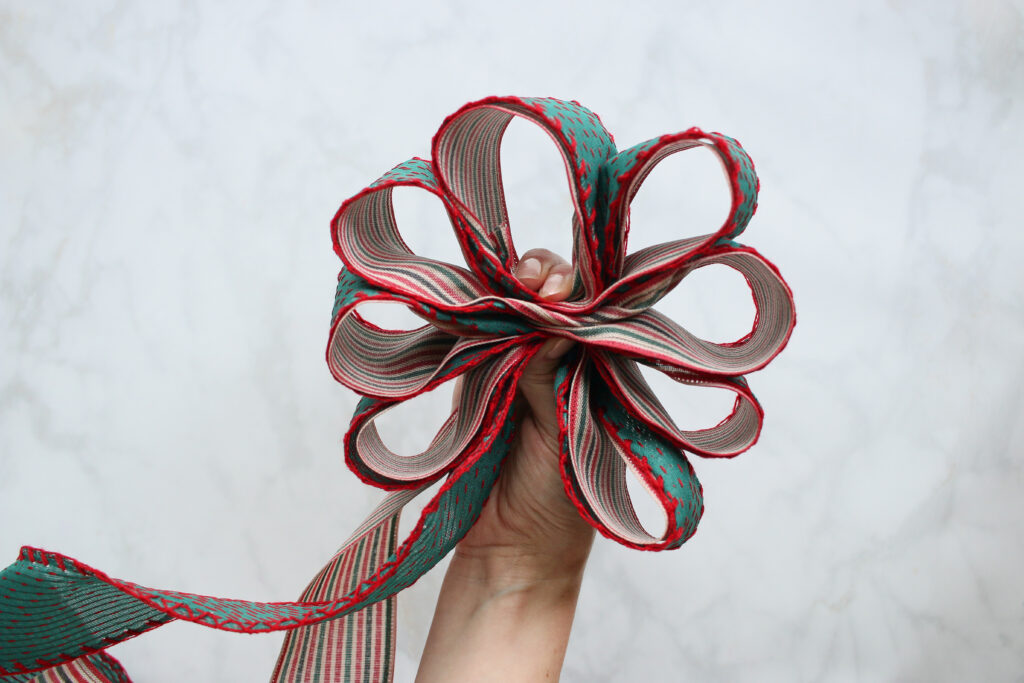
Now make one large loop that will end up being your ribbon tails.
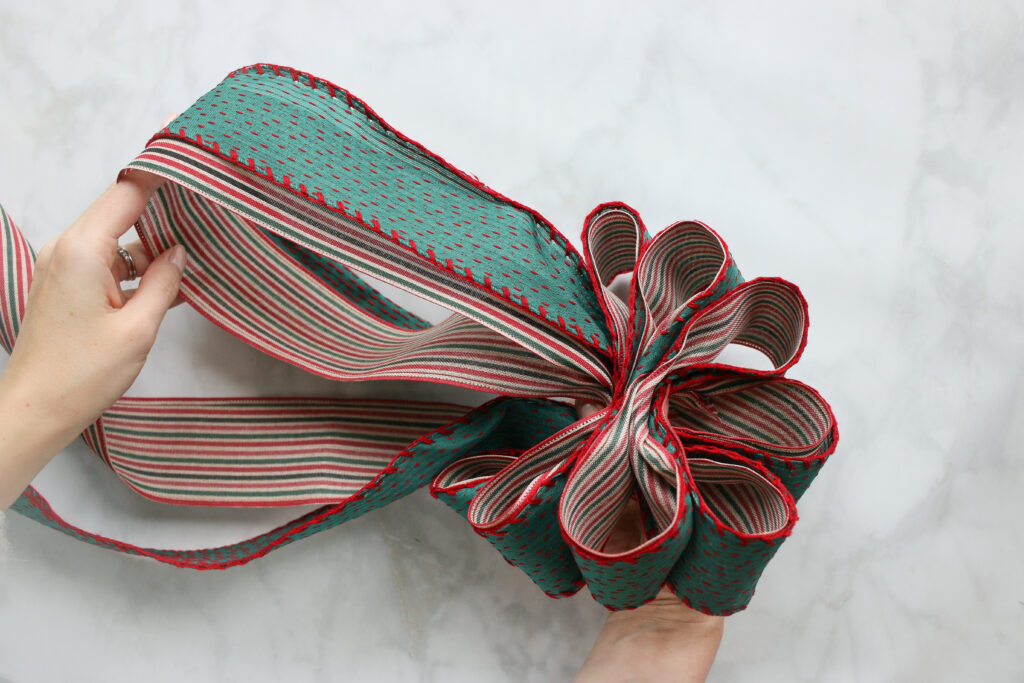
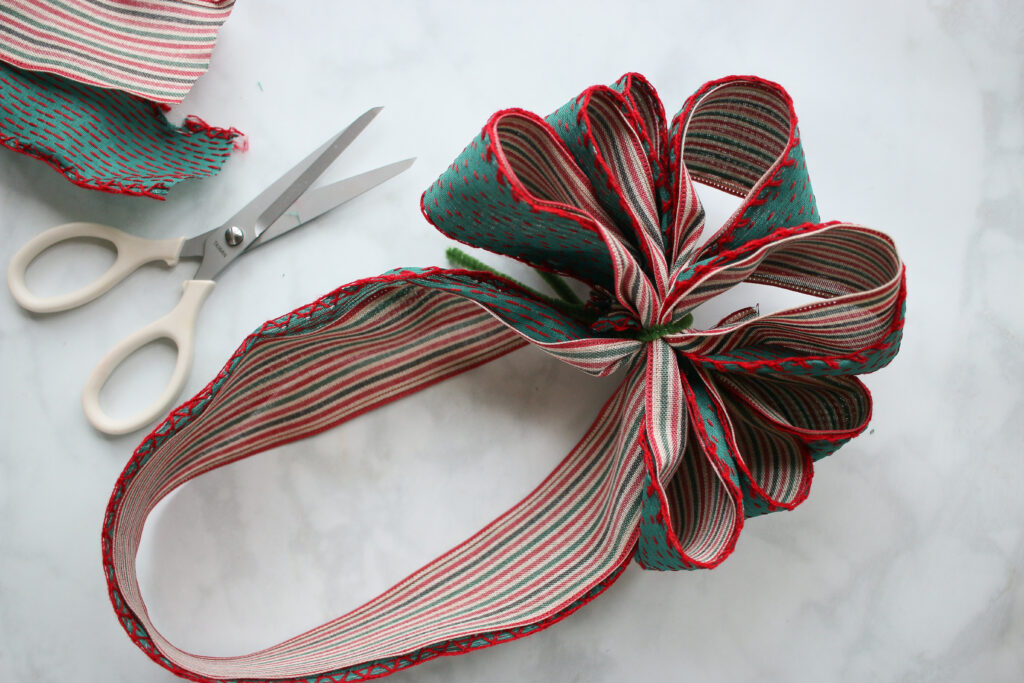
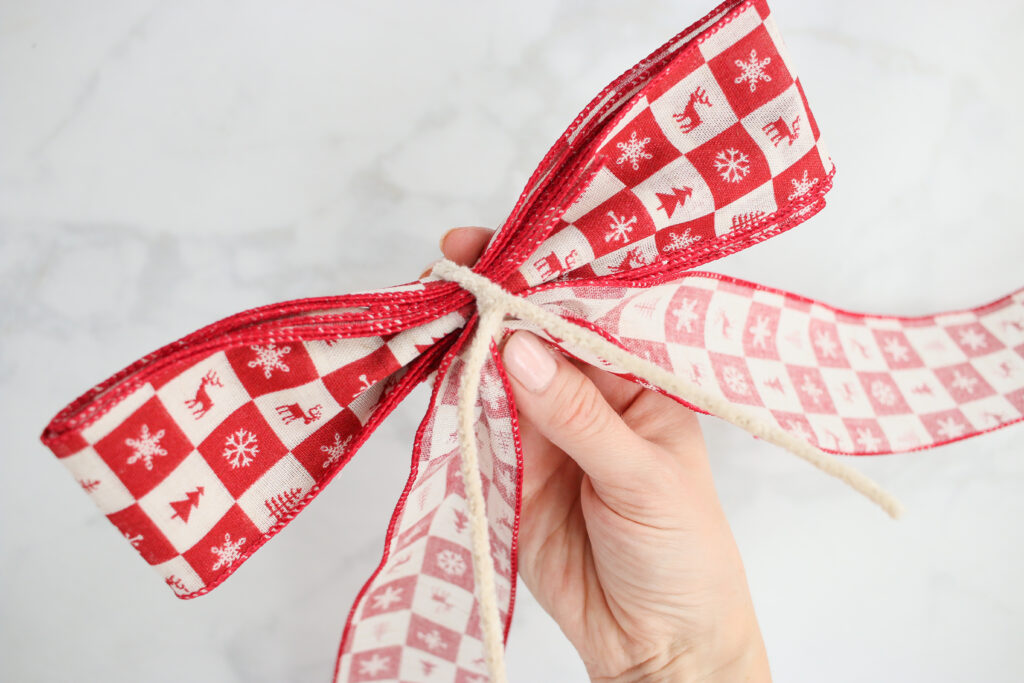
Now use a zip tie or a pipe cleaner to wrap through all your loops and tie tightly.
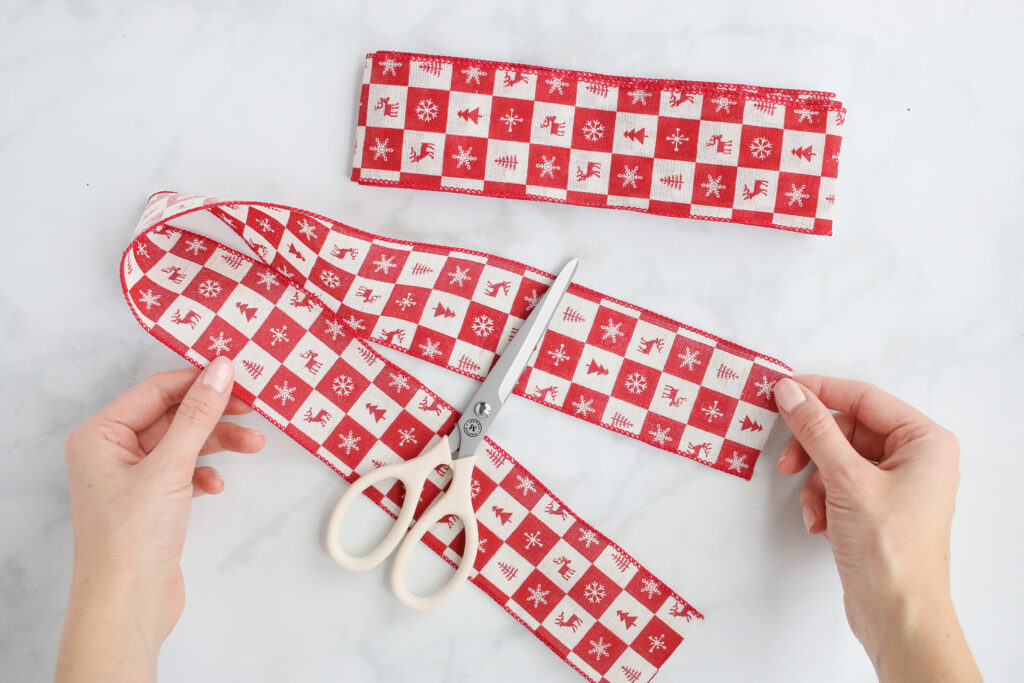
Trim off your excess ribbon of the tails, close to the base of the bow.
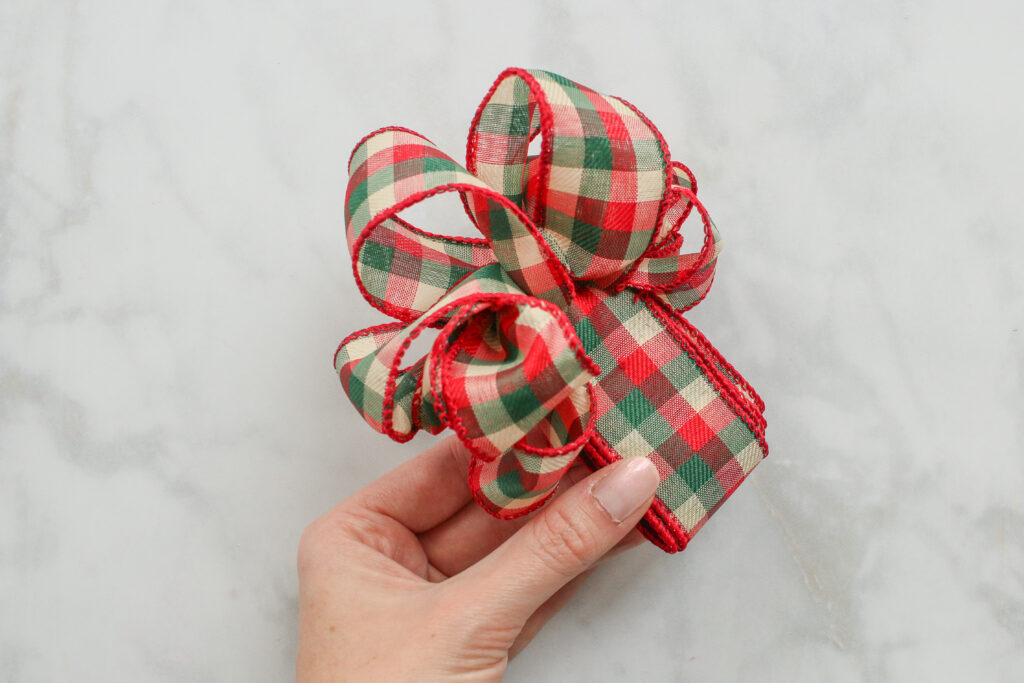
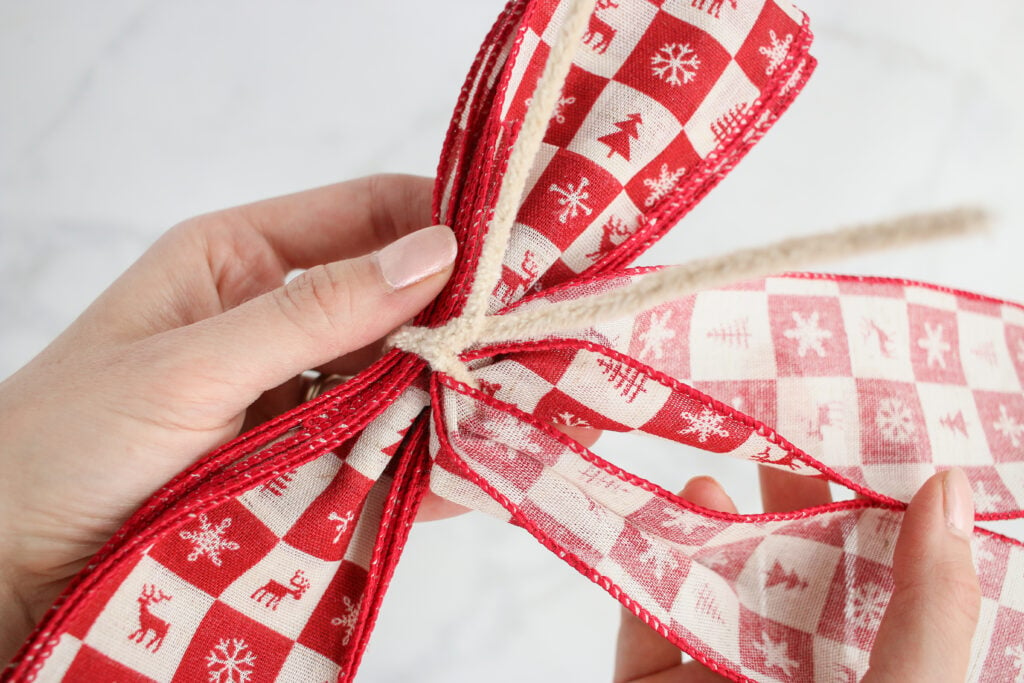
To fluff your bow, we are going to start on the bottom of the bow and separate the two ribbons of each loop. Pull one ribbon loop to the right and the other ribbon loop to the left.
Then with the next loop, do the opposite, so the different patterned ribbons alternate.
Continue separating until all 8 loops are fluffed.
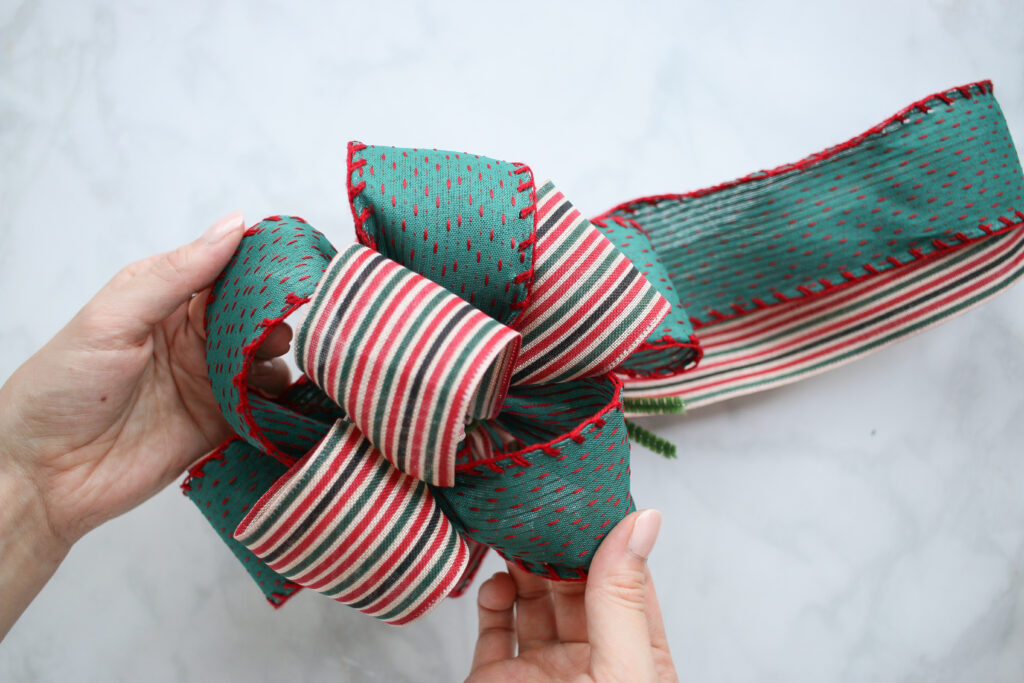
Now cut your large loop in half to create your tails, and then trim the edges at an angle.
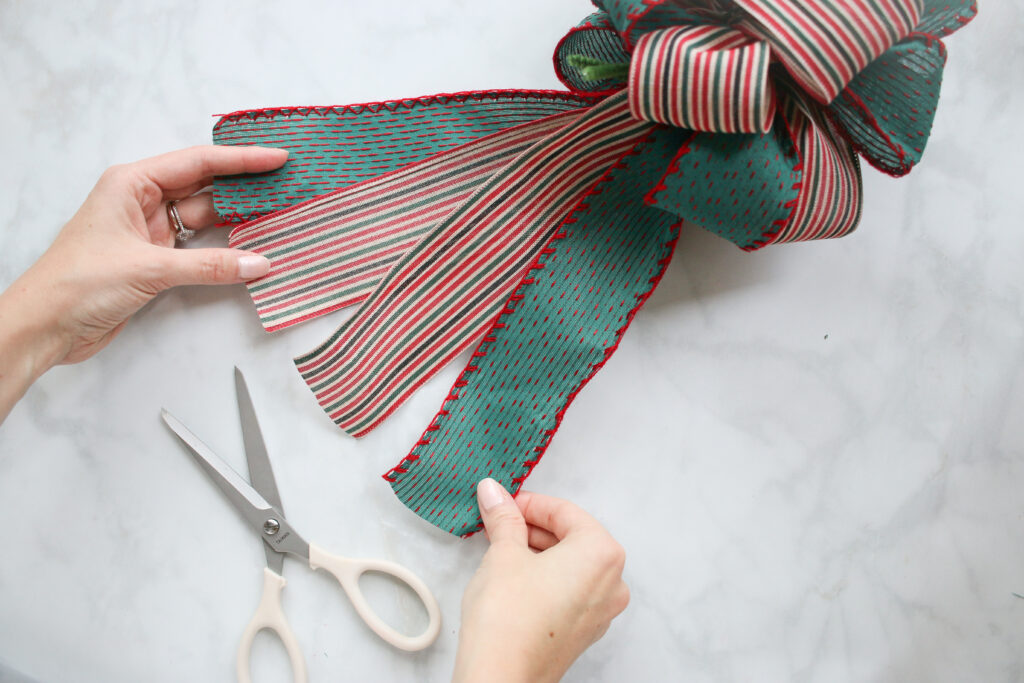
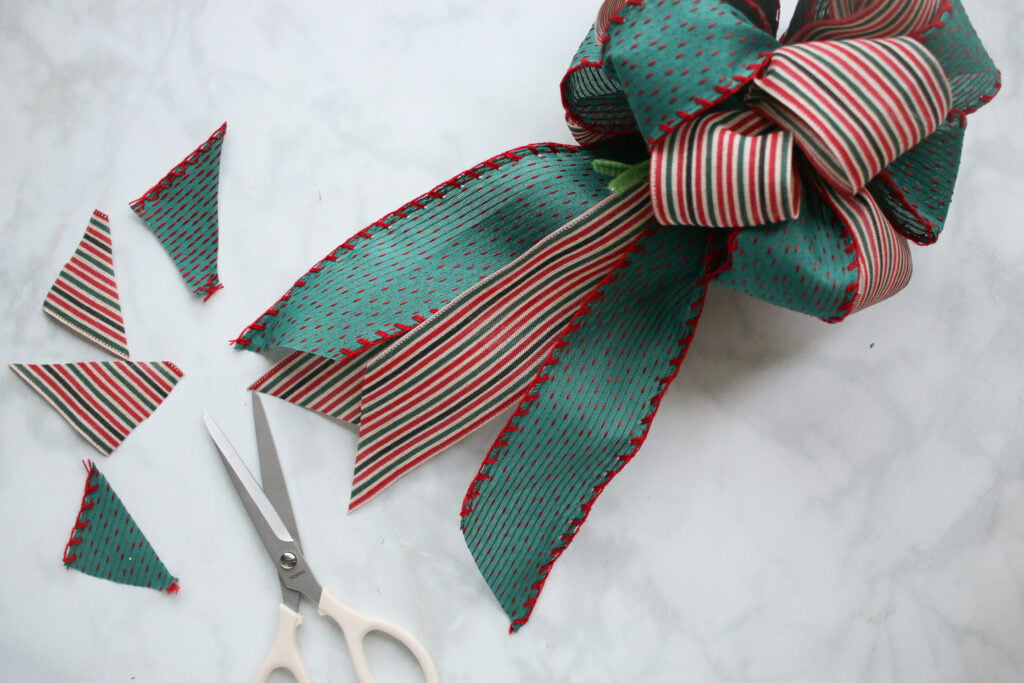
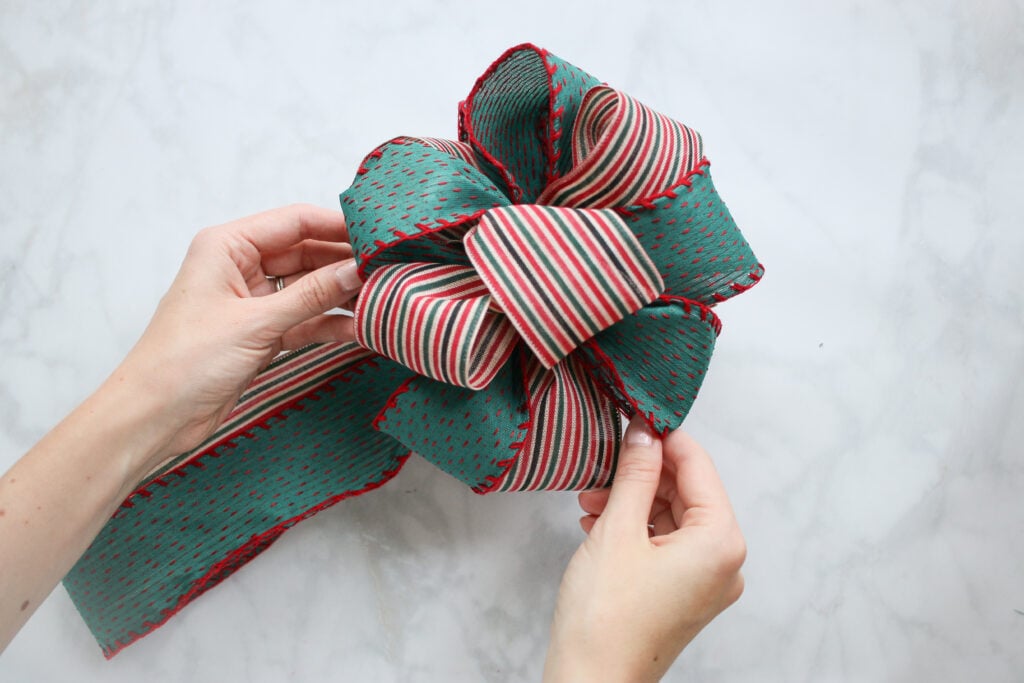
Fluff the bow until you're happy with the finished look.
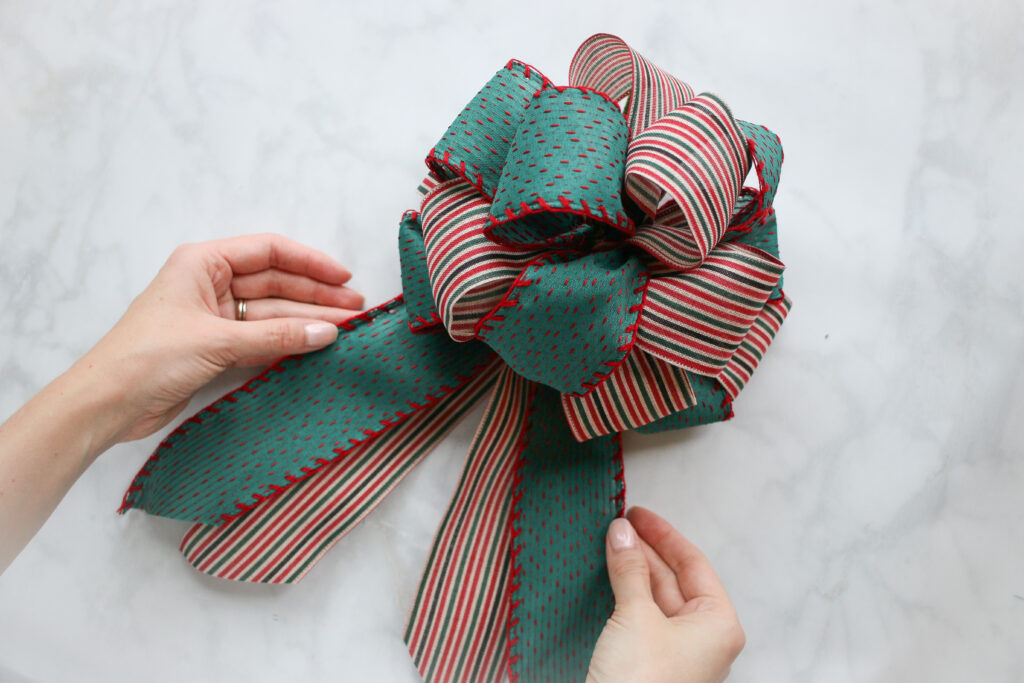
This bow is stunning on a gift, a wreath, or even as a tree topper! If you want to go the route of tree topper, make two of these bows and wire them together to create a more spherical shape.
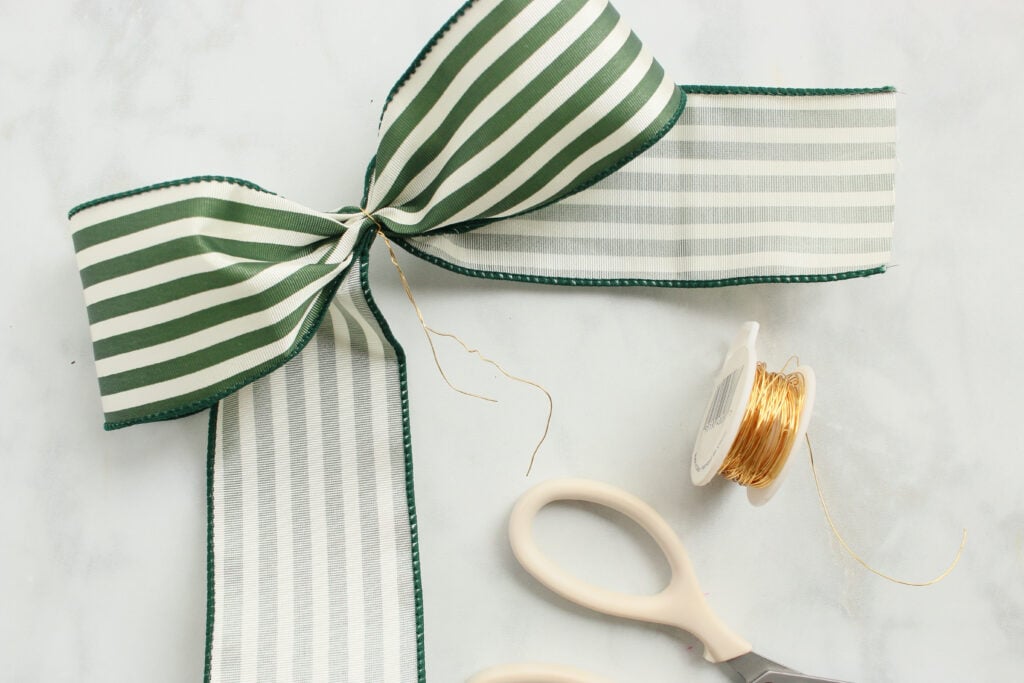
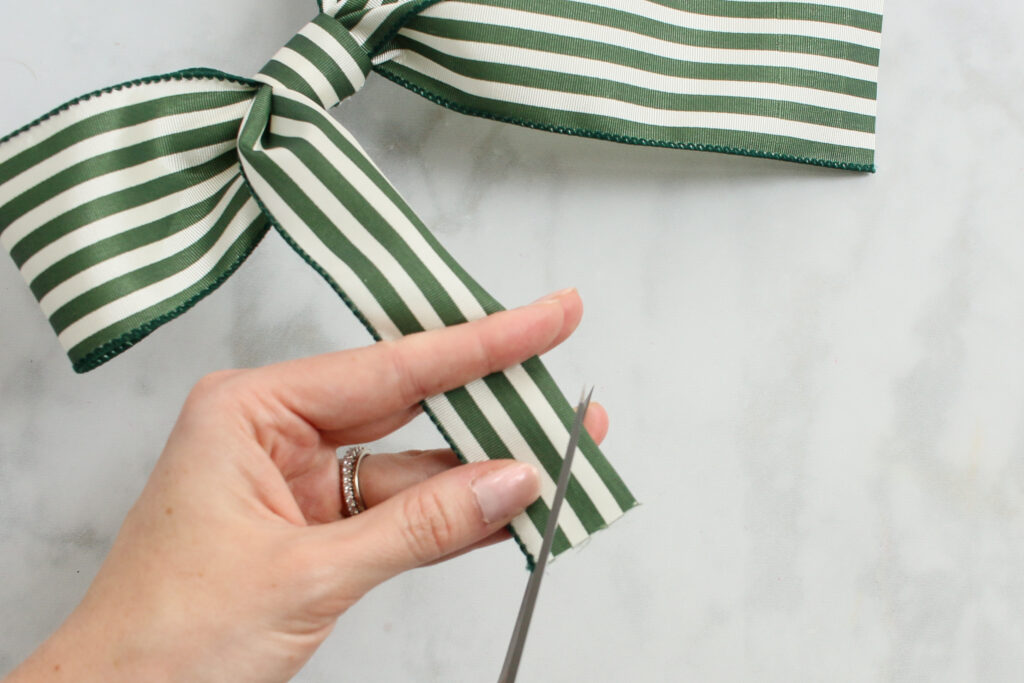
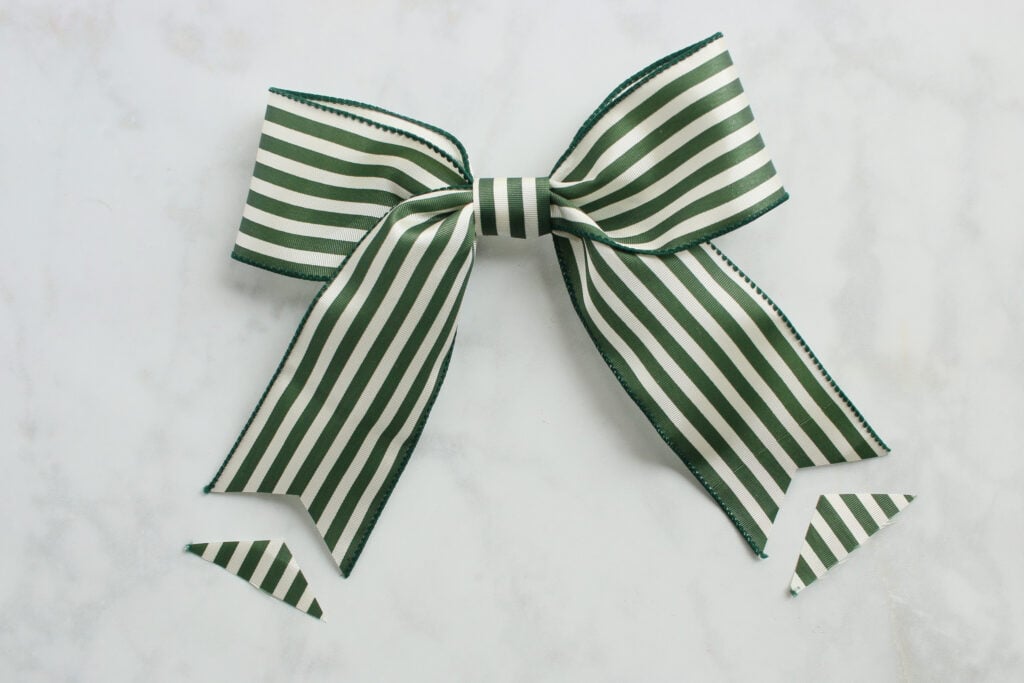
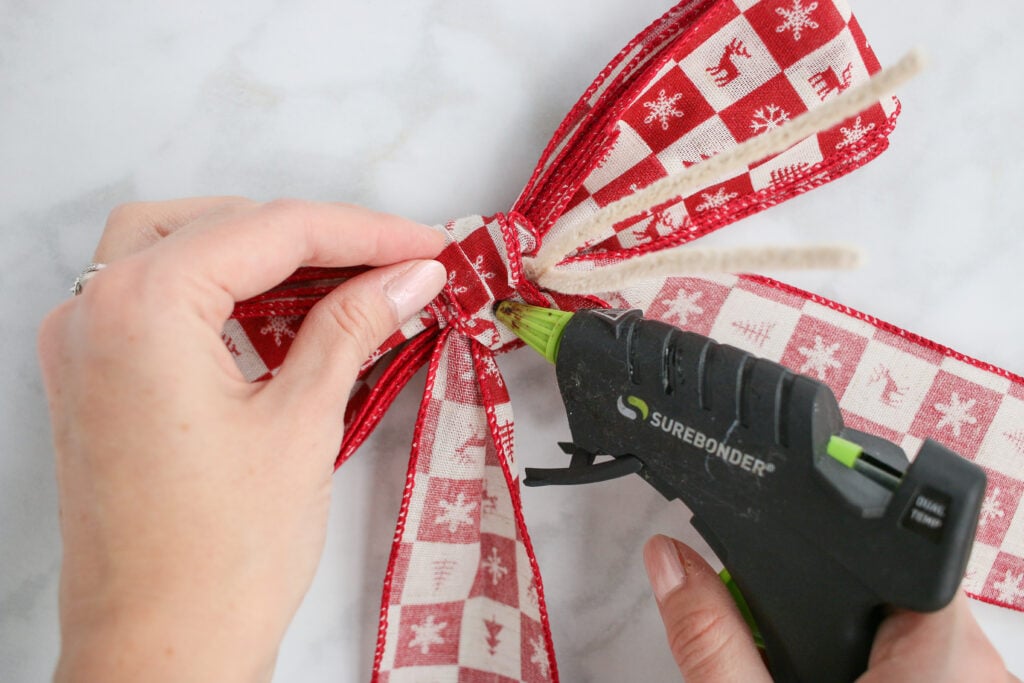
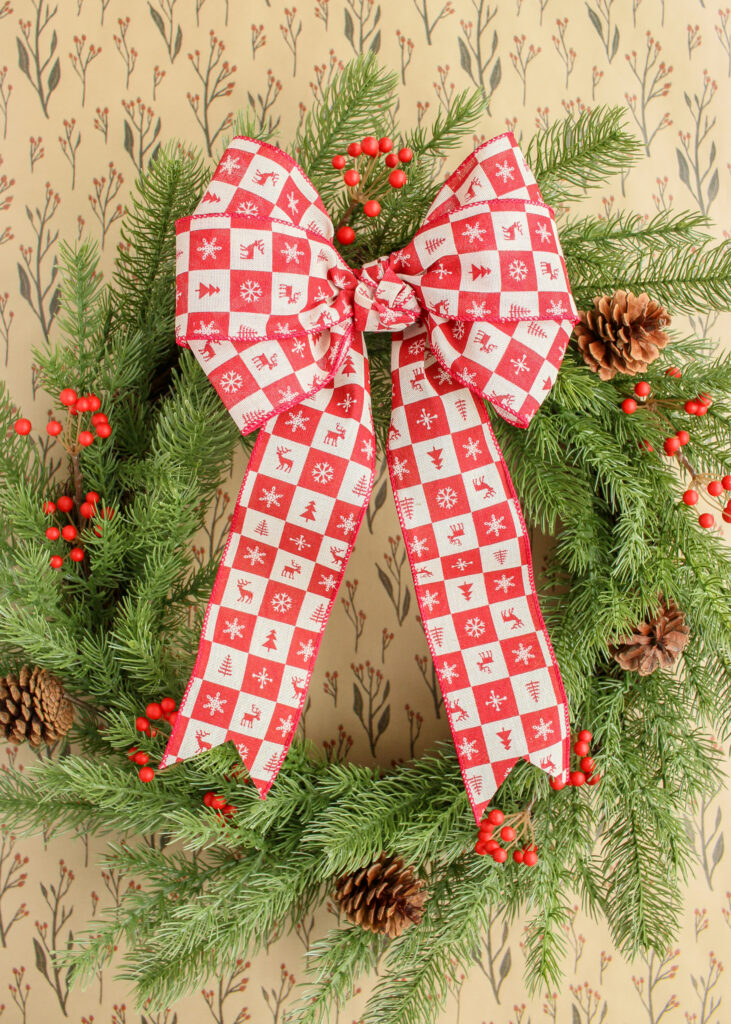
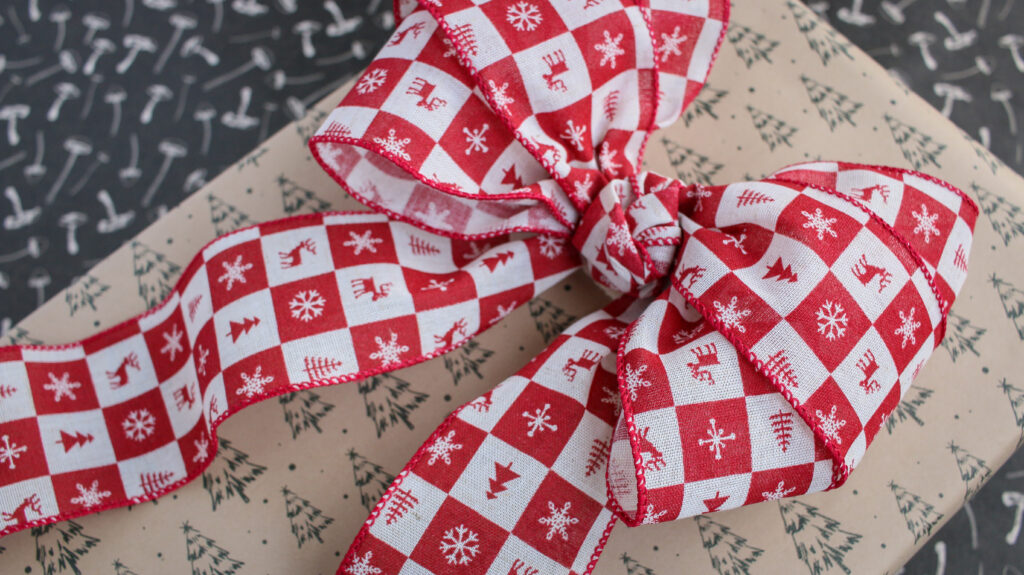
How to Tie a 6-Loop Wired Ribbon Bow
I'm using a 2 1/2-inch wired ribbon for this bow.
Decide how wide you want your bow to be and make one loop that desired diameter.
Now wrap around that loop two more times so you have 3 loops total.
Make sure to start and stop the ribbon loops a little before the center starts and a little after to finish, so that when you make your bow, your ribbon ends will stay secured in the center and your loops won't come undone.
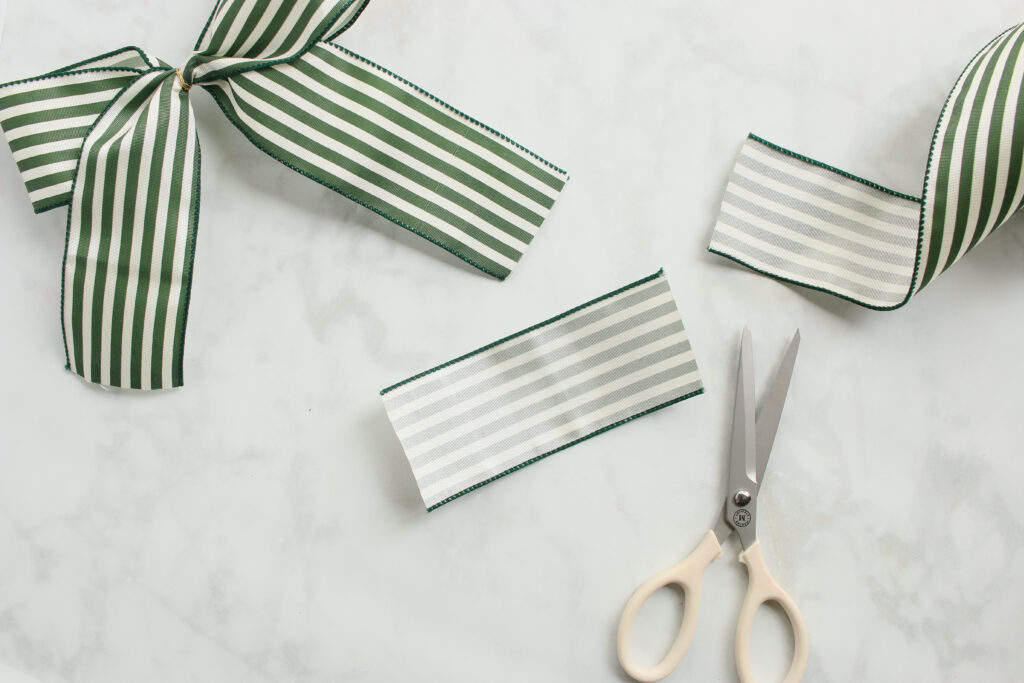
For your ribbon tails, fold a piece of ribbon in half just longer than your desired finish length, and cut.
Pinch the center of your bow. Depending on the thickness of your ribbon, you can make a pretty pleat or just gather it easily.
Now pinch the center of your folded ribbon tails and hold it to the back of your pinched bow.
Now use a piece of wire to secure everything together tightly. Trim wire.
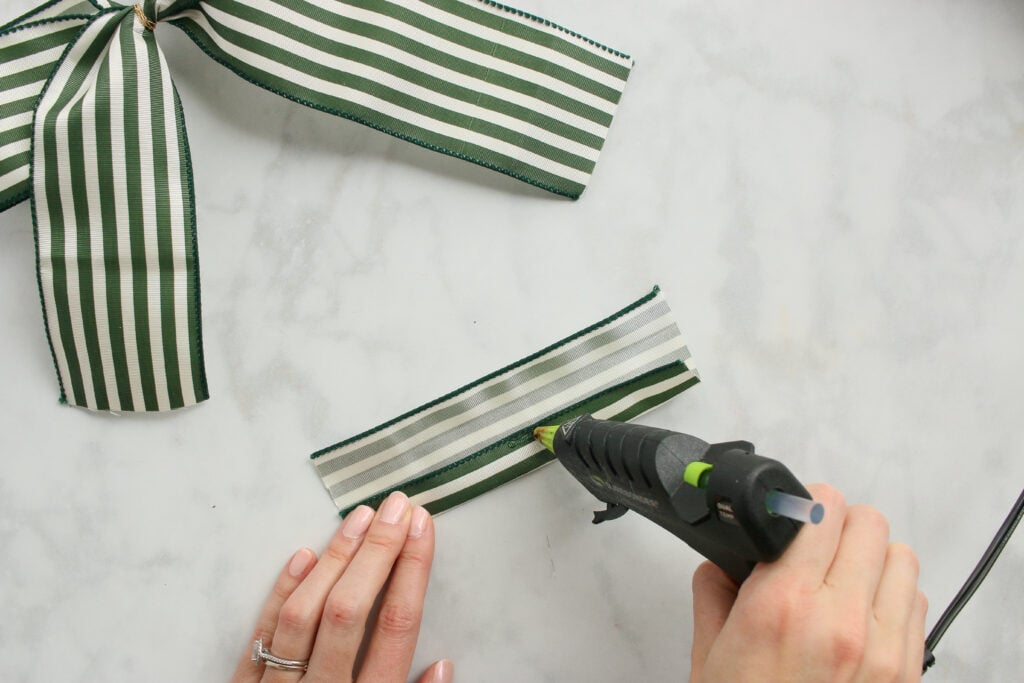
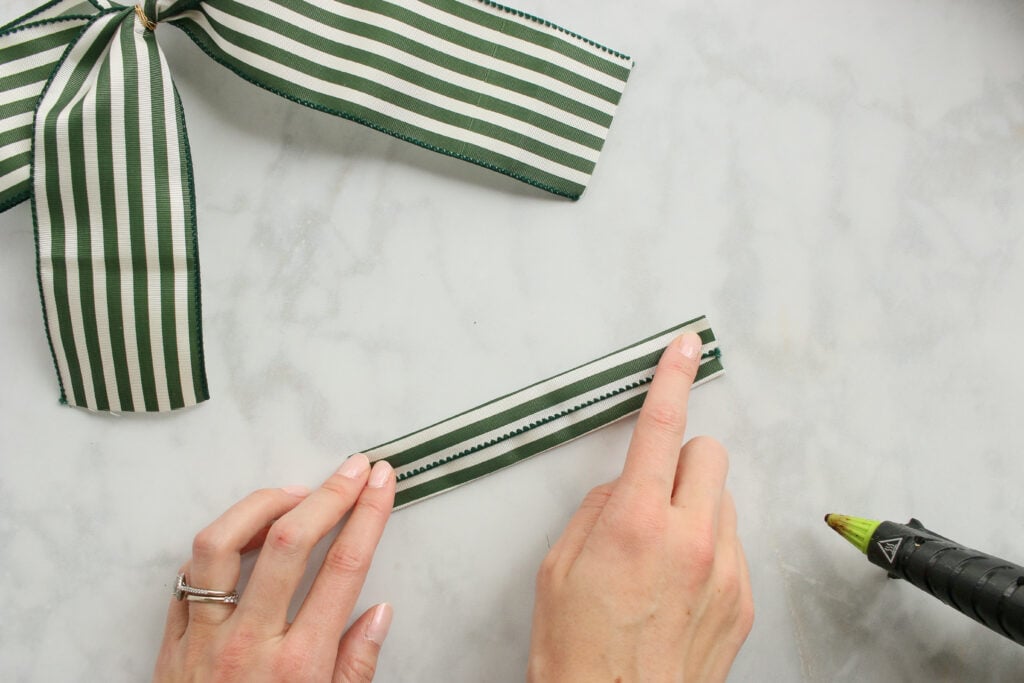
For the center of the bow, take a shorter piece of ribbon and tie a knot in the middle.
Wrap it around the center of the loops and through the tails and secure it with glue.
Now working on one side of the bow, pull apart the inner loops, one to the left and one to the right, leaving the top loop in the center.
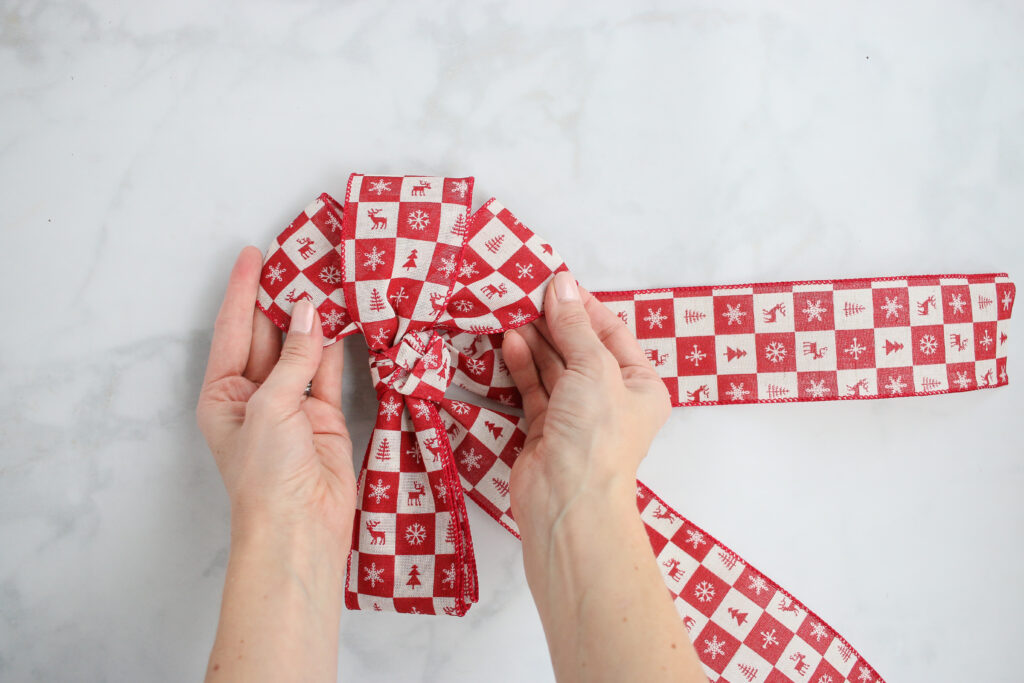
Repeat this for the other side of the bow, and fluff the loops.
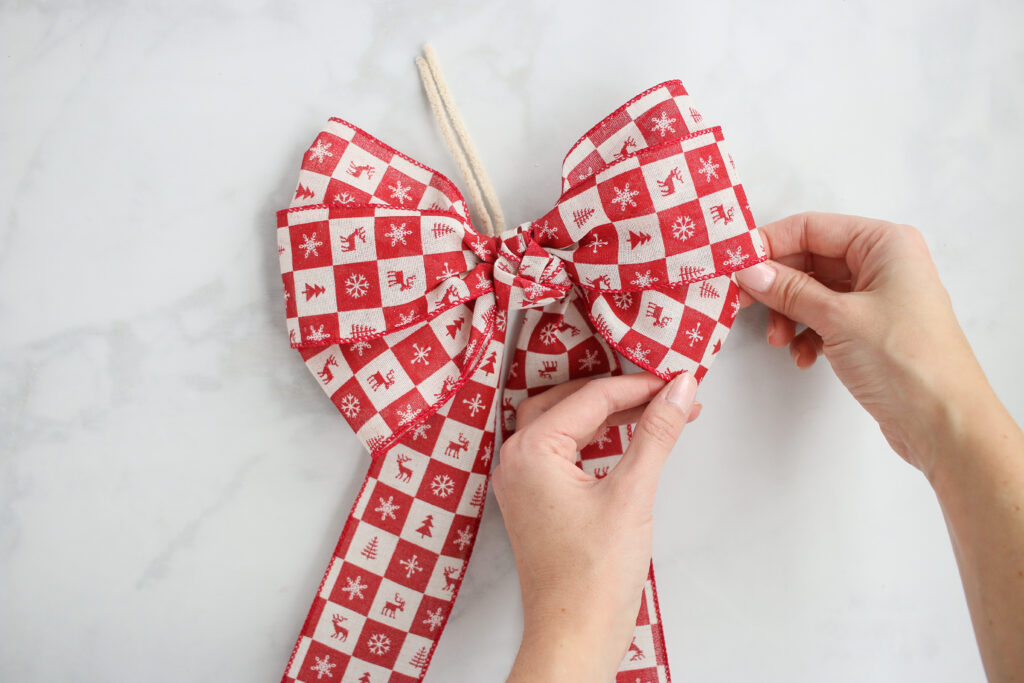
Now you can use the pipe cleaner tails to secure your bow to a wreath or to a gift!
You've officially made it all the way through Sweet Red Poppy's 7 Bows of Christmas!
Which bow tutorial was your favorite and which ones are you planning to feature under the tree this holiday season?
If you try any of these bows, please let me know!
Do you have any other varieties of bows I should try or share a tutorial for?
Click here if you want to make more Christmas crafts.
Join my crafting Facebook group where you can show us what you’re making, ask questions, and learn from others!
Don't want to forget about this project? Be sure to pin it on Pinterest by clicking HERE!
Learn How to Tie a Perfect Bow with Ribbon - Seven Different Ways - Free Printable Guide
Beautiful! Thanks for sharing your talents!!
Hi I just downloaded it again to check and it worked fine for me.
When you click the link, you are taken to a new page and you are prompted to enter your name and email address and you will be sent an email with the download attached to it.
Unfortunately, I'm not sure as to why this is happening to you.
Did I miss the tutorial for the giant front door bow?