Create beautiful Cricut leather earrings with your Cricut Machine and the Deep Cut Blade with this simple step-by-step photo and video tutorial.
Head to the end of this post for all of my tips and tricks for working with faux leather, and canvas sheets.

Recently, I fell in love with a set of leather earrings. During my weekly trip to JOANN, I spotted the new Cricut Textured Metallic Vinyl and all three colors magically hopped into my cart. Ever have that happened to you? 😉
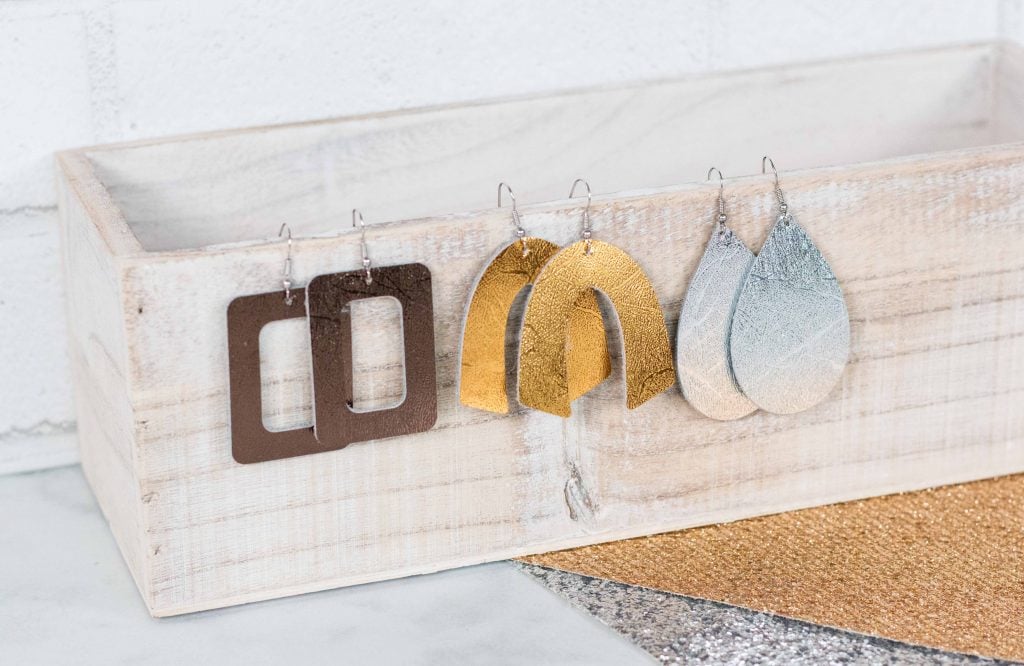
I figured out I could make my earrings for a fraction of the price and have enough left over to give as gifts to friends. I grabbed some Cricut Metallic Leather to use as the base and headed over to the jewelry aisle to grab earrings and a pair of needle-nose pliers.
This project is so easy to make and the results are stunning! Every time, I wear my earrings in public I get questioned on where I purchased them!
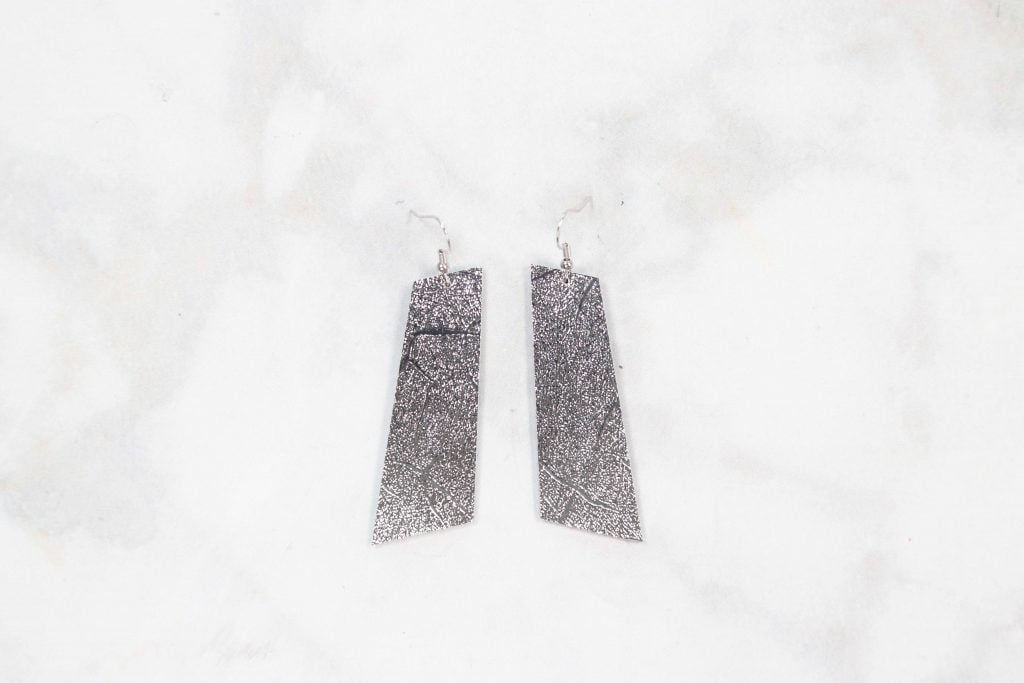
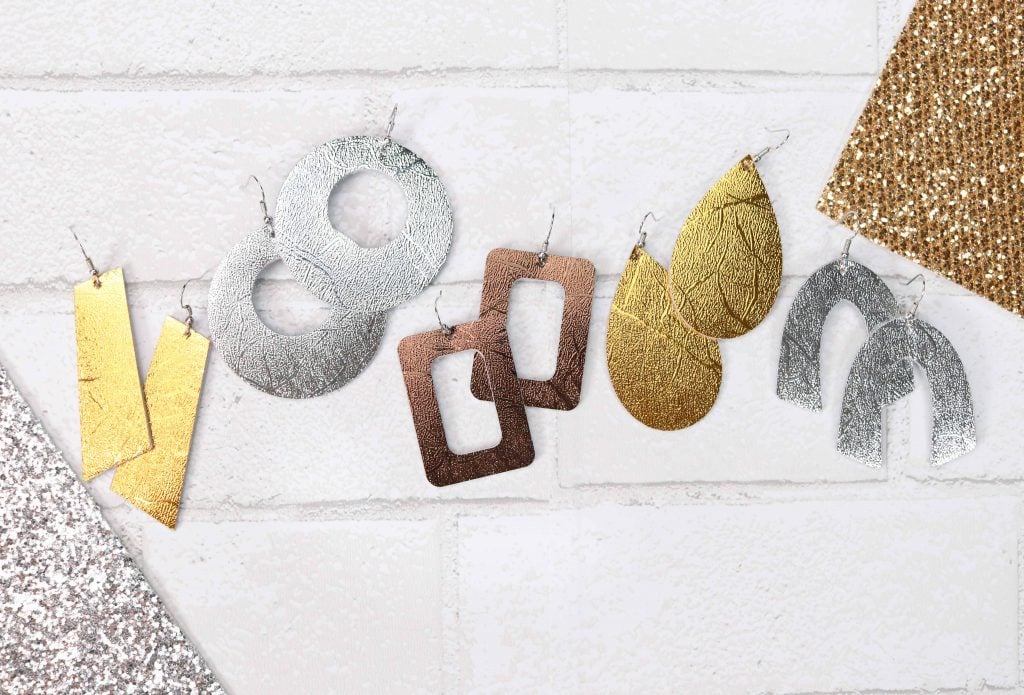
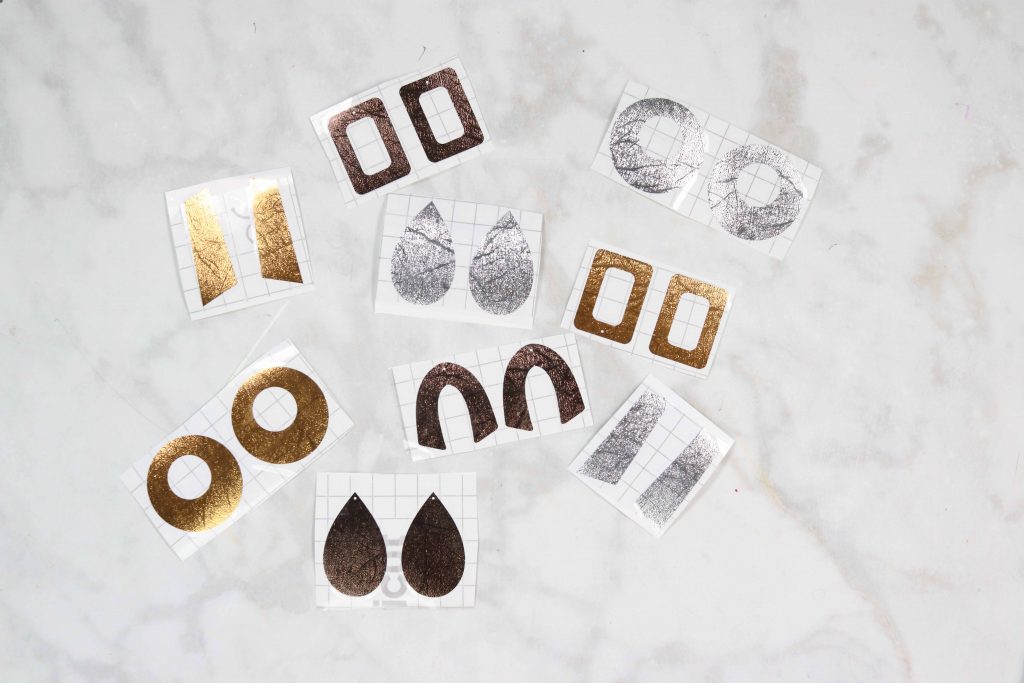
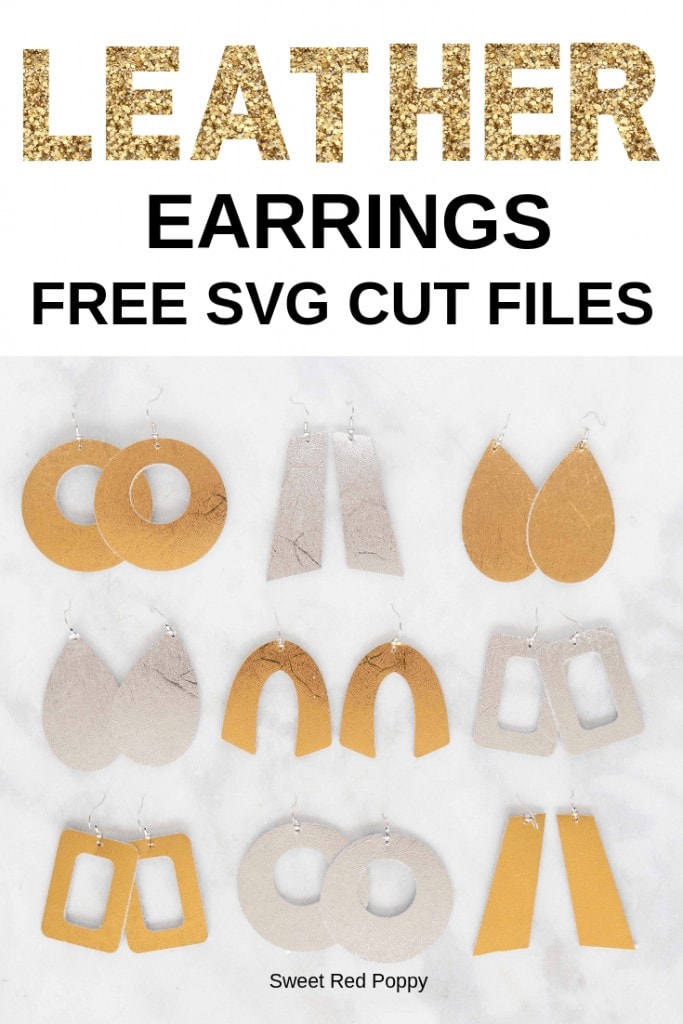
Today I’m sharing five different designs so you can make a variety of different shapes depending on your own personal style! Download the SVG files and use them with any brand of cutting machine.
Table of Contents
Leather Earring Supplies
- Cricut Maker
- Deep Cut Blade
- Cricut Metallic Leather-Similar
- Cricut Textured Metallic Vinyl
- Purple Strong Grip Mat
- Green Standard Grip Mat
- Cricut Transfer Tape
- Scissors
- Earrings
- Needle Nose Pliers
- Awl
- Weeding Tool
Download the FREE SVG Files Here!
Watch the video below.
How to Make Leather Earrings with a Cricut
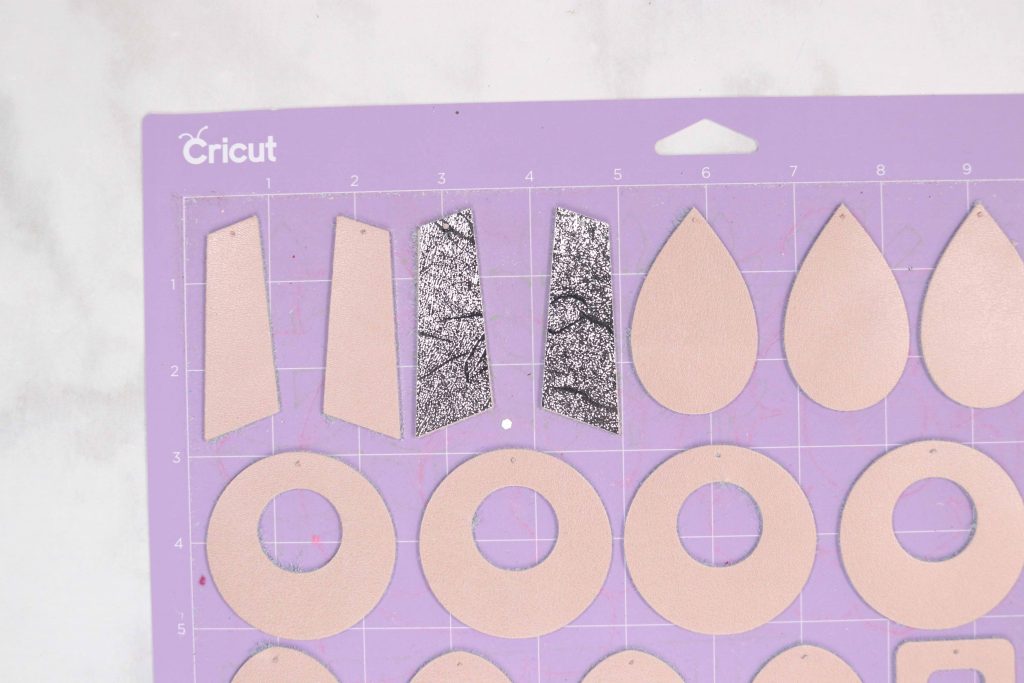
Cut out Leather and Vinyl
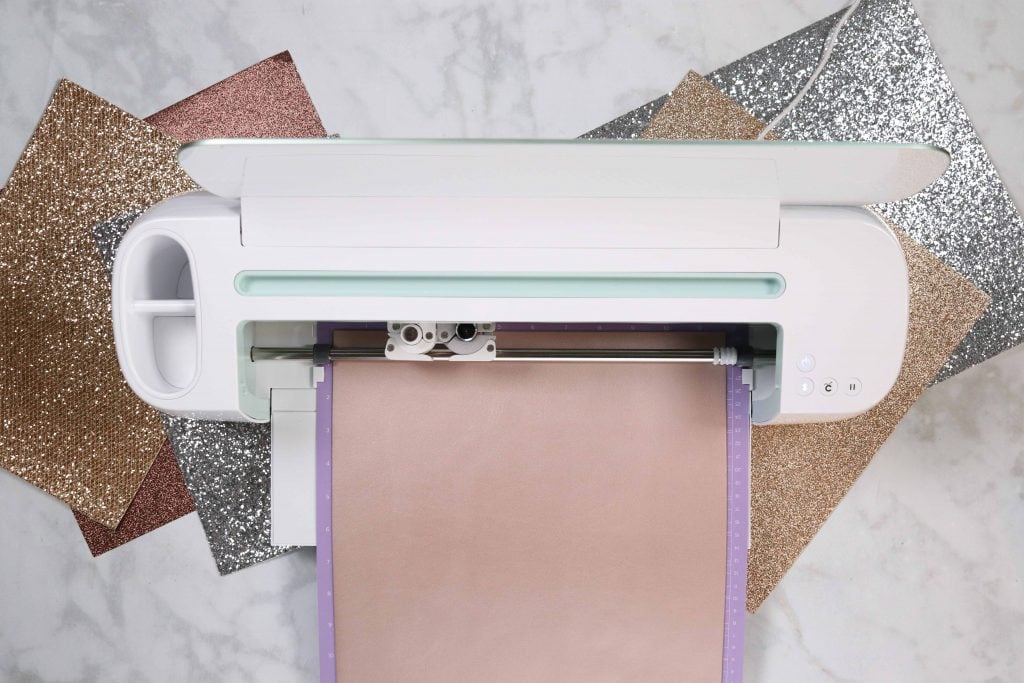
Begin by placing a piece of Cricut Metallic Leather on a Purple Strong Grip Mat. Apply pressure in a sweeping movement to adhere the leather to the mat. If the leather does not adhere, secure the sides of the leather to the mat using masking tape.

Download the Earring files
There are 5 different designs to chose from. Upload the designs into Design Space. They are already pre-sized for you but you can make them smaller or larger depending on your preference.
If you would like to cut all of the earrings at once, change the designs to be one color.
Move the star wheels all the way to the right-hand side of the machine. Switch out the Fine-Point Blade for the Deep-Cut Blade.
Select “Make” in Design Space, then choose Metallic Leather as the cutting option. *I always select “more pressure” to make sure it cuts all the way through the leather.
Insert the Mat into the Cricut Machine and begin cutting. Once the cut h
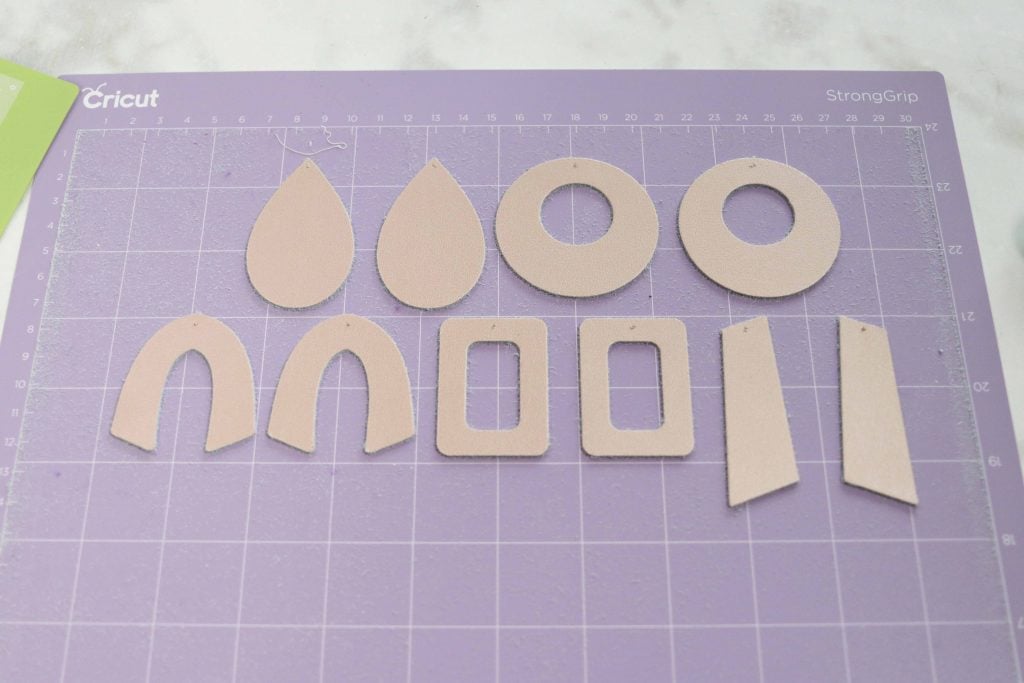
*Don’t forget to reuse the scraps using SnapMat.
Move the star wheels back to their original position and switch back to the Fine-Point Blade. Cut a section of vinyl large enough for the earrings you wish to make and apply it to the mat.
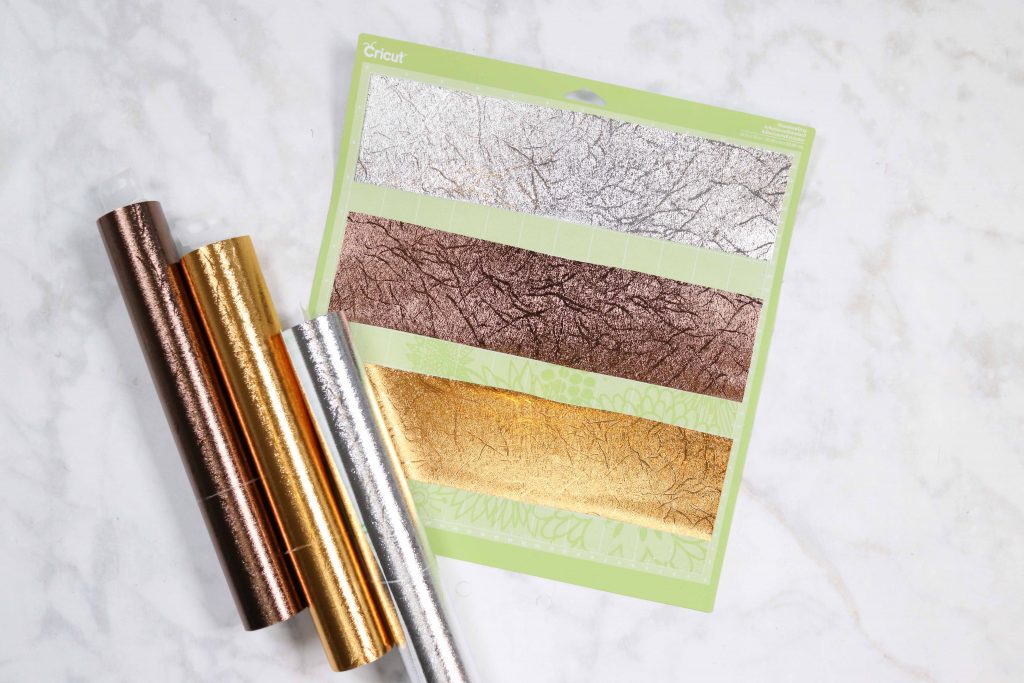
*in the photo I precut three different shades of vinyl and arranged all of my cut files to fit within the sections.
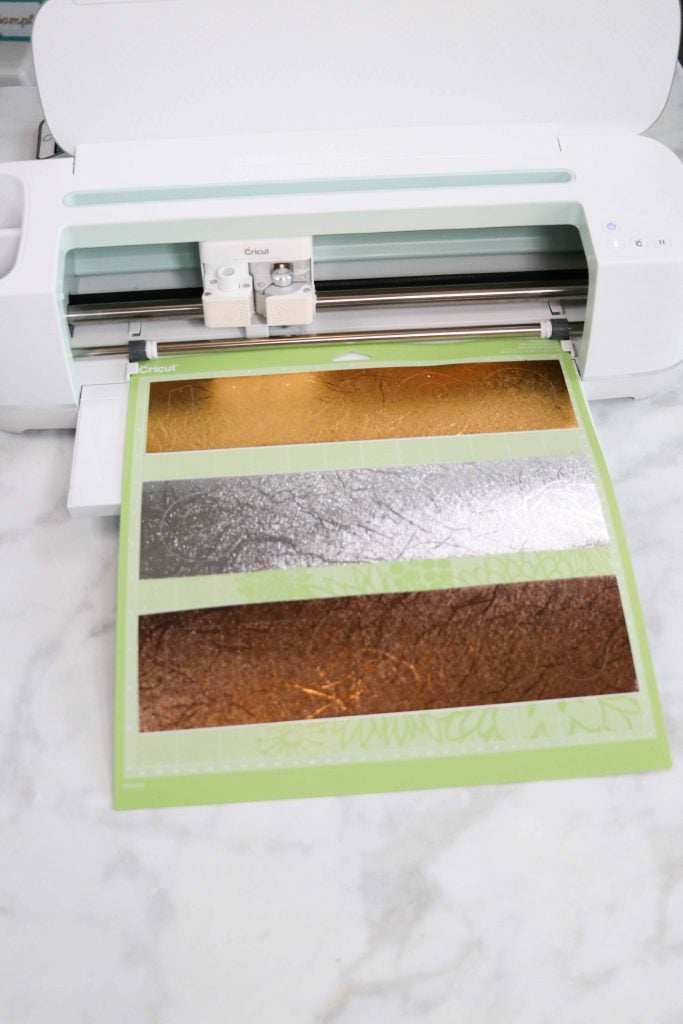
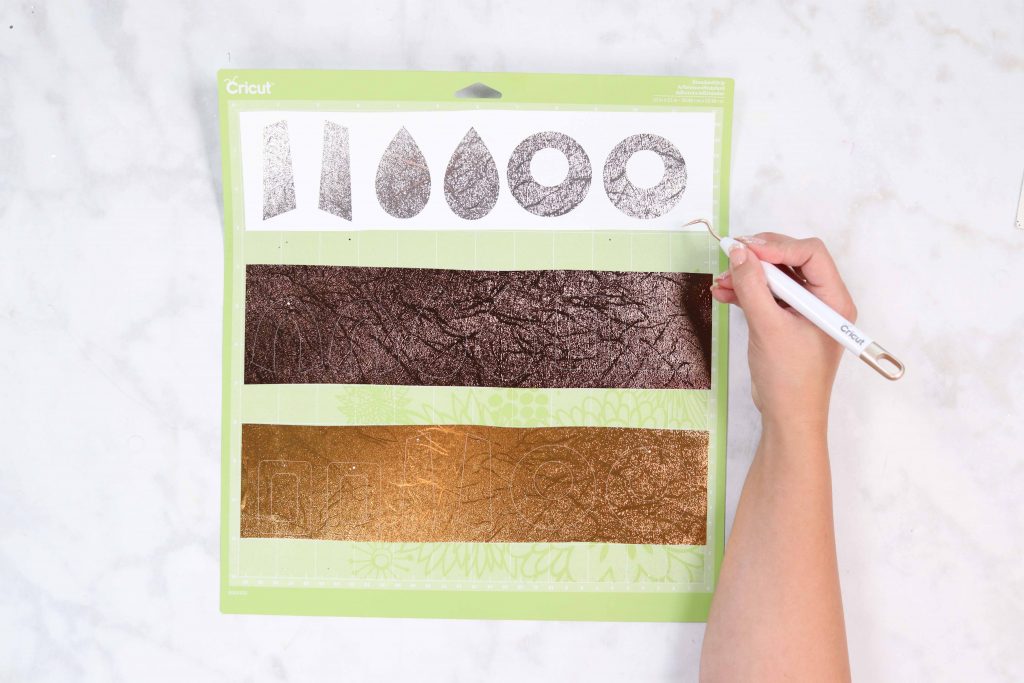
Select the type of vinyl you are cutting, insert the mat and eject it once it has finished cutting all of the earring files.
Transfer Vinyl onto Leather
Weed the individual earrings by carefully peeling back the excess vinyl.
Cover the earrings with a sheet of transfer tape and burnish the vinyl onto the transfer tape. Cut the sets of earrings into pairs and remove the white paper backing.

If you left the leather earrings on the purple mat they will line up perfectly with the vinyl. Place the vinyl on top of the earrings and use a scraper to burnish the vinyl onto the leather. Peel away the transfer tape to reveal the earrings. Repeat this process on all of the earrings.
Using a small Cricut spatula, lift each earring off of the mat.
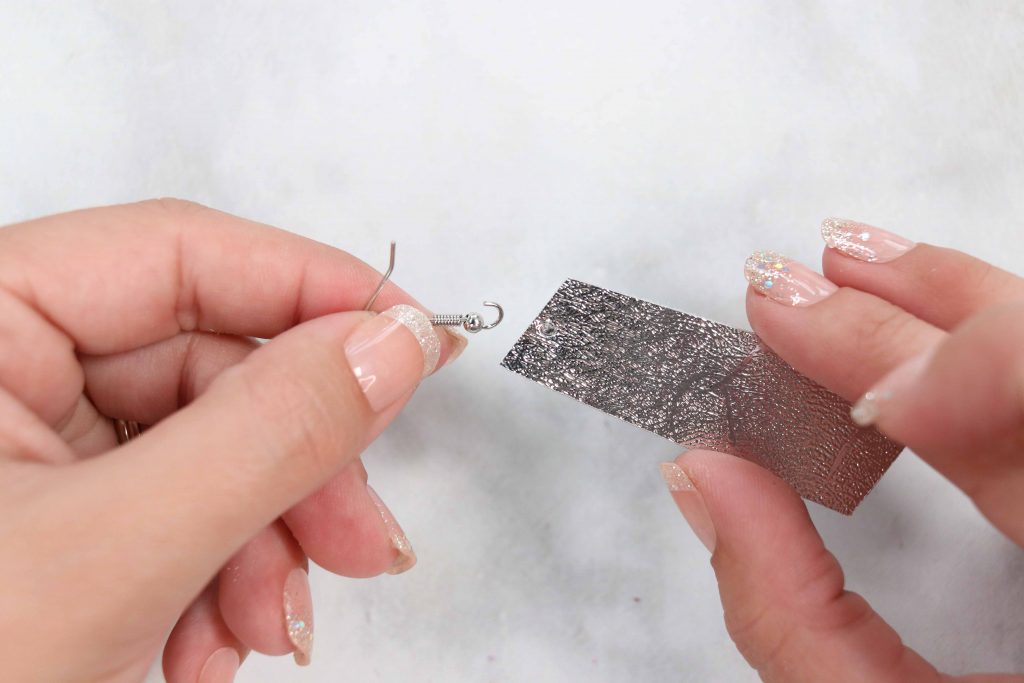
Attach Metal Hooks to Earrings
Now it’s time to attach the metal hooks to the earrings. Using a pair of needle-nose pliers gently open the eye of the earring until it’s wide enough to allow the earring to fit through it.
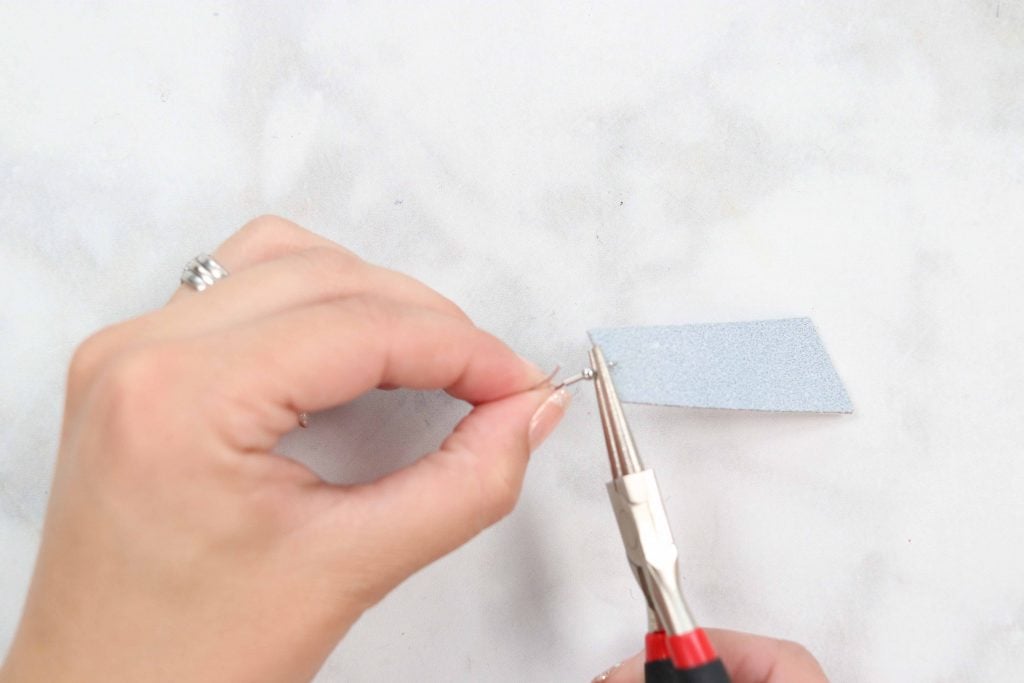
Use an awl to poke a hole through the earring and then insert the hook into the hole from the back of the earring. Use your needle nose pliers to close the earring. Repeat this process on all of the earrings.
Now you have a beautiful set of handmade leather earrings!!
I can’t wait to see what you create with this tutorial. Don’t be afraid to get creative and use new materials with this tutorial.
Just a few ideas to spark your creativity, t
Here are my tips for working with Faux Leather and Canvas Sheets
- Use a brand new Purple Strong Grip Mat.
- Place the Faux Leather shiny or pretty side facing downward. This helps to prevent marks imprinting on the leather from the star wheels. It also allows the machine to cut through the backing.
- Use a Brayer to adhere the leather to the mat or pressure from your hands.
- Secure the Faux Leather to the Mat with masking tape around all four edges if you notice any movement or if you are using an older mat.
- Select Faux Leather - Paper Thin and change the pressure to “More.” If you are using Canvas sheets select Canvas and change the pressure to “More.”
- If it doesn’t cut all the way through try swapping out your old blade for a new Cricut Blade.
Don’t forget to join my Facebook group, Crafting and Sewing with Sweet Red Poppy, and share your creations with us! If you’re on Instagram tag @sweetredpoppy for a chance to be featured in my stories.
Don't want to forget about this project? Save it for later! Click here to save it to Pinterest.
I love how these turned out. I am wondering if you know of any other places to get the faux leather in other colors and prints. I like the ones that Cricut has but I am wanting some other designs. Do you know where I could look?
You can actually layer Cricut IronOn onto felt to get tons of different colors.
Do you have a tutorial on how this is done? I feel like it's self explanatory... but it doesn't hurt to have a visual lol
Hi Kimberly, thanks for the creativity and sharing, the file sadly comes up with 'the owner has put the file in the bin'. Please help.
I just doubled checked it and it seems to be working fine. If you would like to email me I can send the files over directly!
Hey the file doesn’t download for me either. Can you send me the file?
Do you mind emailing me the file also? I am trying to download and its not available. My email is fu**********@***il.com thanks so much!
Hi Kimberly -the link of the SVG files is not working. Getting a error. used several browsers and still not working https://mailchi.mp/6bf5b0316894/8
Unable to download svg file. When trying it says the file is in the owners trash?
Will the Cricut Explore Air2 work for making these if you get the deep cut blade?
could you please email me the file at mt********@***il.com
thanks
Can someone please email me the file. I am getting a does not exist message
Ro*******@***il.com
Thanks
nice earrings thank you