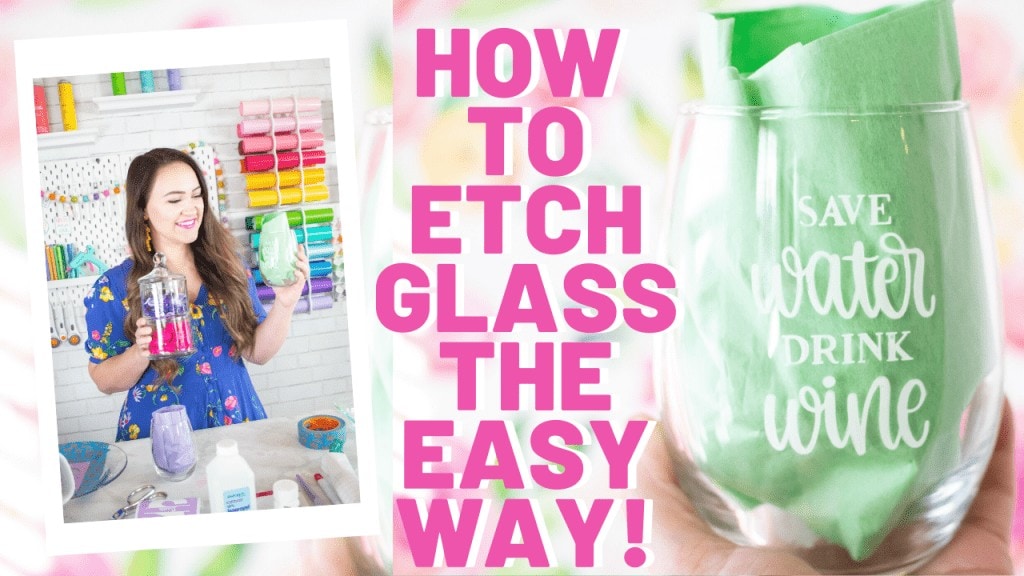
Learn How to Easily Etch Glass using Armour Etching Cream and a Cricut Vinyl Stencil
Recently, I fell in love with the look of etched glass and decided to learn how to etch glass on my own! After scouring the web for all of the best tips and tricks to get great results, I finally had a go at glass etching and guess what? I totally love it!
It's a great permanent alternative to using a vinyl decal and the best part is it's dishwasher safe!
Why Etch Glass?
One of the biggest reasons to etch glass instead of adding vinyl to it is to make it dishwasher safe. With etched glass, you don't have to worry about your decal peeling off or it needing special care.
In this tutorial, I'll be using Armour Etching Cream which is available at most craft stores or on Amazon. This is the highest-rated etching cream and gives the most desirable results.
This is such a fun way to personalize a gift or add some flair to your glassware! In the tutorial below I'll give you every step of the process as well as a few tips and tricks in case you run into a problem.
What is Glass Etching?
Glass etching is the removal of minute amounts of glass from the surface of a glass object in order to create a rough surface that is slightly translucent resembling frosted glass.
“Armour Etch is a fast-acting specially formulated glass etching compound that lets you create permanently etched designs on windows, mirrors and household glassware.”
A few things to keep in mind is that this is not recommended for use on Pyrex, plastic or large solid areas of glass.
- There seems to be some debate on whether or not this will work on Pyrex. Some people have had success using this etching cream on newer versions of Pyrex.
Don't forget to watch the video for a more in-depth look at this process!
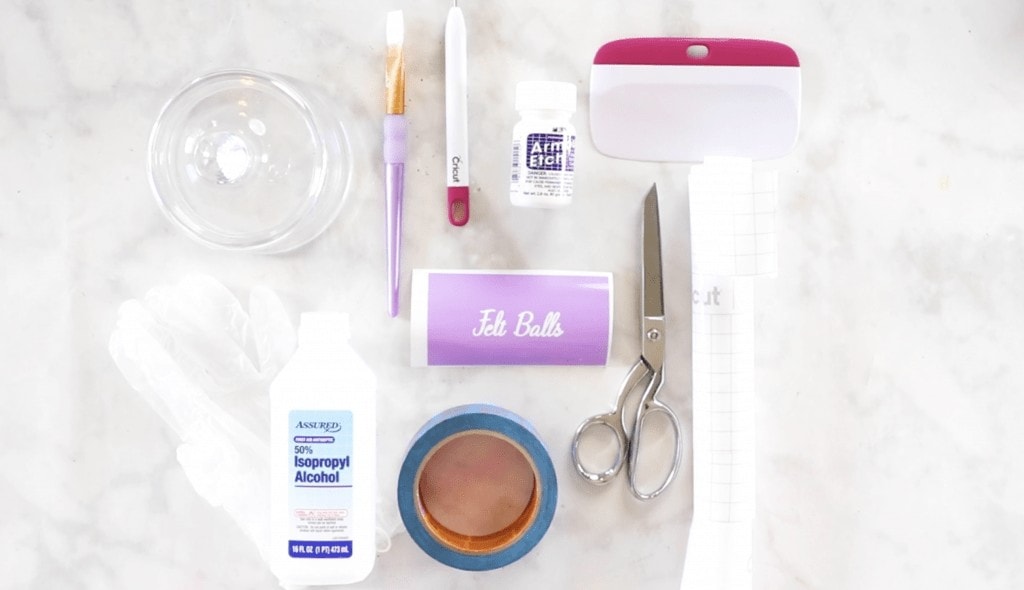
Glass Etching Supplies
- Armour Etch Glass Etching Cream
- Small Paint Brush
- Scraper
- Stencil or Permanent Vinyl
- Scissors
- Painters Tape
- Gloves
- Glass
- Transfer Tape
- Alcohol
- Weeding Tool
- Paper Towels
Creating your Stencil
Before you get started etching you'll need to either create or purchase a vinyl stencil to use on your glass.
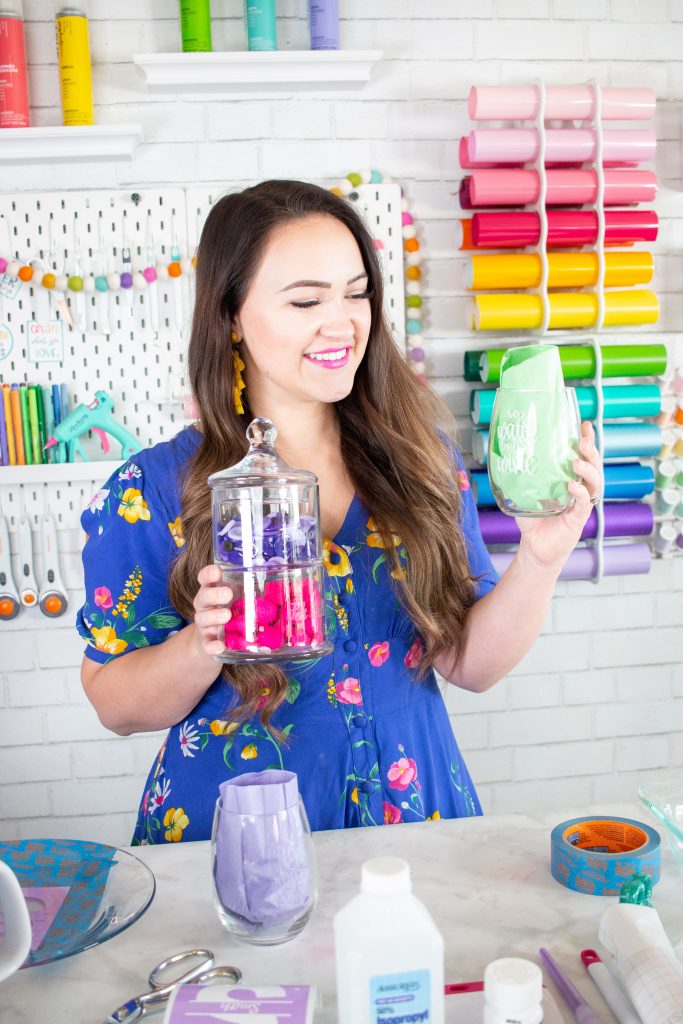
I used my Cricut machine to cut out a variety of different vinyl stencils.
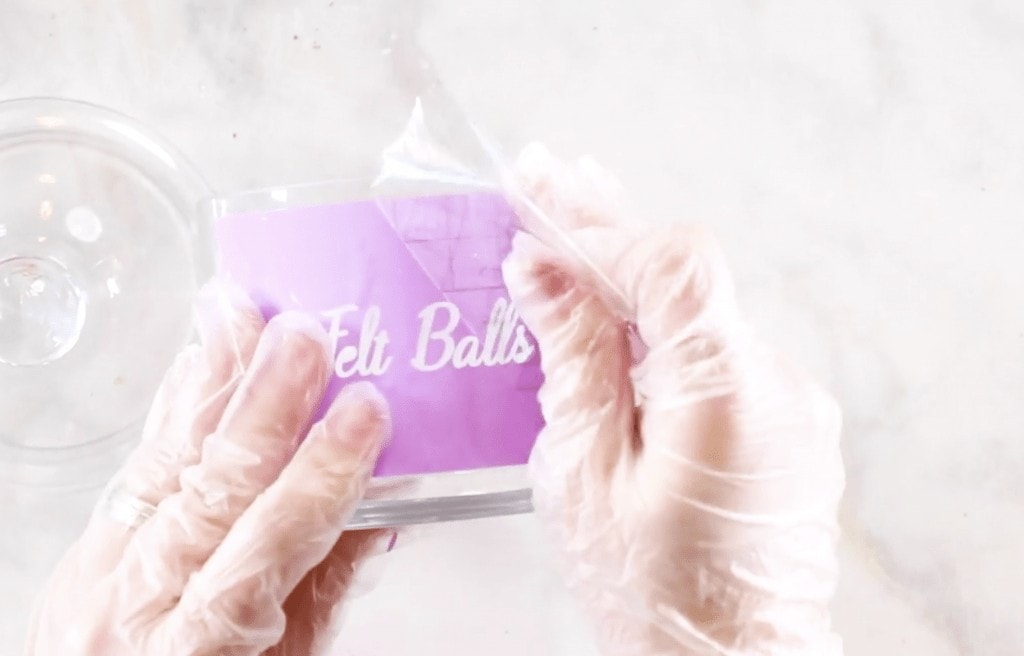
Pro Tip - In this tutorial, I'm using a stencil that I cut from permanent vinyl. The reason why I use permanent vinyl is that it adheres better than removable vinyl and won't allow the etching cream to creep under it.
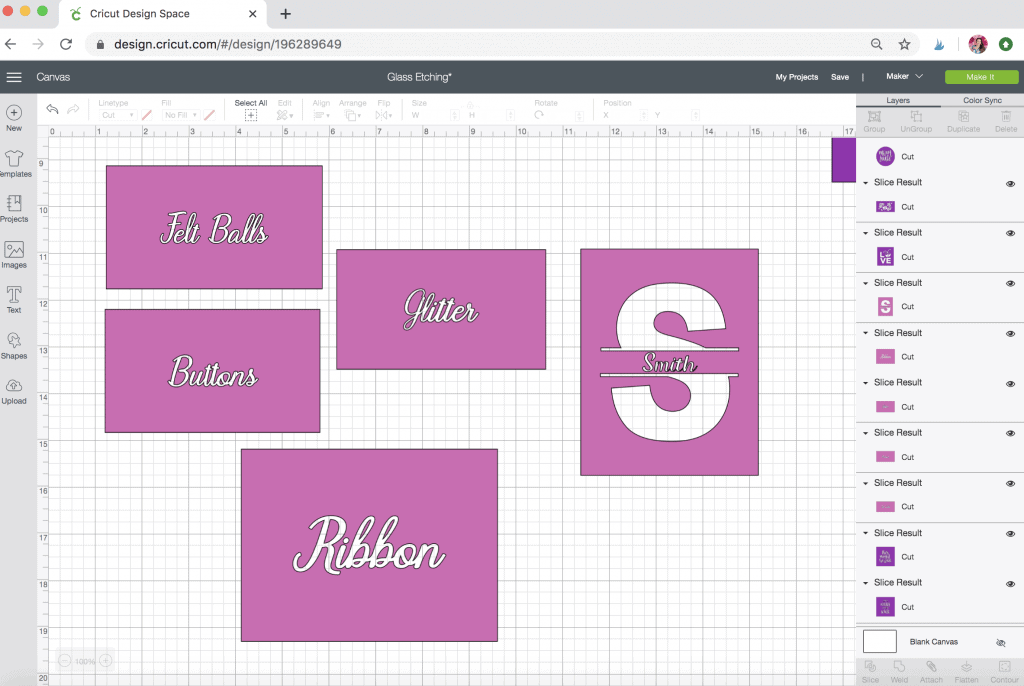
To create the stencil choose a design within Design Space or create your own. I like to add a shape, lay the design on top of it and slice it. This will leave you with a large shape and the letters cut out of the middle. The large area of vinyl will protect the glass from the etching cream.
Choosing the Right Glass for Glass Etching
First off you want to make sure you are using an item that is compatible with this etching cream. It is only recommended that you use this method on small pieces of glass. The cream will etch only work on bare, uncoated glass. Typically, it’s recommended to avoid Pyrex as it may not etch at all or it may have uneven results.
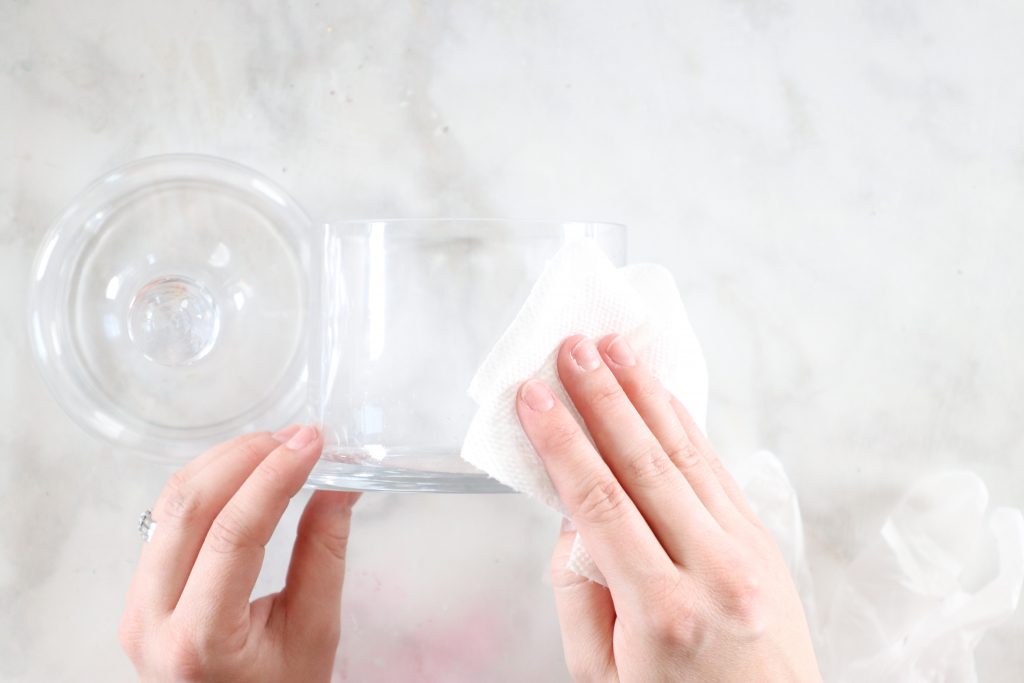
Before working with the glass, place a clean pair or gloves on your hands.
Clean the Glass
Begin by cleaning the glass thoroughly with Alcohol, this will remove any residue that might prevent the etching cream from doing its job. Wipe away any moisture with a clean paper towel.
Apply your Glass Etching Stencil
It’s important to use a pair of gloves when applying the stencil to prevent any oils from your hands from transferring to the glass and to protect your fingers from the acid.
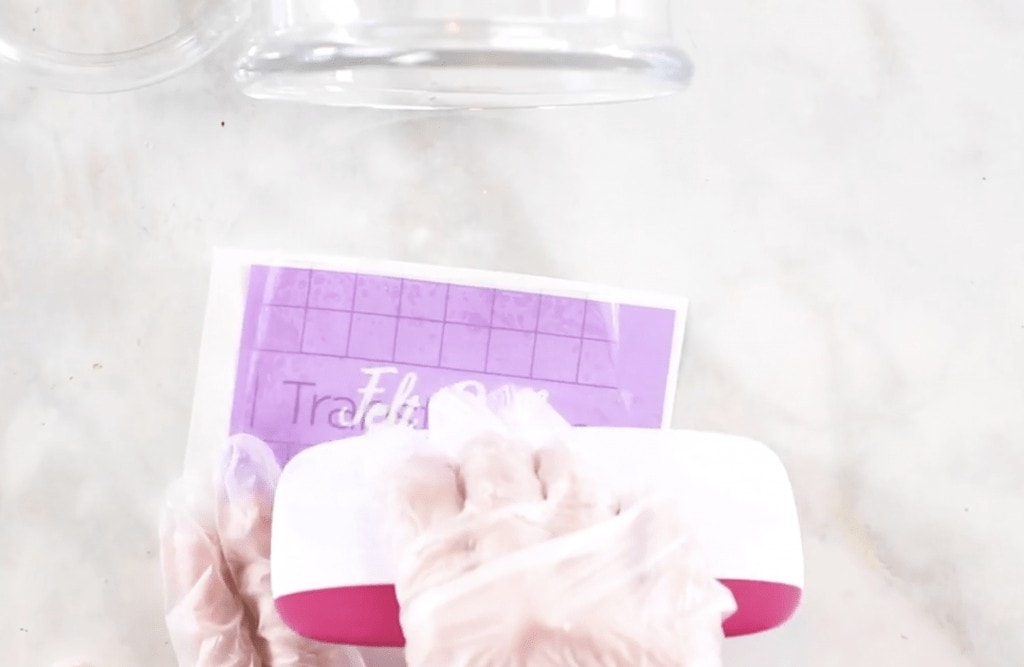
Make sure both the glass and the stencil are at room temperature before beginning this process.
Leftover oils on the glass can prevent the stencil from fully adhering to the glass which can allow the etching cream to creep under the vinyl and destroy the integrity of the design.
Press down on the stencil making sure that it’s fully adhered to the glass.
Hold your glass up to a bright light and inspect the stencil to make sure there isn’t any hair or debris stuck under the design.
Make sure to cover any of the areas that will be touched by the rinse water with masking tape to protect it from the etching cream.
Apply Armour Etch Cream
Apply a layer of cream over the vinyl making sure not to get any of the cream outside of the vinyl stencil. The cream should be patted onto the stencil. Avoid brushing the cream on as this can cause brushstrokes in your finished product. The cream should be patted on with a paintbrush.
Once the area has been fully covered, brush the etching cream around the design back and forth.
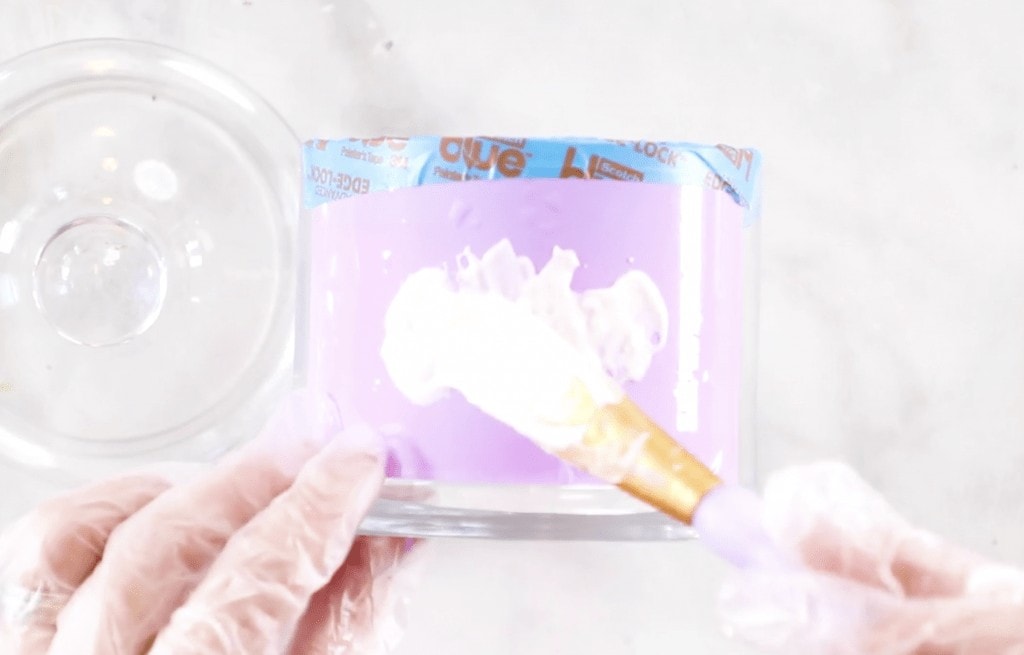
For the best results, use a paintbrush instead of a foam brush. This will allow you to get better coverage and get the cream into the nooks and crannies of the stencil.
The directions will advise you to leave the cream in place for 1 minute, In my experience, I’ve found that’s not quite long enough to get great results. Instead, leave the cream on for about 5-10 minutes.
- Pro Tip - Keep in mind that leaving the etching cream on for too long can weaken the stencil causing a blurry image instead of crips, clean lines.
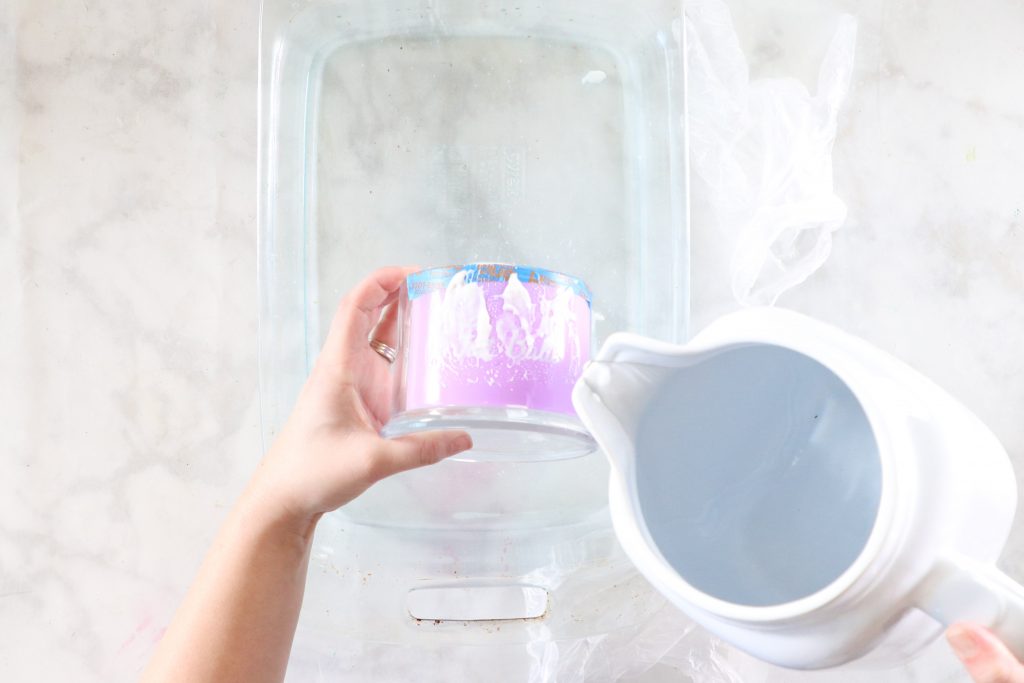
Remove Etching Cream
Rinse the etch cream off under running water. Remove the vinyl stencil and wash the glass once more.
For an even brighter etch you can reapply the etching cream a second time after cleaning the first layer off completely.

Thoroughly dry the glass to reveal the design.
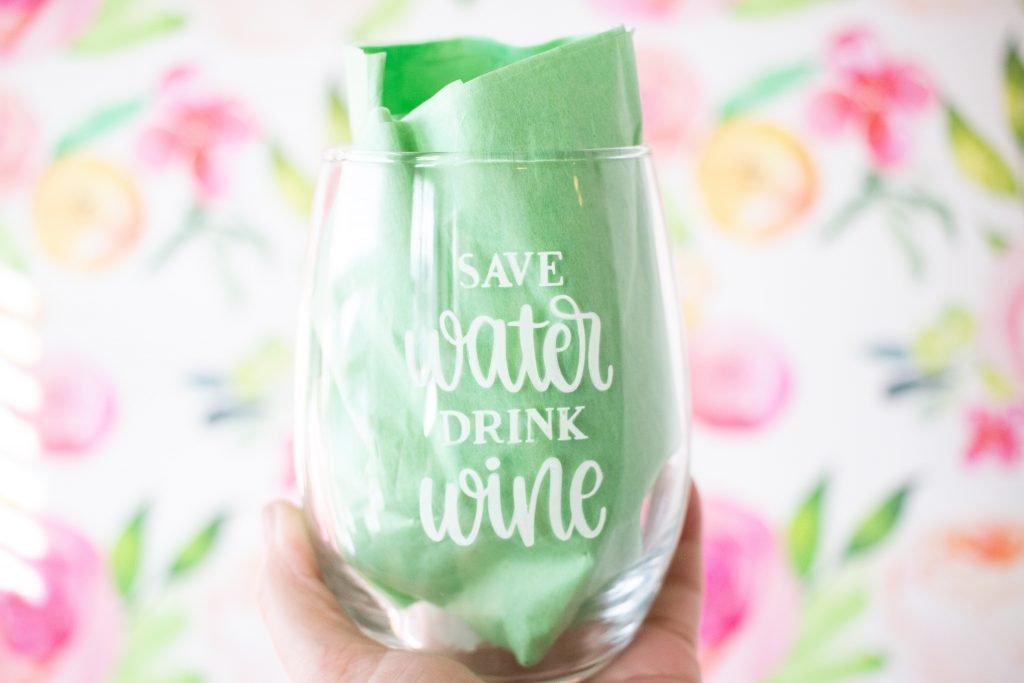
Now you have your finished etched glass! You can reuse these same instructions on a variety of different glass objects! The sky is the limit with this project.
Troubleshooting Glass Etching
Make sure that both your glass and stencil are at room temperature before using it.
Check to make sure that there isn’t any hair or debris stuck under the stencil. You can do this by holding the glass up to bright light.
Completely surround the stencil with tape to prevent any ghosting from appearing where the cream might accidentally spread to especially where the cream will run when being washed.
Avoid brushing the cream on as this can cause brushstrokes in your finished product. The cream should be patted on with a paintbrush.
Glass with a high leaded content can be hard to etch. I recommend using glass from the Dollar Store.
Be sure to share your SRP crafts with me on Instagram using the tag #sweetredpoppy or in my crafting Facebook group!
More tutorials can be found at Sweet Red Poppy!
Good morning and thank you for the wonderful information!! I just have a question regarding the etching cream. Can we add color to the cream? If I wanted the etch red hearts can I add red acrylic paint to it? Does the etching cream come in colors other than white?
Consider using resin colored with mica colorant. Apply a clean stencil (position exactly for best results). pour the resin on one side and use a scraper to pull a thin layer across. Allow the resin to dry for 24 hours prior to removing your stencil. This will leave a slightly raised layer of colored resin over your etched work making the entire project looking 3-d. 🙂
I was wondering the same thing about color, online I've come across rub n buff they say works but haven't tried it yet. I also so a glass paint but haven't seen it in the stores, maybe online
I have tried the rub and buff paint without success.
I just bought decoart glass paint at michaels yesterday.. I haven't tried it after etching yet but that is my goal
I have tried the rub and buff paint without success.
My question is does the etch cream get old? I was going to do a project years ago and forgot about it, we moved i unpacke a bottle of tbe etch cream, opened to see if it dried out and it looks justlike a grey cream, it has a thick texture, can i dilute it w water? I have a Box of lil glass votives and a lady gave me a HUGE mirror she took out of her bathroom while updating so i have a ton of things i can practice etching with, Wanted to THANK ALL the kind people out there w their tips n things they found easier, example use brush not sponge to get cream on thicker, etc. Leave on 5-10 min not one as instructions say, BUT HEY AM I ONLY ONE who got a bottle that has no instructions on it? So wen the etch has sat for 5 min or so, i just run under faucet to rinse cream off? Good thing i t read your tips etc. I would have tried taking ofc tge template first, cuz though i. Very crafty I've never used glass etch cream, speaking of cricket for templates i bought a cricket on black friday YEARS AGO, and then we moved [hubby's job ugh.) And again forgot about it, even decided to have a major stroke, so it sat in box a year or two, took it out to try it and it doesn't work, thought it was i didn't know how to use it, so put back in box and back in closet for a year, so does anyone know who i can get to repair or fix my cricket? I used to go to local craft store and rent time to use theirs, loved it and without braging got pretty good at it, so i was HUGELY DISAPPOINTED IN trying to use this one but no go who can fix these or do i need to buy another, and simply toss this one out? Now a days they make ones that you can use ALL templates not just their brand, BUT i have so many incredible programs to use w it, so would love to get it going can ANY OF YOU AMAXZINGLY KIND PEOPLE OUT THERE ADVISE ME WHERE TO GET IT REPAIRED OR if its possible? Thanks for ANY INFO. I'LL TAKE ANYTHING I CAN GET( INFO.) IM GIVING OUT A NUMBER THAT ONLY ACCEPTS TEXTS so please can i get how to repaired message, i would REALLY REALLY APPRECIATE IT, AND MAY GOD BLESS YOU ALL I. THESE TRYING TIMES, PLEASE STAY HEALTHY AND HAVE A VERY BLESSED EVERYDAY!!
MY CONTACT TEXTS ONLY PLEASE: 916 342-9033, thanks again and God bless you all
REV.Kymm Blair
Have you gone to the Cricut website & their troubleshooting page? It may be something easy to fix yourself. If not maybe they can get you in touch with someone in your area that does repairs. At least one of the really old models can't be repaired due to lack of parts, but the majority still seem fine to fix. Hope this helps.
Hi Kitty,
Can you reuse the stencil? I don't have a cricket myself so I'd have to ask my daughter to make the stencil for me.
Thank you, Eileen
My armor etch says to dilute with water. Is that not actually necessary?
Can you add color to the cream or paint the design after you have etched it onto the glass?
A bit confused....in your instructions, its says to brush the etching cream back and forth, but later it says not to brush it on. Can you clarify for me, please?
This is for the first application. When the cream first touches the glass. Doing so will leave a smooth surface rather than streaks. Once the whole area is covered, then it’s time to “brush” back and forth.
Do you brush or move the cream the entire 5 minutes?
Which fonts do you use in this tutorial?
What temp rinse water should be used?
Do you leave it to sit for 5 minutes after you have completely covered the stencil?
I would like to etch some glass doors to a small china cabinet.
Doors are 14”x24”, are there any tips or special care needed?
Thanks
Can you reuse the cricut vinyl stencil. I want to make multiple glasses with the same message and hate to think I have to make a dozen stencils all the same.
A very interesting and useful article! The whole process is described correctly. However, this cream is only for small letters. We present to your attention the only glass etching cream for large surfaces - IVSATIN.
The cream is reusable. Developed by scientists from the Russian Institute of Solution Chemistry. You can find out more details and order on the official website http://www.ivsatin.com
When I make stencils on the Cricut I use contact paper, it’s a lot cheaper than permanent vinyl. I leave it on for 5 min or so, and use a brush and constantly brush in all different directions the entire time. If it’s streaky just do it again before taking off the stencil.
Im putting a star on wine glasses for a christmas present. I tried making a stencil but when i applied it to the glass it wouldnt go on even. So im using frog tape instead. Will the cream work without eating up the tape?
Hi Paul, the cream should still work even with the tape! We recommend using permanent vinyl, as it adheres better to the glass and you really want to try for a flat, bubble-free seal. But again, tape will certainly help and the cream should not eat up the tape.
Hi, I am really struggling to apply a stencil to a gin glass to etch, I am searching everywhere for a tutorial but ant find anything that shows you or gives hints and tips. any advice please
I have found when getting the vinyl stencil to stick down on a curved glass it wasn't really sticking down evenly. So after I have removed the transfer tape I use a little bit of heat from my heat gun to put it on evenly - bit like the method for vinyl wrapping a car! Hope this helps someone else!