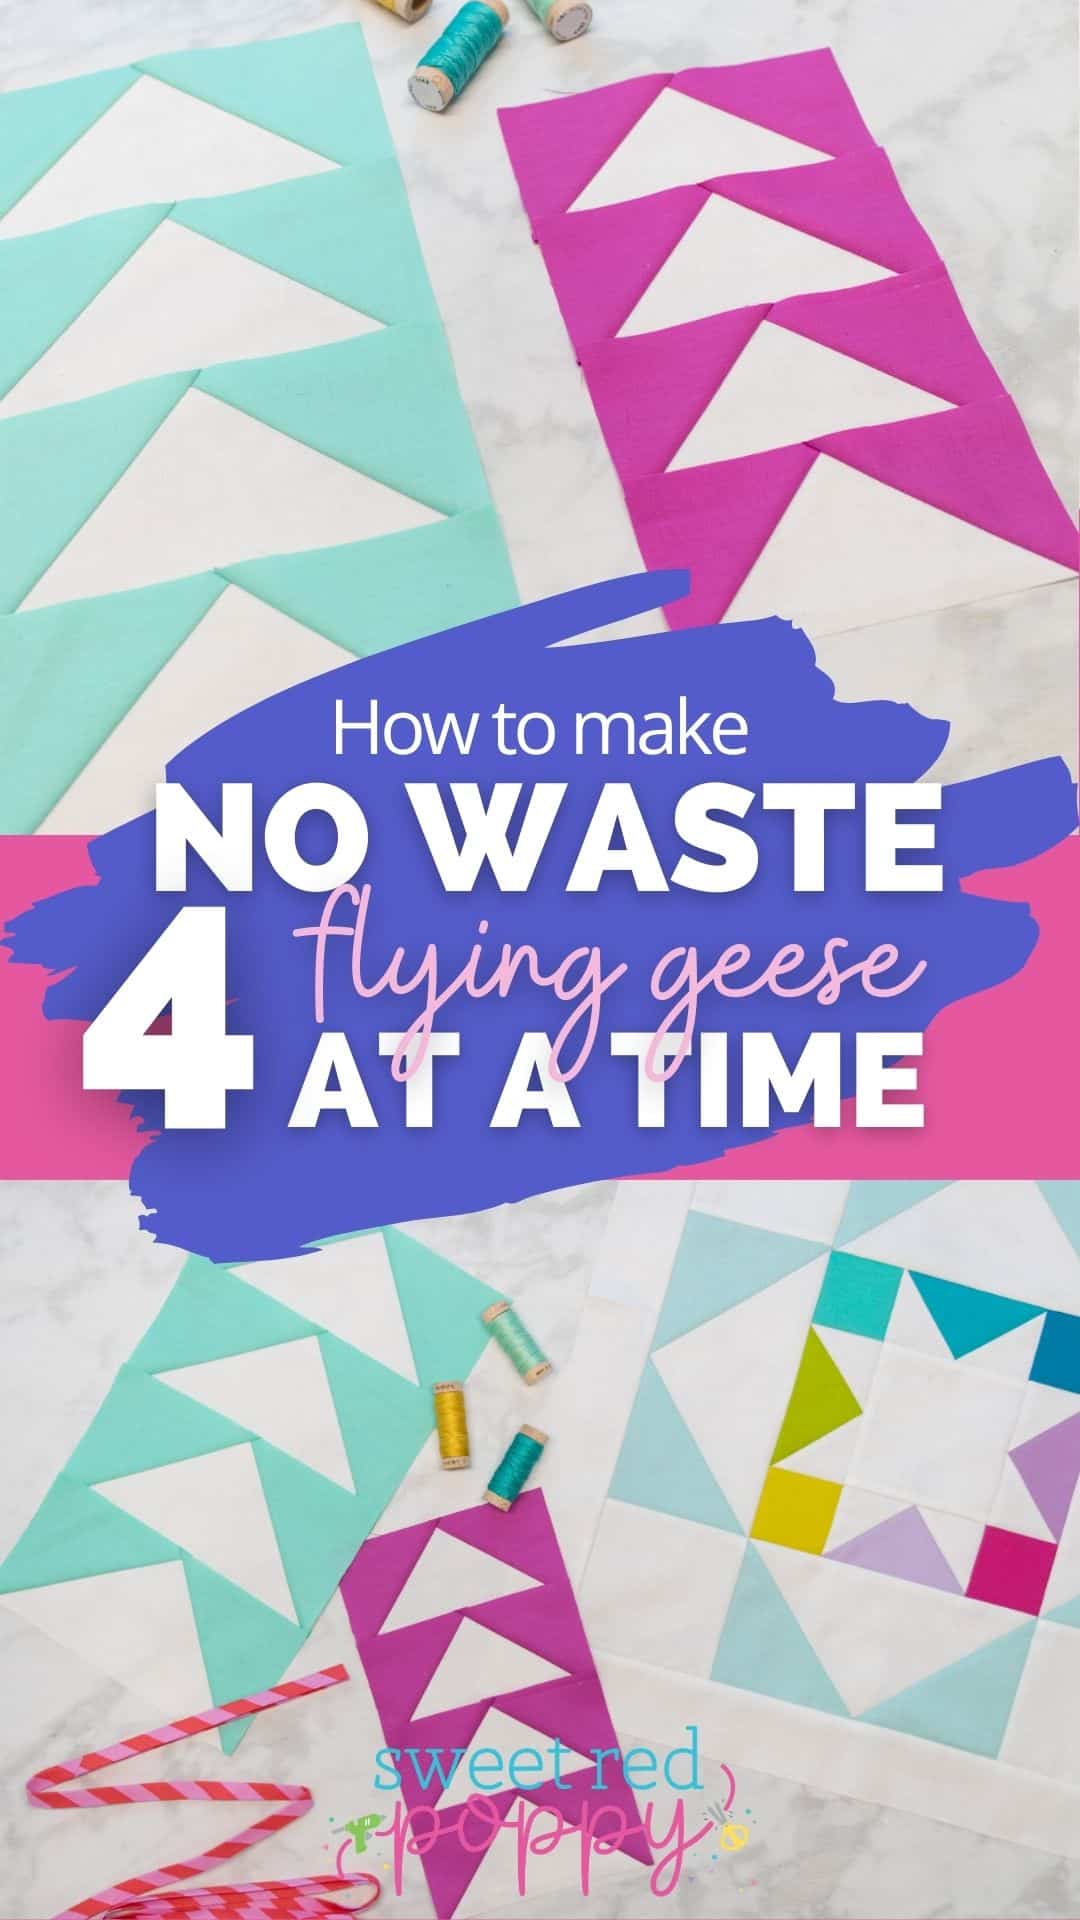
Making perfect flying geese is easy and fast with this simple, no-waste method! The 4-at-a-time method will save you time and frustration.
Today I'm sharing my favorite super-easy, low-stress, no-waste method of making flying geese. Plus, I've put together an easy-to-use cheat sheet that does the math for you - that way you can get straight to making whatever size of flying geese you need!

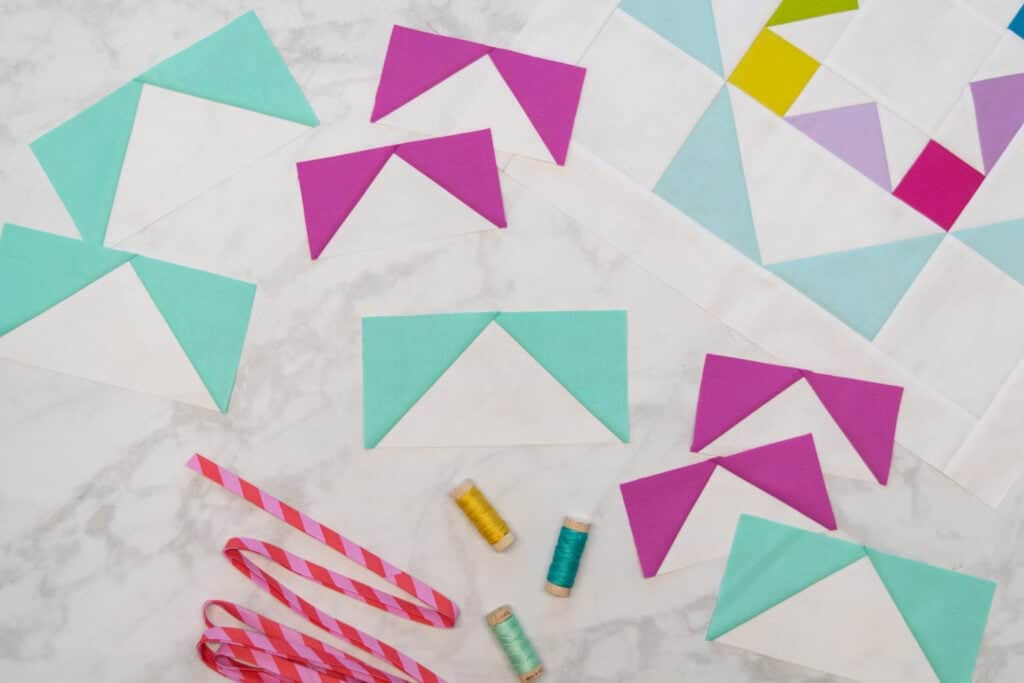
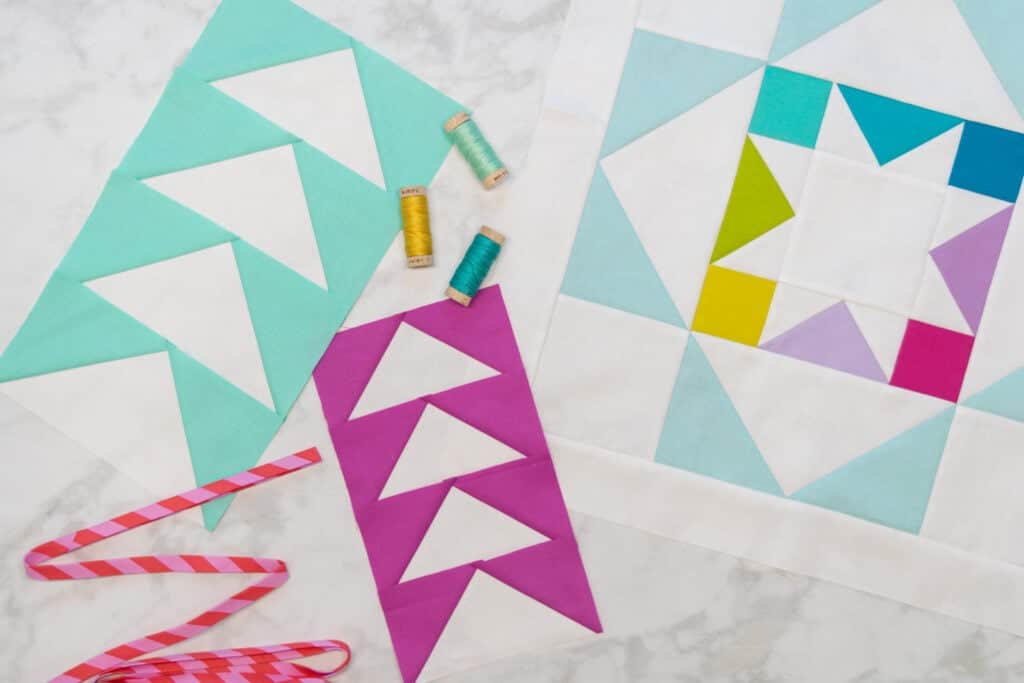
Flying geese are a beautifully classic and versatile component of many quilt patterns. They can be arranged in many different ways, or even combined with other shapes to create more intricate designs, such as a sawtooth star.
As such a versatile unit in quilting, it's one that is well worth learning to create. And don't worry, they're way easier to sew than they look!
Table of Contents
What are Flying Geese?
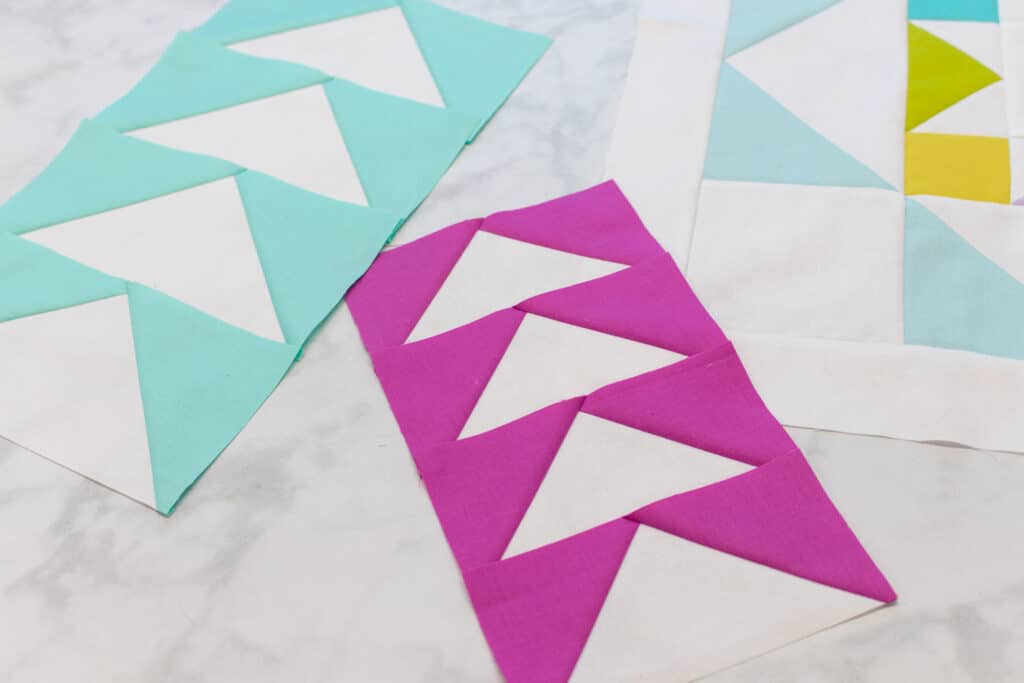
Flying geese are rectangles made from 3 triangles, one larger center triangle and two identical smaller triangles, one to either side of the large triangle. Generally, the two smaller triangles are made from the same fabric and the larger triangle is made from a contrasting fabric.
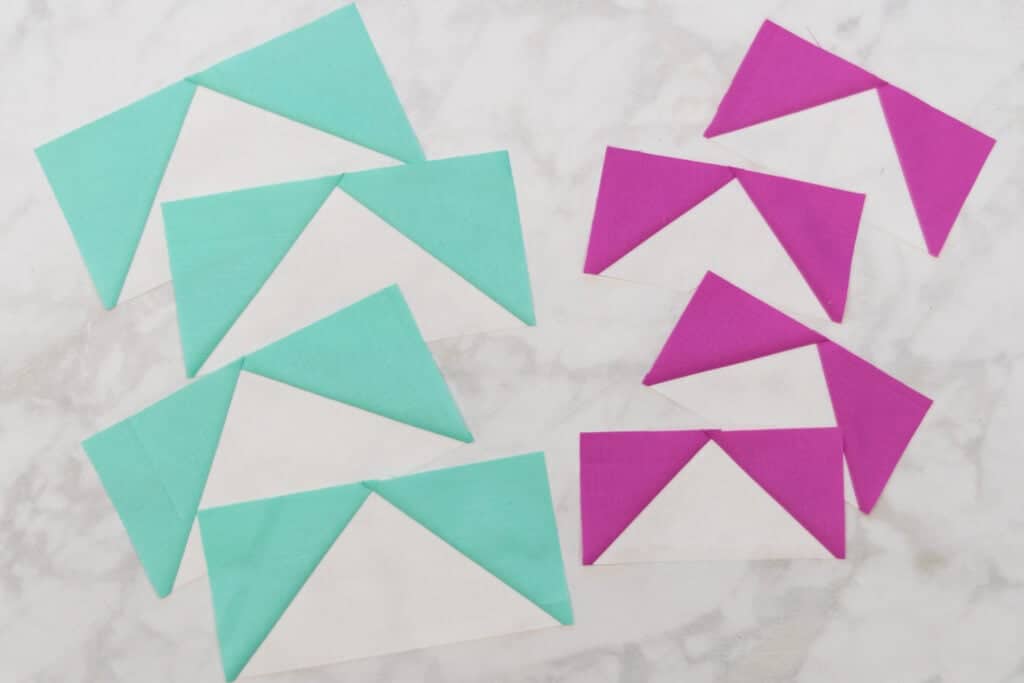
When several flying geese units are arranged together, especially when they are all faced in the same direction and made from the same fabrics, they resemble a distant flock of geese in the sky. Hence, the name "flying geese."
Avoid Waste and Save Time With the 4-At-A-Time Flying Geese Method
Many quilters avoid this wonderful unit because they feel that creating flying geese requires a lot of precision and produces a lot of fabric waste.
Traditionally, flying geese are created one at a time, by stitching diagonally across two smaller squares pinned to either end of a larger rectangle. Then, the squares are trimmed down to 1/4" from the stitching lines. With this method, almost half of each square is wasted.
In addition, if you don't stitch very accurately, your flying geese won't come out quite the right size.
The 4-at-a-time flying geese method makes sewing perfect flying geese easy and (almost) waste-free! Plus, it will save you time by allowing you to create four flying geese all at once, rather than just one.
4-At-A-Time Flying Geese Cutting Chart
Sewing flying geese with the 4-at-a-time method requires cutting 5 different squares. 1 large square from the fabric that will be at the center of your flying geese and 4 smaller squares from the fabric that will be the smaller triangles.
This formula can be used to calculate what size of squares to cut to create any finished size of flying geese:
Large Square Size = Finished Flying Geese Width + 1.5 inches
Small Squares Size = Finished Flying Geese Height + 1 inch

This formula makes flying geese that are slightly larger than the intended finished size. They can then be trimmed down to the exact measurements you need when you square the units up.
I find this to be much easier and less stressful than sewing flying geese to the exact size I need. My sewing is never precise enough to get them completely accurate, so I'd rather be able to trim them down to the perfect size after sewing.
I've put together a cheat sheet to make it easy for you to find the right sizes of squares to cut for your specific project. This cheat sheet tells you exactly what size of squares to cut to create your desired finished size of flying geese.
DOWNLOAD THE FREE 4-AT-A-TIME FLYING GEESE CHEAT SHEET HERE

Alright, let's get into the tutorial!
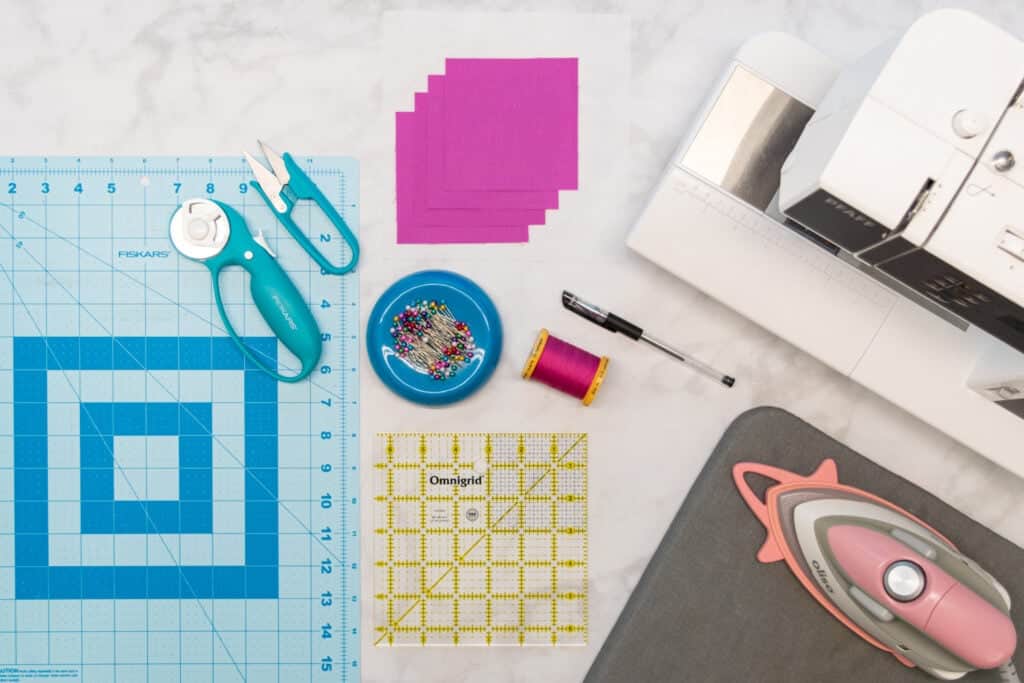
Supplies to Make Flying Geese
Here are the supplies you'll need to make 4 flying geese.
Shop my favorite sewing supplies here!
- 1 Large Square and 4 Smaller Squares Cut According to the Math Cheat Sheet
- Rotary Cutter
- Rotary Cutting Mat
- Thread Snips
- Thread
- Sewing Pins
- Iron & Ironing Board
- Fabric Pen or Chalk
- Sewing Machine Needle
- Sewing Machine
- Quilting Ruler
Why Shop Through My Links?
When you shop through my affiliate links, it doesn't cost you anything extra, but it helps me out in a big way! I earn a small commission from those purchases, and that support allows me to continue creating and sharing free tutorials and patterns for you. Thank you so much for helping me keep this creative community going!
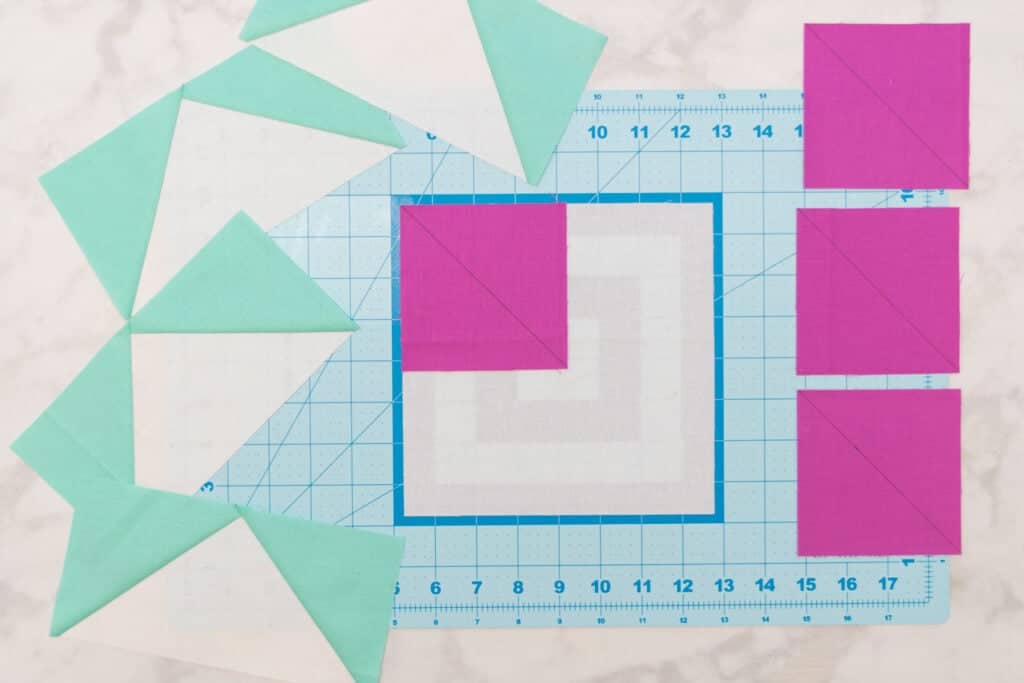
Step 1: Cut the Squares
Start by cutting 1 larger square from the fabric you want to form the center of your flying geese.
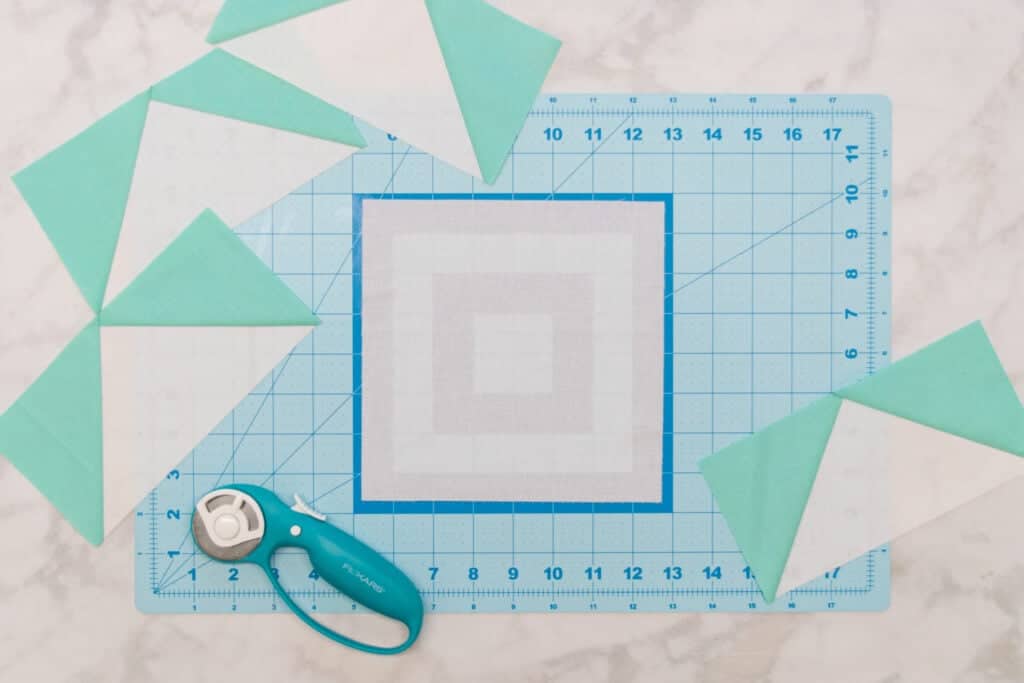
Then, cut 4 identical smaller squares from the contrasting fabric.
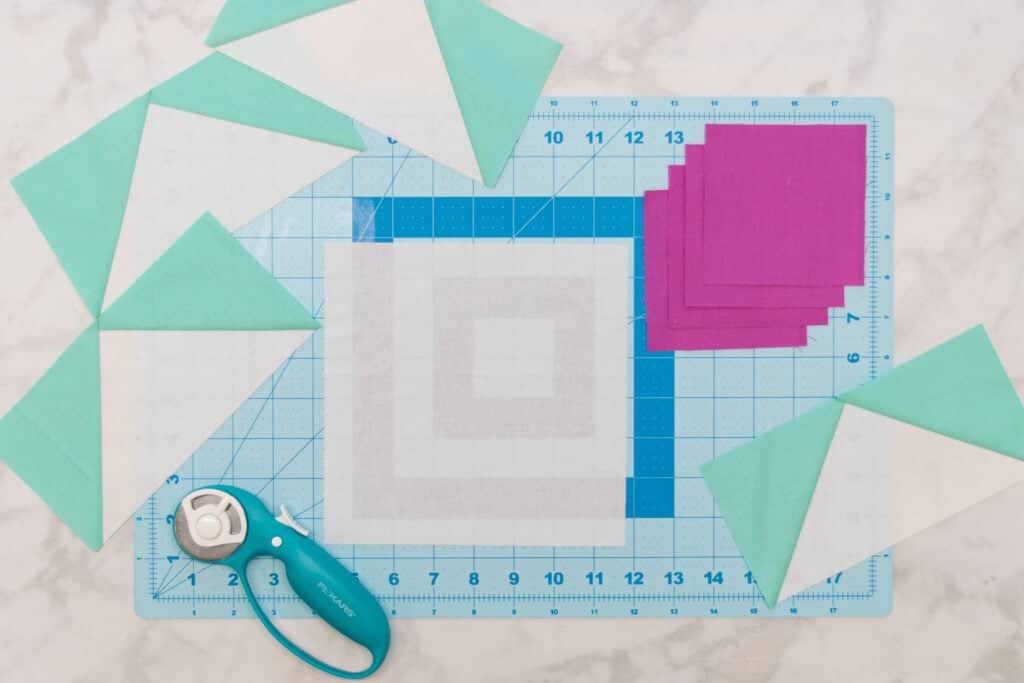
To determine what size to cut your squares to create a specific finished size of flying geese, reference the cheat sheet I put together or use the following formula.
Large Square Size = Finished Flying Geese Width + 1.5 inches
Small Squares Size = Finished Flying Geese Height + 1 inch
You can download the cutting chart here.
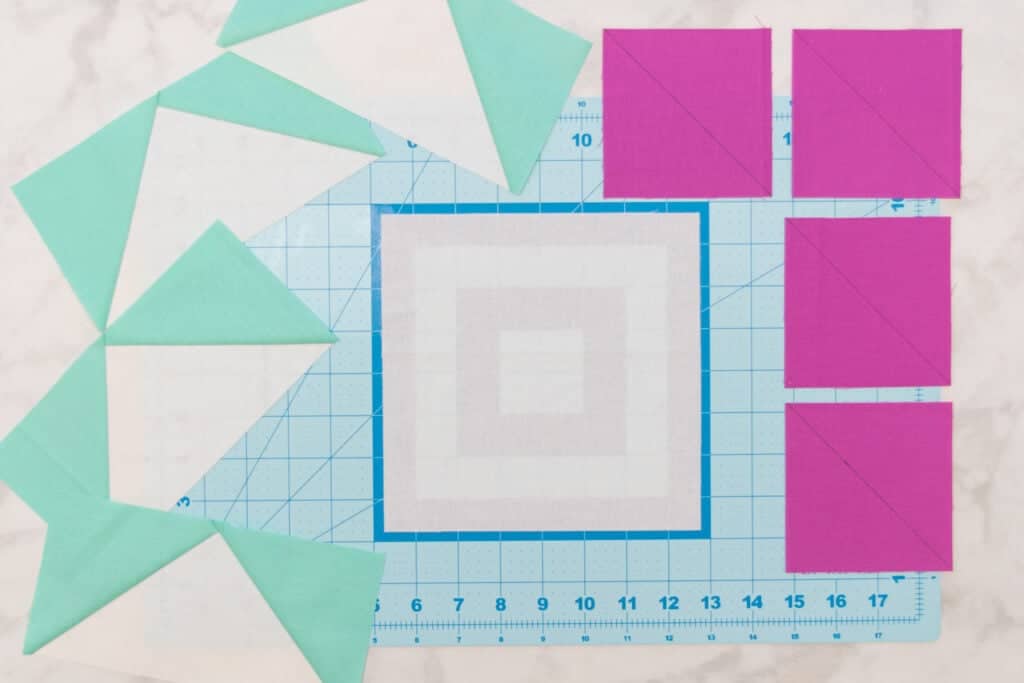
Step 2: Mark the Small Squares
Once your squares are cut, it's time to prepare them for sewing.
To do this, lay all four of the smaller squares on your table with the wrong side facing up.
Then, use a quilting ruler and a fabric pen to mark a diagonal line across each square from the upper left to lower right corner.
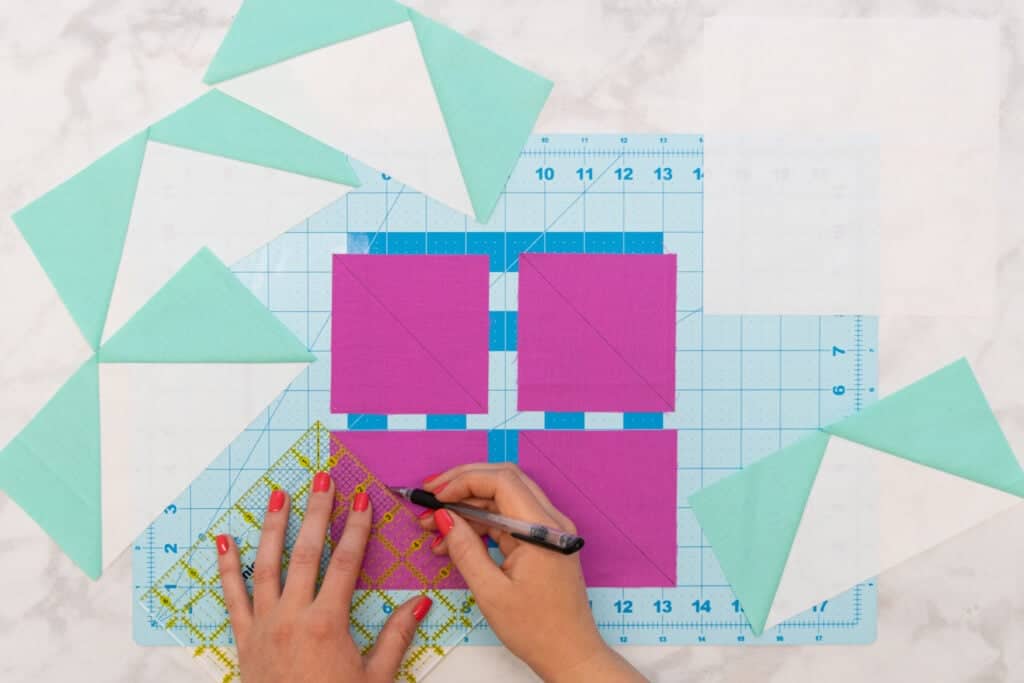
Make sure that whatever marking tool you use is easy to remove!
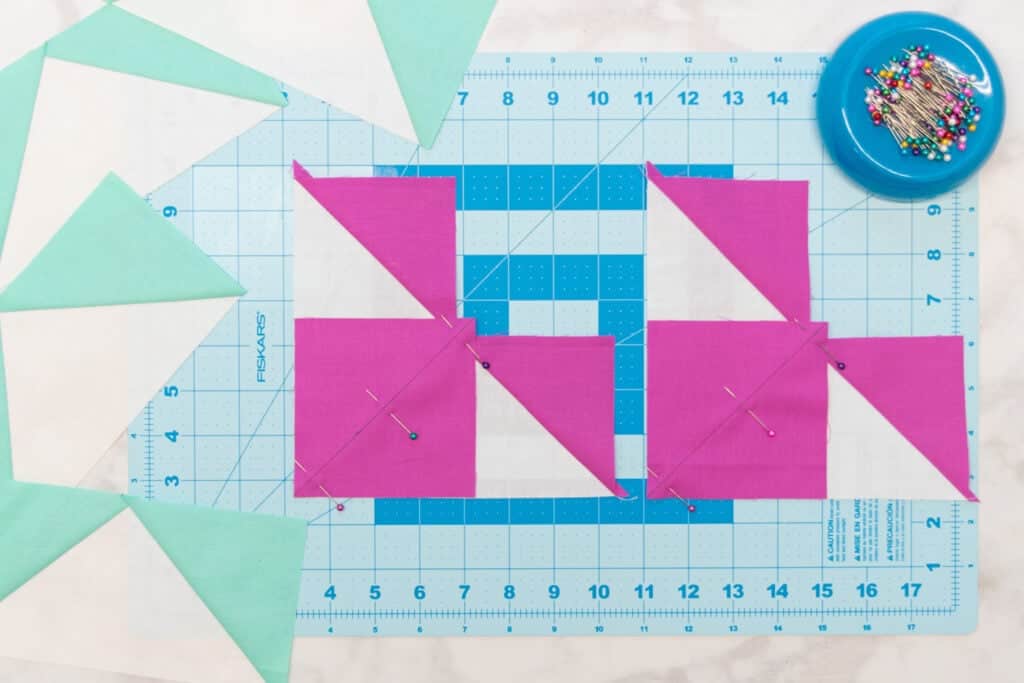
Step 3: Stitch the First Set of Squares
Place the large square right side up on your table.
Then, lay one smaller square, right side down, in the upper left corner of the large square. Orient the smaller square so that the marked line is still running from upper left to lower right.
Then, place a second small square in the lower right corner of the large square. Again, orient the square with the line running from upper left to lower right.

The two small squares will overlap in the center of the large square. Pin the two smaller squares in place.

Next, take the square to your sewing machine and stitch 1/4 inch to either side of the marked diagonal line.

Use your rotary cutter to cut along the marked line, between the two stitching lines.

Then, use your iron to press the smaller triangles up away from the larger triangle, pressing the seam allowance towards the smaller triangles.
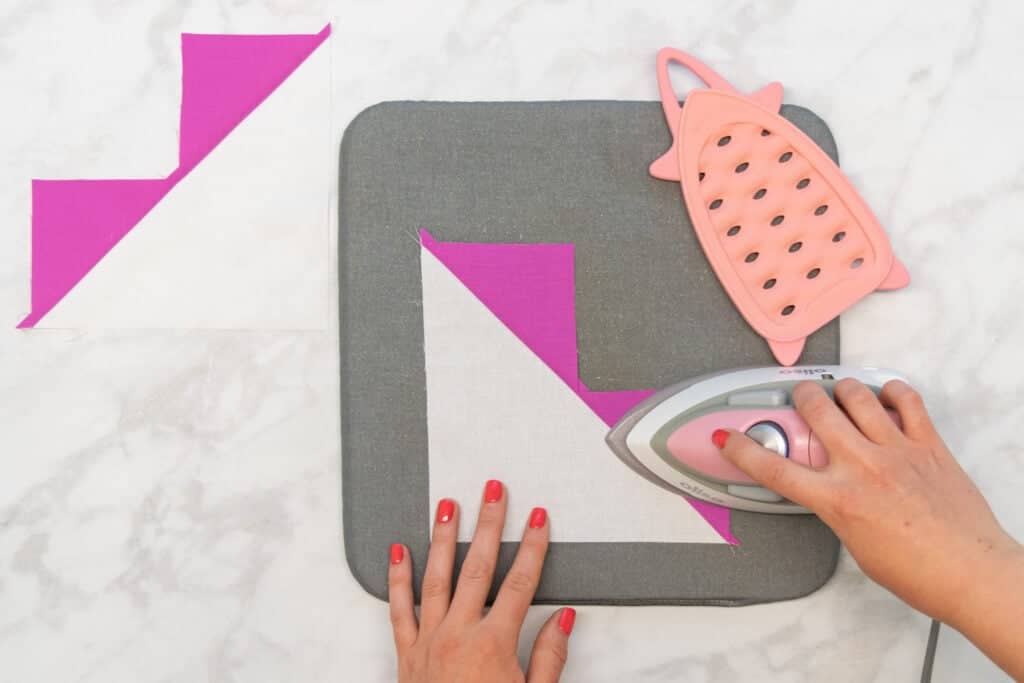
You will now have two identical pieces that look somewhat like a heart.
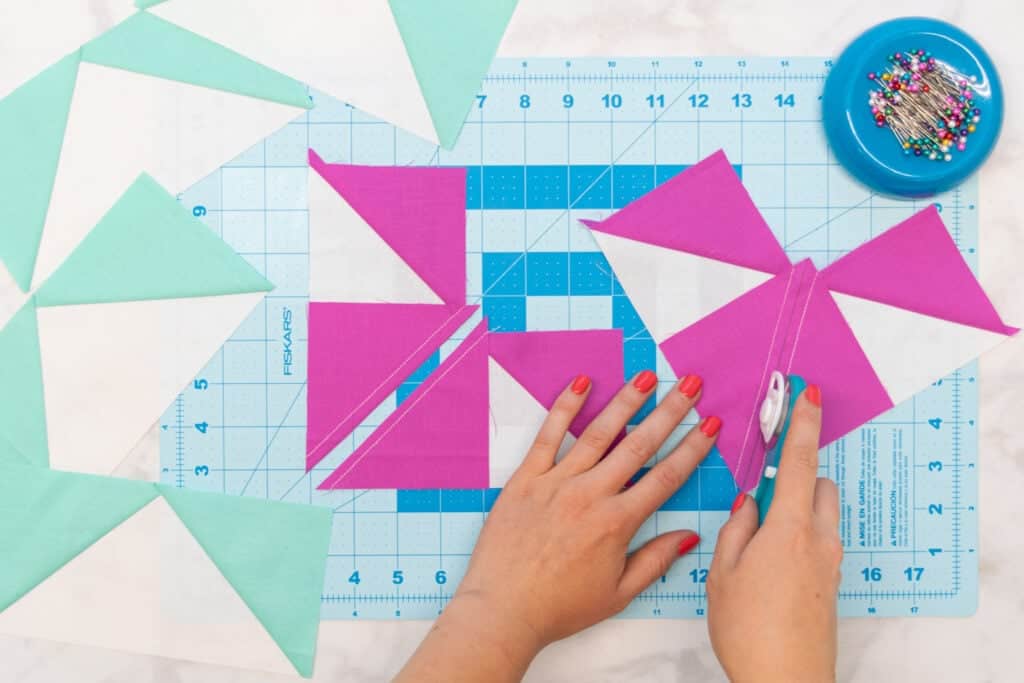
Step 4: Stitch the Second Set of Squares
Lay each heart-shaped piece on your table with the right side facing up.
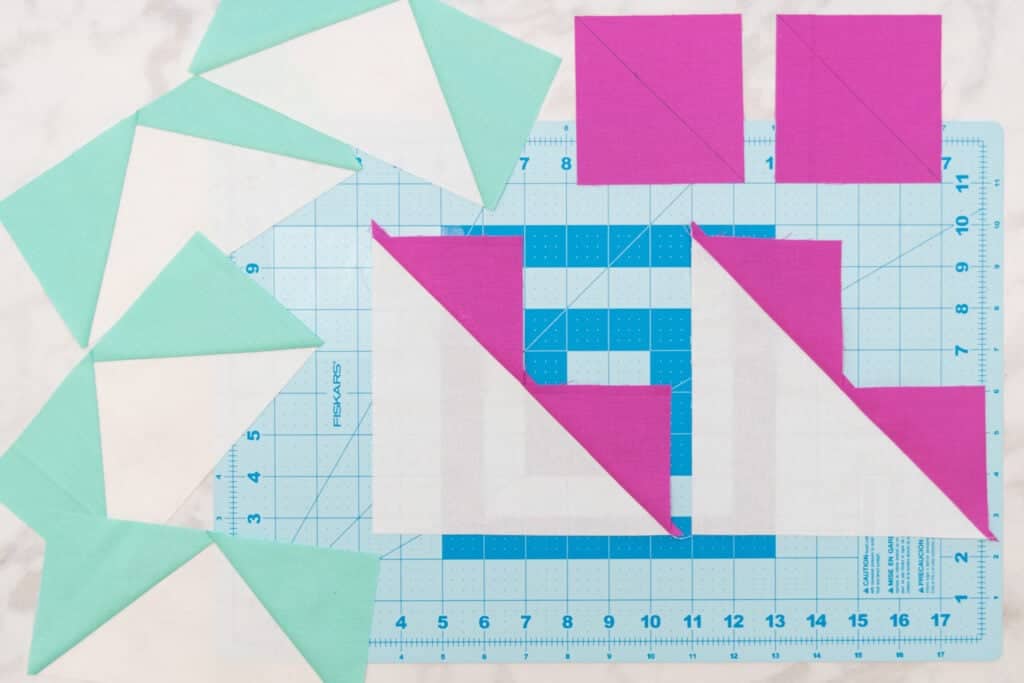
Place one of the remaining small squares right side down in the bottom corner of each heart-shaped piece.
Orient the small squares so that the diagonal lines are running from the corner up to the center between the two small triangles.
Pin each small square in place.
Then, stitch 1/4 inch to either side of the marked diagonal line on each of the pinned squares.

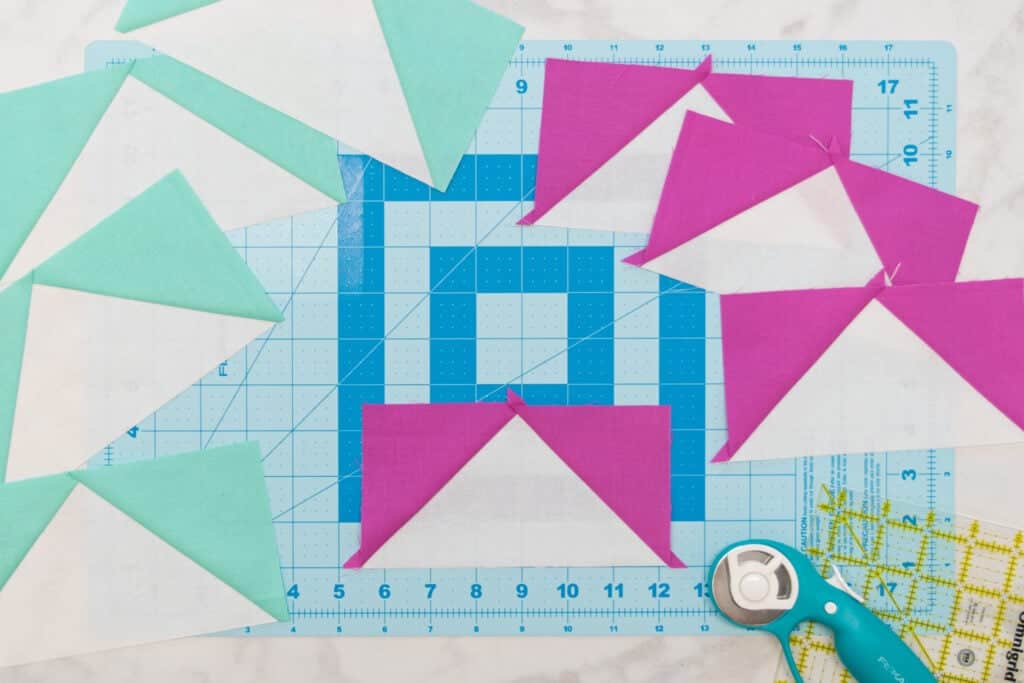
Cut along the line between the stitching on each of the heart-shaped pieces.
Next, press the new small triangles outwards, pressing the seam allowances towards the smaller triangle.

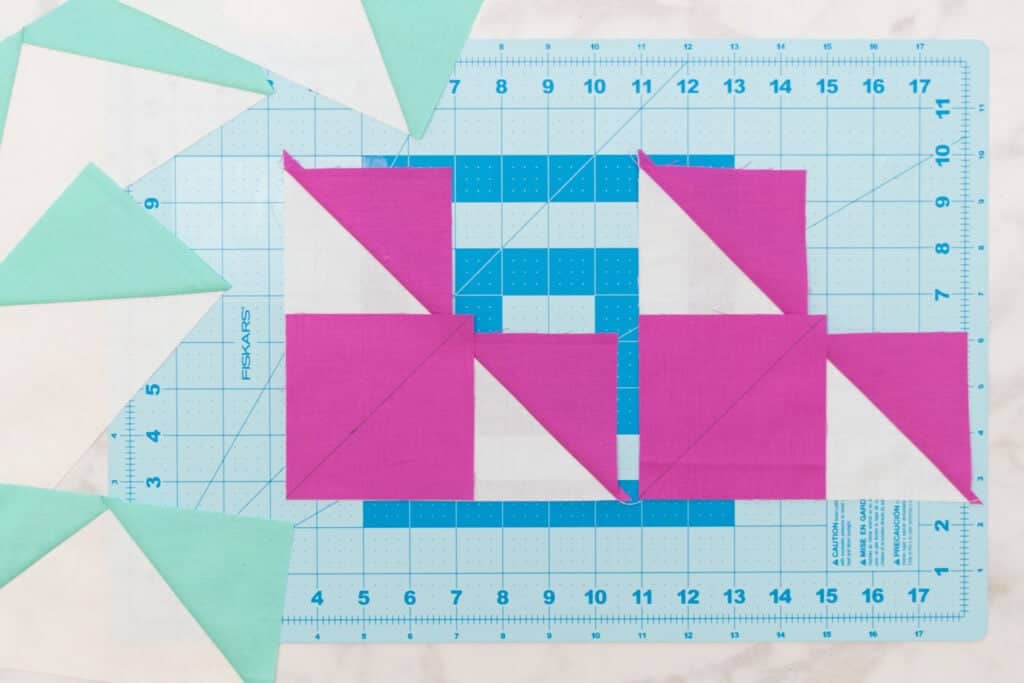
You now have 4 beautiful flying geese! To finish these up, we need to trim them to the right size.
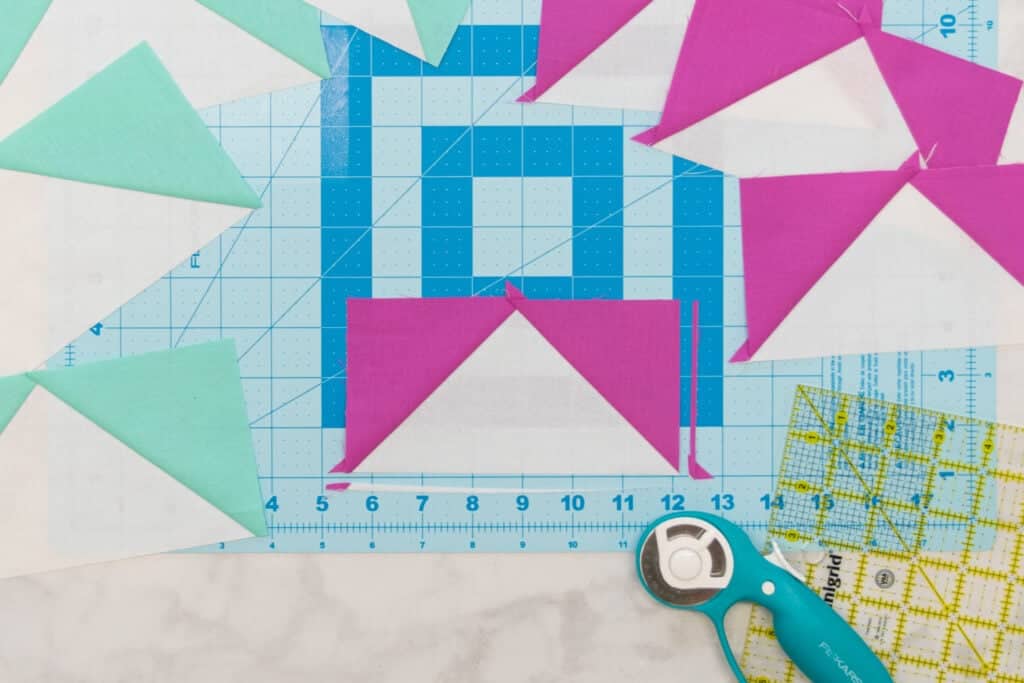
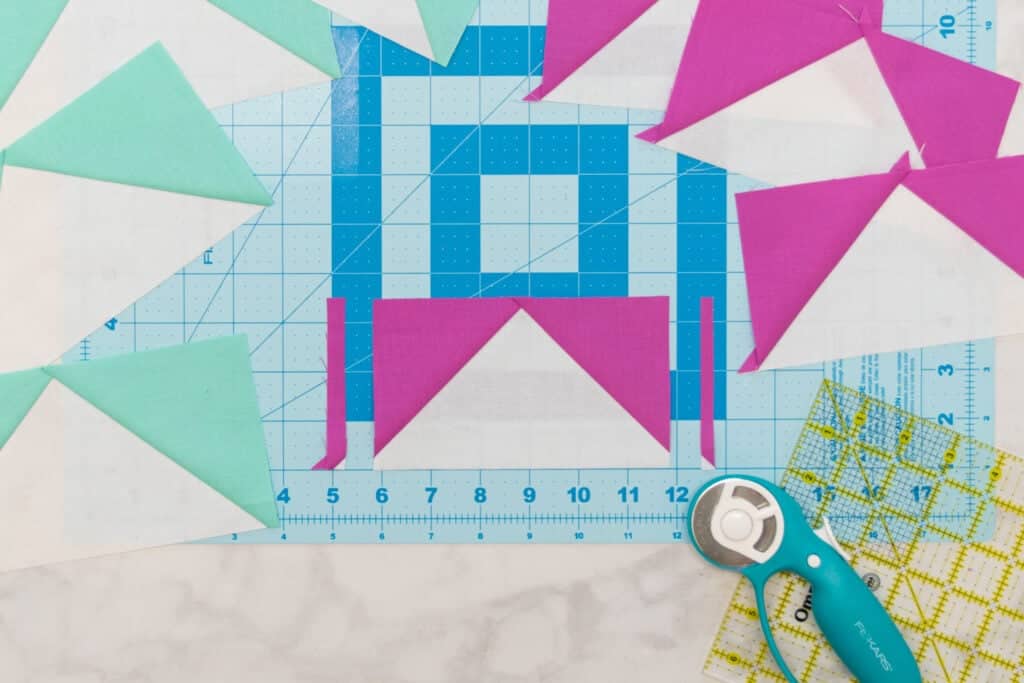
Step 5: Square Up and Trim Down the Flying Geese
I'll be trimming my flying geese to 3" x 6", but you can use this method to square up your units to whatever size you need.
Start by placing one of the flying geese on your cutting mat. Orient it with the center triangle pointing upwards.
Then, line up your ruler with the 45-degree line on the right-hand diagonal seam of the unit, with the bottom and right-hand edges of the fabric slightly emerging from the edges of the ruler.
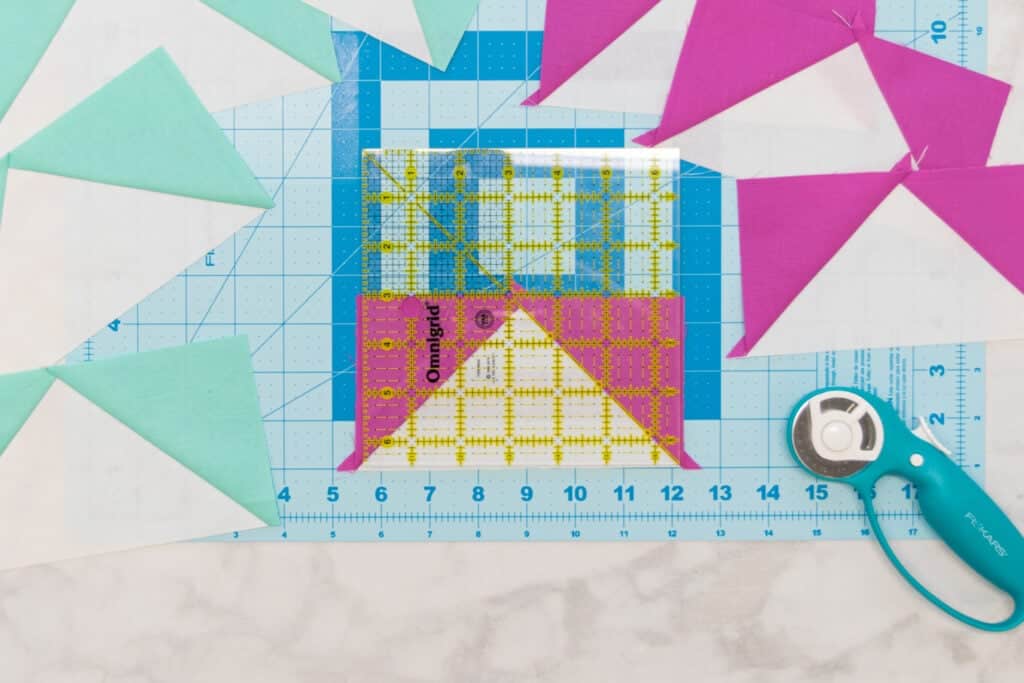
Trim a small amount off the bottom and right-hand edges. Make sure to keep the 45-degree line of the ruler lined up on the seam.

The bottom right corner is now at a perfect 90-degree angle with the seam running at 45-degrees from the corner.
Next, using the bottom edge as a straight-edge guide, line up the ¼ inch line on your ruler with the triangle point at the TOP of the unit. Cut the top edge to a straight line, cutting exactly ¼ inch above the point.
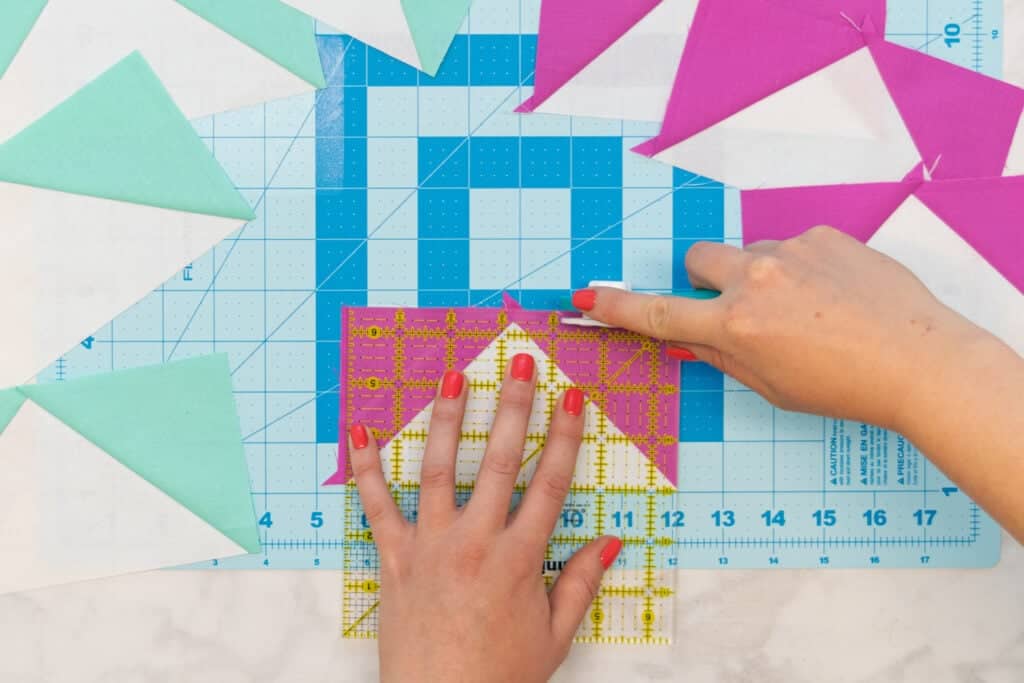
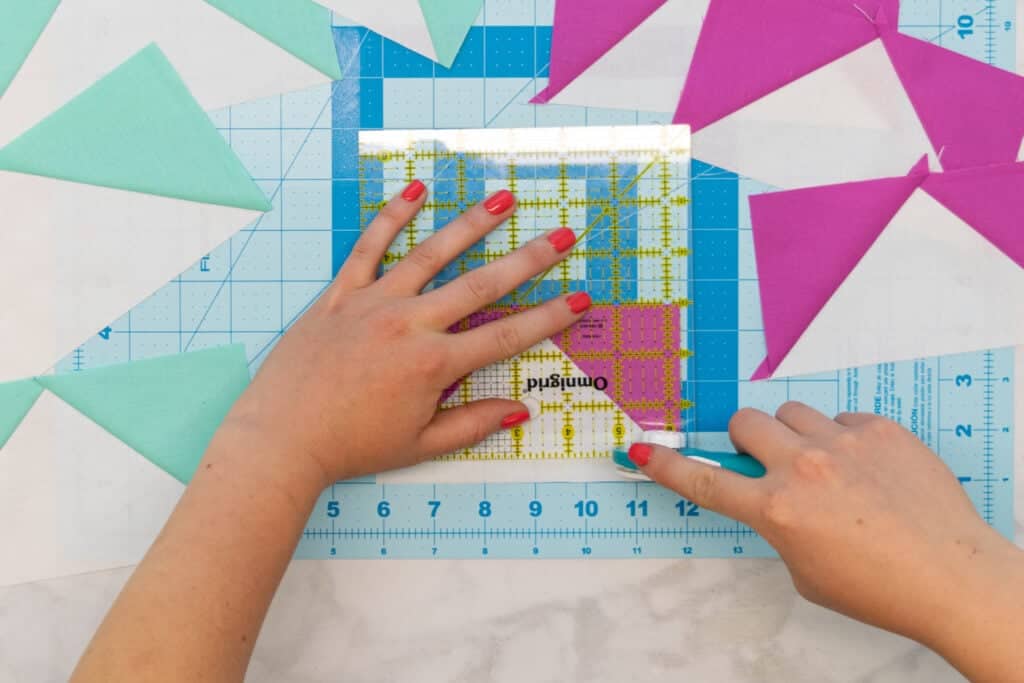
Calculate half the desired finished width of your flying geese. In my case, half my finished width of 6" is 3".
Then, find the line corresponding to this measurement on your ruler.
Using the cut bottom and top edges as straight-edge guides, align this line on your ruler vertically through the center of the unit. Make sure it’s going right through the point in the center triangle.
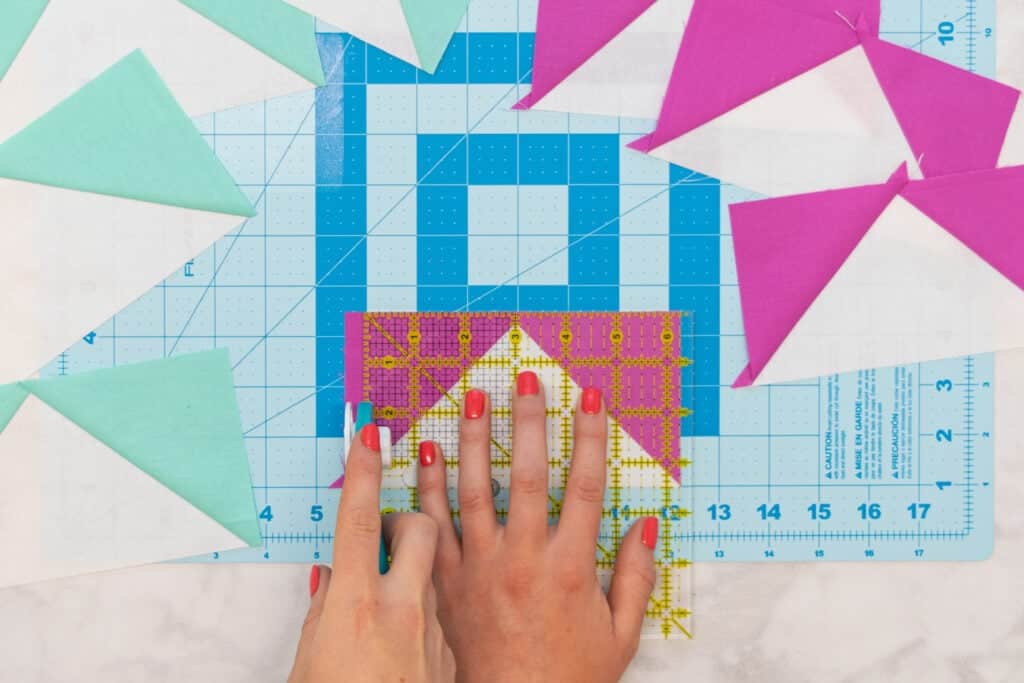
Trim the left-hand edge straight. I'm cutting mine 3 inches from the point in the center of the unit.
Flip the ruler. Realign the same line vertically through the point, then trim the right-hand edge straight the same distance from the center point.

In my case, cutting 3 inches in each direction from the point of the triangle results in a finished width of 6 inches with the point at the exact center!
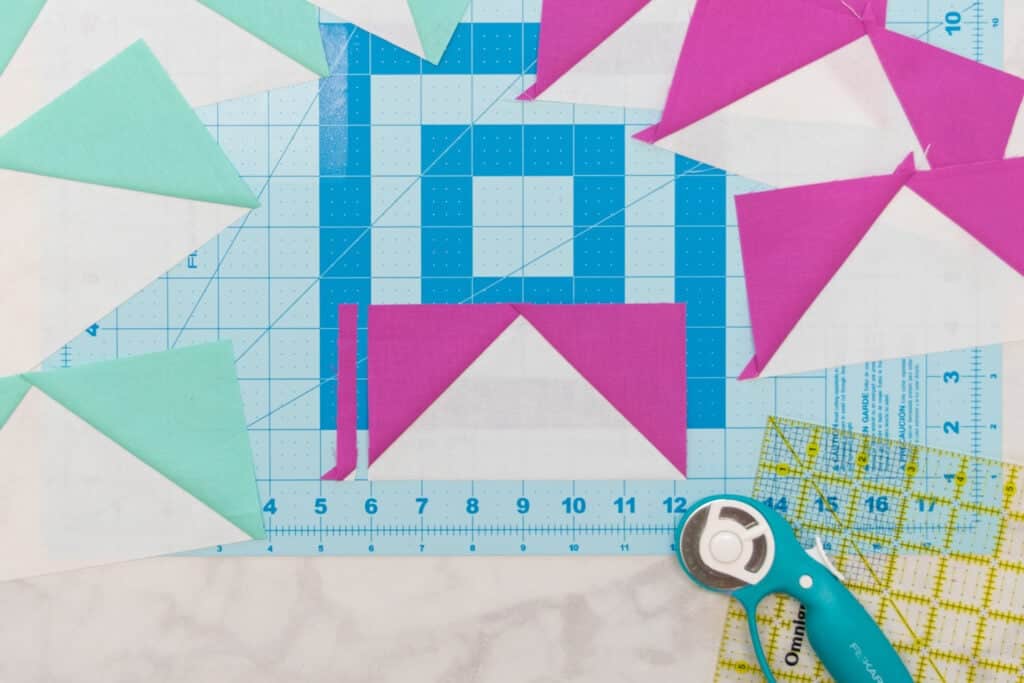
Next, line up the line of your ruler that corresponds with the desired finished height of your flying geese along the top edge of the unit. In my case, this is 3 inches.
Then, trim the bottom edge off.
You now have a squared-up, perfectly sized flying goose unit!
Again, make sure that you're using the intended finished measurements of your flying geese here, not my measurements!
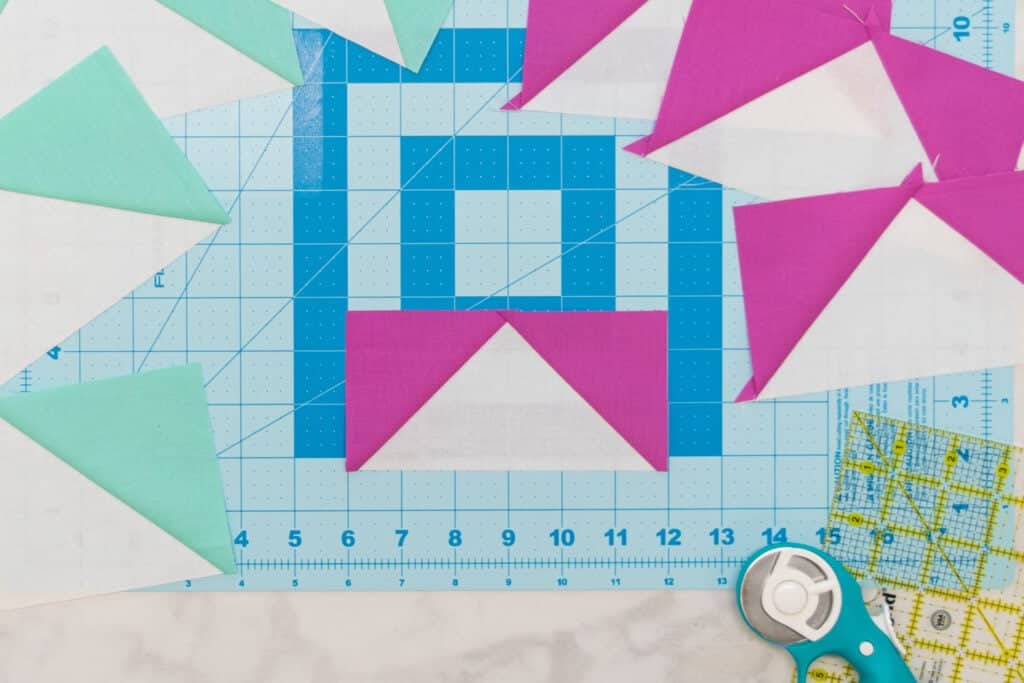
Repeat this process to trim down each of your remaining flying geese.
That's all there is to creating beautiful, perfectly-sized flying geese! Not as hard as it looks, right?

What's your favorite method of sewing flying geese? Let me know in the comments below!
Looking for more free quilting tutorials? Click here!
Don't forget about this free cheat sheet and tutorial! Pin it to your favorite Pinterest board by clicking HERE.
I have made a similar quilt but using 2 pieces of same size fabric, sewn diagonally to make 4 equal squares less measuring still no waste sewing 2 lines 1/2 inch apart diagonally from right bottom to Left top and Left bottom to right top then making cuts on lines from centre bottom to centre top, and from centre left to centre right. less fiddling.
It is a family tradition to make a comfort, single size quilt for each grandchild as they graduate from high school and go off on their own to take with them, a little piece of home and comfort. I have 2 now in University and 3 more will be attending in the fall.
Easy quilts like the one you posted make a great gift.
Hi!! I'd love the chart but I don't see the link.