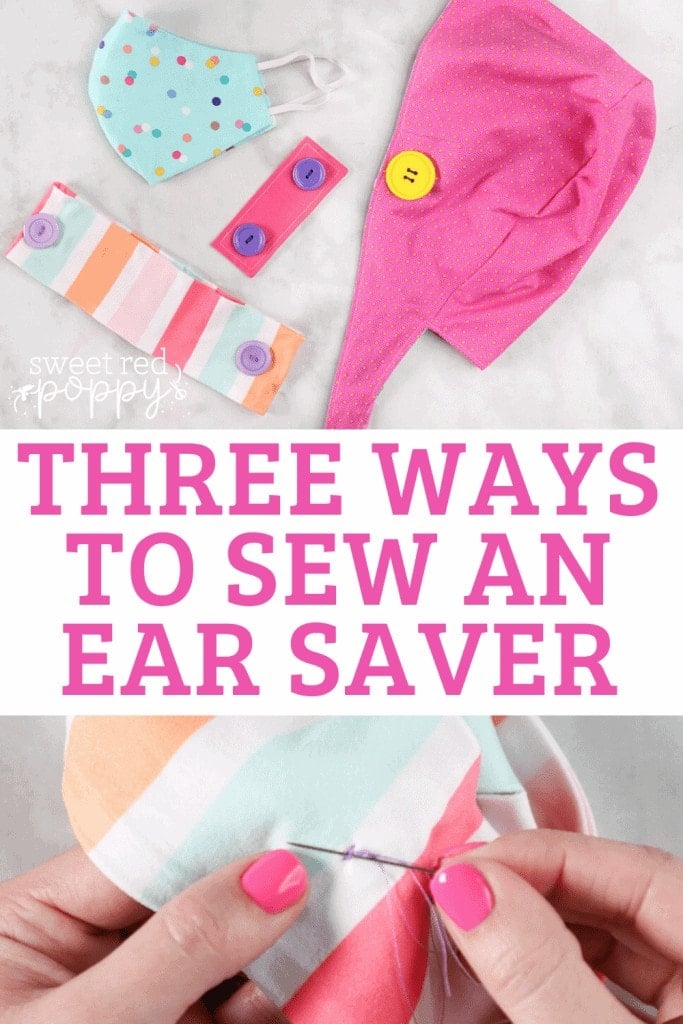
Learn How to Sew an Ear Saver 3 Different Ways
Wearing a mask with elastic straps for hours on end can cause extreme irritation behind the ears.
After many requests from doctors, nurses, and healthcare providers for a solution to this problem, I came up with three different ways to put less strain on their ears.
The solution is a handful of buttons and some fabric! The best part is you can make each option from home and donate them to your local hospital. Let's go ahead and get started!
Click HERE to get our Back to School Guide for Sewing Face Mask for Kids
This post may contain affiliate links, meaning when you click the links and make a purchase, Sweet Red Poppy receives a small commission at no extra cost to you.
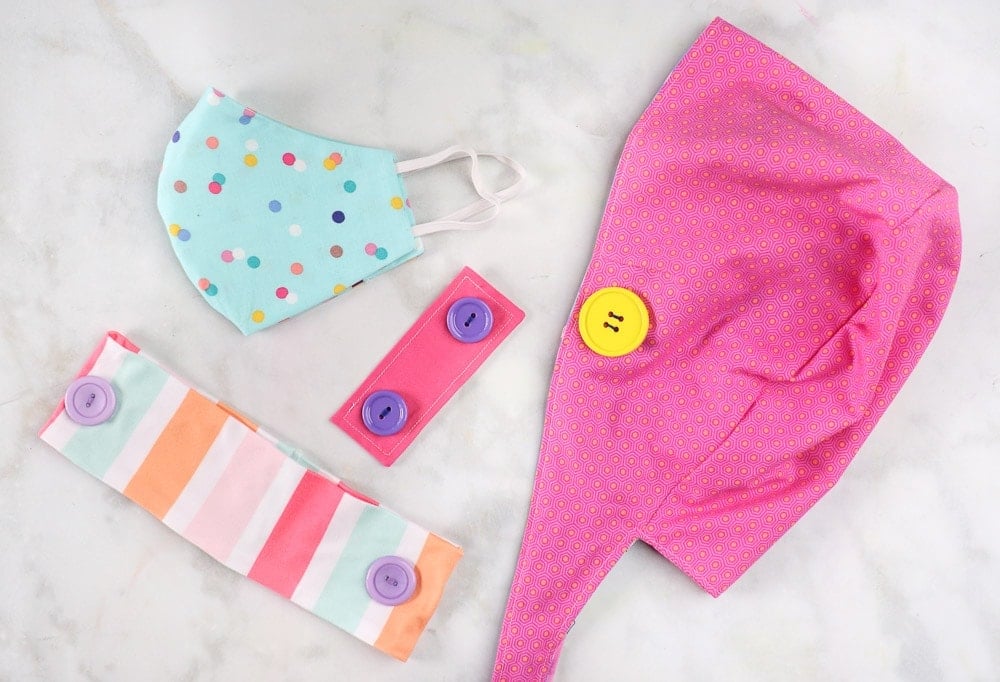
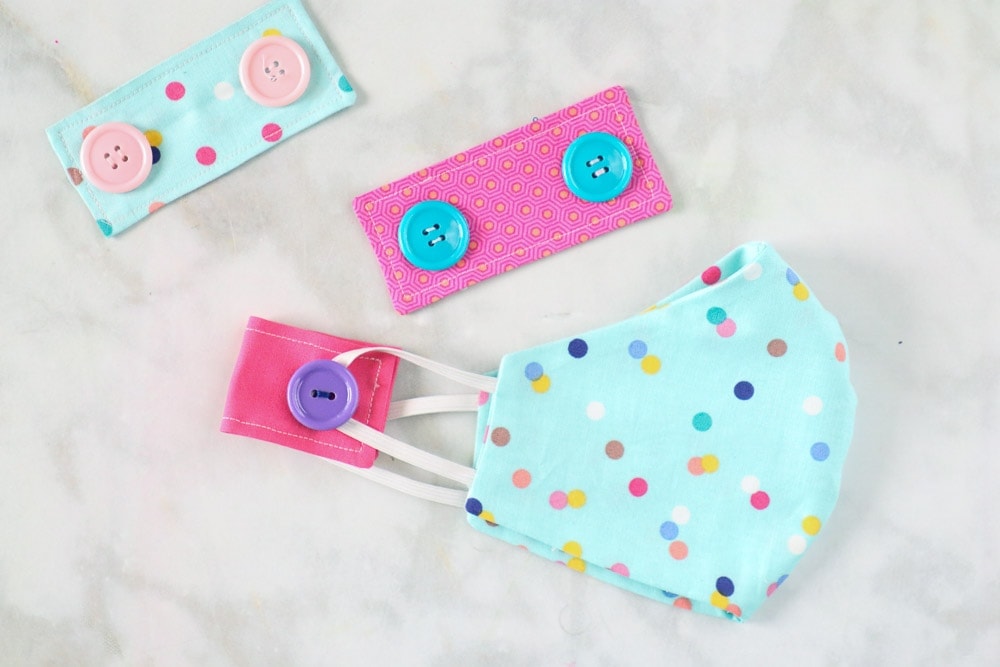
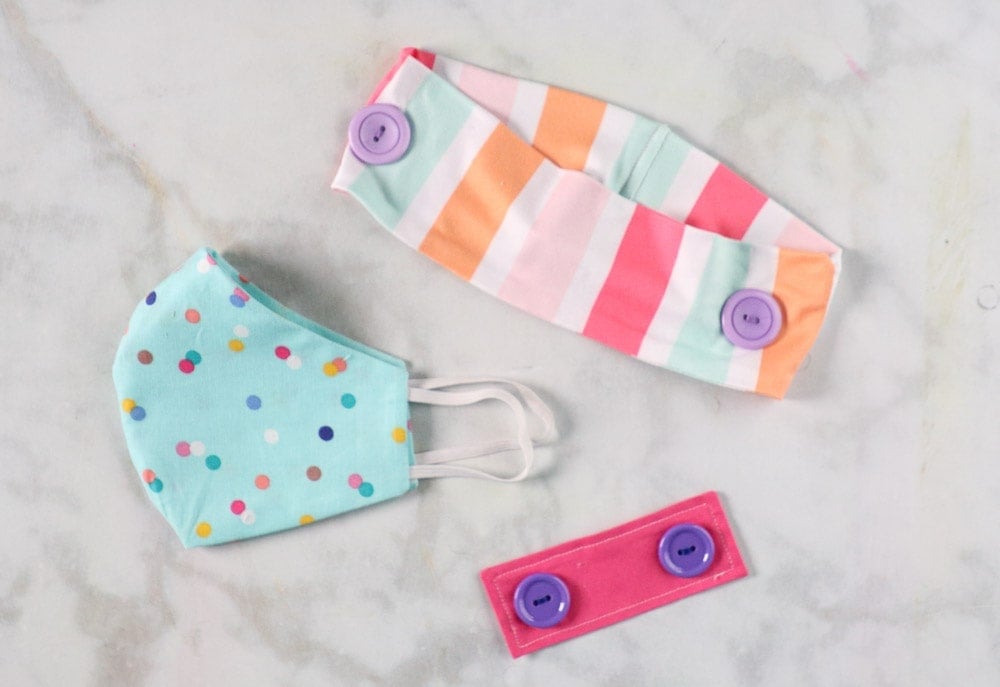
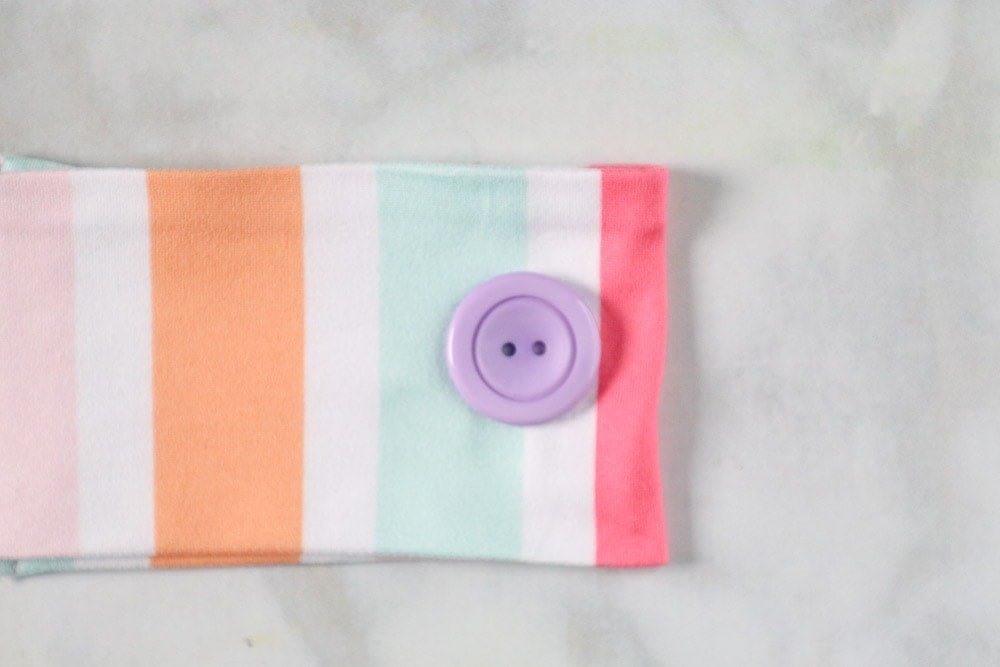
Ear Saver with Buttons
This is probably the easiest ear saver to make. Simply wrap the elastic strap around the button and place it at the base of your neck to hold your mask up without any ear irritation.
Ear Saver Supplies Needed:
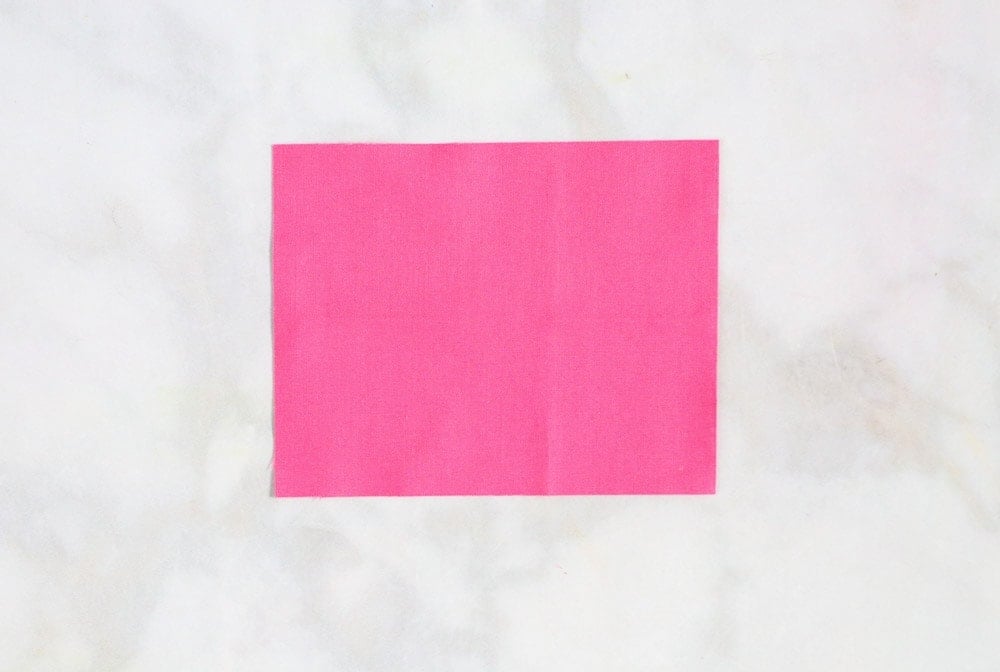
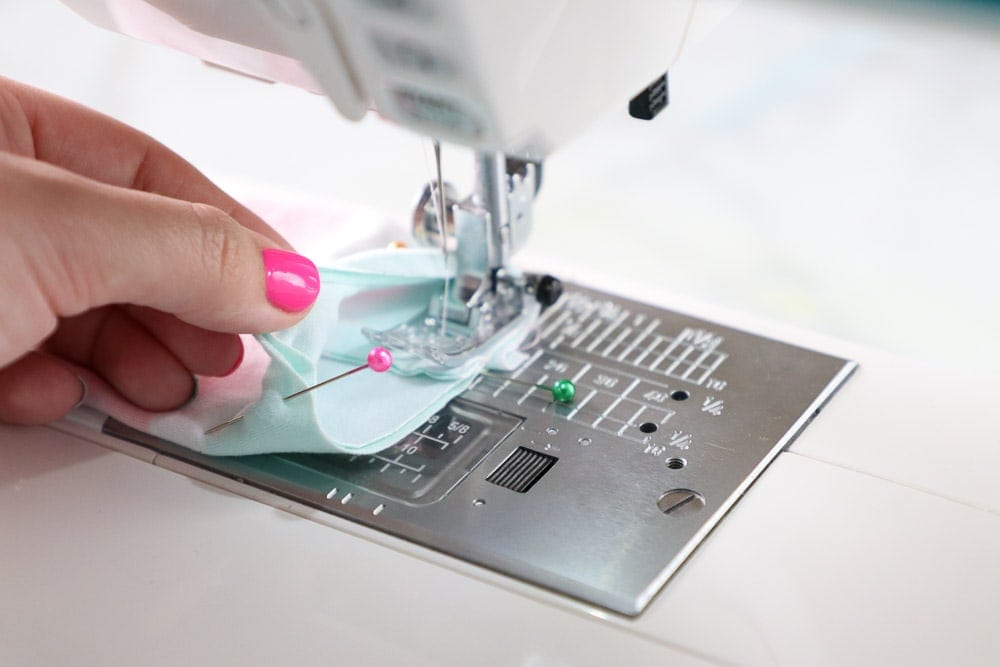
Cut a piece of cotton fabric 5" wide x 4" tall.
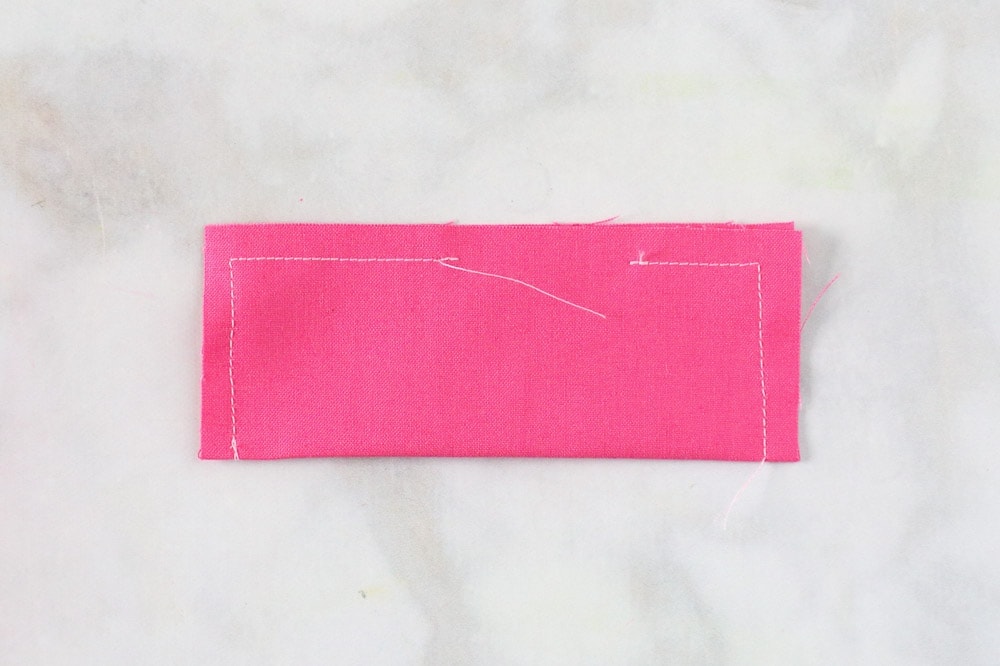
Fold the fabric in half, by bringing the bottom of the rectangle up to meet the top.
Place a few pins along the top raw edges to secure them together.
Sew along the three raw edges using a 3/8" seam allowance leaving a 1" opening for turning.

Clip the corners of the rectangle to reduce the bulk of the fabric. This will help you to get sharper corners once it's turned right side out.
Turn the rectangle right side out through the 1" opening. Use a point turner to gently push out the corners.
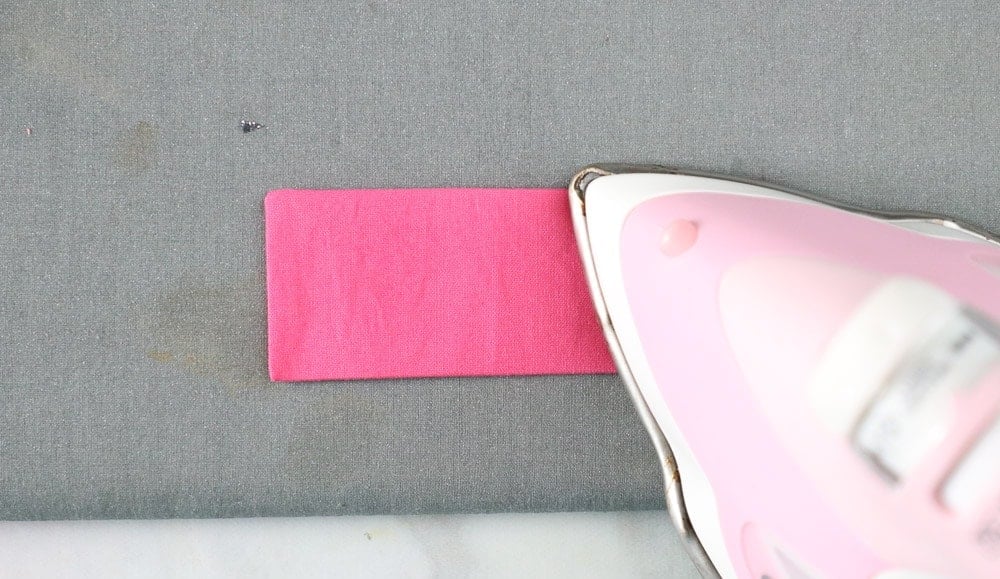
Press the fabric with an iron and plenty of steam.
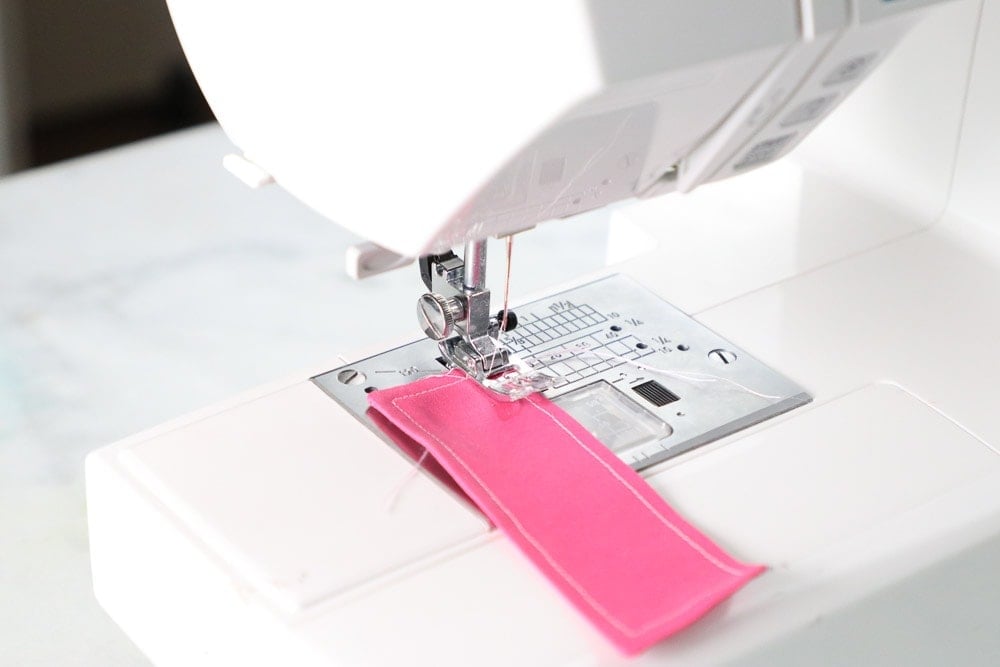
Topstitch around the entire rectangle using a 1/4" seam allowance.
Thread a needle with about 20” of thread. Pull the thread so you have an equal amount of length on both sides and tie the end in a double-knot.
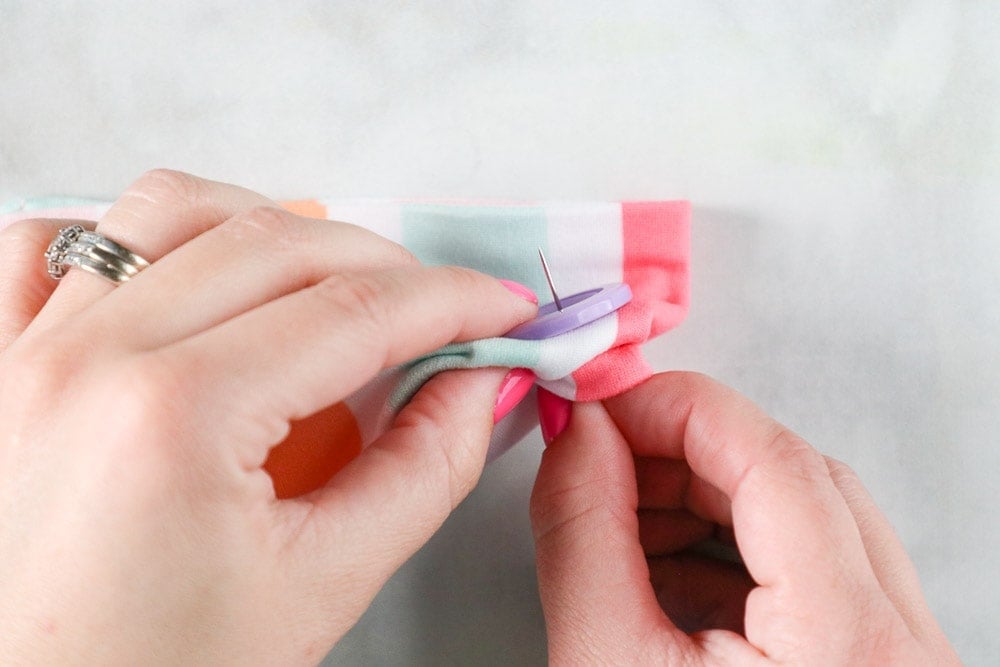
Position the button on the fabric, push the needle from the back of the fabric upwards through one hole of the button, pulling upwards until the knot is flush with the fabric. Pull the thread back downwards through the opposite hole and repeat this process about 6 times.
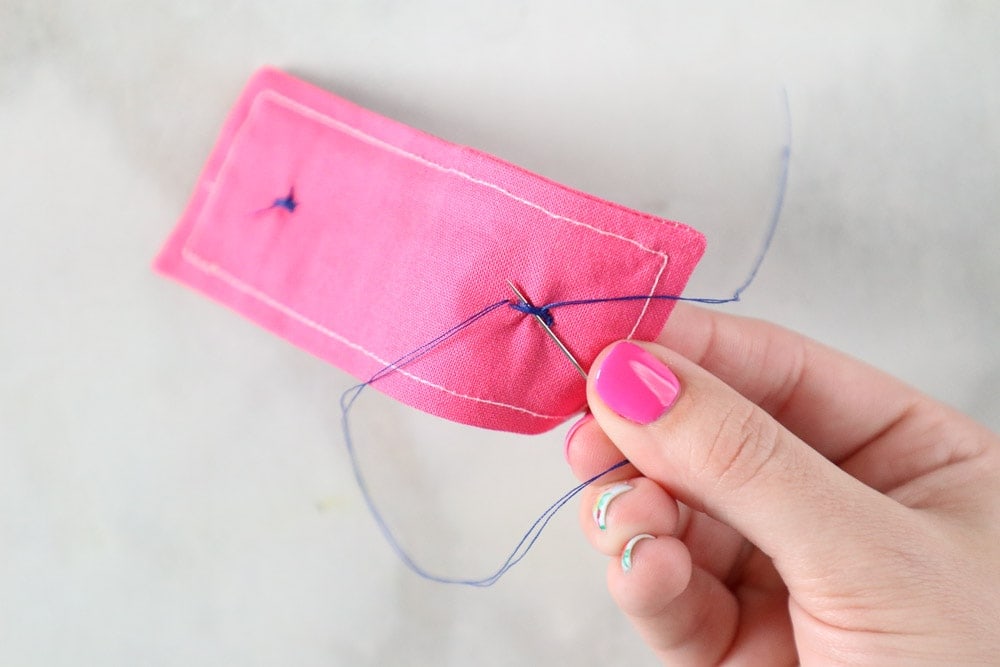
On the backside of the button, slide the needle underneath the tightly woven thread and pull gently until you have created a small loop. Thread the needle through the loop and pull tightly. Repeat this process several times. Cut the threads and place a small amount of fabric glue on the threads.

Headband Ear Saver with Buttons
This option is great for healthcare providers who enjoy wearing a headband. It's easy to make and can stretch to fit a variety of different sized heads. The buttons are placed near the ears where the elastic can easily hook onto them.
Headband Ear Saver Supplies Needed:
- Knit Fabric 18" x 6" (Cut 19" x 6" for a Larger Sized Head)
- Scissors
- Sewing Pins
- Sewing Machine
- Iron
- Ironing Mat
- Buttons
- Needle
- Thread
When looking for the fabric for this project, you'll need a stretchy fabric that has the ability to stretch at least 50%. That means a 4-inch piece of fabric should be able to be stretched to 6".
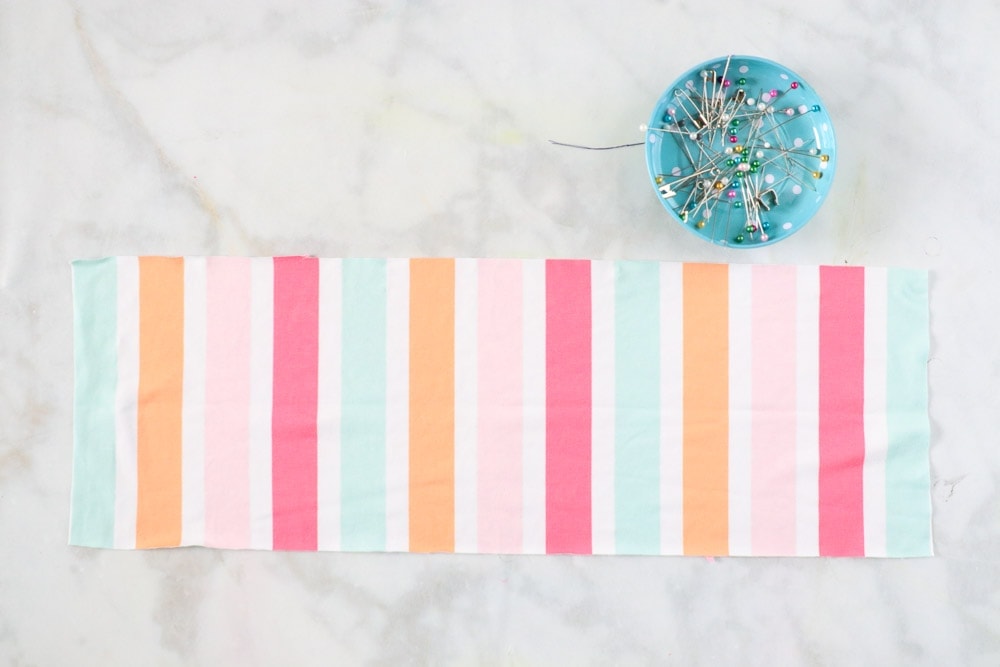
Cut your knit fabric into an 18" x 6" piece. (If your head is slightly larger than average cut a longer length.) The greatest amount of stretch should be running along with the length of the fabric.
Place the fabric on a flat surface in front of you. Fold it in half (hot dot style) so the raw edges are aligned.
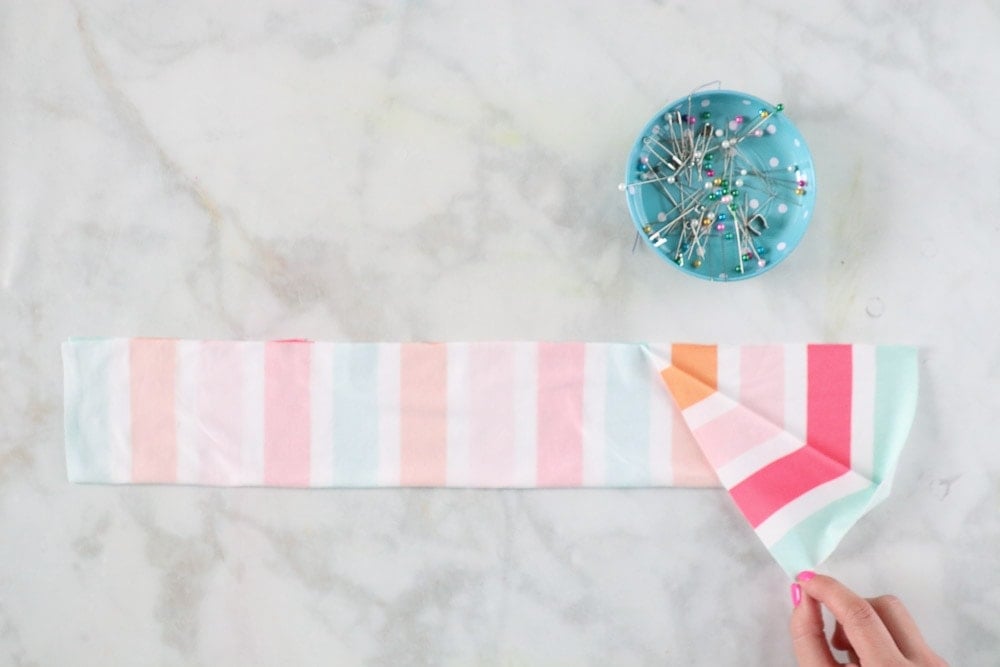
Pin the fabric in place.
On your sewing machine, select a knit friendly stitch. Look for an option that resembles a lightning bolt or select a zig-zag stitch and decrease the width of the stitch if you have the option.
Using this type of stitch will allow the headband to stretch to fit the wearer's head without the stitches breaking.
Place the fabric under the sewing presser foot and use a 3/8" seam allowance to sew along the entire length of the fabric leaving the short ends unsewn.

Don't forget to backstitch at the beginning and end of the seam.
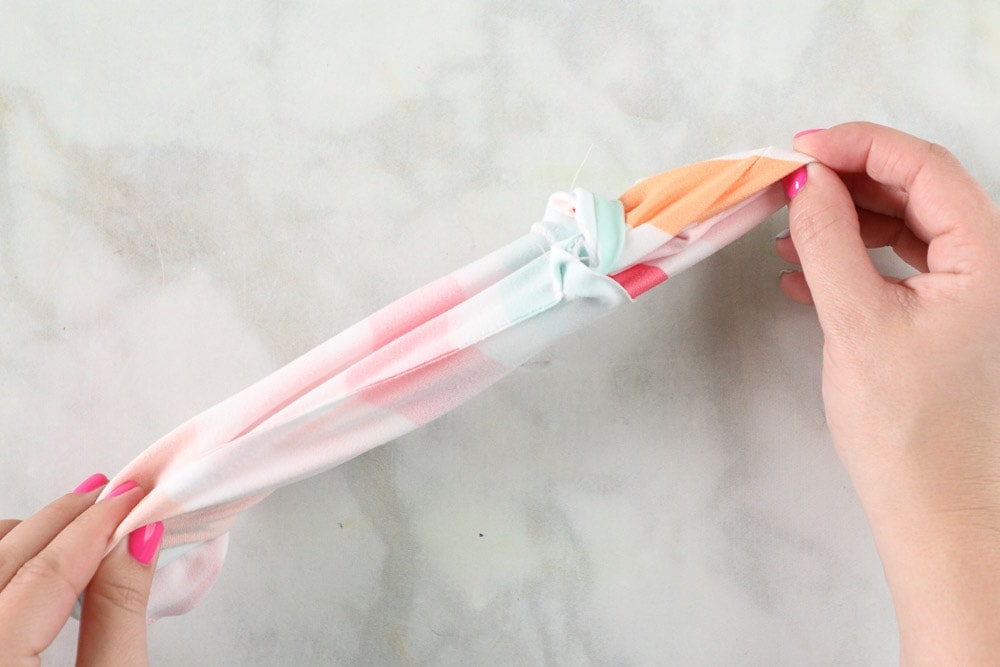
Starting at the open end of the fabric push it inwards so that the right sides of the fabric are facing each other. Continue turning the fabric until you align both open ends of the tunnel together.
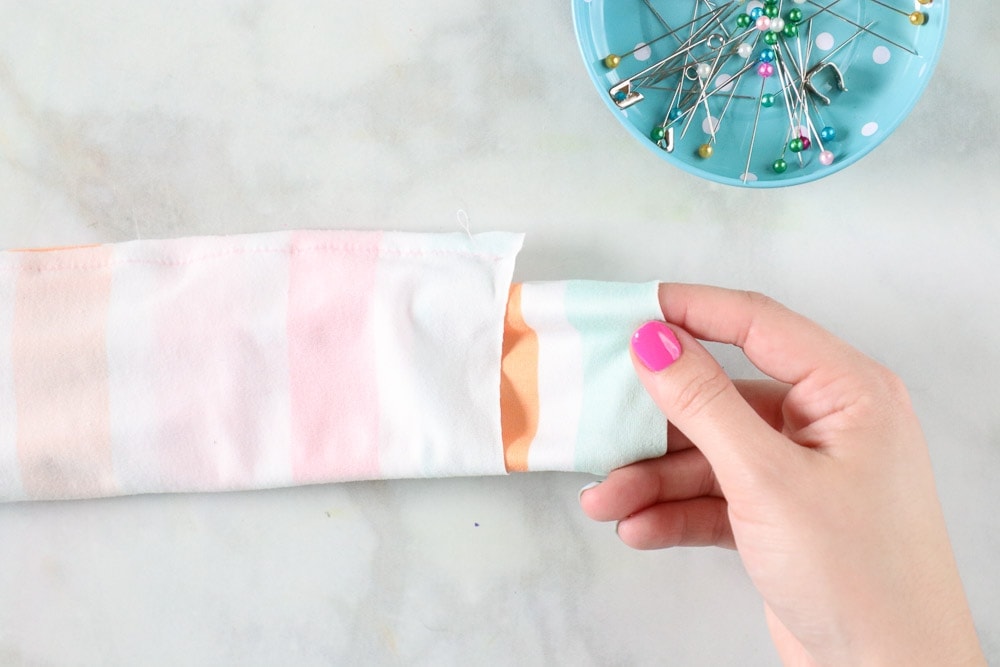
Line up the seam allowances and pin them together. Place a few more pins around the opening.
Place the fabric under the presser foot. Sew, leaving a 1-2" opening for turning.
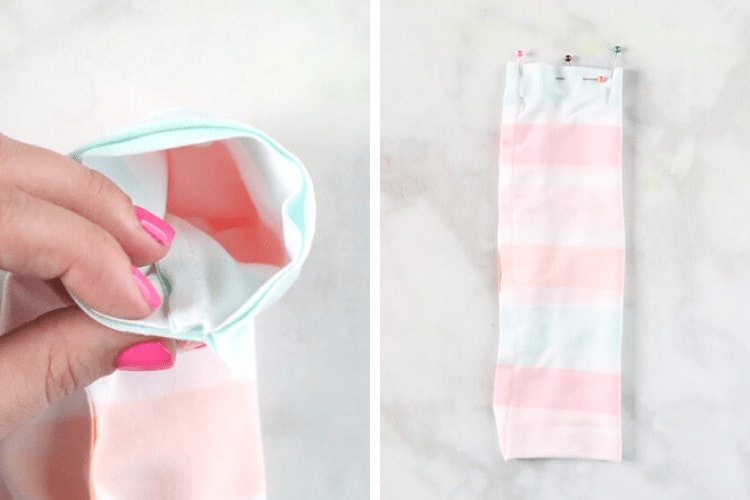
Pull the fabric through the opening to turn it right-side out.
Roll the seams back and forth between your fingers to turn them out completely and press the fabric flat.
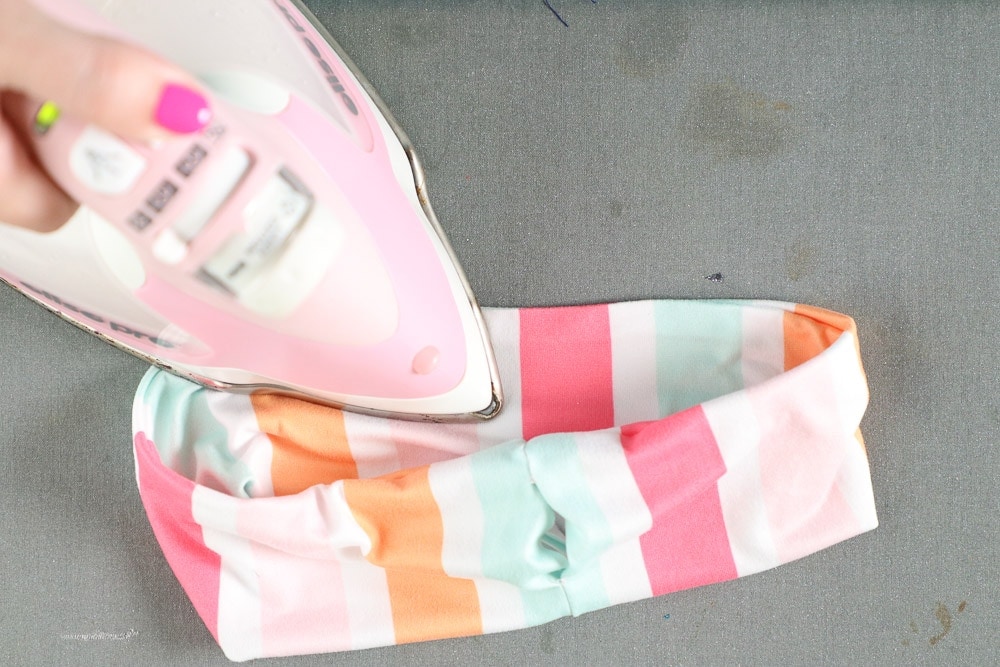
Now it's time to close the opening, you can slip stitch the opening, use fabric glue or topstitch over the opening.
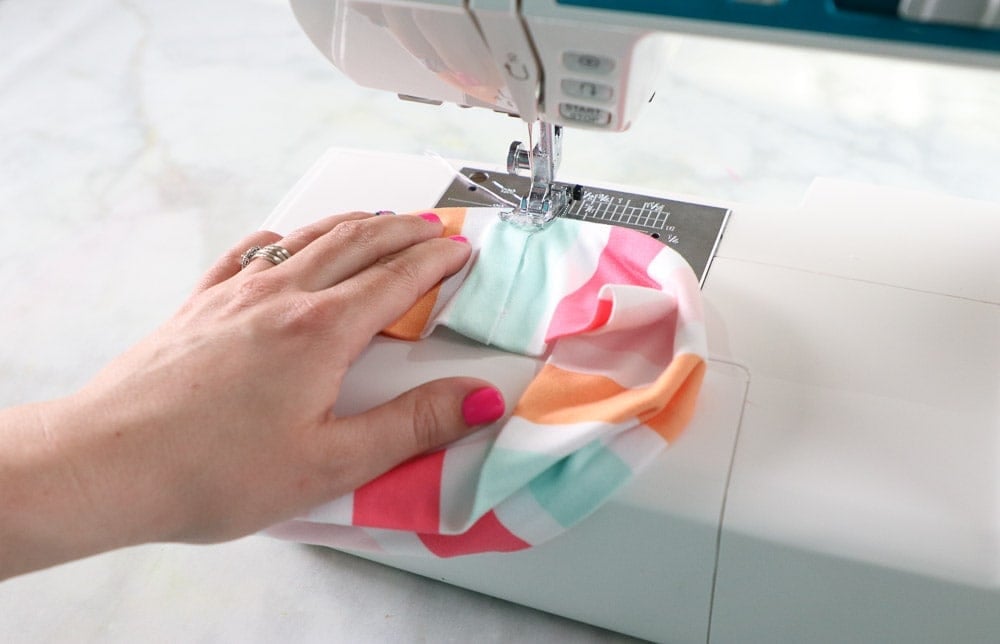
Place the headband in front of you with the seam in the center against the table. Place the button close to the folded edge.
Thread a needle and sew the buttons onto the knit headband securing the button at least 6 times per set of holes. Make sure you're not catching the back of the headband.
Once you've secured the button to the headband flip it over to the backside and follow the directions below.

Snip off the excess thread. Secure the back of the knot with a dab of fabric glue for extra strength.
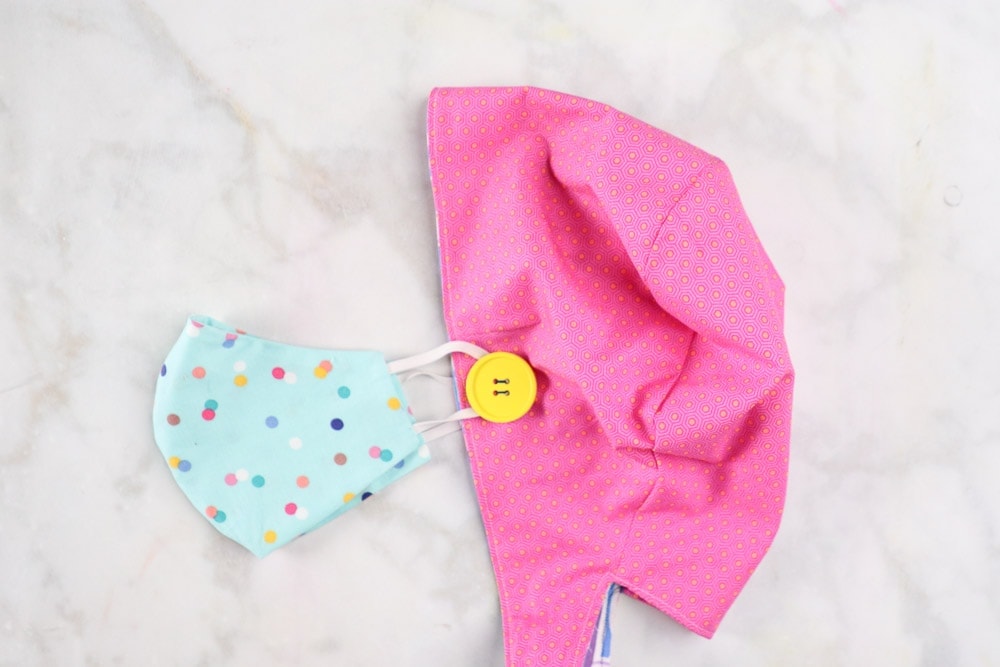
Scrub Cap with Ear Saver Buttons
It's oh sew simple to add two buttons to a scrub cap! You can use an existing scrub cap or use my scrub cap free pattern to create your own!
You can sew a scrub cap using this tutorial or add buttons to an already made scrub cap.
Supplies
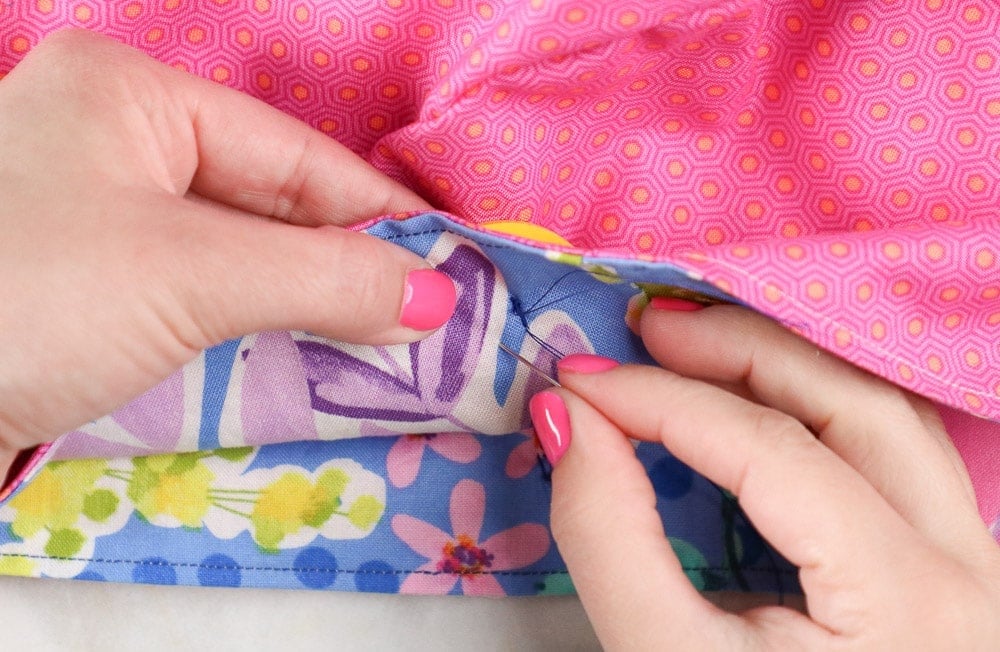
Place the Scrub Cap on your head and mark either side near the ear. Now it's time to sew on a button.
You can refer to the photos listed above with the other tutorials for the full step-by-step of how to sew a button.
Don’t forget to join my face mask Facebook group where you can show us what you’re making, ask questions, and learn from others! Follow me on Instagram for daily crafting inspiration and a look behind the scenes.
I've made masks with elastic around the ear for young children and sometimes the elastic is too short. I thought the ear saver with buttons might fix this problem but what dimensions would you use for the fabric?
I would suggest 4" × 3" to start out with, ending up a 2" × 1 1/2" for younger children. Maybe try 5" × 3" to get a 2 1/2" × 1 1/2" for pre-teens up. To alleviate the large size range in children, you could also put a second set of buttons a little further in, as to tighten, if need be.
Thank you! Back to being a musketeer. I just want you to know I've appreciated your sharing of knowledge!
Please advise what size buttons to use for the ear savers and the surgical caps? Thanks!
I would guess about an inch, give or take a bit, so it would be easy to get the elastic around the button.
Thank you again! Just what I needed to add buttons to those scrub caps (from your pattern.) I knew that I needed to add buttons but wasn't sure where to put them. I will machine sew those buttons on rather than hand-sewing them. Lazy me!
great idea and easy to make. Thank you!
I have tried 6 different fitted mask patterns and yours is by far the very best. Thanks for your efforts, I truly appreciate all you are sharing. I have added a garden wire (from dollar tree encased in rubber) for my nose wire. I have tried out every single wire listed and these work wonderfully and are washable! Also since HEPA filters are non-woven with 65 gsm, and non-woven interfacing is 25 gsm, I have followed the suggestion to use 3 layers of non-woven interfacing since the unofficial tests showed NO virus penetration. Instead the virus's bounced between the layers. Blessings to you for your sharing!
I applaud you! I agree with Marie! Your tutorial(s) are the best! There are about 4,000 mask patterns out there now and attempting to come up with the perfect one to make that fits ALL the needs out there, yours is by far the best and easiest to understand. BIG KUDOS on your Videos!
Ive been making both the headbands and ear saver bands for a couple of weeks! I think I've made close to over 100 of each. Much appreciated by nursing staff. But I make the back of the head bands with stretchy fabric too. That way it can fit the guys who like to where them. I also streamlined the process and just used single layer headbands - like a yoga headband - and just used zigzag stretch edging stitch on the seam. Can get more headbands from your fabric that way and much quicker! May not be as pretty, but I made up for that by using cute patterned buttons.
I have been asked to sew the scrub hats and ear savers for the nurses in ICU in our hospital. But I am having problems printing the pattern. I don't want to print 35 pages. Can you help? With thanks.
Thank so much for all of these tutorials and patterns. I am NOT a seamstress by any means but I have been able to make PPE for friends and family and it is truly lifesaving. Thank you, thank you, thank you!
Could you please post a picture of the ear saver in use with a mask? Thank you!
Google it and click on images. Or this video https://www.youtube.com/watch?v=K-6AcE3UAxc
Easy to follow directions. I love it. Thank you very much.
What size buttons do you recommend?
Do you have written instructions for the Sweet Poppy Paracord fitted mask with the T-shirt ties?
It’s hard for me to remember the steps and I keep having to go back to the video.
Thanks for all your doing.
I have made several of the face masks. Really like your pattern. Thanks much. Will be trying the scrub cap soon.
Thank you so much for this great information! I've sewn many years. I'm spending extra time making masks and ear savers and donating to hospital, friends, etc. Your pattern and instructions are clear, concise, and finished product looks great! Thank you for the details provided. You are a good communicator and teacher. On behalf of those who will receive my sewing, thank you for instructions!
Thanks for sharing your sewing videos Kimberley.
Have made masks for donation to LTC homes as well as to a women shelter.
I am about to start making the OR caps and heard from the nurses to add buttons to the caps.
I will now be adding some ear saver pieces. A great idea.
From a Retired RN,
Thank you
Dumb question I'm sure. But can I use a stretchy headband my kids already have and just add buttons?
For the headband, do you suggest 95% cotton 5% spandex like we use for leggings?
Do you have a print version of the instructions for the ear savers? Or am I just missing it?