• Skip to primary navigation
  • Skip to main content
  • Skip to primary sidebar
Sweet Red Poppy logo
  • Cricut
    • Free SVG Files
    • Paper Flowers
    • Mandala
    • Iron-On
    • Vinyl
    • Maker
    • Explore Air 2
    • Joy
  • Sewing
    • Baby
    • Kids
    • Accessories
    • Christmas
    • Blankets
    • Womens
    • Learn to Sew Tips & Tricks
    • Face Masks
  • DIY Crafting
    • Paint
    • Paper
    • Food
    • Kids
  • Holiday Crafts
    • Valentine’s Day
    • Easter
    • 4th of July
    • Halloween
    • Thanksgiving
    • Christmas
  • Books
    • Cricut Printed Book
    • Cricut E-Book
    • Cricut Joy Printed Book
    • Cricut Joy E-Book
    • Sewing Printed Book
    • Sewing E-Book
    • Face Mask E-Book
    • Mandala E-Book Bundle
    • Mandala E-Book - Inkscape
    • Mandala E-Book - Adobe Illustrator
    • Mandala Printed Book - Inkscape
    • Mandala Printed Book - Adobe Illustrator
    • Baby Pattern E-Book
  • Courses
    • Cricut Course
    • Sewing Course
    • Serger Course
  • Shop
    • E-Books
    • Printed Books
    • Sewing Patterns
    • SVG Files
    • Baby Patterns
    • Subscribe to Emails
  • Search

How to Create a Custom Mug with Cricut's Mug Press and Infusible Ink Transfer Sheets

Written by Kimberly Coffin · This post may contain affiliate links · 6 Comments

1.6K shares

Have you seen the new Cricut Mug Press? Are you still a little nervous to try out the Cricut Infusible ink transfer sheets? In this step-by-step tutorial, I’ll walk you through everything you need to know to create your very own custom mug with the new Cricut Mug Press. Scroll down for all the info!

How to Create a Custom Mug with Cricut's Mug Press and Infusible Ink Transfer Sheets, a tutorial featured by top Cricut blogger, Sweet Red Poppy | Cricut Infusible Ink Transfer Sheets by popular US craft blog, Sweet Red Poppy: image of a woman standing behind a Cricut Mug Press and white ceramic mugs.

The Cricut Mug Press is designed to create vivid, permanent results using Cricut Mug Blanks and Infusible Ink. For more information on the new Cricut Mug Press, be sure to check out my blog post HERE. 

Click here to view all of the new Cricut Mug Press products!

The Cricut Mug Press will release on March 11th, 2021.

How to Create a Custom Mug with Cricut's Mug Press and Infusible Ink Transfer Sheets, a tutorial featured by top Cricut blogger, Sweet Red Poppy |Cricut Infusible Ink Transfer Sheets by popular US craft blog, Sweet Red Poppy: image of white ceramic mugs with Cricut designs on them.

I've had so much fun creating these customized mugs and testing out this new product. I even created a bunch of SVG files that are perfect for mugs and sized for Cricut's mugs. You'll want to make sure to download the files for this project!

Cricut Infusible Ink Transfer Sheets

How to Create a Custom Mug with Cricut's Mug Press and Infusible Ink Transfer Sheets, a tutorial featured by top Cricut blogger, Sweet Red Poppy |Cricut Infusible Ink Transfer Sheets by popular US craft blog, Sweet Red Poppy: image of white ceramic mugs with Cricut designs on them.

Cricut Mug Press DIY Mug - Tools Needed

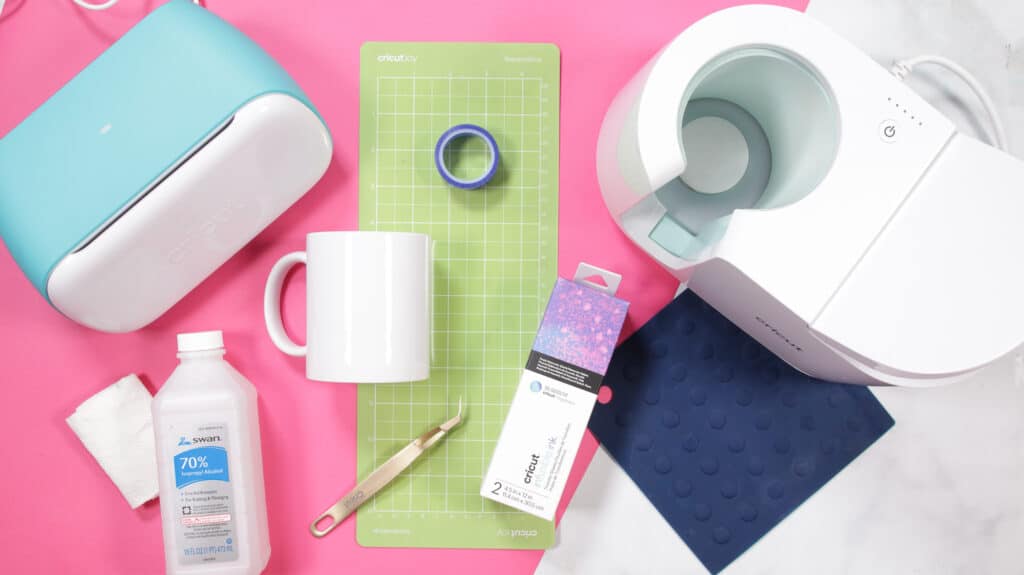
For this project, you will need: 

  • Cricut Joy, Explore Air 2, or Maker
  • Infusible Ink Transfer Sheets
  • Standard Grip Mat
  • Design File
  • Fine-Point Blade
  • Alcohol Wipes
  • Cricut Mug Blank
  • Heat Resistant Tape
  • Cricut Mug Press
  • Scissors
  • Tweezers

Click HERE to download FREE SVG Files for the Cricut Mug Press.

How to Create a Custom Mug with Cricut's Mug Press and Infusible Ink Transfer Sheets, a tutorial featured by top Cricut blogger, Sweet Red Poppy |Cricut Infusible Ink Transfer Sheets by popular US craft blog, Sweet Red Poppy: image of a Cricut mug press, rotary board, white ceramic mug and Cricut infusible ink.

Step 1 - Cut Your Design

Begin by opening up Design Space. 

We’re going to be cutting out this adorable SRP free SVG file which you can find by downloading it below the supply list.

This design is already sized for your mug, but if you are creating your own design, be sure to resize it to the correct size. 

Once you have your design ready, go ahead and click “Make It.” 

This will bring you to the prepare screen. Be sure to "Mirror" your design. Click “Continue."

Select “Infusible Ink Transfer Sheets” as your material. Make sure you have a Fine-Point Blade loaded into your machine.

How to Create a Custom Mug with Cricut's Mug Press and Infusible Ink Transfer Sheets, a tutorial featured by top Cricut blogger, Sweet Red Poppy |Cricut Infusible Ink Transfer Sheets by popular US craft blog, Sweet Red Poppy: image of woman laying Cricut infusible ink on a rotary board.

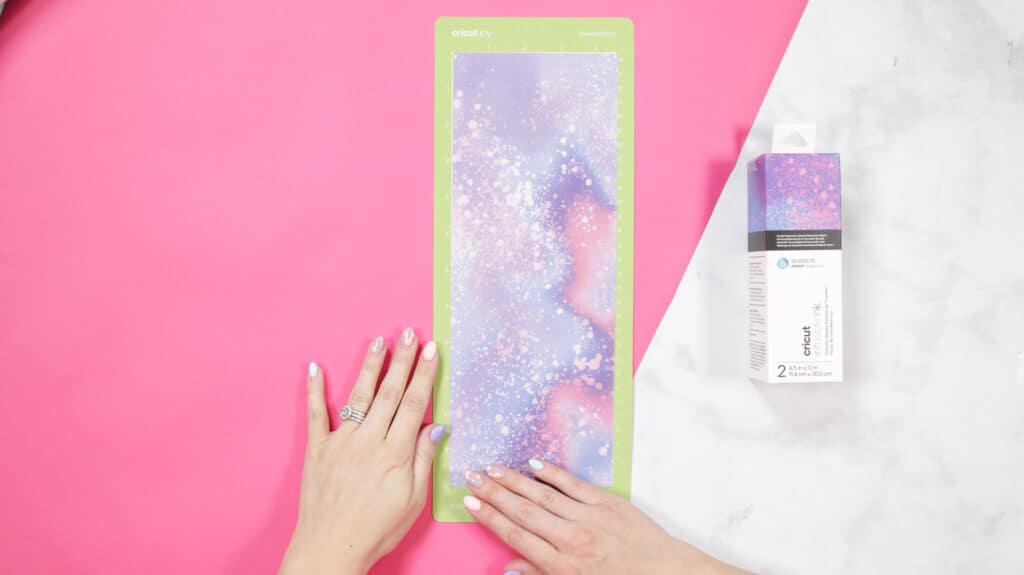
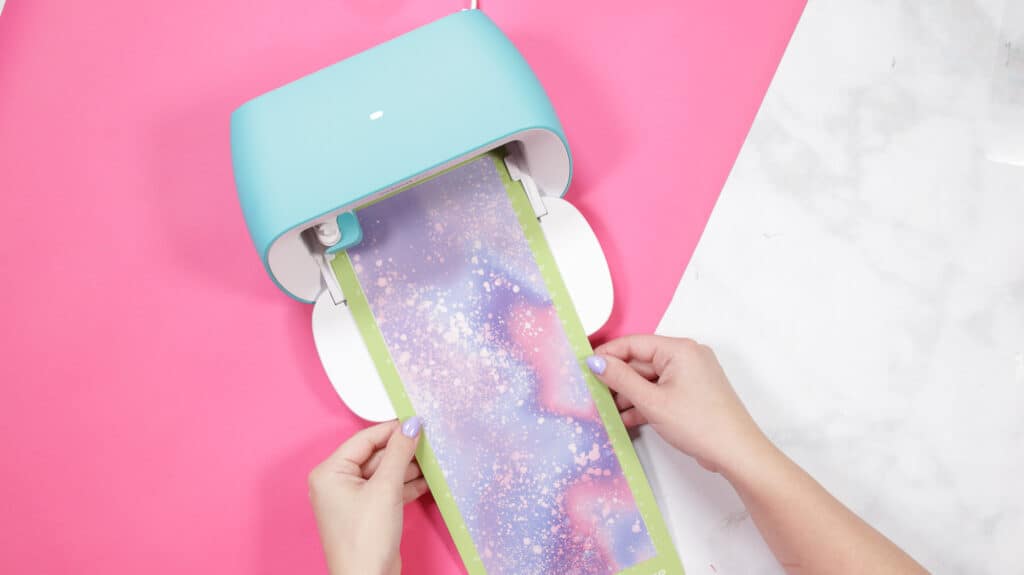
Place the Infusible Ink Transfer Sheet ink side up on a Green StandardGrip mat. Insert it into the machine and press the flashing "C" button to begin cutting

How to Create a Custom Mug with Cricut's Mug Press and Infusible Ink Transfer Sheets, a tutorial featured by top Cricut blogger, Sweet Red Poppy |Cricut Infusible Ink Transfer Sheets by popular US craft blog, Sweet Red Poppy: image of a woman putting Cricut infusible ink in a Cricut Mug Press.

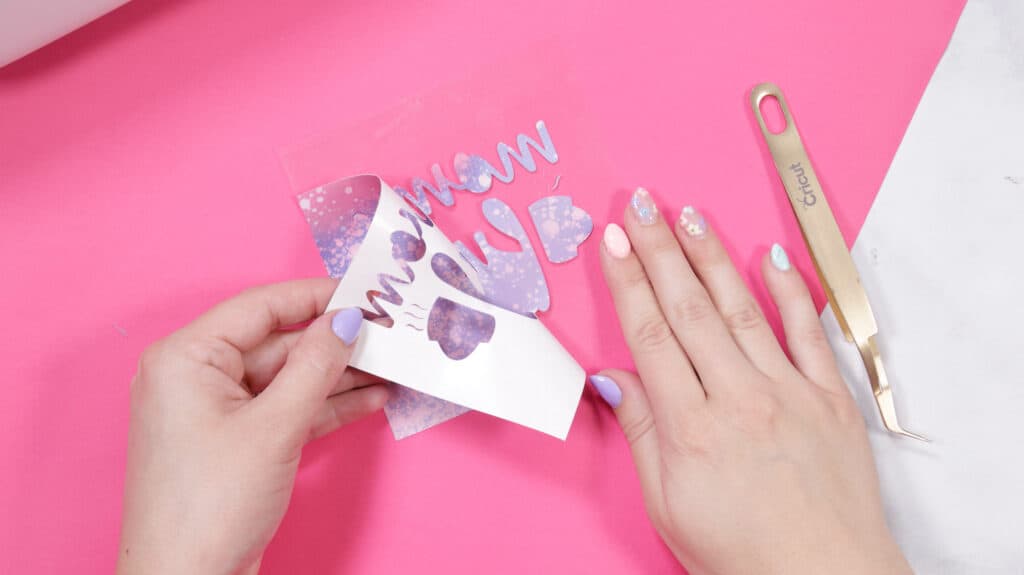
Step 2 - Weed Your Design

Once you have your design has finished cutting, unload it from the machine.

Gently roll the cut area to remove the excess, negative space from your design. For more intricate designs, use tweezers to weed your design.

Trim the clear liner so it does not extend beyond your mug's surface area.

How to Create a Custom Mug with Cricut's Mug Press and Infusible Ink Transfer Sheets, a tutorial featured by top Cricut blogger, Sweet Red Poppy |Cricut Infusible Ink Transfer Sheets by popular US craft blog, Sweet Red Poppy: image of a woman peeling the backing off of a cricut mug press design.

Step 3 - Prepare Your Custom Mug

To begin, clean your mug using rubbing alcohol.

How to Create a Custom Mug with Cricut's Mug Press and Infusible Ink Transfer Sheets, a tutorial featured by top Cricut blogger, Sweet Red Poppy |Cricut Infusible Ink Transfer Sheets by popular US craft blog, Sweet Red Poppy: image of a woman holding a white ceramic mug in her hands.

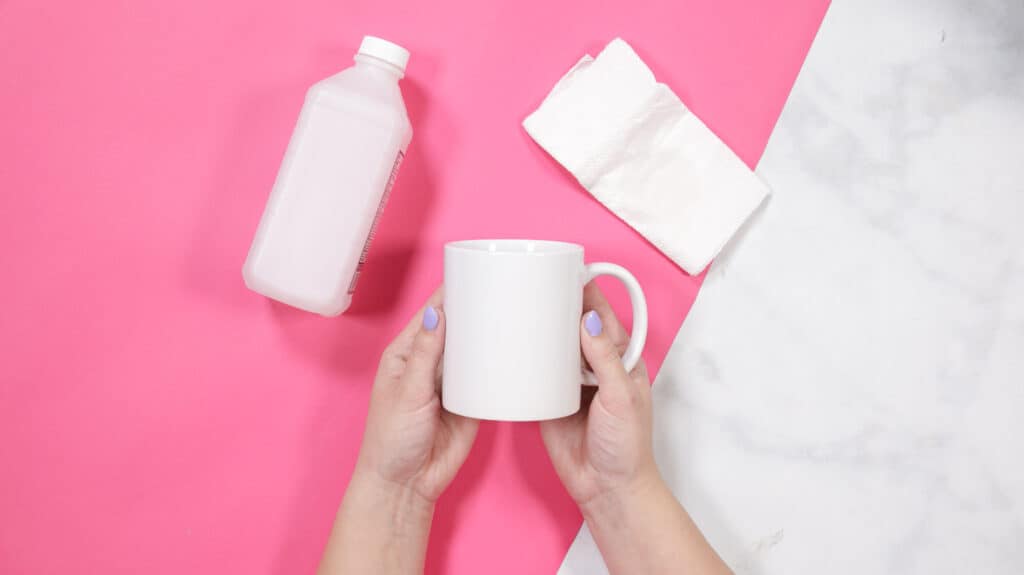
Once it is dry, use a lint-free cloth to remove any stray hairs or lint from your mug.

Be sure to let your mug completely dry before placing your Infusible Ink design on it. 

How to Create a Custom Mug with Cricut's Mug Press and Infusible Ink Transfer Sheets, a tutorial featured by top Cricut blogger, Sweet Red Poppy |Cricut Infusible Ink Transfer Sheets by popular US craft blog, Sweet Red Poppy: image of a woman placing a Cricut infusible ink design backing off of a white ceramic mug.

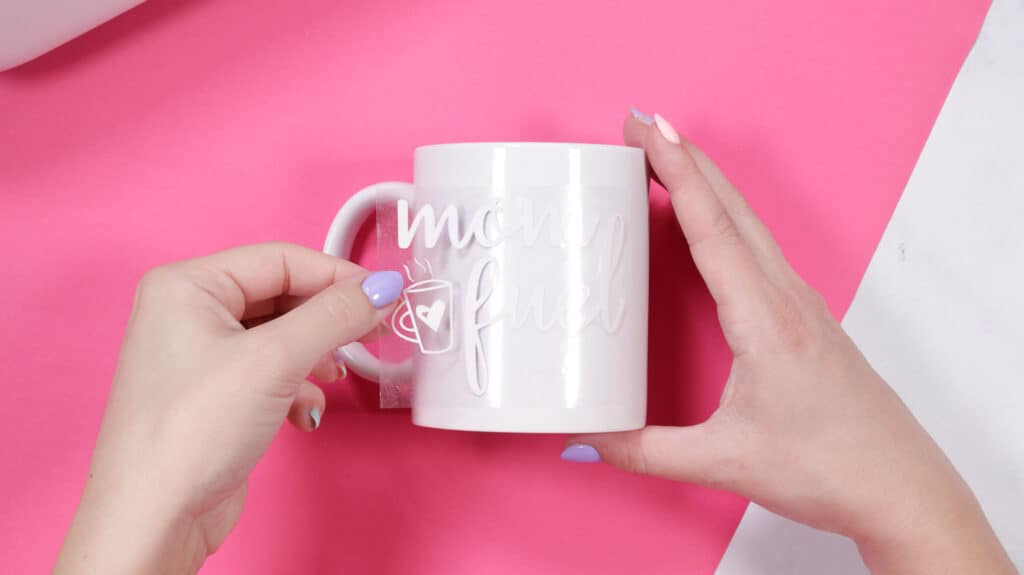
Secure your design to your mug using heat-resistant tape. I like to place a piece of tape along both sides to really secure the transfer to the mug.

How to Create a Custom Mug with Cricut's Mug Press and Infusible Ink Transfer Sheets, a tutorial featured by top Cricut blogger, Sweet Red Poppy |Cricut Infusible Ink Transfer Sheets by popular US craft blog, Sweet Red Poppy: image of a woman holding a white ceramic mug with a Cricut infusible ink design on it.

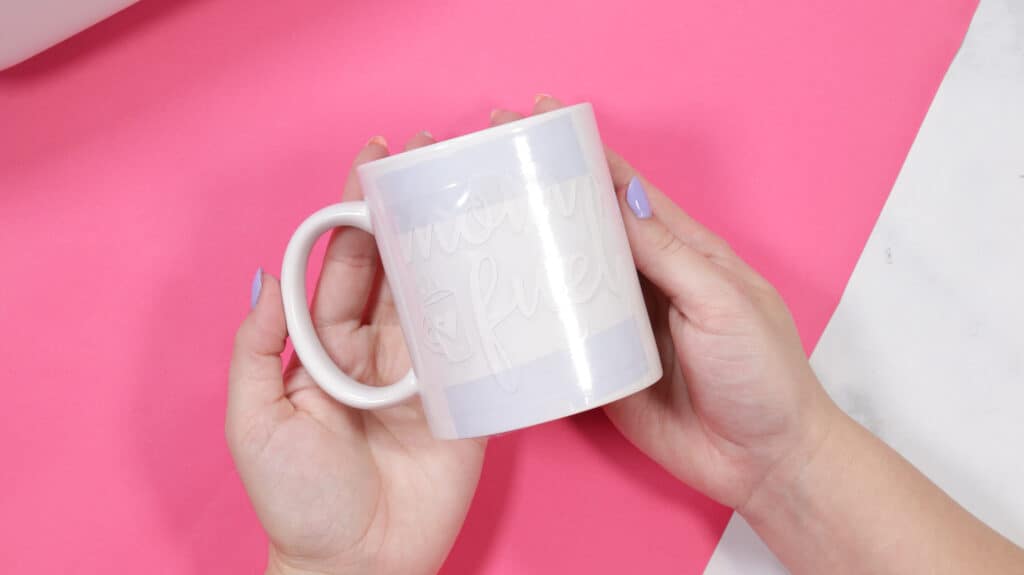
Heat-resistant tape prevents your transfer sheet from shifting during the press. You don't want the transfer sheet to move around at all because it causes ghosting, leaving a lighter impression of the design to the side.

Step 4 - Apply Your Design Using the Cricut Mug Press

To heat up your Mug Press, plug it in, and then click the power button to turn it on. The power button will turn green when the press is heated up. 

The Mug Press only heats up to one temperature making it super easy to use.

Next, insert the mug into the press. Make sure that the lever is completely up when you insert it in. 

How to Create a Custom Mug with Cricut's Mug Press and Infusible Ink Transfer Sheets, a tutorial featured by top Cricut blogger, Sweet Red Poppy |Cricut Infusible Ink Transfer Sheets by popular US craft blog, Sweet Red Poppy: image of a woman placing a white ceramic mug in a Cricut Mug Press.

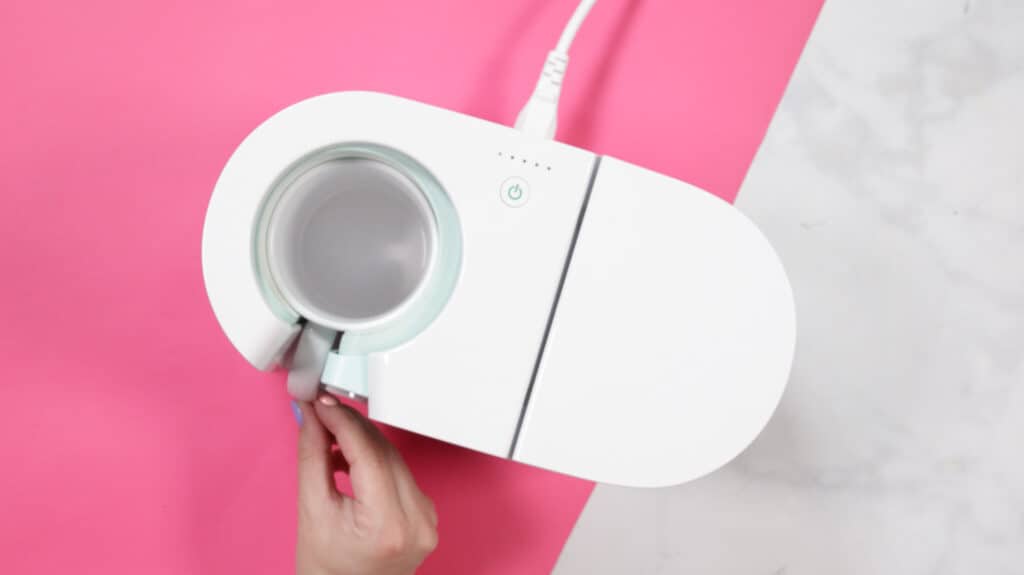
Once it’s in, press the lever down and let the mug press do the rest. 

How to Create a Custom Mug with Cricut's Mug Press and Infusible Ink Transfer Sheets, a tutorial featured by top Cricut blogger, Sweet Red Poppy |Cricut Infusible Ink Transfer Sheets by popular US craft blog, Sweet Red Poppy: image of a woman using a Cricut mug press.

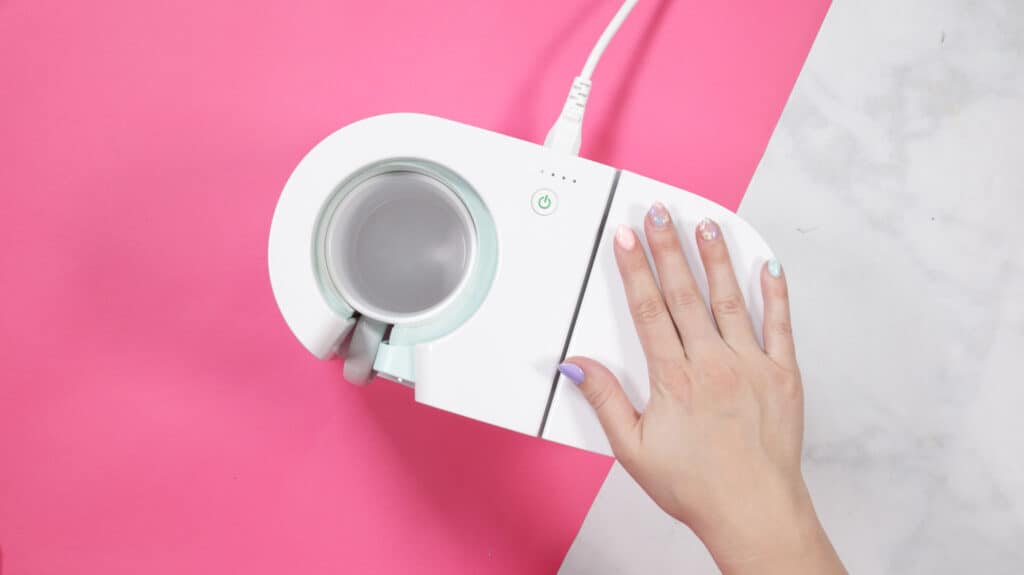
You’ll notice these five lights above the power button. These let you know how far along your mug is in the process. Once the press is complete, your machine will beep and all five lights will flash. 

To take the mug out, just lift up on the lever and pull your mug straight out. 

How to Create a Custom Mug with Cricut's Mug Press and Infusible Ink Transfer Sheets, a tutorial featured by top Cricut blogger, Sweet Red Poppy |Cricut Infusible Ink Transfer Sheets by popular US craft blog, Sweet Red Poppy: image of a woman using a Cricut mug press.

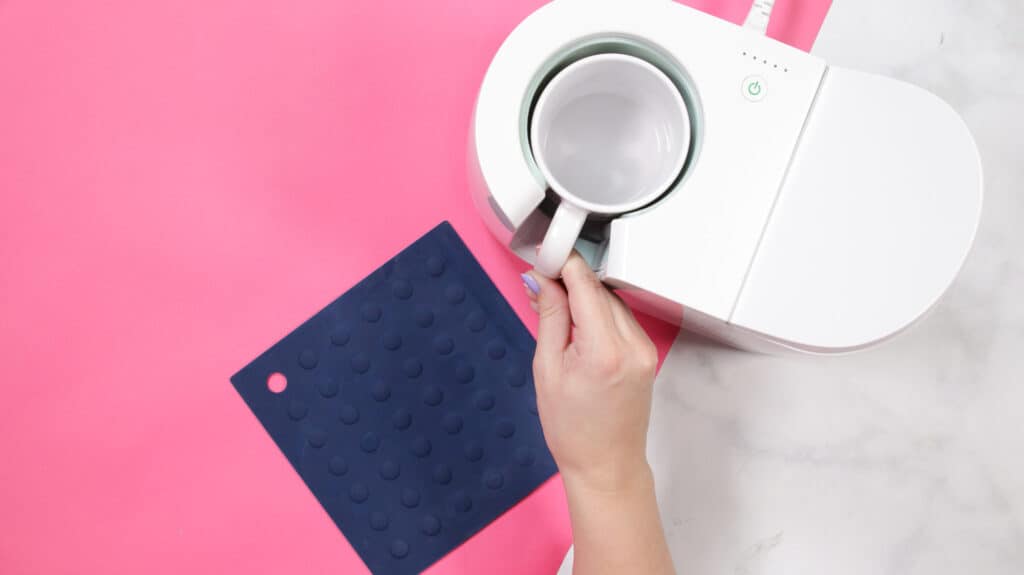
CAUTION: Your mug is going to be extremely hot, so be extra careful taking it out. I like to wear an oven mitt when doing this.

Step 5 - Let Your Custom Mug Cool 

Set your on a heat-resistant surface and let it cool completely. Now you can remove the transfer sheet and reveal your custom mug.
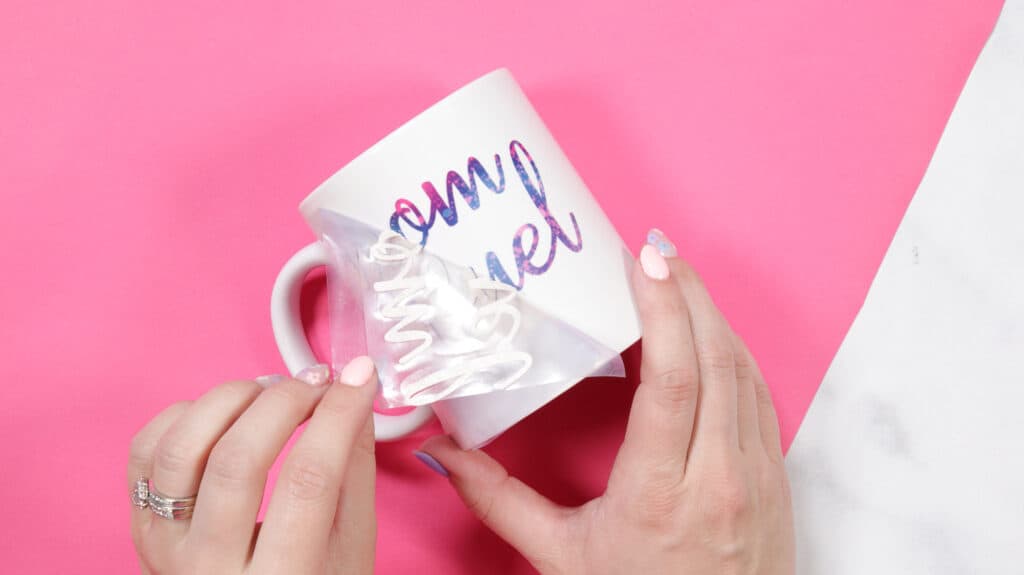
How to Create a Custom Mug with Cricut's Mug Press and Infusible Ink Transfer Sheets, a tutorial featured by top Cricut blogger, Sweet Red Poppy |Cricut Infusible Ink Transfer Sheets by popular US craft blog, Sweet Red Poppy: image of a woman peeling the backing of a Cricut infusible in design off of a white ceramic mug.

Step 6 - Enjoy!

Now we have this adorable mug. I hope you enjoyed learning a little more about the Cricut Mug Press. I can not wait to see what you create! 

Looking for more Cricut Mug Press tutorials? Be sure to check out my Infusible Ink Pen Mug Press tutorial HERE. 

Share your finished mugs with us in the Sweet Red Poppy Crafting & Sewing Group!

How to Create a Custom Mug with Cricut's Mug Press and Infusible Ink Transfer Sheets, a tutorial featured by top Cricut blogger, Sweet Red Poppy |Cricut Infusible Ink Transfer Sheets by popular US craft blog, Sweet Red Poppy: image of white ceramic mug with Cricut infusible ink designs.

Troubleshooting

When using Infusible Ink and the Cricut Mug Press, there are a few things that can go wrong. Here are the top problems I see as well as solutions to prevent them from happening to you.

My Infusible Ink Transfer is Faded or Uneven

This is one of the most common problems with Infusible Ink. There are a couple of reasons this could be happening.

First, there is something in between your mug and transfer sheet, causing it not to lay evenly. Make sure that you clean your mug beforehand.

Another reason for fading is that you're not using Cricut's Mug Blanks. Cricut's straight-edged mugs are designed to work seamlessly with Infusible Ink and Cricut's Mug Press.

Fading can also occur if you do not press your mug for the correct amount of time. Only take out your mug when you hear the Mug Press beep and see all 5 lights flashing.

Finally, an uneven transfer can be caused by moisture. After cleaning your mug, be sure to let it completely dry beforehand.

There are Colored Dots Around My Design

If you see small, pin-sized dots on your mug, chances are you used a weeding tool to weed your transfer sheet. If you pierce your transfer sheet with a weeding tool, it may push little pieces of infusible ink into the transfer sheet.

To avoid this, I always weed by hand. I occasionally use a tweezer to help lift away pieces.

My Infusible Ink Design Ghosted

If your transfer sheet shifts during or after the press, you may lift it up to find that it has "ghosted" or left a light image slightly off-center.

When pressing your design, be sure to secure it with heat-resistant tape. Once your press has finished, wait until it has completely cooled before removing the transfer sheet.

My Design is Off-Centered

Your design may shift and become off-centered if you do not use enough (or any) heat-resistant tape. I like to tape down all 4 sides of my transfer just to be safe.

I hope you enjoyed learning more about Cricut's Mug Press and Infusible Ink. Do you have any questions about the Mug Press or Infusible Ink? Be sure to let me know in the comments below.

Have you used Cricut Infusible Ink Transfer Sheets? Let me know in a comment below!

« Everything You Need to Know About the Brand New Cricut Mug Press
How to Make a Custom Mug with Cricut's Mug Press and Infusible Ink Pens »

Reader Interactions

Comments

  1. Debbie Hamil says

    March 05, 2021 at 2:21 am

    Thank you so much for going over this. You have made it look interesting and fun. And of course now I look forward to this being available.

    Reply
  2. Renee says

    March 05, 2021 at 9:39 pm

    I would not let me open the
    Infusible Ink Pen Mug Press tutorial when I pushed Here

    Reply
  3. Patricia Pugh says

    March 05, 2021 at 11:19 pm

    How much will this machine cost? It looks amazing!

    Reply
  4. Colleen says

    March 19, 2021 at 4:28 am

    Thank you for this! How long does it take to heat up? Mine does not seem to be heating.

    Reply
  5. April says

    July 12, 2021 at 4:23 pm

    I love your designs! Do you happen to sell any of your images for commercial use, like for products in an Etsy shop?

    Reply
  6. Angela Li says

    September 10, 2022 at 4:25 pm

    I didn’t know what I did wrong? When I cut the infusible ink sheet, it’s not clean cut, all the letters lift up/peel off that ruin the whole design.

    Reply

Leave a Reply Cancel reply

Your email address will not be published. Required fields are marked *

This site uses Akismet to reduce spam. Learn how your comment data is processed.

Primary Sidebar

Ready, Set, Sew! An online sewing course for beginners by top US sewing blogger, Sweet Red Poppy.

Hello, I’m Kimberly, the creator of Sweet Red Poppy!

I’m a wife, mother to 3, seamstress, and lover of all things crafty! Sweet Red Poppy is my creative outlet where I find and create inspiration. It’s a place where I can share my never-ending sewing projects and my love of learning!

Read more about me →

The Latest

  • How to Sew Half Square Triangles Eight at a Time
    How to Sew a Half Square Triangle - Eight at a Time
  • Computer that says, Where to find fonts online
    Where to Find Fonts Online
  • Kim holding ipad talking about fonts
    How to Add Fonts to Adobe Illustrator on iPad
  • Rolled Paper Flower Wreath
    Free Rolled Paper Flower Wreath Template
  • 5 Useful Tools to Help You Organize After the Holidays with JOANN
  • How to Make Christmas Gift Tags with Your Cricut Machine

Footer

↑ back to top

Legal

  • Privacy Policy
  • Disclosure

Newsletter

  • Sign Up! For Emails and Updates

About

  • Contact
  • About
  • Home

Copyright © 2022 Sweet Red Poppy