Create Farmhouse Style Christmas Ornaments with this Step-by-Step DIY Tutorial!
One of my favorite parts of the Christmas season is making handmade ornaments each year! I love pulling out each handmade ornament at the beginning of the season from each year prior and reliving those sweet memories of Christmases past!
I’m always on the hunt for inexpensive Christmas ornaments because I like to stay within my budget and I have a 2, 3, and a 4-year-old running around my house, which means that something will inevitably get broken. I brainstormed up a few new ideas for handmade ornaments this year after browsing some of my favorite home decor sites.
I set off to the craft store like any crafty mom would, with three children in tow, my pockets loaded with applesauce squeeze tubes and an abundance of fruit snacks to see what I could find. While I was there, I found the perfect supplies for these DIY ornaments!
These ornaments are virtually indestructible and entirely within my budget!
I even created a video to walk you through each step!
Now, you just need to plan an ornament-making party with all of your friends! How fun would that be?
Are you ready to get started?
You can watch the step-by-step video below.
Table of Contents
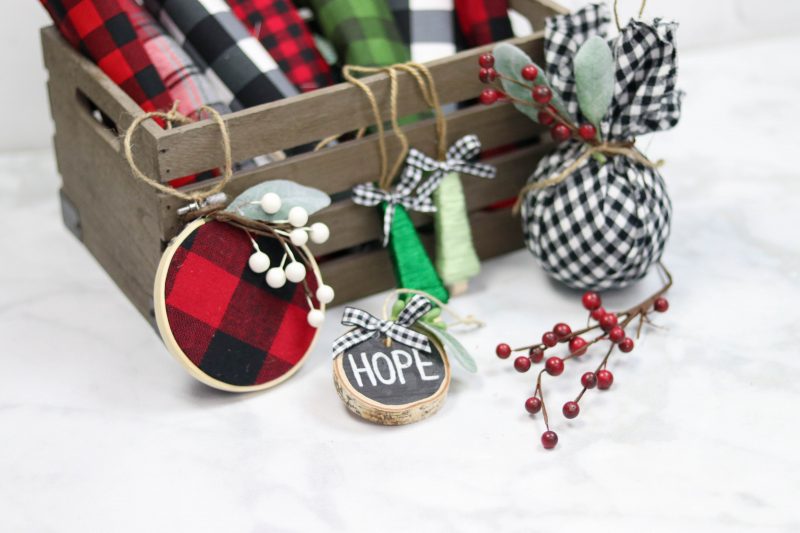
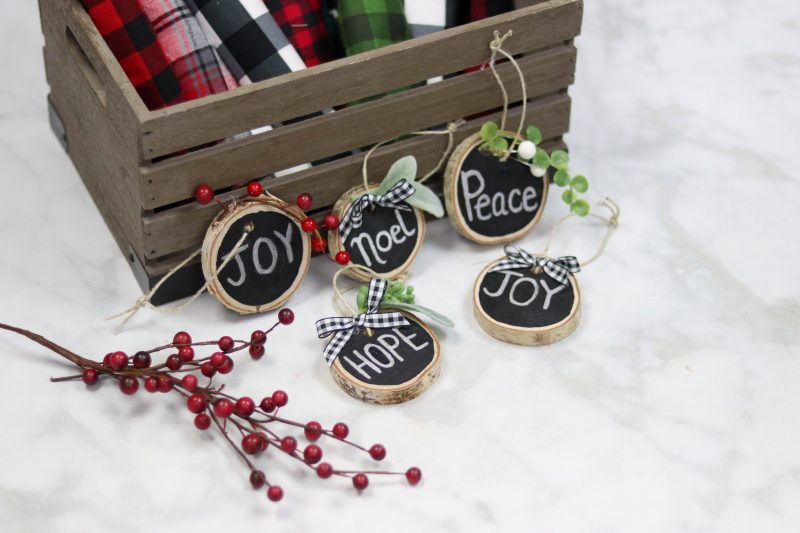
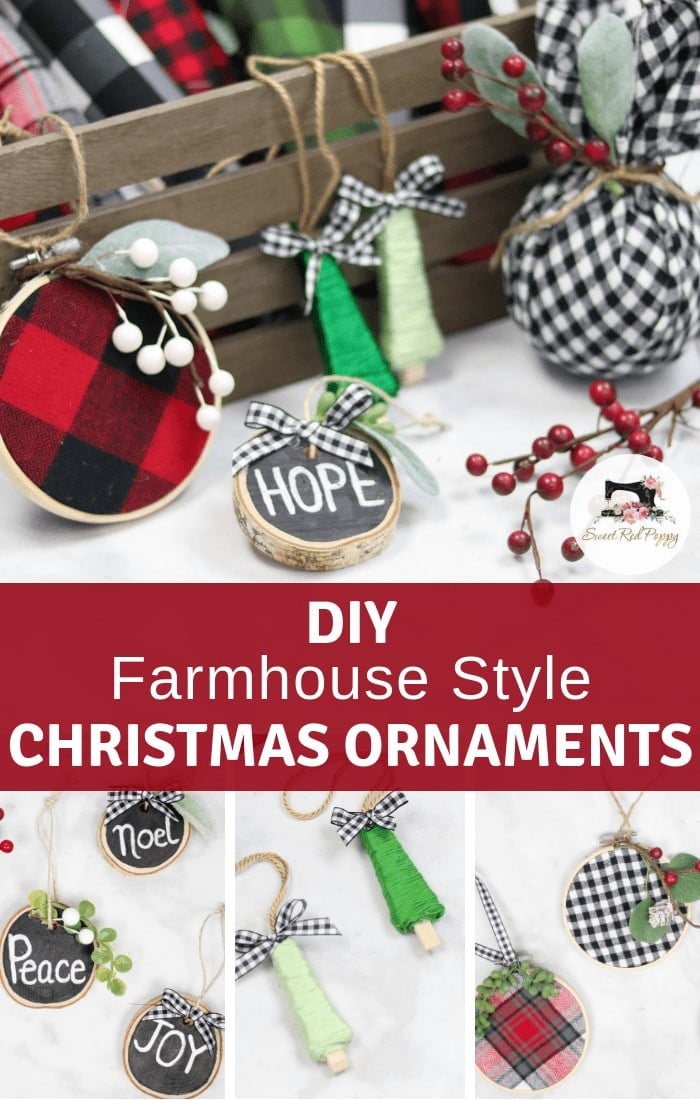
Hand-Painted Wooden Slice Ornaments
Why Shop Through My Links?
When you shop through my affiliate links, it doesn't cost you anything extra, but it helps me out in a big way! I earn a small commission from those purchases, and that support allows me to continue creating and sharing free tutorials and patterns for you. Thank you so much for helping me keep this creative community going!
Supplies
Basswood Coaster Ornament
Chalk Paint
Silver Paint
Paintbrushes & Foam Brush
Ribbon or Twine
Greenery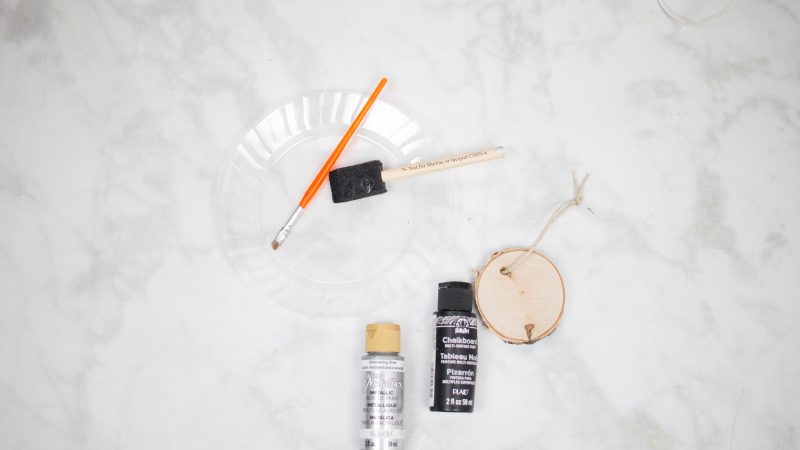
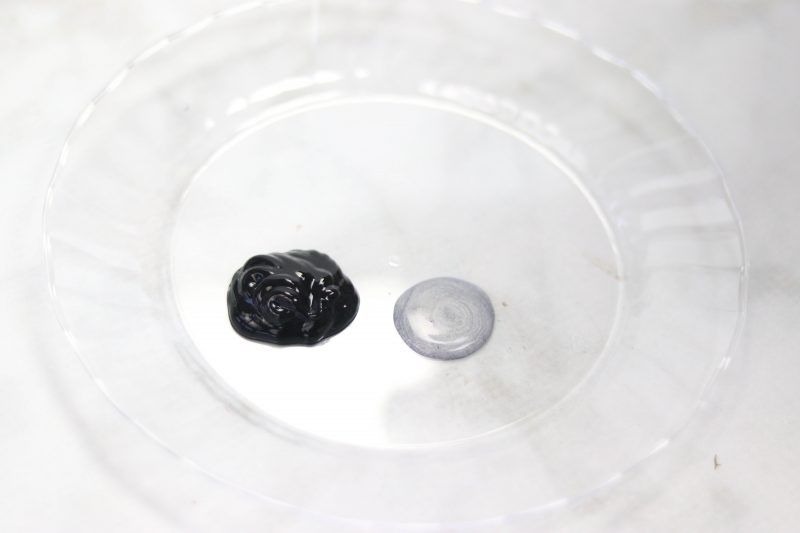
Squeeze a small amount of chalkboard paint and silver paint onto a disposable plate.
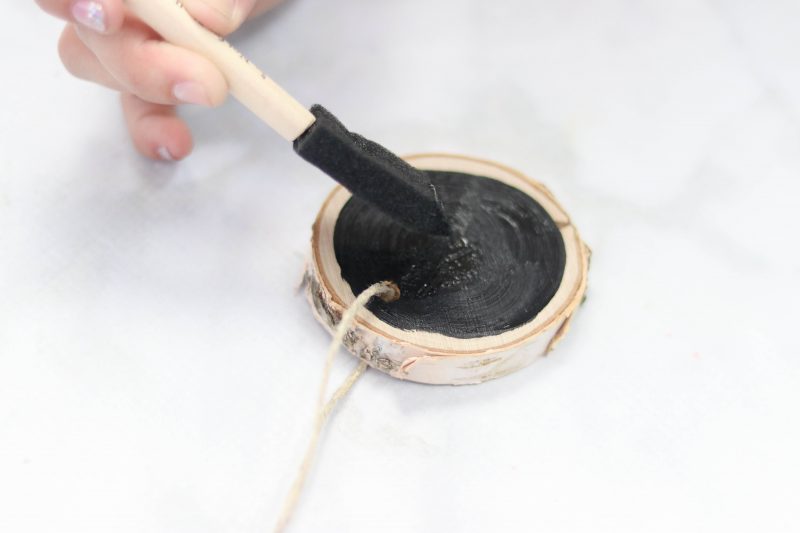
Paint a circle with a foam brush and let the paint dry completely.
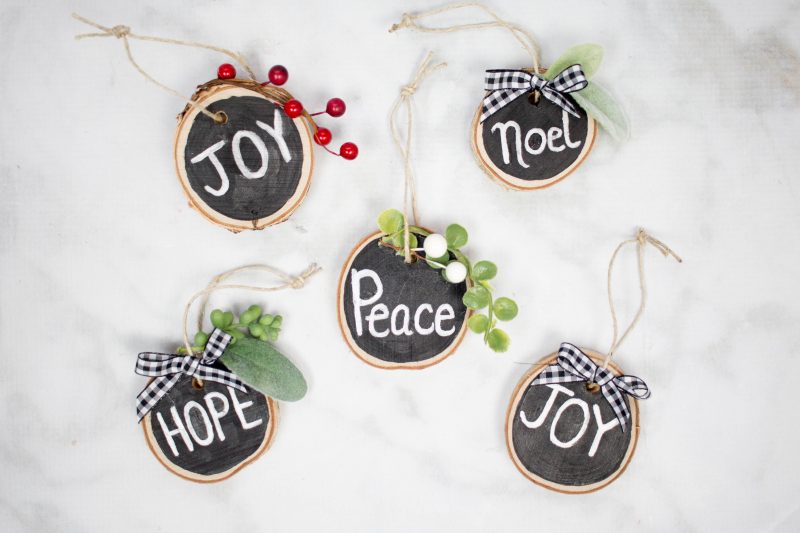
Use a small brush to hand-paint Christmas-themed words onto the ornaments.

Use a hot glue gun to add a bit of greenery or ribbon to the ornament! Wasn't that simple? I just love how easy this ornament is to make!
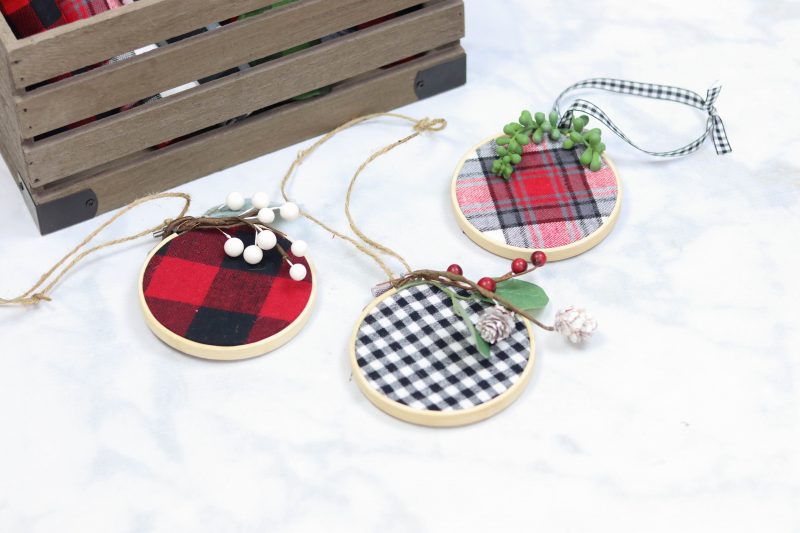
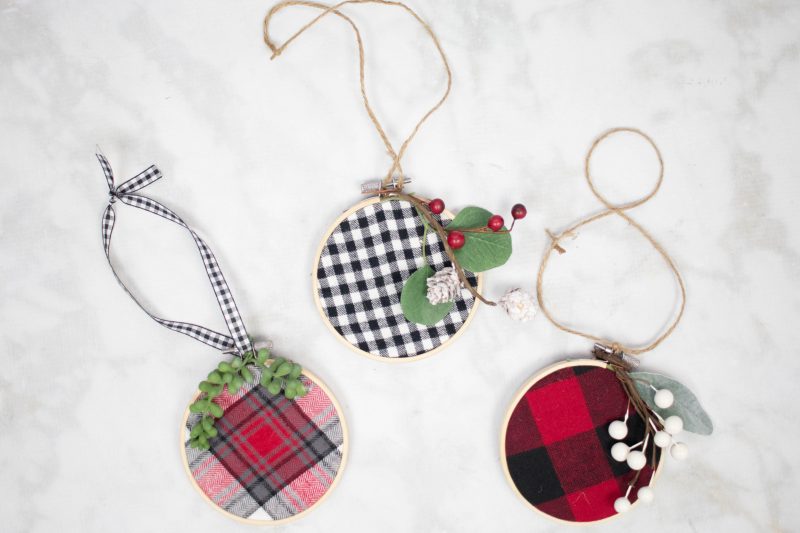
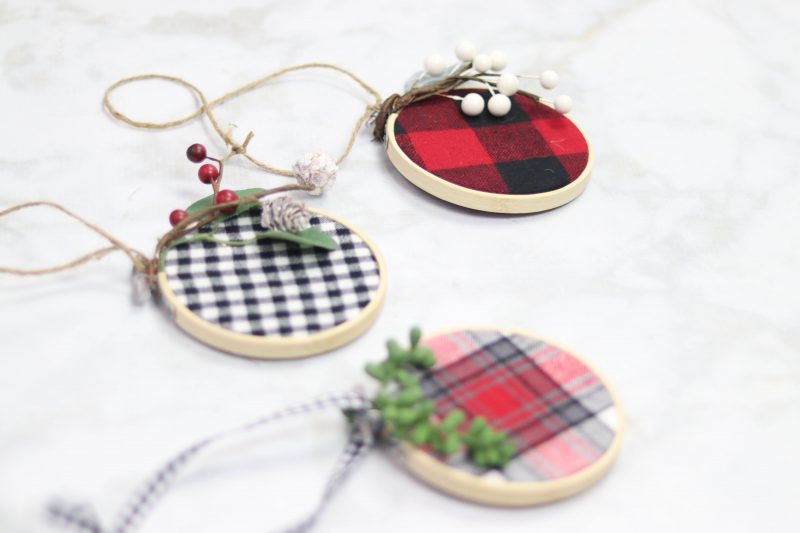
Embroidery Hoop Ornaments
Supplies
Mini Embroidery Hoops
Ribbon
Flannel Fabric
Hot Glue Gun
Floral Stems & Sprays
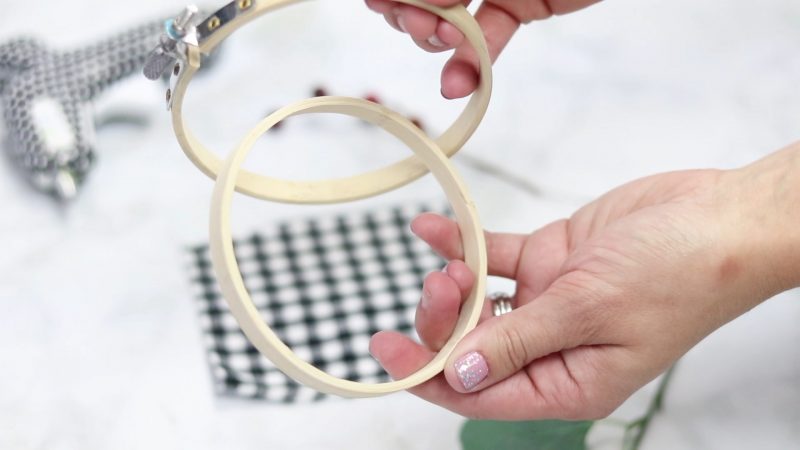
Open the embroidery hoop by loosening the screw located at the very top.
Place the hoop without the screw underneath a square of flannel fabric that is slightly larger than the circle. Place the other hoop on top and gently push it down. Once the front hoop is flush with the back hoop tighten the screw at the top.
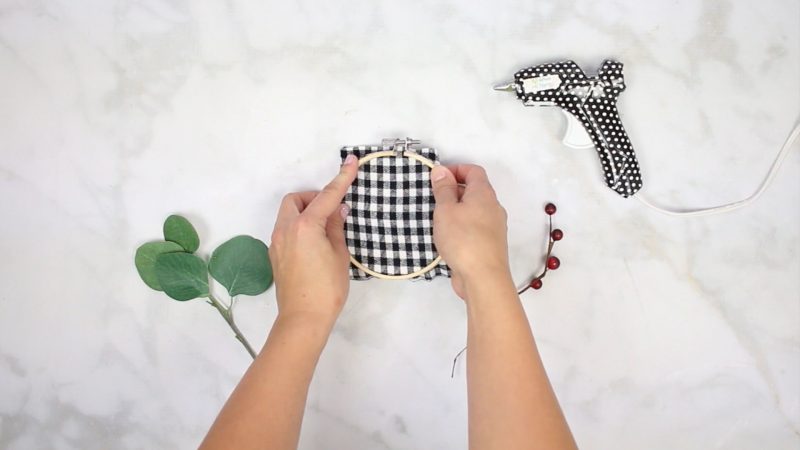
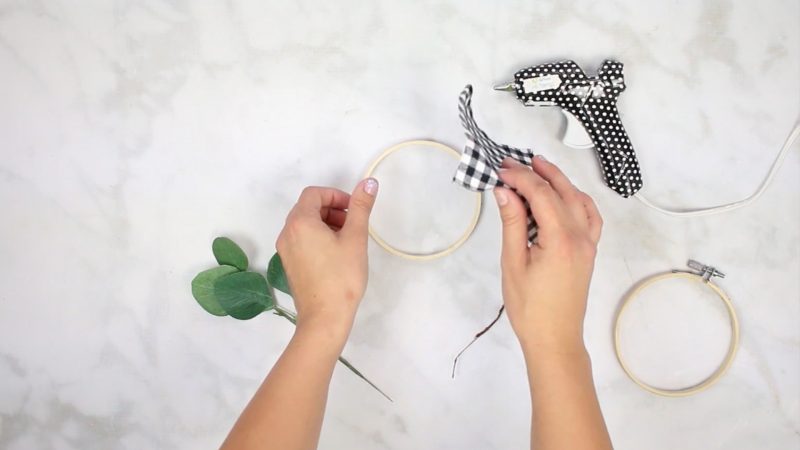
Turn the hoop over and glue the excess fabric to the backside of the hoop.
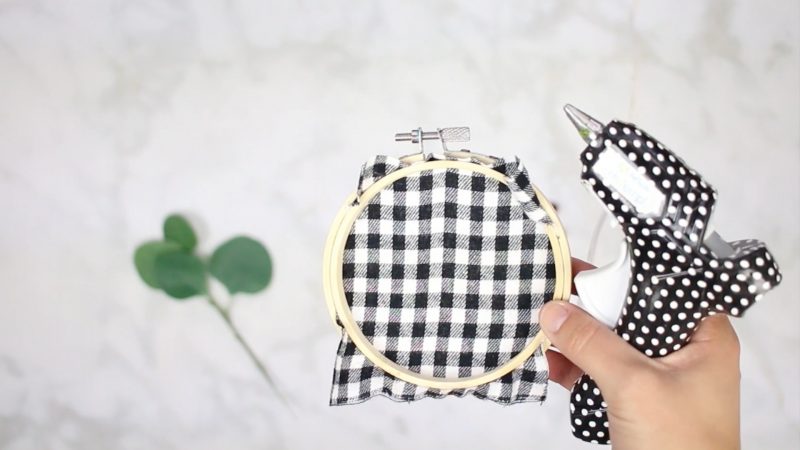
Use hot glue to add sprays, small pinecones, and berries to the embroidery hoop. Tie a short piece of twine around the screw to hang the ornament.
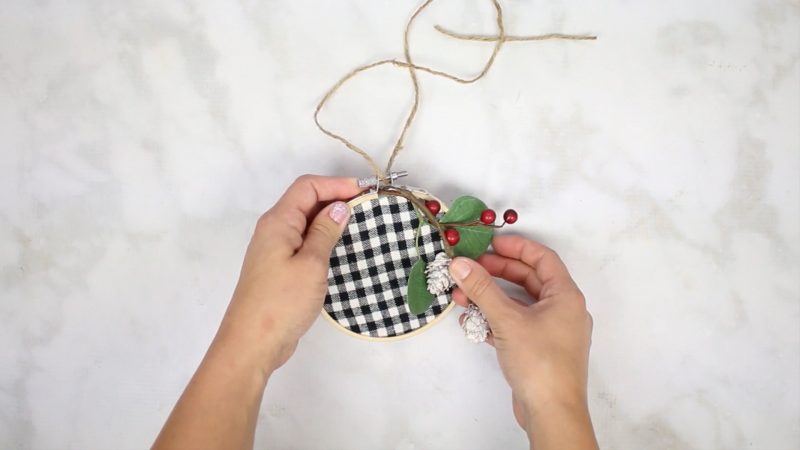
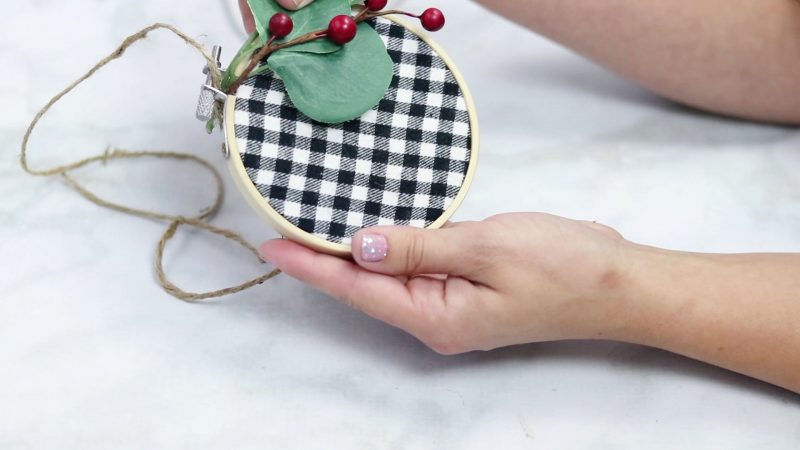
The possibilities are endless with this ornament! Add Iron-On for personalization or even add a touch of hand-embroidery.
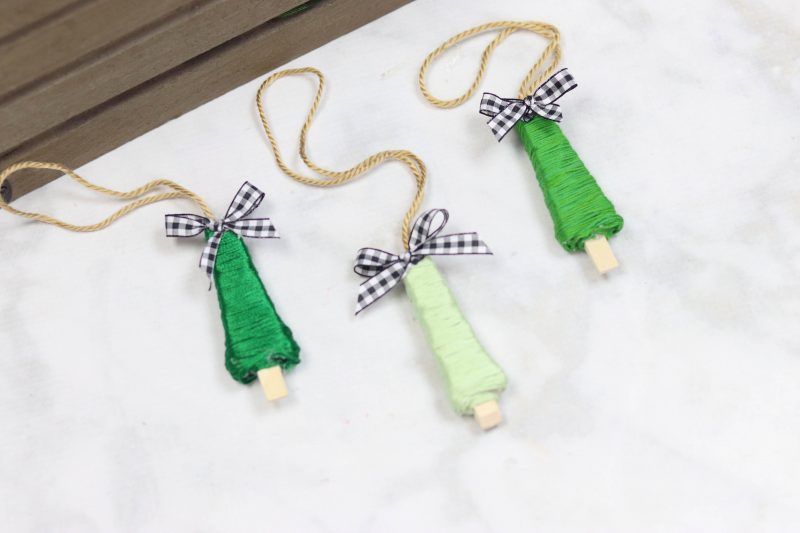
Embroidery Thread Christmas Trees
Supplies
Green Embroidery Floss
Ribbon
Clothespins
Hot Glue Gun
Twine
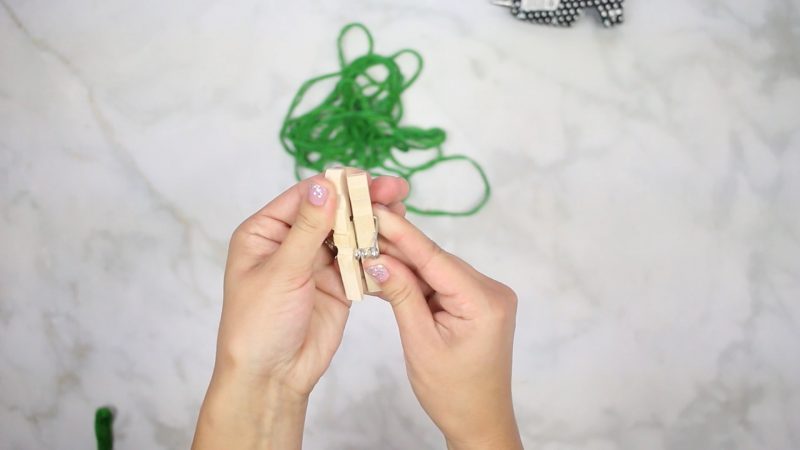
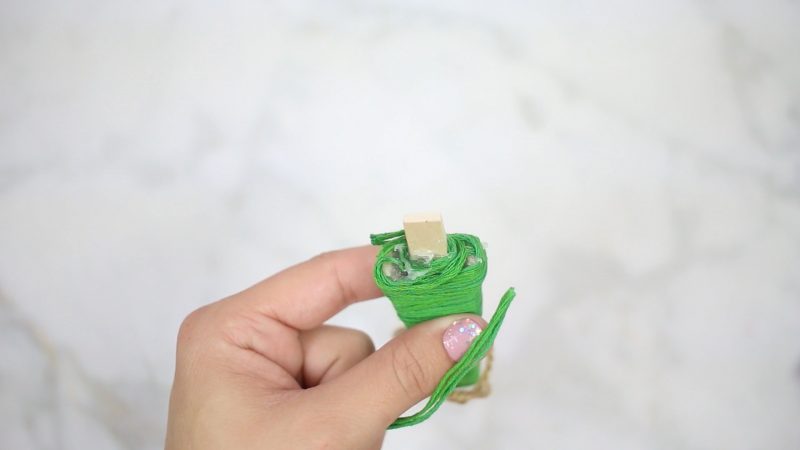
Remove the metal spring from a clothespin and separate the two pieces of wood.
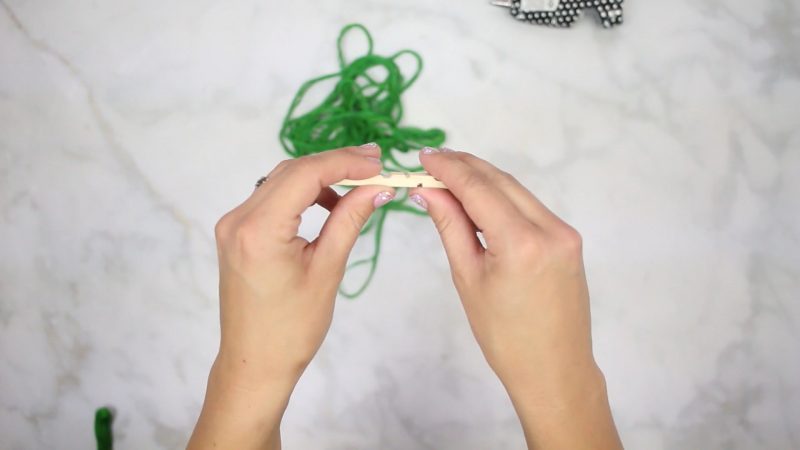
Break one of the pieces in half, this will create the bottom of the tree.
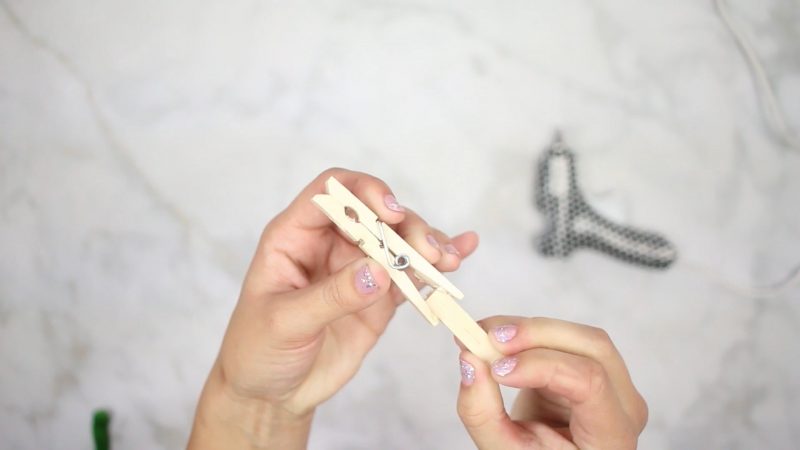
Push the broken clothespin in between the opening of the other clothespin.
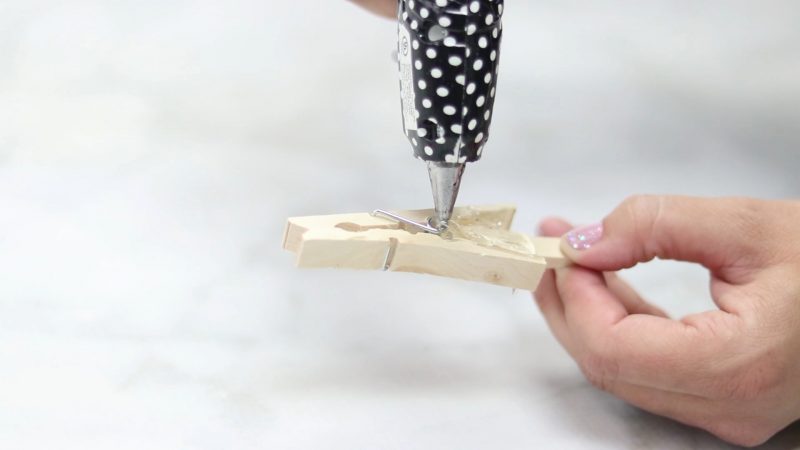
Use a hot glue gun to secure the pieces in place and let them cool completely.
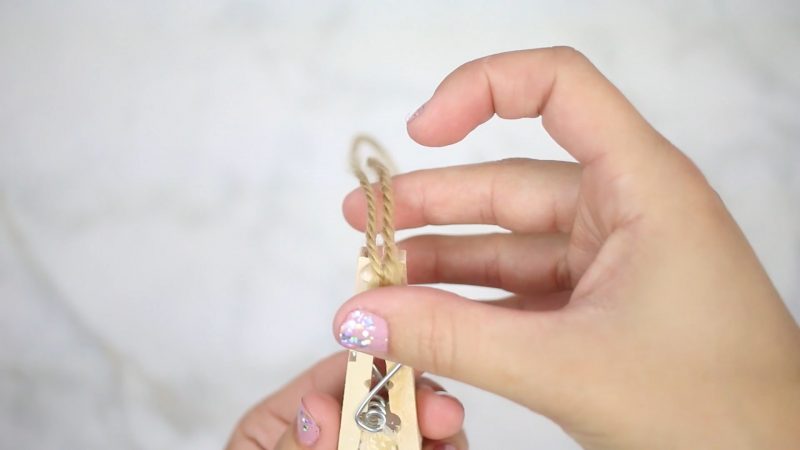
Attach a piece of twine to the top of the clothespin.
Dab a spot of hot glue on the top of the clothespin and lay the embroidery floss on top of it to secure it to the clothespin.
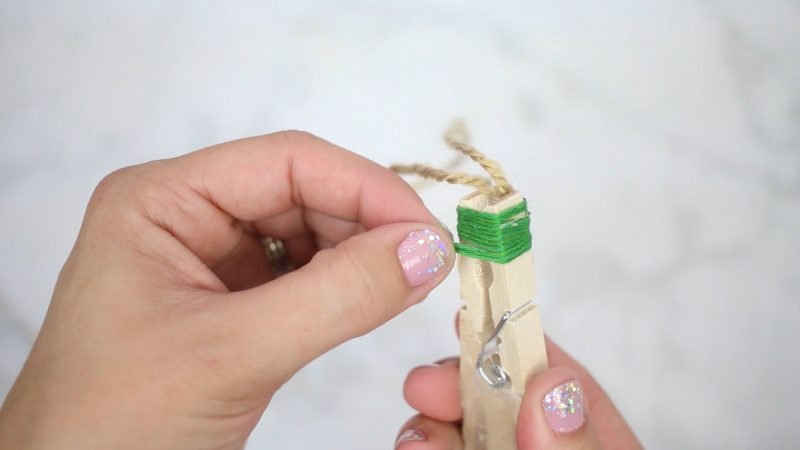
Wrap the embroidery floss all the way to the bottom of the clothespin and secure the end of the thread with a dot of hot glue.
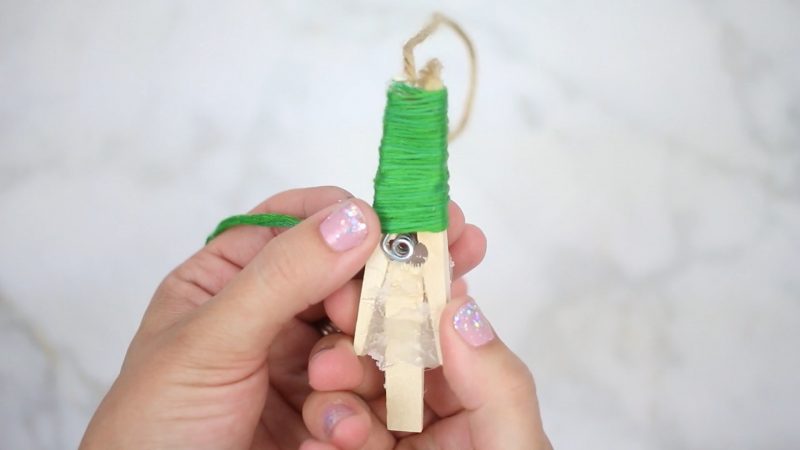
Add a small bow to the top of the Christmas tree.
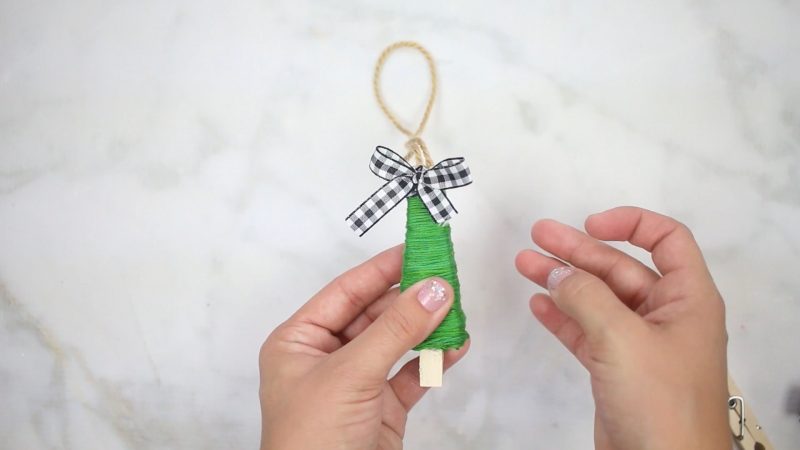
You can make this ornament in a variety of different colors!
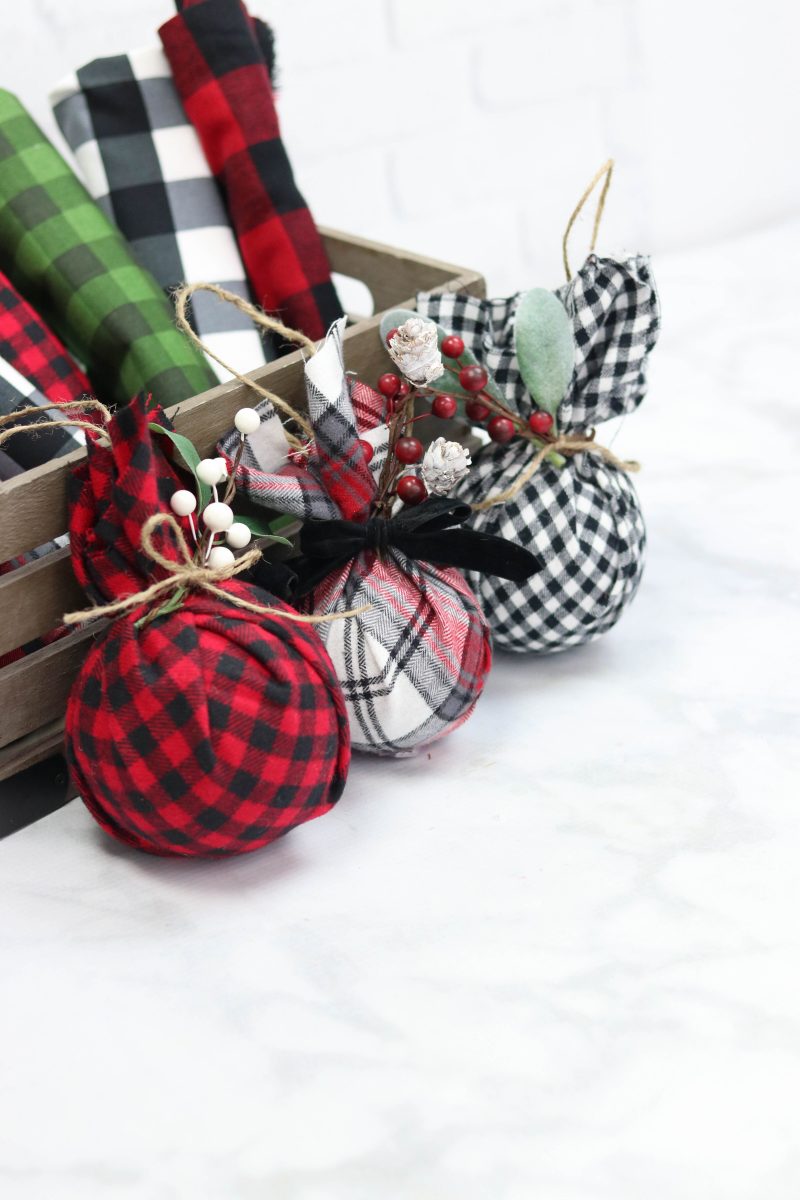
Fabric Covered Ornaments
Supplies
1/3 Yard Flannel Fabric
Twine
Clear Ornaments
Floral Sprays and Stems
Velvet Ribbon
I love working with clear ornaments, there are so many different things that you can do with them!
You can see my post from last year with five different ways to transform an ornament.
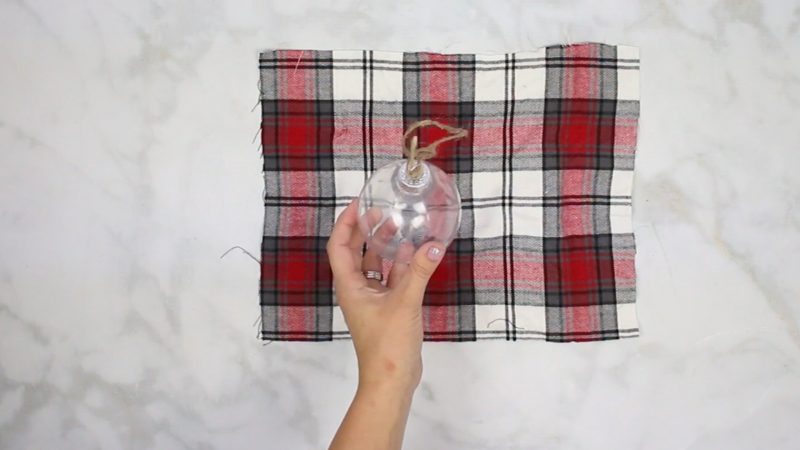
Cut a piece of plaid flannel fabric that's larger than the ornament. Place the ornament in the center of the flannel and pull the sides up.
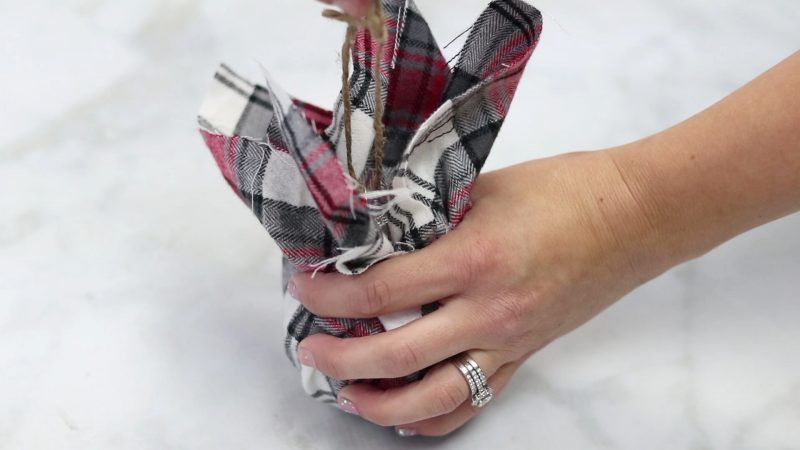
Use a velvet ribbon to tie the fabric in place. Add floral sprays and stems under the ribbon.

I hope you enjoyed these easy Christmas ornament ideas; I can't wait to see what you make with them!
Don’t want to forget about this free template? Save this project for later! Click here to save this project on Pinterest.
Thx so much love this DIY.
Welcome, husband!!