• Skip to primary navigation
  • Skip to main content
  • Skip to primary sidebar
Sweet Red Poppy logo
  • Cricut
    • Free SVG Files
    • Paper Flowers
    • Mandala
    • Iron-On
    • Vinyl
    • Maker
    • Explore Air 2
    • Joy
  • Sewing
    • Baby
    • Kids
    • Accessories
    • Christmas
    • Blankets
    • Womens
    • Learn to Sew Tips & Tricks
    • Face Masks
  • DIY Crafting
    • Paint
    • Paper
    • Food
    • Kids
  • Holiday Crafts
    • Valentine’s Day
    • Easter
    • 4th of July
    • Halloween
    • Thanksgiving
    • Christmas
  • Books
    • Cricut Printed Book
    • Cricut E-Book
    • Cricut Joy Printed Book
    • Cricut Joy E-Book
    • Paper Flower E-Book
    • Sewing Printed Book
    • Sewing E-Book
    • Face Mask E-Book
    • Mandala E-Book Bundle
    • Mandala E-Book - Inkscape
    • Mandala E-Book - Adobe Illustrator
    • Mandala Printed Book - Inkscape
    • Mandala Printed Book - Adobe Illustrator
    • Baby Pattern E-Book
  • Courses
    • Cricut Course
    • Sewing Course
    • Serger Course
    • Quilting Course
    • SVG Design Course
    • Course Login: Teachable
  • Shop
    • E-Books
    • Printed Books
    • Sewing Patterns
    • SVG Files
    • Baby Patterns
    • Subscribe to Emails
    • Course Login: Teachable
    • Contact
  • Search

DIY Canada Day Layered Wreath

Written by Kimberly Coffin · This post may contain affiliate links · 47 Comments

Looking for Canada Day home decor?  This DIY layered Canada Day wreath is easy to put together using your cutting machine and cardstock. 

This Canada Day Layered Wreath is special for my Canadian crafters!  As soon as I posted my 4th of July Layered Wreath, I received several requests for a Canadian version. With Canada Day coming up, I hopped on that request and created this festive Canada Day Layered Wreath. 

Canada Day Wreath by popular US craft blog, Sweet Red Poppy: image of a DIY layered Canada Day wreath.

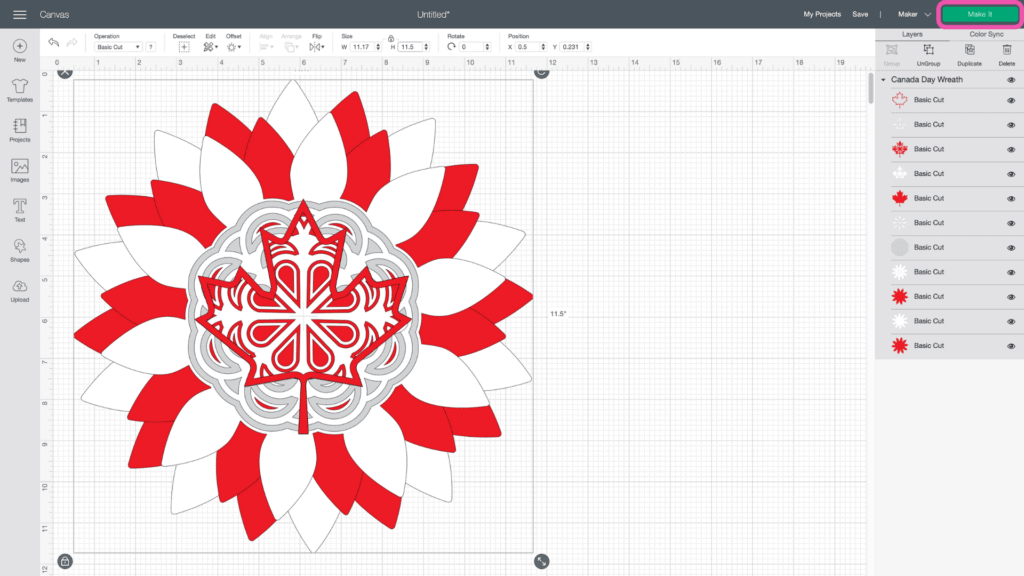
While this design has 11 layers, don’t be intimidated.  It is really easy to make.  The maple leaf itself is 5 layers, you can make multiples and use it for other decorations as well. 

Canada Day Wreath by popular US craft blog, Sweet Red Poppy: image of a red, white, and silver Cricut mascot.

DIY Canada Day Layered Wreath Supplies

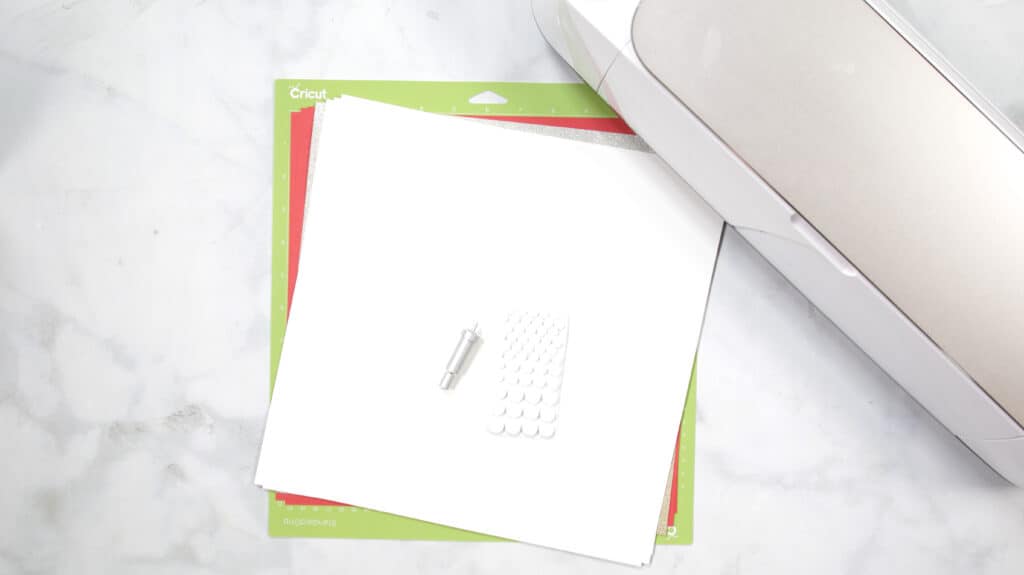
For this project, you need:

  • Cricut Explore or Cricut Maker
  • Fine-Point Blade
  • StandardGrip Mat
  • Cardstock Red, White, and Silver Glitter or any colors of your choice
  • Foam Adhesive Dots

Download the FREE Canada Day Layered Wreath SVG File Here!

Canada Day Wreath by popular US craft blog, Sweet Red Poppy: image of red and white paper next to a Cricut machine.

How To Make A Layered DIY Canada Day Wreath In Cricut Design Space

Follow these easy steps to make the Canada Day Layered Wreath using Cricut Design Space and your Cricut cutting machine. 

Step 1 - Upload SVG File to Design Space

If you haven't already, download my FREE 4th of July Layered Wreath SVG File HERE.

Open Cricut Design Space and click the + to create a new project.

Canada Day Wreath by popular US craft blog, Sweet Red Poppy: image of Cricut Design Space.

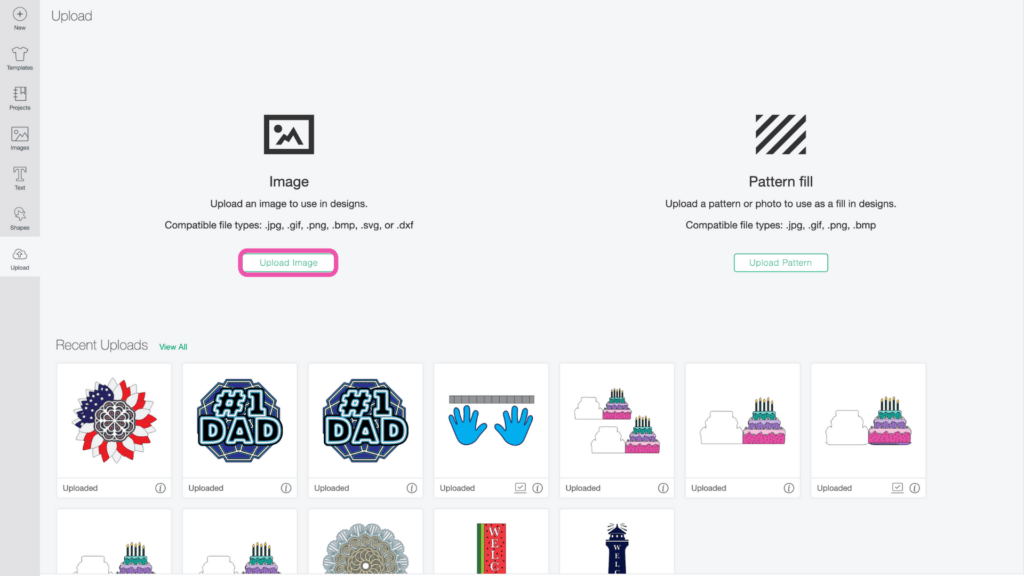
In the Design Panel on the left, select "Upload."

Canada Day Wreath by popular US craft blog, Sweet Red Poppy: image of Cricut Design Space.

Click “Upload Image."

Canada Day Wreath by popular US craft blog, Sweet Red Poppy: image of Cricut Design Space.

Click “Browse.”

Canada Day Wreath by popular US craft blog, Sweet Red Poppy: image of Cricut Design Space.

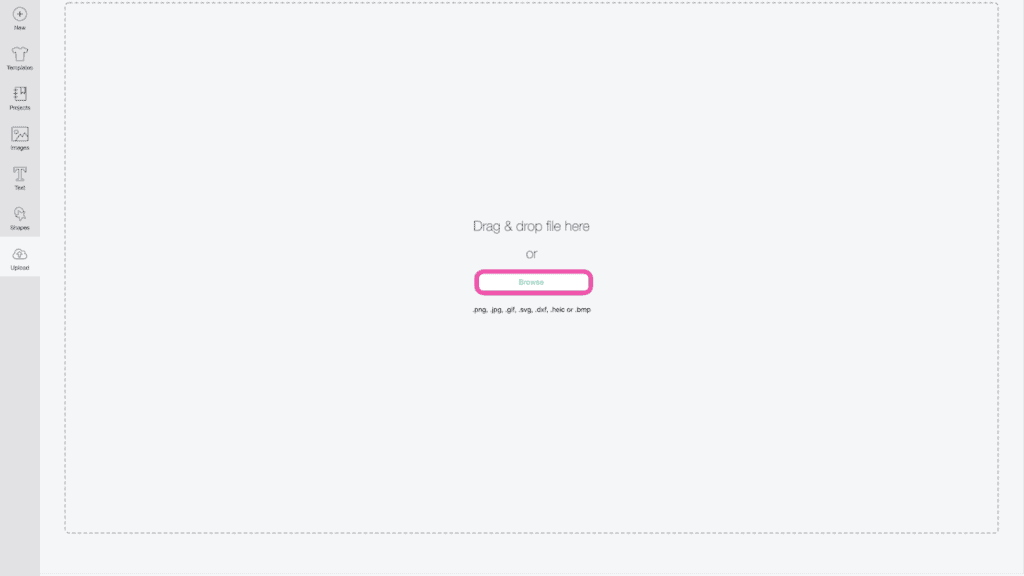
Navigate to the file on your device to upload it to Cricut Design Space.  

Canada Day Wreath by popular US craft blog, Sweet Red Poppy: image of Cricut Design Space.

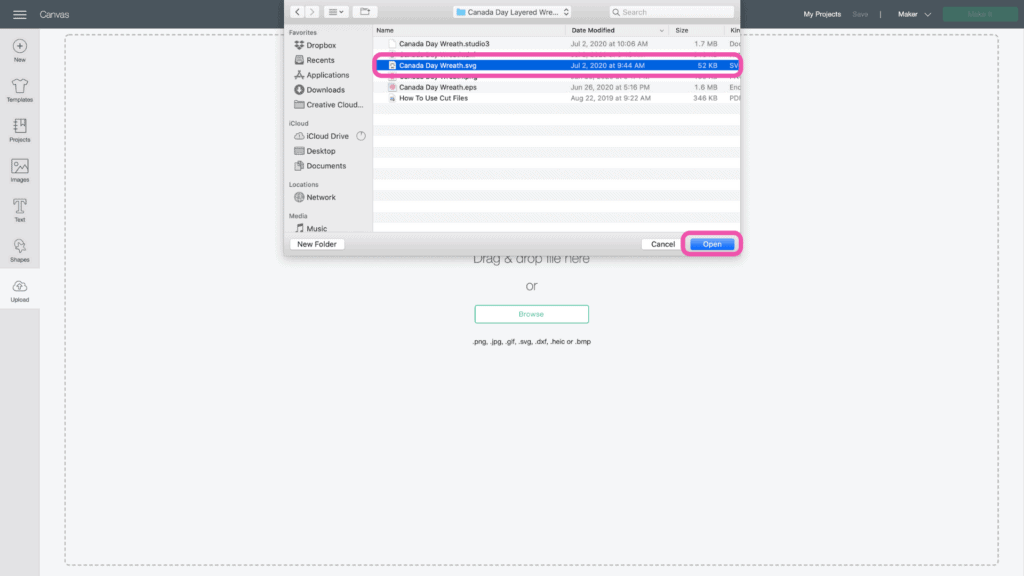
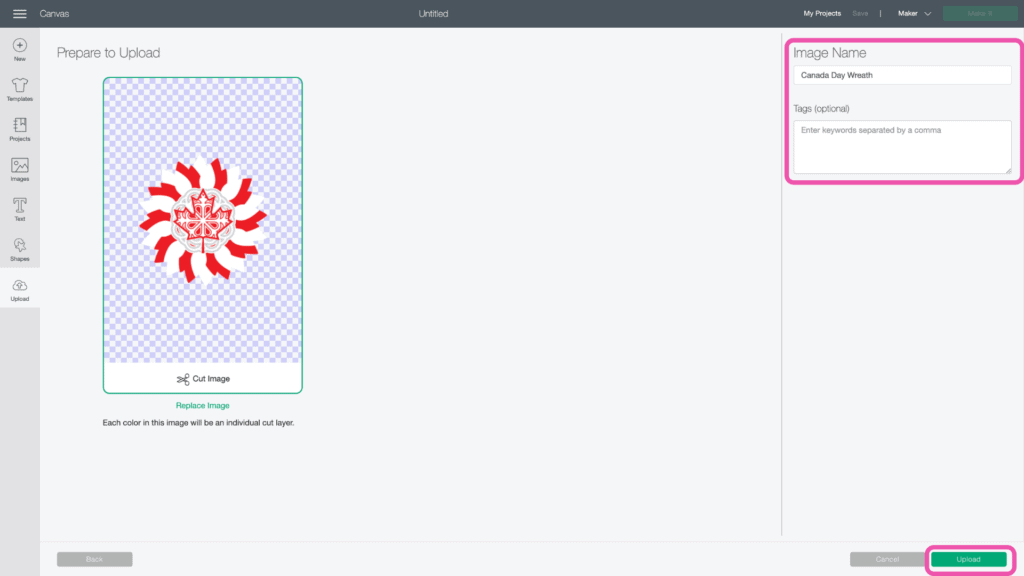
Here you can change the name and add tags. Click "Upload."

Canada Day Wreath by popular US craft blog, Sweet Red Poppy: image of Cricut Design Space.

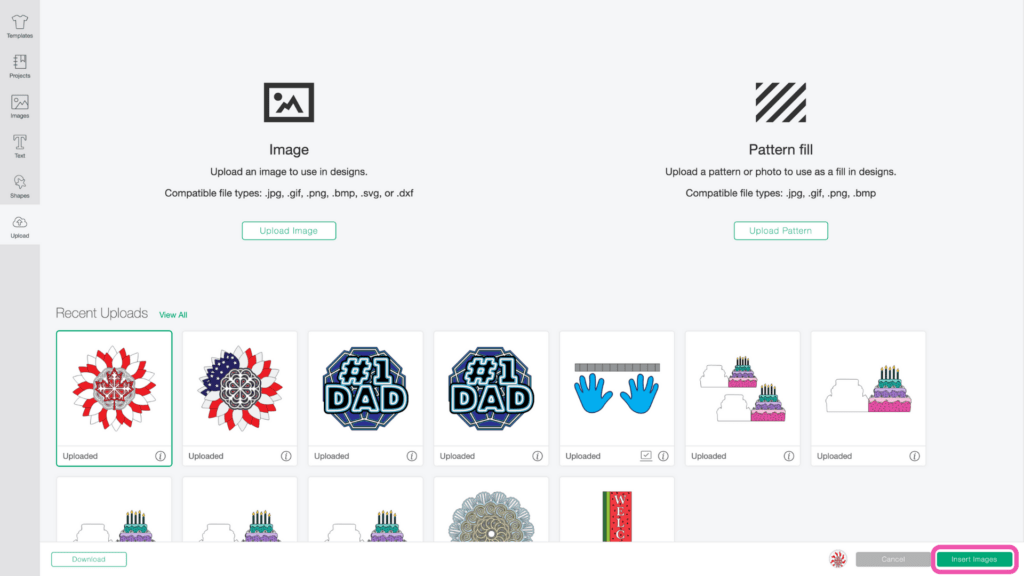
Once you have the file uploaded, select it and click "Upload" to bring it onto your canvas.

Canada Day Wreath by popular US craft blog, Sweet Red Poppy: image of Cricut Design Space.

Step 2 - Resize Design

You'll see all of the layers in the Layers Panel on the right side of your screen.

Canada Day Wreath by popular US craft blog, Sweet Red Poppy: image of Cricut Design Space.

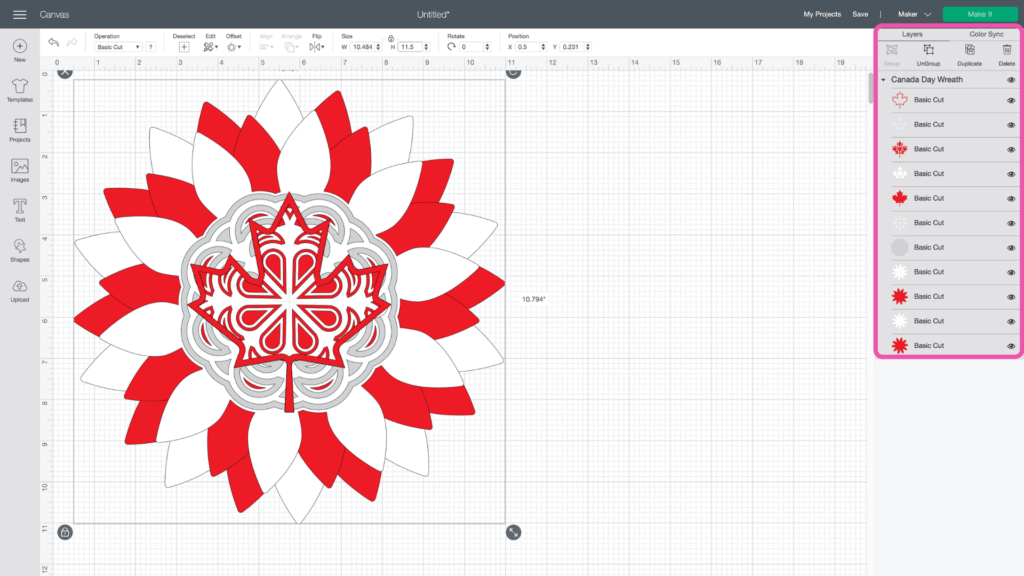
When I said this was easy, I meant it! There is nothing you have to do with this design except resize it.  

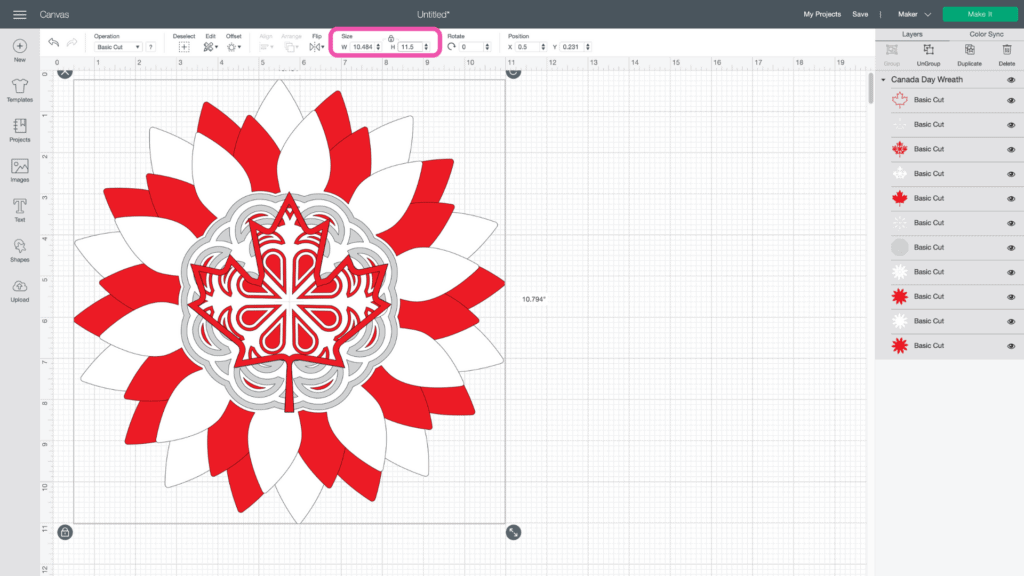
Simply keep the layers grouped and enter the size you want the wreath to be. Remember, the maximum size you can go in Cricut Design Space is 11.5 inches.

Canada Day Wreath by popular US craft blog, Sweet Red Poppy: image of Cricut Design Space.

Now you're ready to cut the design! Click “Make It” in the upper right-hand corner of the screen.

Canada Day Wreath by popular US craft blog, Sweet Red Poppy: image of Cricut Design Space.

This brings you to the preview screen. 
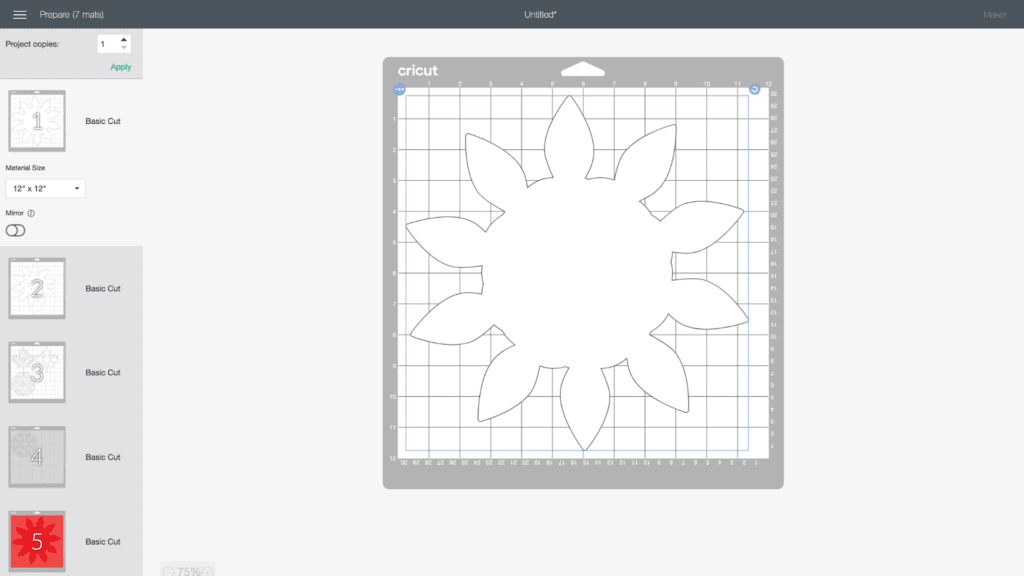
Canada Day Wreath by popular US craft blog, Sweet Red Poppy: image of Cricut Design Space.

Click “Continue.”

Canada Day Wreath by popular US craft blog, Sweet Red Poppy: image of Cricut Design Space.

Connect to your machine and select your material within Design Space. 

Ensure your Fine-Point Blade is loaded into your machine. 

Canada Day Wreath by popular US craft blog, Sweet Red Poppy: image of a woman using a Cricut machine.

Step 3 - Cut Out Design

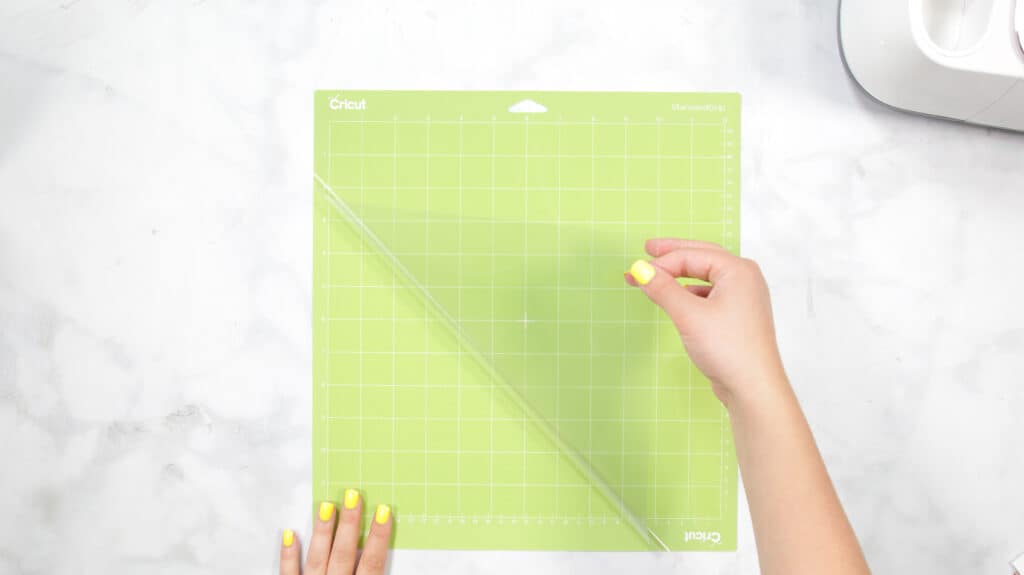
Peel the clear liner away from your mat. 

Canada Day Wreath by popular US craft blog, Sweet Red Poppy: image of a woman peeling away the clear liner on a Cricut cutting board.

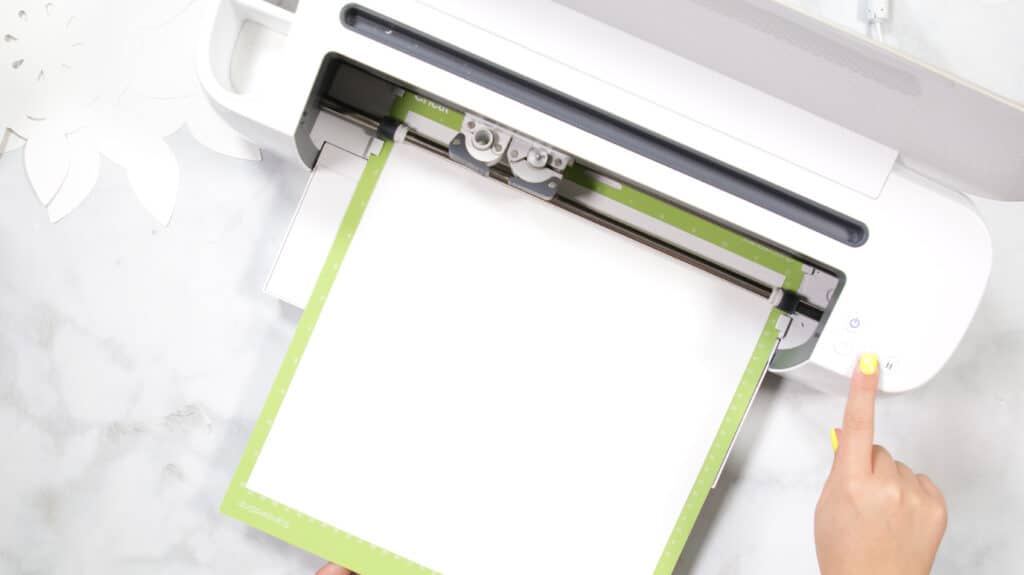
Following Design Space’s prompts, place your first color of card stock on your mat. 

Press the load button to load the mat into your machine. 
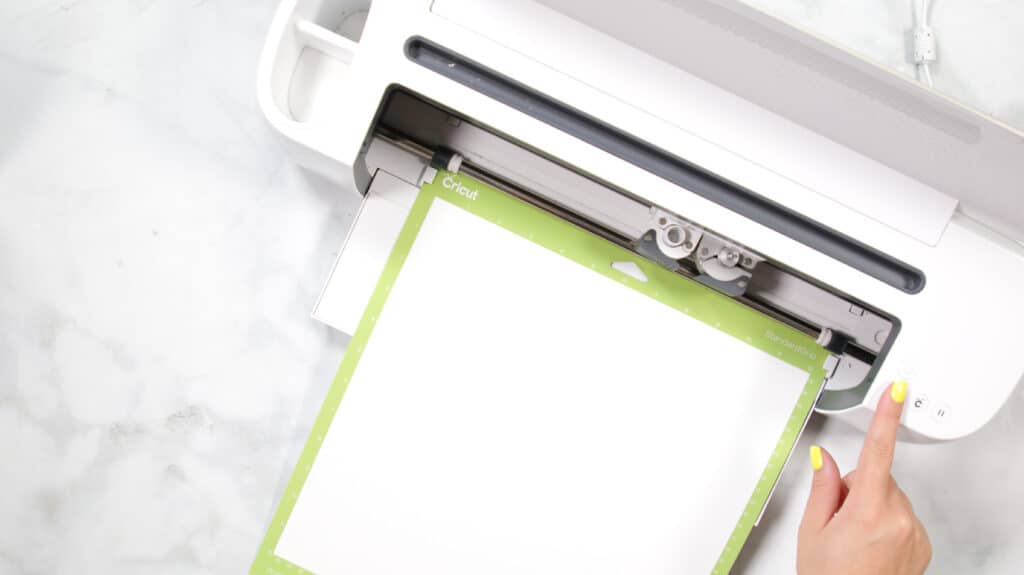
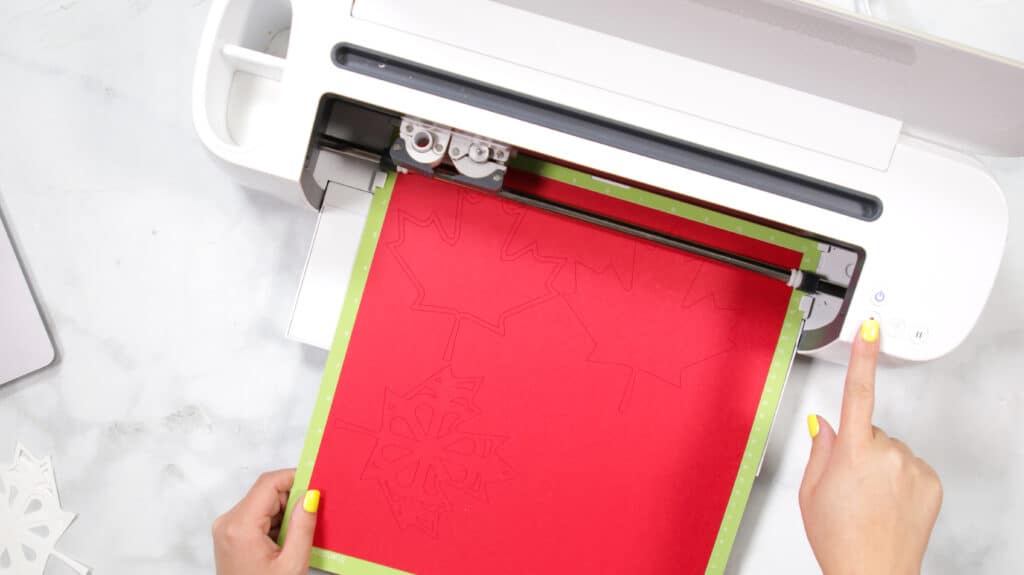
Canada Day Wreath by popular US craft blog, Sweet Red Poppy: image of a woman using a Cricut machine.

Begin the cut. 

Canada Day Wreath by popular US craft blog, Sweet Red Poppy: image of a woman using a Cricut machine.

Once your first cut is complete, unload the mat. 

Canada Day Wreath by popular US craft blog, Sweet Red Poppy: image of a woman using a Cricut machine.

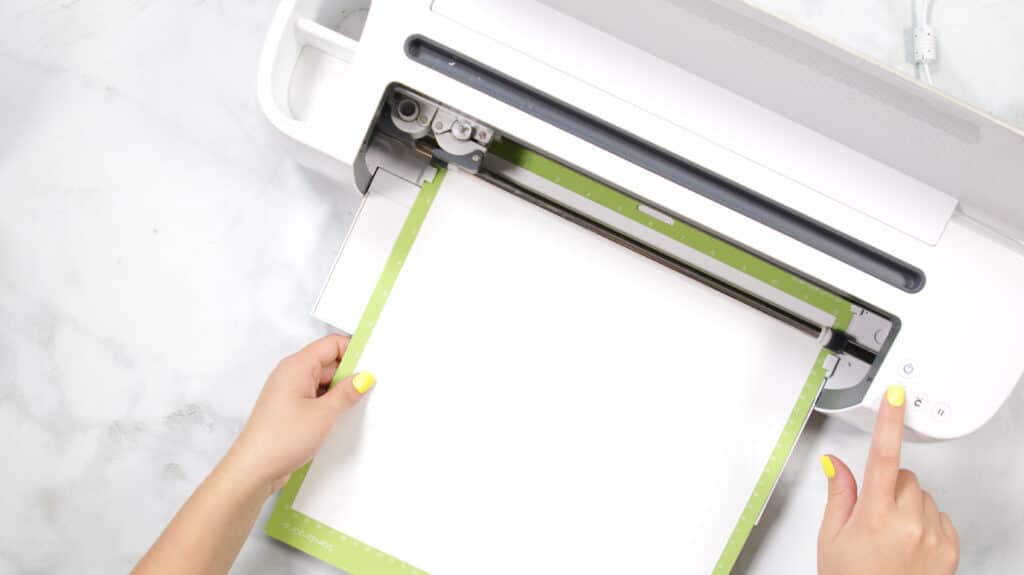
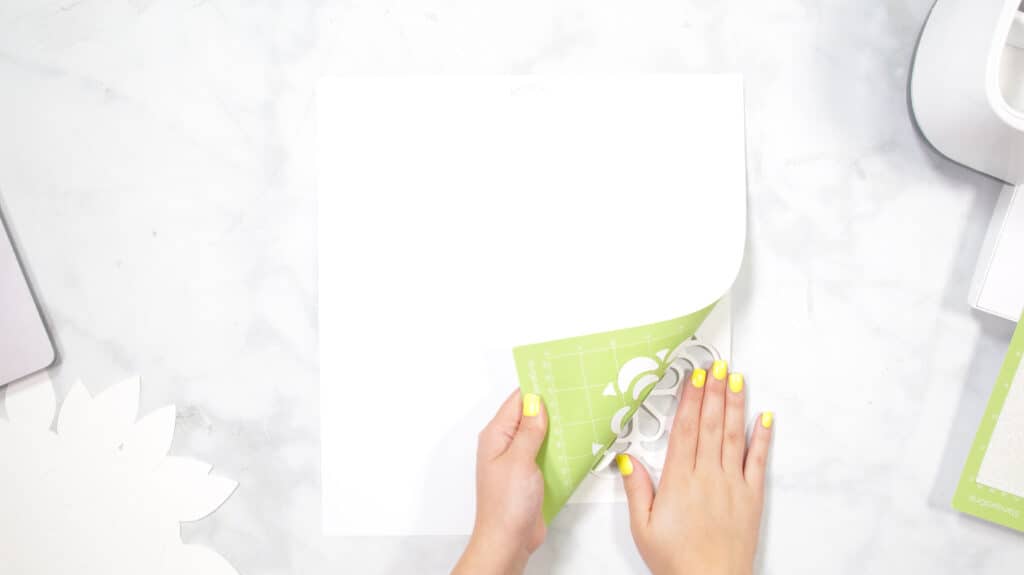
Carefully peel your mat away from the card stock to avoid tearing or rolling your card stock. 

Canada Day Wreath by popular US craft blog, Sweet Red Poppy: image of a woman peeling a green Cricut mat away from their design.

Following the prompts in Design Space, place the second color of cardstock on your mat. 

Continue to load, cut, and unload the rest of the cuts until you have all of the elements cut out. 

Canada Day Wreath by popular US craft blog, Sweet Red Poppy: image of a woman using a Cricut machine.

Step 4 - Assemble Layered Wreath

Lay the pieces out in front of you in order.

Canada Day Wreath by popular US craft blog, Sweet Red Poppy: image of red and white paper maple leaves.

Cricut Design Space doesn't cut out the layers in order so it can get confusing to piece together especially with this many layers.  Head back to Design Space to see the layers as a reference for how to put the wreath together.

Using foam adhesive, carefully put your layered wreath together. It’s best to use the adhesive in the same spot on each layer to get an even rise and layered look. 

Canada Day Wreath by popular US craft blog, Sweet Red Poppy: image of some red and white paper maple leaves and a woman peeling off a sticky dot.

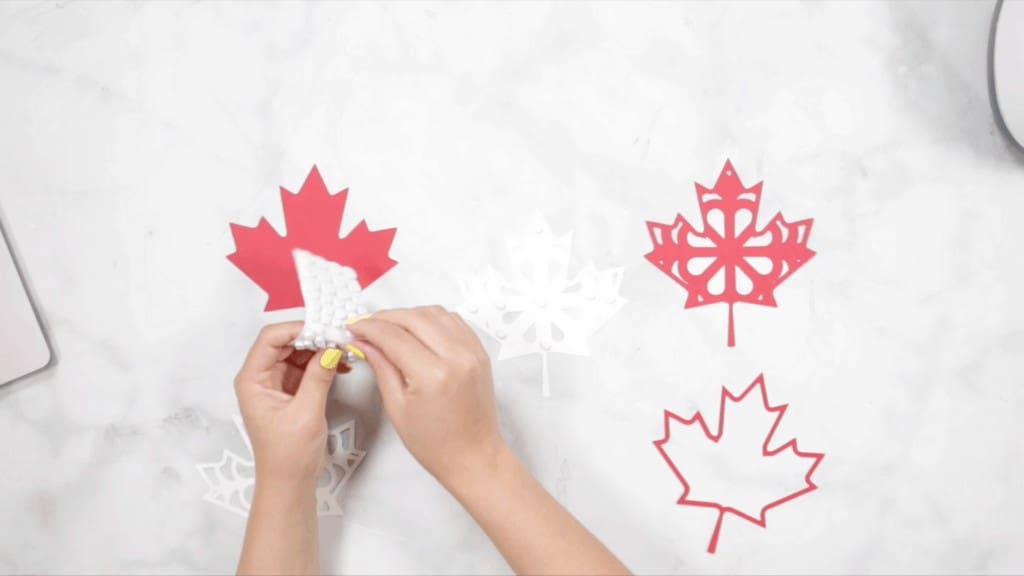
Start with the maple leaf which has five layers. There are three red layers and two white layers.

The image below shows you from bottom to top how the layers should be placed starting with the solid maple leaf and ending with the outline of the maple leaf.

Canada Day Wreath by popular US craft blog, Sweet Red Poppy: image of some red and white paper maple leaves.

Next, piece together the two mandalas that sit behind the maple leaf with the smaller mandala layered on top of the larger mandala.

Canada Day Wreath by popular US craft blog, Sweet Red Poppy: image of some white paper mandalas.

Then, work with the two red petal leaf layers and two white petal leaf layers.

The image below shows you from bottom to top how the layers should be placed starting with the larger red petal leaf layer and ending with the smaller white petal leaf layer with the cuts in the center.  

Canada Day Wreath by popular US craft blog, Sweet Red Poppy: image of red and white petal leaf paper.

Place the leaves from each of the white layers in between the leaves from each of the red layers.  Then place one on top of the other.

Canada Day Wreath by popular US craft blog, Sweet Red Poppy: image of layered red and white petal leaf paper.

Now, put it all together. The 5 layer maple leaf will sit on the 2 layer mandala which sits on the 4 layers of petal leaves.

Canada Day Wreath by popular US craft blog, Sweet Red Poppy: image of red and while layered petal leaf and maple leaf paper.

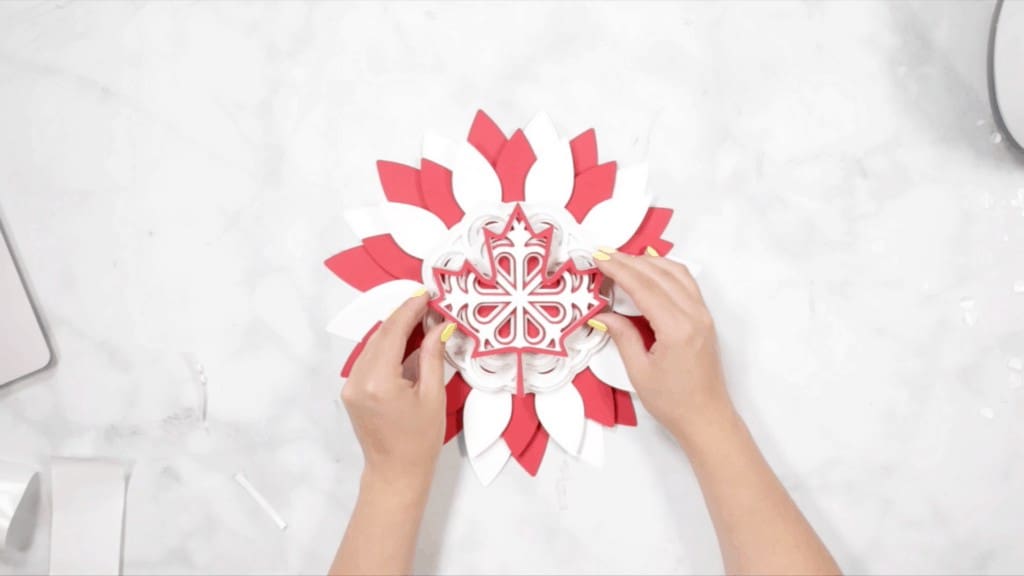
Now you have this festive Canada Day Layered Wreath! I can’t wait to see how yours turned out. Be sure to share a picture of your wreath in my Facebook group.

Canada Day Wreath by popular US craft blog, Sweet Red Poppy: image of a layered Canada Day wreath.
Canada Day Wreath by popular US craft blog, Sweet Red Poppy: Pinterest image of a layered Canada Day wreath.

Have you ever made a Canada Day wreath? Let me know in a comment below!

« DIY 4th of July Layered Wreath
Layered Heart Mandala SVG File »

Reader Interactions

Comments

  1. Barbara Morris says

    June 26, 2021 at 10:32 pm

    Hi as a proud Canadian may I say that I find this design not to my liking. Our maple leaf is RED

    Reply
  2. Williametems says

    April 20, 2026 at 9:59 am

    http://accessbridgepharmacy.com/# AccessBridge

    Reply
  3. KennethAcict says

    April 20, 2026 at 4:24 pm

    pharmacy in mexico that ships to us: farmacia mexicana en chicago - AccessBridge Pharmacy

    Reply
  4. KennethAcict says

    April 21, 2026 at 5:27 am

    AccessBridge Pharmacy: mexican farmacia - AccessBridge

    Reply
  5. PeterSnino says

    April 21, 2026 at 9:55 am

    pharmacy order online http://petcanadadirect.com/# Pet Canada Direct

    Reply
  6. PatrickFes says

    April 21, 2026 at 9:58 am

    https://pharmrate.shop/# legal online pharmacy

    Reply
  7. CharlesJounk says

    April 21, 2026 at 1:16 pm

    pet med [url=https://petcanadadirect.shop/#]pet meds online[/url] Pet Canada Direct

    Reply
  8. PatrickFes says

    April 21, 2026 at 1:35 pm

    https://petcanadadirect.shop/# Pet Canada Direct

    Reply
  9. PeterSnino says

    April 21, 2026 at 3:05 pm

    pharmacy websites http://petcanadadirect.com/# vet pharmacy

    Reply
  10. PatrickFes says

    April 21, 2026 at 5:03 pm

    https://pharmrate.com/# Pharm Rate

    Reply
  11. CharlesJounk says

    April 21, 2026 at 8:02 pm

    ed med online [url=https://edmedscoupon.com/#]erectile dysfunction drugs online[/url] overseas pharmacy no prescription

    Reply
  12. PatrickFes says

    April 21, 2026 at 8:36 pm

    https://petcanadadirect.com/# Pet Canada Direct

    Reply
  13. PeterSnino says

    April 21, 2026 at 8:45 pm

    top-rated online pharmacies https://pharmrate.shop/# Pharm Rate

    Reply
  14. PatrickFes says

    April 21, 2026 at 11:58 pm

    https://petcanadadirect.shop/# best pet rx

    Reply
  15. PeterSnino says

    April 22, 2026 at 2:10 am

    new pharmacy online https://edmedscoupon.com/# cheap ed medicine

    Reply
  16. CharlesJounk says

    April 22, 2026 at 2:47 am

    pet prescriptions online [url=http://petcanadadirect.com/#]dog medicine[/url] Pet Canada Direct

    Reply
  17. PatrickFes says

    April 22, 2026 at 3:19 am

    https://edmedscoupon.shop/# erectile dysfunction meds online

    Reply
  18. PatrickFes says

    April 22, 2026 at 6:48 am

    https://pharmrate.shop/# Pharm Rate

    Reply
  19. PeterSnino says

    April 22, 2026 at 8:04 am

    top online pharmacy https://edmedscoupon.com/# cost of ed meds

    Reply
  20. CharlesJounk says

    April 22, 2026 at 10:59 am

    Pharm Rate [url=https://pharmrate.com/#]medicine online[/url] overseas online pharmacy

    Reply
  21. PeterSnino says

    April 22, 2026 at 3:11 pm

    reputable online pharmacy no prescription https://petcanadadirect.com/# pet rx

    Reply
  22. PatrickFes says

    April 22, 2026 at 3:53 pm

    https://pharmrate.com/# Pharm Rate

    Reply
  23. PatrickFes says

    April 22, 2026 at 8:25 pm

    http://pharmrate.com/# online pharmacy no prescription needed

    Reply
  24. CharlesJounk says

    April 22, 2026 at 8:48 pm

    canada pet meds [url=https://petcanadadirect.com/#]Pet Canada Direct[/url] Pet Canada Direct

    Reply
  25. PeterSnino says

    April 22, 2026 at 10:18 pm

    secure medical online pharmacy https://pharmrate.shop/# no rx needed pharmacy

    Reply
  26. PatrickFes says

    April 23, 2026 at 1:01 am

    https://edmedscoupon.shop/# edmeds

    Reply
  27. PatrickFes says

    April 23, 2026 at 5:32 am

    https://edmedscoupon.com/# where to buy ed pills

    Reply
  28. CharlesJounk says

    April 23, 2026 at 6:33 am

    express scripts mail order pharmacy [url=https://pharmrate.shop/#]Pharm Rate[/url] buy online medicine

    Reply
  29. DanielMor says

    April 23, 2026 at 10:02 am

    https://semaglutide.life/# rybelsus without diabetes

    Reply
  30. Pedrofusly says

    April 23, 2026 at 11:46 am

    https://antibiotics.cheap/# antibiotics cheap

    Reply
  31. DanielMor says

    April 23, 2026 at 1:18 pm

    https://stromectol.reviews/# stromectol reviews

    Reply
  32. DavidDromy says

    April 23, 2026 at 1:56 pm

    ivermectin 8 mg [url=https://stromectol.reviews/#]stromectol reviews[/url] stromectol reviews

    Reply
  33. DanielMor says

    April 23, 2026 at 4:37 pm

    https://semaglutide.life/# can you drink alcohol on semaglutide

    Reply
  34. Pedrofusly says

    April 23, 2026 at 4:59 pm

    https://semaglutide.life/# rybelsus nausea

    Reply
  35. DanielMor says

    April 23, 2026 at 8:09 pm

    https://antibiotics.cheap/# antibiotics cheap

    Reply
  36. DavidDromy says

    April 23, 2026 at 8:43 pm

    over the counter antibiotics [url=https://antibiotics.cheap/#]antibiotics online purchase[/url] antibiotics

    Reply
  37. Pedrofusly says

    April 23, 2026 at 10:25 pm

    https://antibiotics.cheap/# antibiotics drugs

    Reply
  38. DanielMor says

    April 23, 2026 at 11:32 pm

    https://stromectol.reviews/# stromectol reviews

    Reply
  39. DanielMor says

    April 24, 2026 at 2:54 am

    https://stromectol.reviews/# ivermectin

    Reply
  40. Pedrofusly says

    April 24, 2026 at 3:54 am

    https://antibiotics.cheap/# prescribed antibiotics online

    Reply
  41. DavidDromy says

    April 24, 2026 at 3:57 am

    over the counter antibiotics [url=https://antibiotics.cheap/#]antibiotics cheap[/url] antibiotics cheap

    Reply
  42. Eliasspums says

    April 24, 2026 at 6:15 am

    stromectol reviews: stromectol reviews - stromectol reviews

    Reply
  43. DanielMor says

    April 24, 2026 at 7:11 am

    https://antibiotics.cheap/# cheap antibiotics

    Reply
  44. Pedrofusly says

    April 24, 2026 at 10:28 am

    https://stromectol.reviews/# stromectol reviews

    Reply
  45. DanielMor says

    April 24, 2026 at 11:23 am

    https://semaglutide.life/# semaglutide pros and cons

    Reply
  46. DavidDromy says

    April 24, 2026 at 1:45 pm

    over the counter antibiotics [url=https://antibiotics.cheap/#]antibiotics cheap[/url] generic antibiotics online pharmacy

    Reply
  47. DanielMor says

    April 24, 2026 at 4:02 pm

    https://antibiotics.cheap/# over the counter antibiotics

    Reply

Leave a Reply Cancel reply

Your email address will not be published. Required fields are marked *

Primary Sidebar

Ready, Set, Sew! An online sewing course for beginners by top US sewing blogger, Sweet Red Poppy.

Hello, I’m Kimberly, the creator of Sweet Red Poppy!

I’m a wife, mother to 3, seamstress, and lover of all things crafty! Sweet Red Poppy is my creative outlet where I find and create inspiration. It’s a place where I can share my never-ending sewing projects and my love of learning!

Read more about me →

The Latest

  • DIY Valentine Paper Bow Garland Template
  • All About Bags Round-Up
  • What is Fleece and How to Sew it
    What is Fleece Fabric and How to Sew It
  • Easy No-Sew Appliqué with Cricut Machine
  • How to Paint a Kraft Paper Banner
  • How to Create Magnetic Photo Frames with Glowforge & Cricut + 20 Free SVGs

Footer

↑ back to top

Legal

  • Privacy Policy
  • Disclosure

Newsletter

  • Get My Cricut Book HERE
  • Sign Up! For Emails and Updates
  • YouTube
  • Instagram
  • Facebook
  • Pinterest
  • TikTok
  • Mail

About

  • Contact
  • About
  • Home

Copyright © 2024 Sweet Red Poppy