• Skip to primary navigation
  • Skip to main content
  • Skip to primary sidebar
Sweet Red Poppy logo
  • Cricut
    • Free SVG Files
    • Paper Flowers
    • Mandala
    • Iron-On
    • Vinyl
    • Maker
    • Explore Air 2
    • Joy
  • Sewing
    • Baby
    • Kids
    • Accessories
    • Christmas
    • Blankets
    • Womens
    • Learn to Sew Tips & Tricks
    • Face Masks
  • DIY Crafting
    • Paint
    • Paper
    • Food
    • Kids
  • Holiday Crafts
    • Valentine’s Day
    • Easter
    • 4th of July
    • Halloween
    • Thanksgiving
    • Christmas
  • Books
    • Cricut Printed Book
    • Cricut E-Book
    • Cricut Joy Printed Book
    • Cricut Joy E-Book
    • Sewing Printed Book
    • Sewing E-Book
    • Face Mask E-Book
    • Mandala E-Book Bundle
    • Mandala E-Book - Inkscape
    • Mandala E-Book - Adobe Illustrator
    • Mandala Printed Book - Inkscape
    • Mandala Printed Book - Adobe Illustrator
    • Baby Pattern E-Book
  • Courses
    • Cricut Course
    • Sewing Course
    • Serger Course
  • Shop
    • E-Books
    • Printed Books
    • Sewing Patterns
    • SVG Files
    • Baby Patterns
    • Subscribe to Emails
  • Search

DIY 4th of July Layered Wreath

Written by Kimberly Coffin · This post may contain affiliate links · 4 Comments

101 shares

Looking for patriotic home decor?  This layered DIY 4th of July wreath is easy to put together using your cutting machine and cardstock. 

Because we have three young kids, going into the city to watch the fireworks can be challenging. So the way we really get into the holiday is by decorating the house, the yard, and ourselves in Red, White, and Blue!  We have a lot of fun with it and it makes it exciting for the kids.

I've made lots of Independence Day decorations over the years but this one is by far my favorite one. This design is 8 layers and is perfect to place on a door or wall.

This project features multiple layers for a truly jaw-dropping design! You can customize this with different types of paper to get a one-of-a-kind look. Just imagine this project in a glitter paper! Wouldn't that be gorgeous?

Are you ready to get started on this project?

Layered DIY 4th of July Wreath
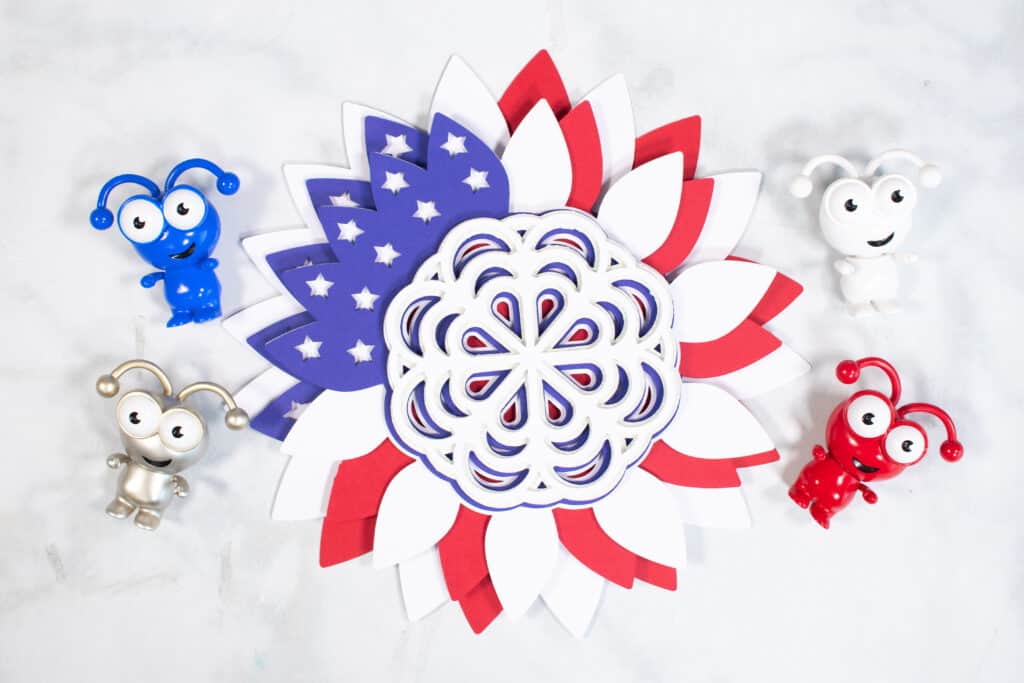
DIY 4th of July Wreath by popular US craft blog, Sweet Red Poppy: image of a layered DIY 4th of July wreath surrounded by some red, white, blue, and silver Cricut mascots.

4th of July Layered Wreath Supplies

For this project, you need:

  • Cricut Explore or Cricut Maker
  • Fine-Point Blade
  • StandardGrip Mat
  • Cardstock Red, White, and Blue
  • Foam Adhesive Dots

Download the FREE 4th of July Layered Wreath SVG Files Here!
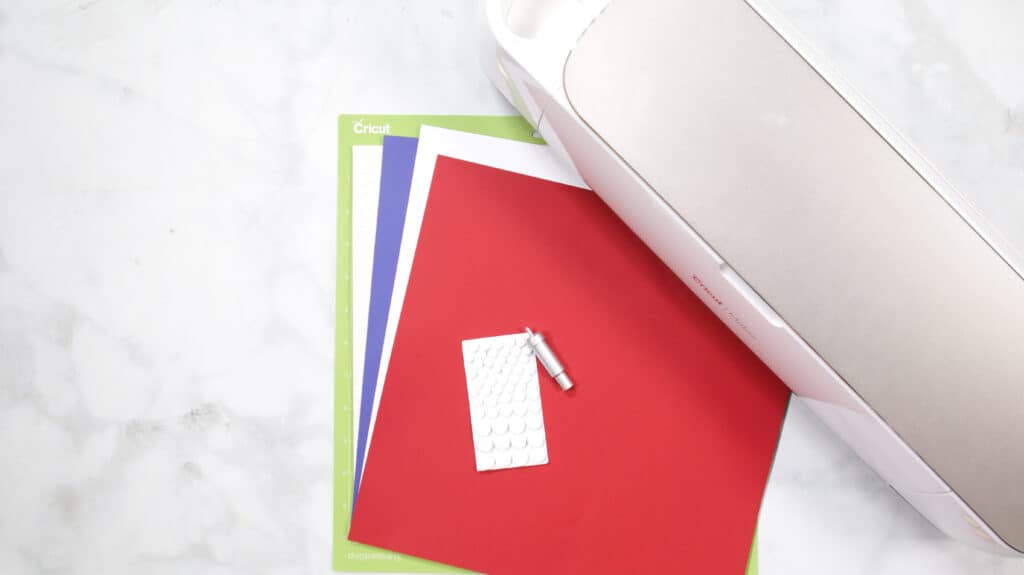
DIY 4th of July Wreath by popular US craft blog, Sweet Red Poppy: image of red, white,and blue paper next to a Cricut machine.

How To Make a Layered DIY 4th of July Wreath

Follow these easy steps to make the 4th of July Layered Wreath using Cricut Design Space and your Cricut cutting machine.

Step 1 - Upload SVG File to Design Space

If you haven't already, download my FREE 4th of July Layered Wreath SVG File HERE.

Open Cricut Design Space and click the + to create a new project.

DIY 4th of July Wreath by popular US craft blog, Sweet Red Poppy: image of Cricut Design Space.

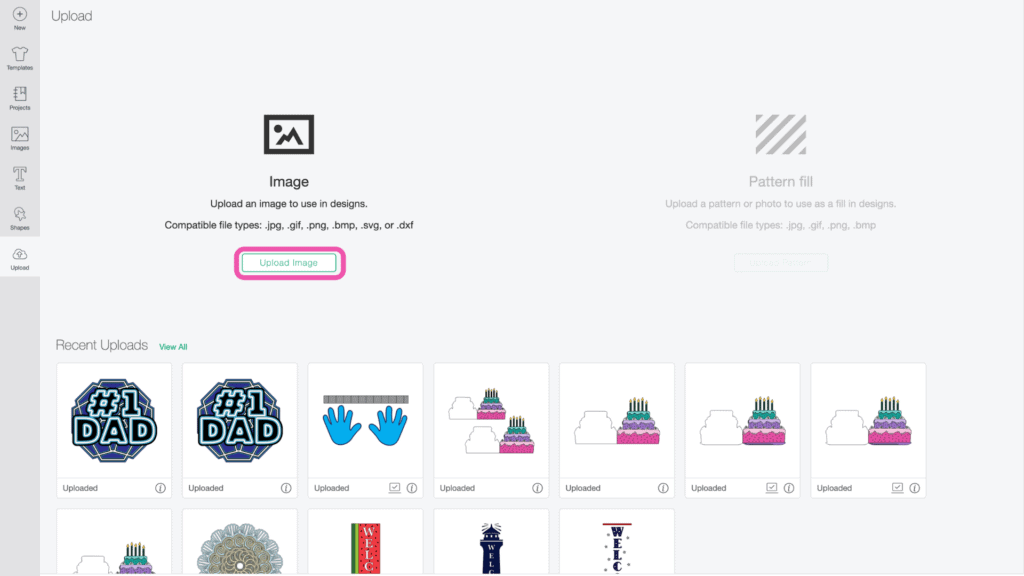
In the Design Panel on the left, select "Upload."
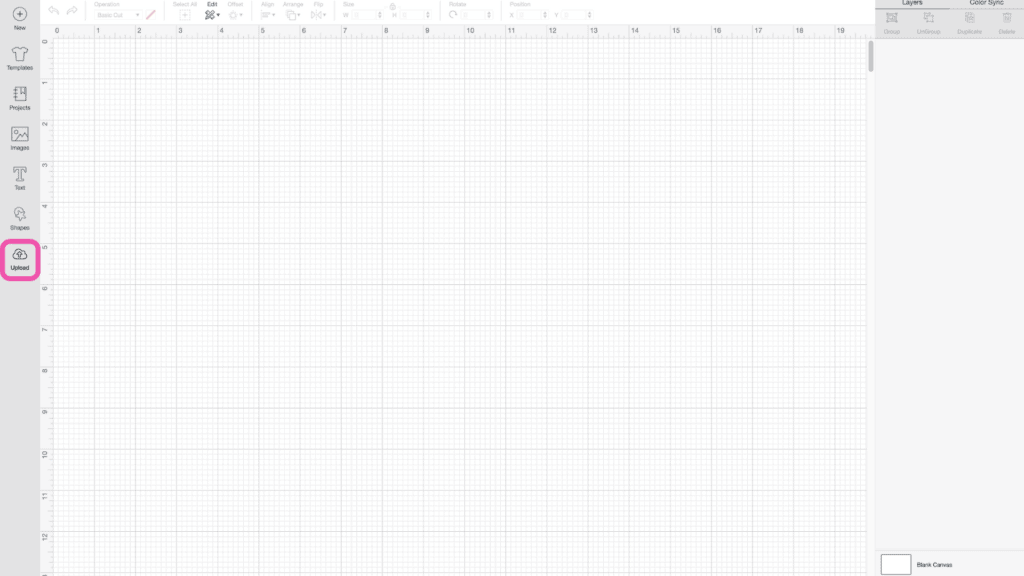
DIY 4th of July Wreath by popular US craft blog, Sweet Red Poppy: image of Cricut Design Space.

Click “Upload Image.”

DIY 4th of July Wreath by popular US craft blog, Sweet Red Poppy: image of Cricut Design Space.

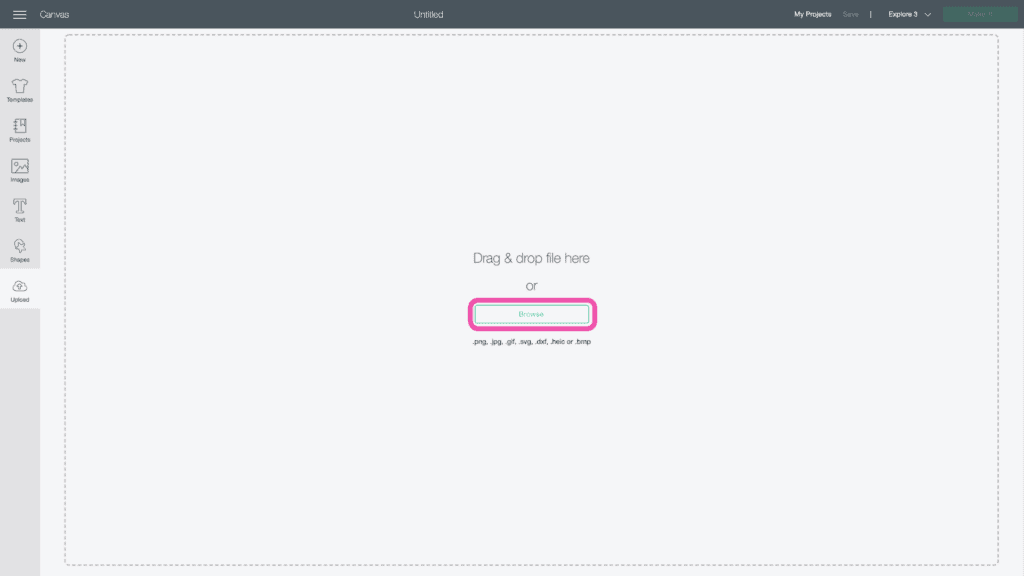
Click “Browse.”

DIY 4th of July Wreath by popular US craft blog, Sweet Red Poppy: image of Cricut Design Space.

Navigate to the file on your device to upload it to Cricut Design Space.  
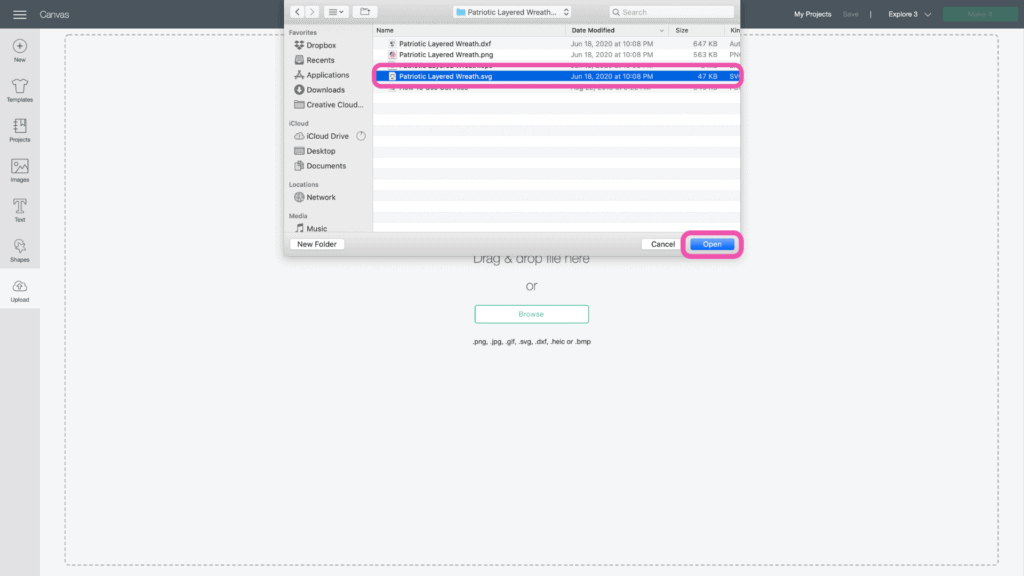
DIY 4th of July Wreath by popular US craft blog, Sweet Red Poppy: image of Cricut Design Space.

Here you can change the name and add tags. Click "Upload."
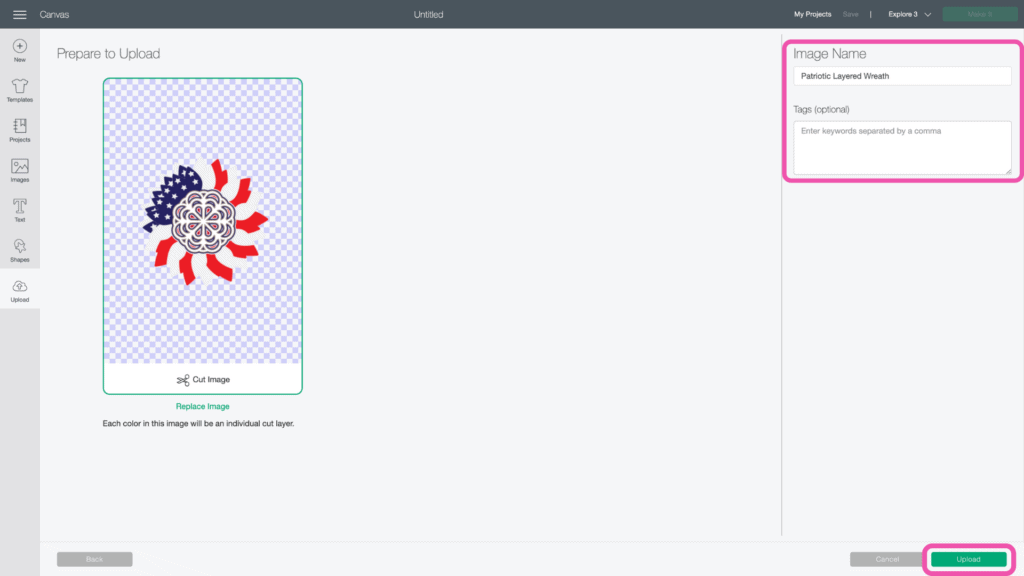
DIY 4th of July Wreath by popular US craft blog, Sweet Red Poppy: image of Cricut Design Space.

Once you have the file uploaded, select it and click "Insert Images" to bring it onto your canvas.
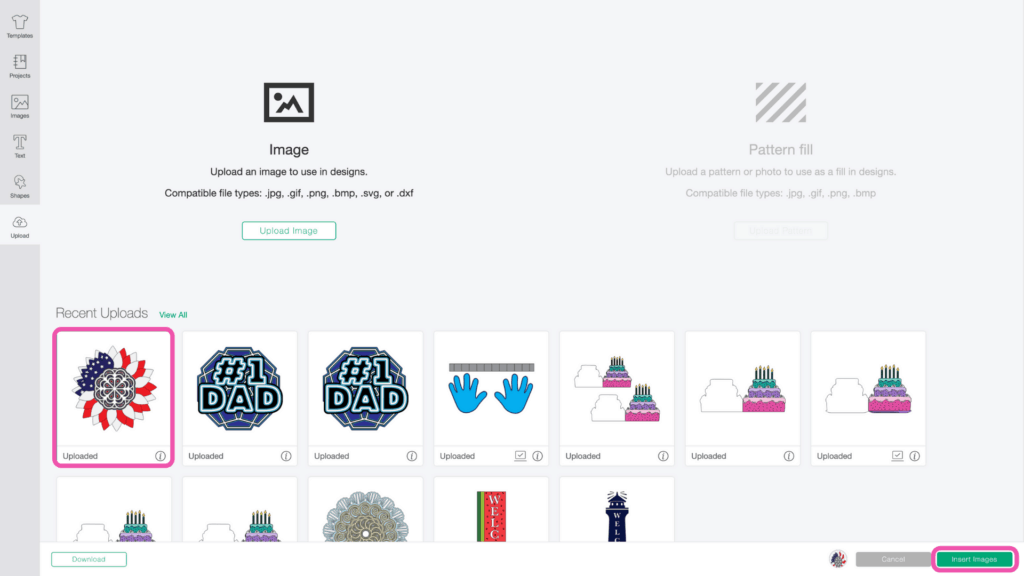
DIY 4th of July Wreath by popular US craft blog, Sweet Red Poppy: image of Cricut Design Space.

Step 2 - Resize Design

You'll see all of the layers in the Layers Panel on the right side of your screen.
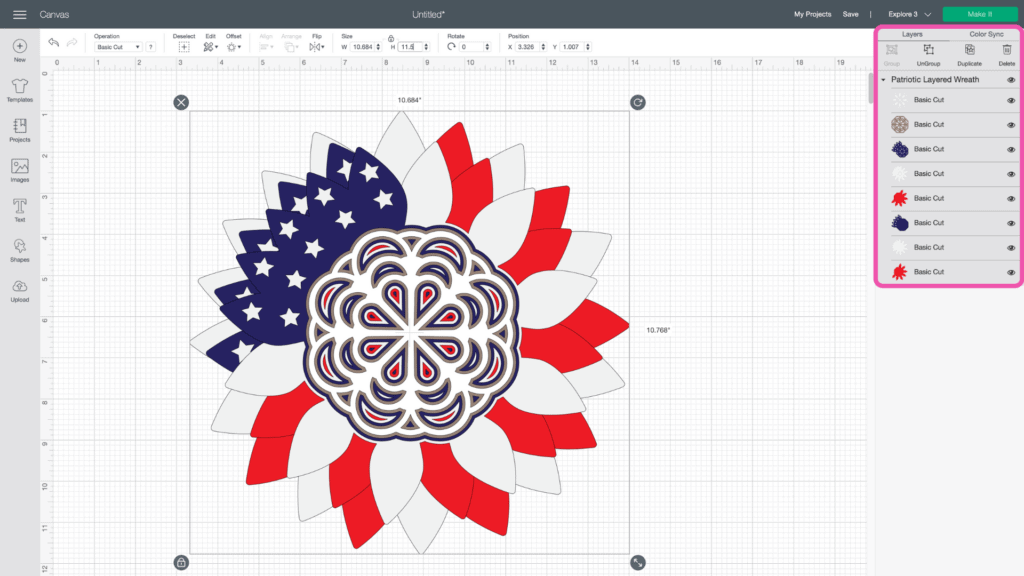
DIY 4th of July Wreath by popular US craft blog, Sweet Red Poppy: image of Cricut Design Space.

When I said this was easy, I meant it! There is nothing you have to do with this design except resize it.  

Simply keep the layers grouped and enter the size you want the wreath to be. Remember, the maximum size you can go in Cricut Design Space is 11.5 inches.

DIY 4th of July Wreath by popular US craft blog, Sweet Red Poppy: image of Cricut Design Space.

Now you're ready to cut the design! Click “Make It” in the upper right-hand corner of the screen.
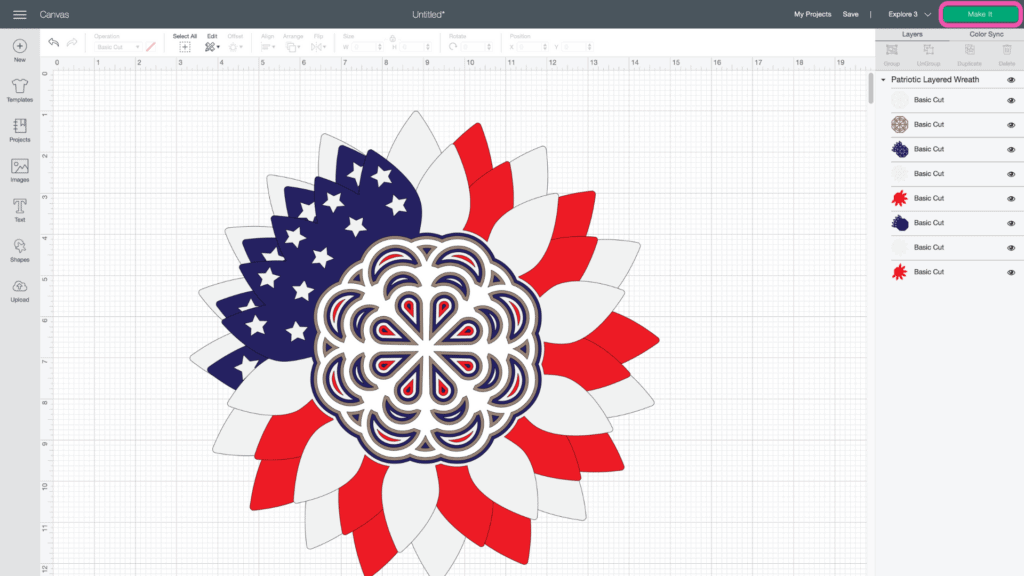
DIY 4th of July Wreath by popular US craft blog, Sweet Red Poppy: image of Cricut Design Space.

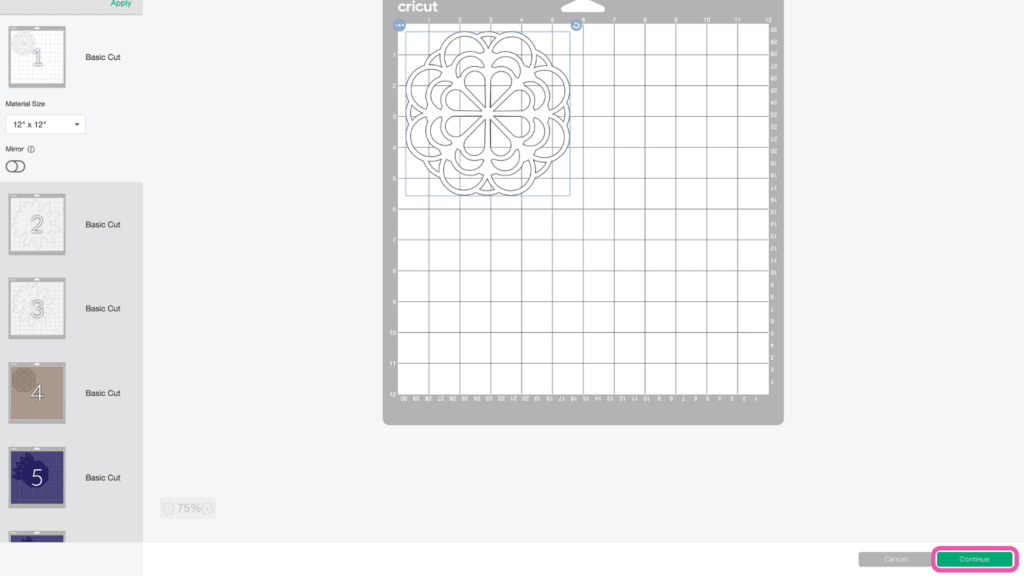
This brings you to the preview screen. 
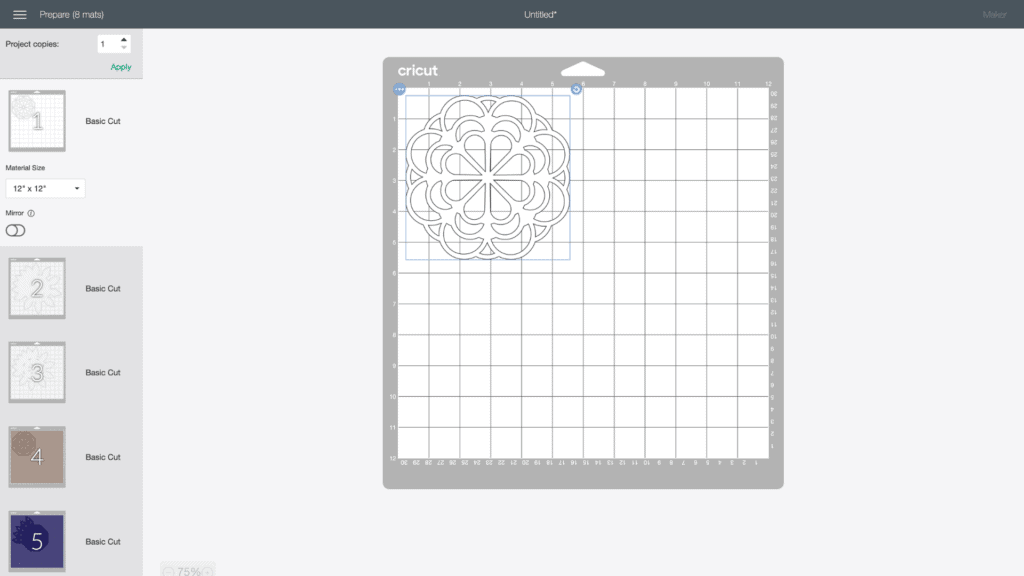
DIY 4th of July Wreath by popular US craft blog, Sweet Red Poppy: image of Cricut Design Space.

Click “Continue.”

DIY 4th of July Wreath by popular US craft blog, Sweet Red Poppy: image of Cricut Design Space.

Connect to your machine and select your material within Design Space. 

Ensure your Fine-Point Blade is loaded into your machine. 
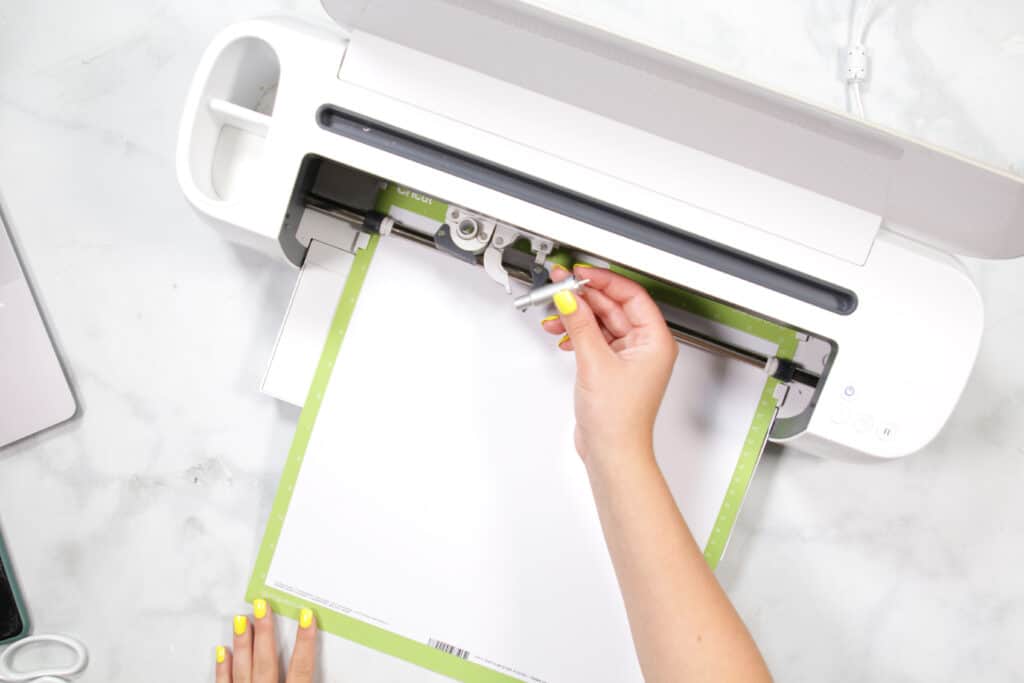
DIY 4th of July Wreath by popular US craft blog, Sweet Red Poppy: image of a woman using a Cricut machine.

Step 3 - Cut Out Design

Peel the clear liner away from your mat. 
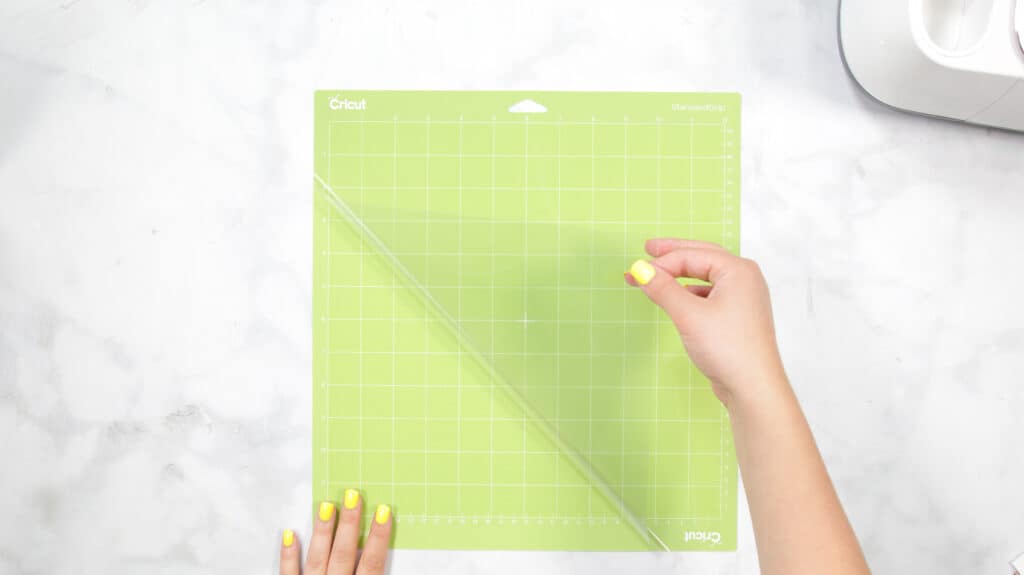
DIY 4th of July Wreath by popular US craft blog, Sweet Red Poppy: image of a woman peeling the clear cover off of Cricut cutting board.

Following Design Space’s prompts, place your first color of cardstock on your mat. 
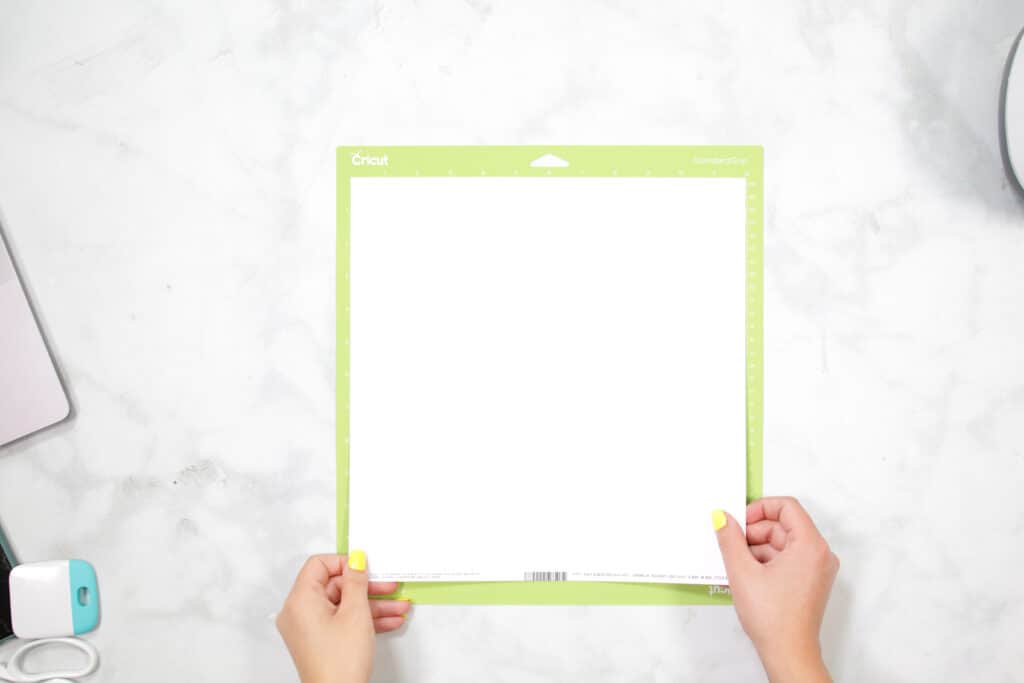
DIY 4th of July Wreath by popular US craft blog, Sweet Red Poppy: image of a woman putting white paper on a Cricut cutting board.

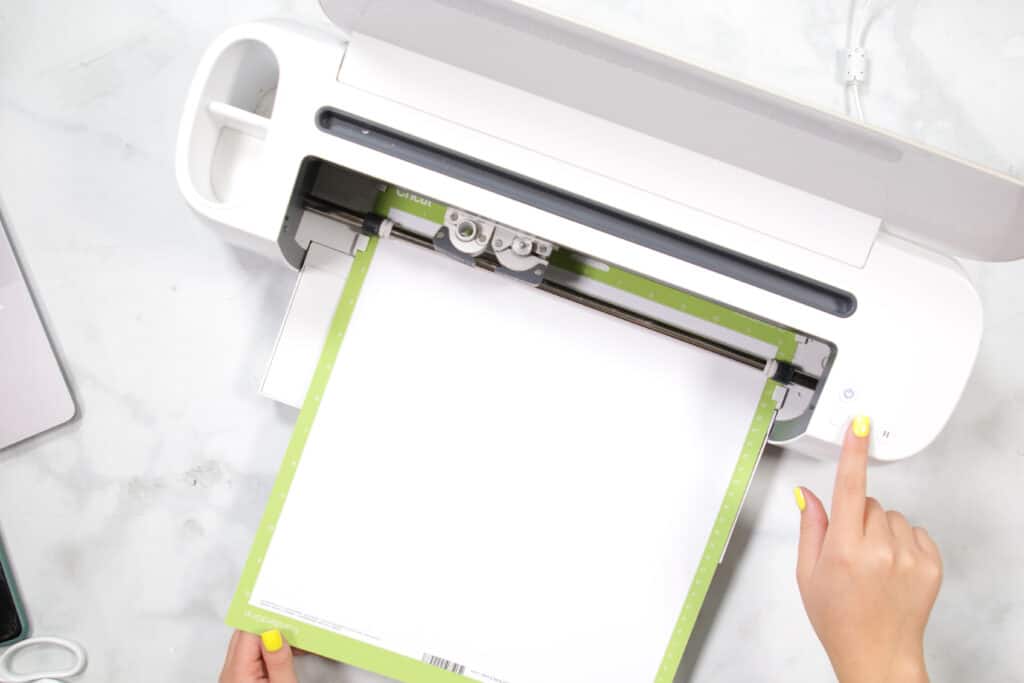
Press the load button to load the mat into your machine. 
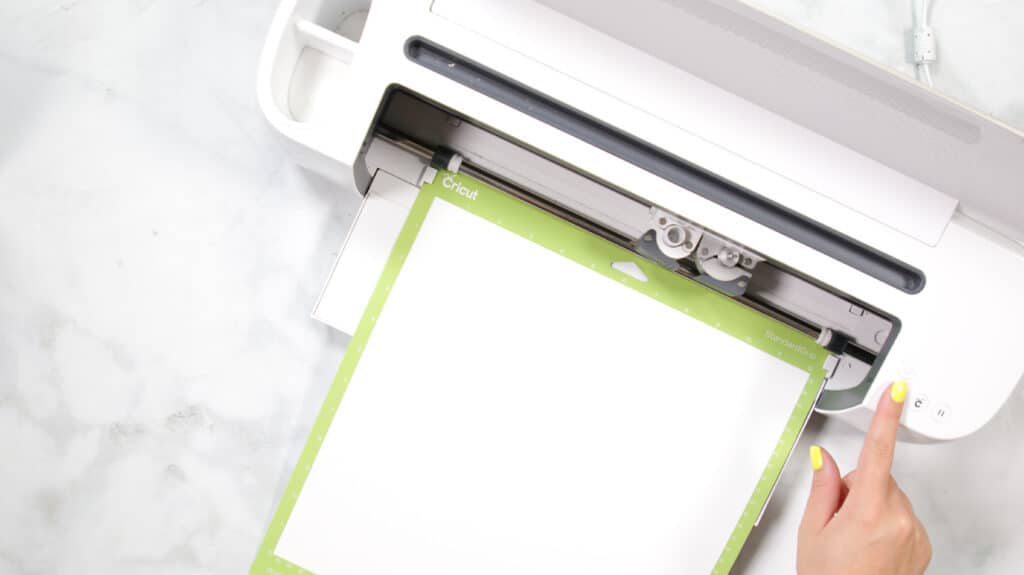
DIY 4th of July Wreath by popular US craft blog, Sweet Red Poppy: image of a woman using a Cricut machine.

Begin the cut. 

DIY 4th of July Wreath by popular US craft blog, Sweet Red Poppy: image of a woman using a Cricut cutting machine.

Once your first cut is complete, unload the mat. 
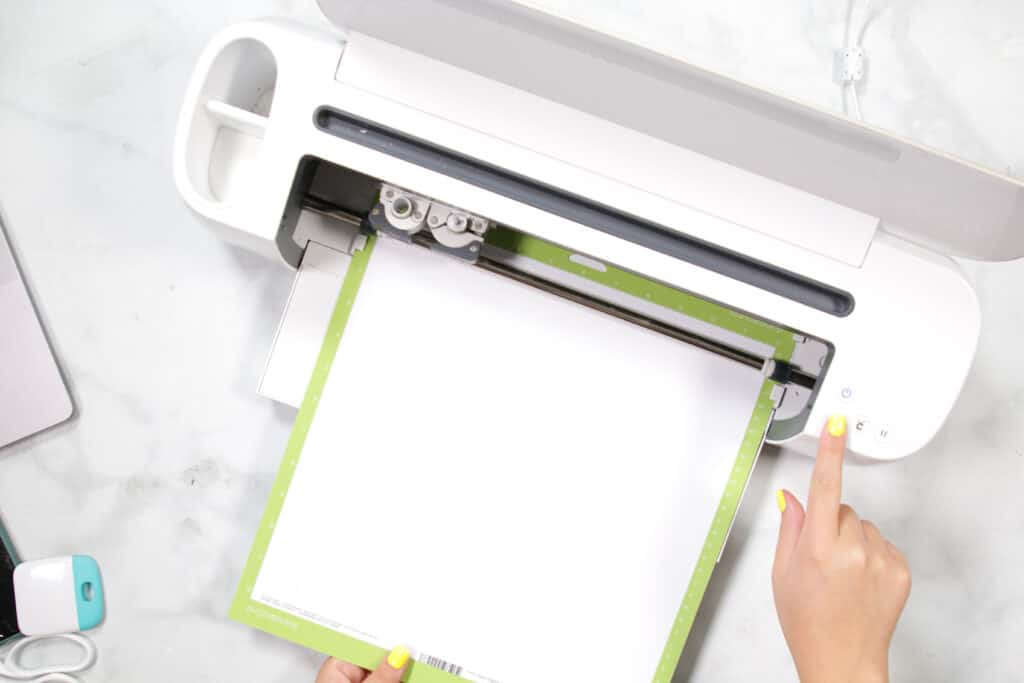
DIY 4th of July Wreath by popular US craft blog, Sweet Red Poppy: image of a woman using a Cricut machine.

Carefully peel your mat away from the cardstock to avoid tearing or rolling your cardstock. 
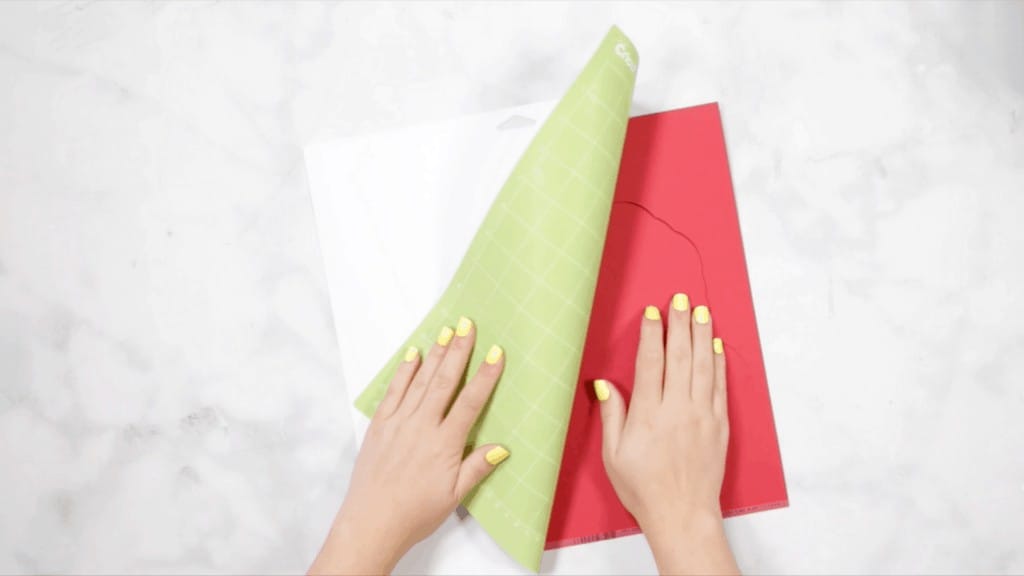
DIY 4th of July Wreath by popular US craft blog, Sweet Red Poppy: image of a woman peeling away a mat from her Cricut paper design.

Following the prompts in Design Space, place the second color of cardstock on your mat. 
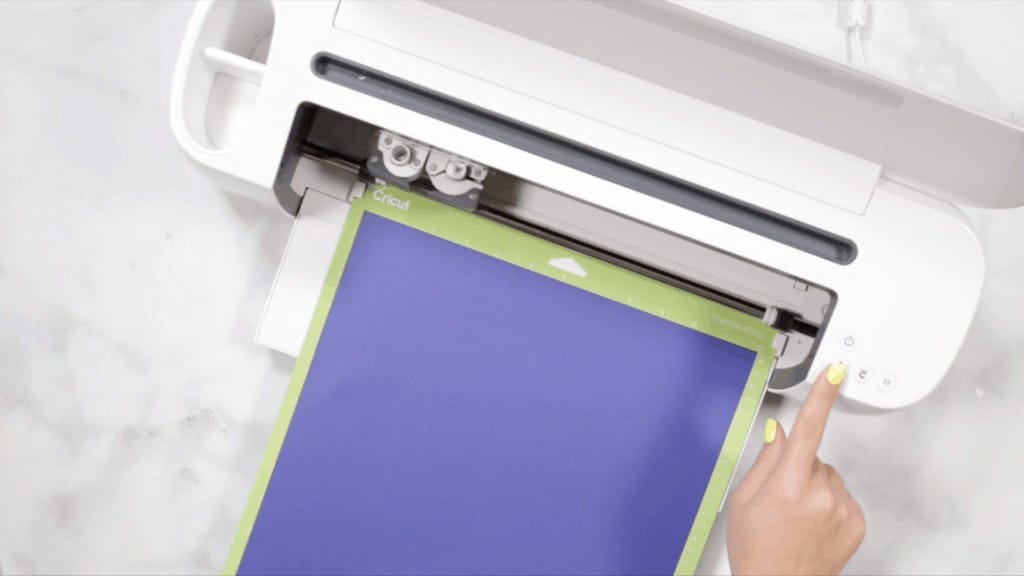
DIY 4th of July Wreath by popular US craft blog, Sweet Red Poppy: image of a woman using a Cricut machine.

Continue to load, cut, and unload the rest of the cuts until you have all of the elements cut out. 

Step 4 - Assemble Layered Wreath

Lay the pieces out in front of you in order.
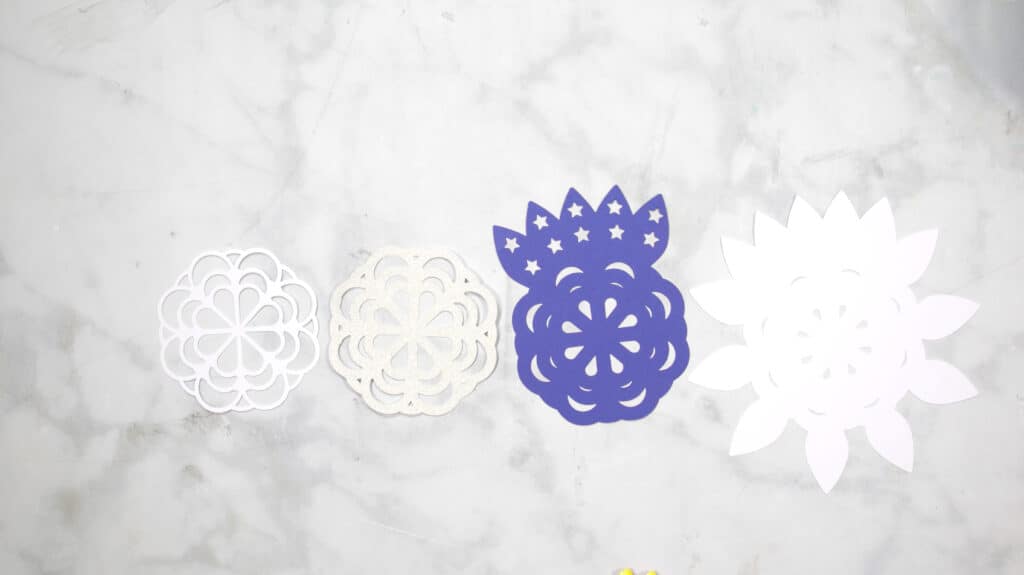
DIY 4th of July Wreath by popular US craft blog, Sweet Red Poppy: image of blue and white layer wreath pieces.

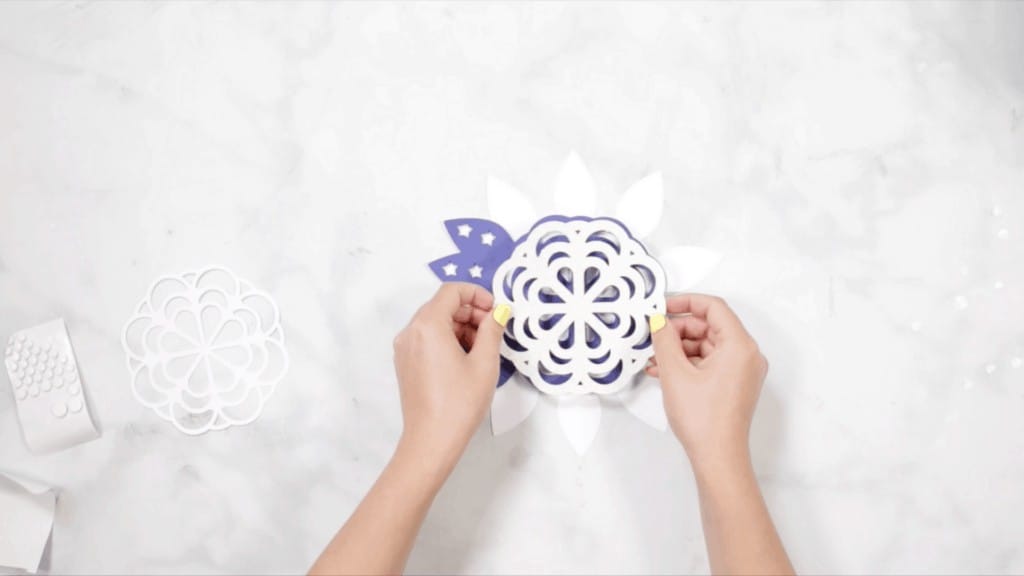
Using foam adhesive, carefully put your layered wreath together. It’s best to use the adhesive in the same spot on each layer to get an even rise and layered look. 
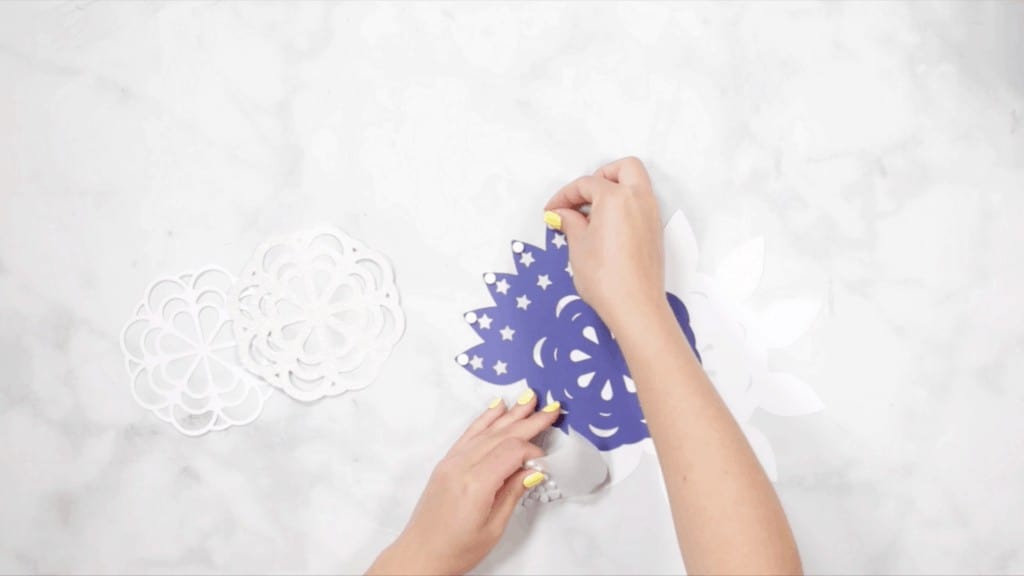
DIY 4th of July Wreath by popular US craft blog, Sweet Red Poppy: image of a woman assembling blue and and white layer wreath pieces.

First, assemble the front 4 pieces of your wreath.
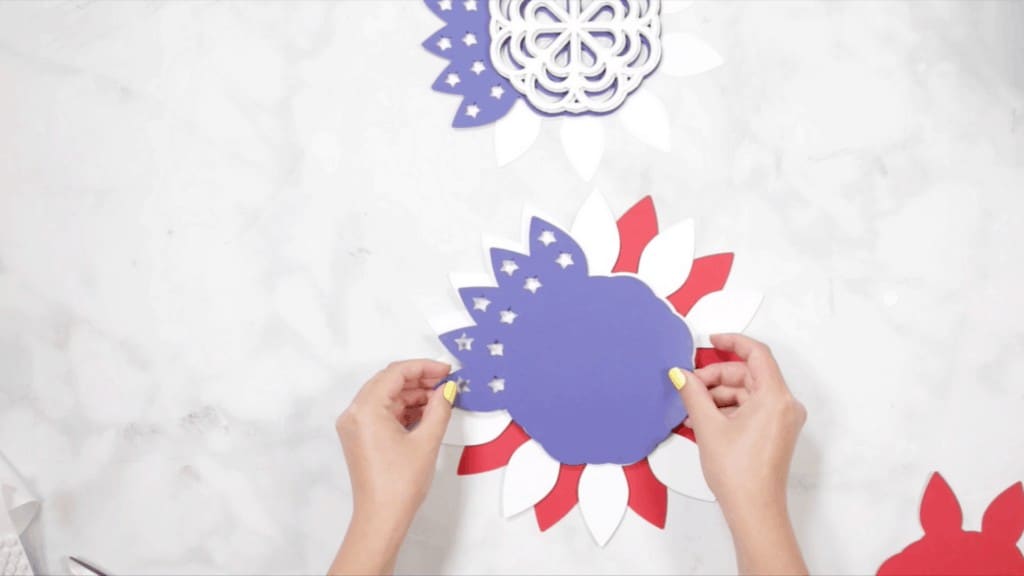
DIY 4th of July Wreath by popular US craft blog, Sweet Red Poppy: image of a woman assembling her blue, white, and red layer wreath pieces.

Next, assmeble the back 4 pieces.

DIY 4th of July Wreath by popular US craft blog, Sweet Red Poppy: image of a woman assembling her blue and white layer wreath pieces.

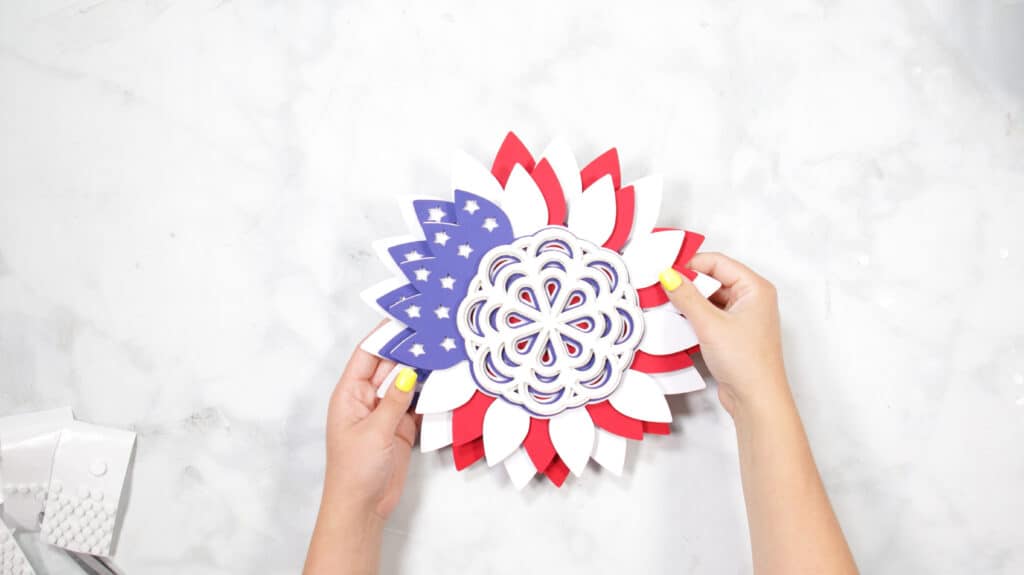
Finally, assemble the two sections together.
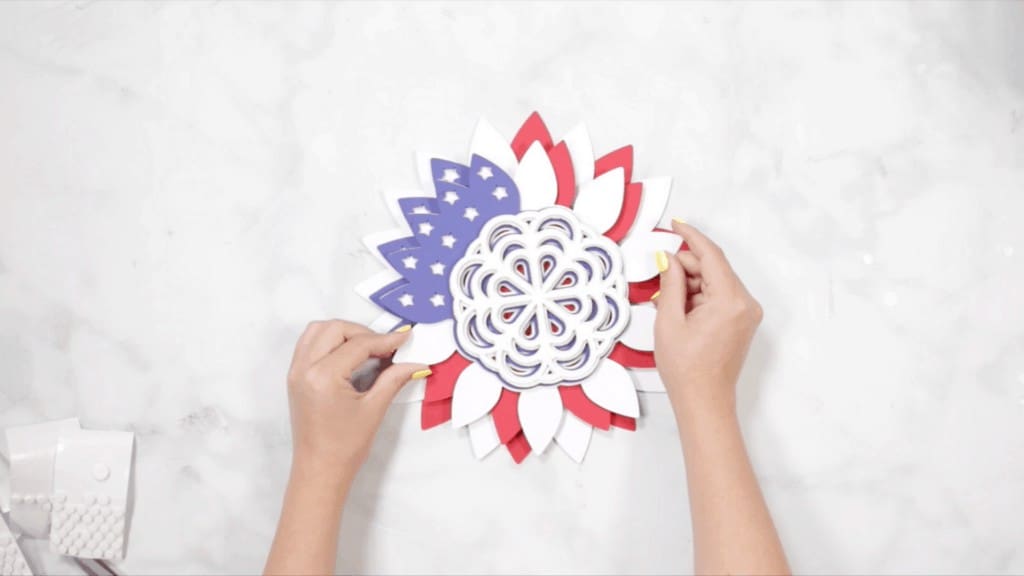
DIY 4th of July Wreath by popular US craft blog, Sweet Red Poppy: image of a woman assembling her blue, white, and red layer wreath pieces.

Now you have this cute 4th of July Layered Wreath! I can’t wait to see how yours turned out. Be sure to share a picture of your wreath in my Facebook group!
Looking for more holiday projects? Check out a few of my blog posts HERE.
DIY 4th of July Wreath by popular US craft blog, Sweet Red Poppy: Pinterest image of a 4th of July layer wreath.

Have you ever made a DIY 4th of July wreath? Let me know in a comment below!

« #1 Dad Layered Mandala - DIY Father's Day Card
DIY Canada Day Layered Wreath »

Reader Interactions

Comments

  1. Dot says

    June 27, 2021 at 6:55 pm

    Thank you for the 4th of July SVG file and for the how to make the wreath.
    It will be my first project wish me luck. Dot

    Reply
  2. Sue says

    June 29, 2021 at 6:36 am

    Thank you. Going to make this today!

    Reply
  3. Tonya Lynn Mann says

    May 16, 2022 at 5:06 pm

    How many of each color 12 x 12 sheets of card stock did you use? I'm thinking of making this with 5 ladies at a long-term drug treatment center and need an idea how many sheets I will need before I want to download it.
    Thank you
    Tonya

    Reply
  4. Carol Jenne says

    May 30, 2022 at 5:25 pm

    thank you for this svg - love it
    can you explain how the layers go together? from bottom to top - not sure of the order
    please help
    thank you again
    Carol Jenne

    Reply

Leave a Reply Cancel reply

Your email address will not be published. Required fields are marked *

This site uses Akismet to reduce spam. Learn how your comment data is processed.

Primary Sidebar

Ready, Set, Sew! An online sewing course for beginners by top US sewing blogger, Sweet Red Poppy.

Hello, I’m Kimberly, the creator of Sweet Red Poppy!

I’m a wife, mother to 3, seamstress, and lover of all things crafty! Sweet Red Poppy is my creative outlet where I find and create inspiration. It’s a place where I can share my never-ending sewing projects and my love of learning!

Read more about me →

The Latest

  • How to Sew Half Square Triangles Eight at a Time
    How to Sew a Half Square Triangle - Eight at a Time
  • Computer that says, Where to find fonts online
    Where to Find Fonts Online
  • Kim holding ipad talking about fonts
    How to Add Fonts to Adobe Illustrator on iPad
  • Rolled Paper Flower Wreath
    Free Rolled Paper Flower Wreath Template
  • 5 Useful Tools to Help You Organize After the Holidays with JOANN
  • How to Make Christmas Gift Tags with Your Cricut Machine

Footer

↑ back to top

Legal

  • Privacy Policy
  • Disclosure

Newsletter

  • Sign Up! For Emails and Updates

About

  • Contact
  • About
  • Home

Copyright © 2022 Sweet Red Poppy