Learn How to Use 12 Important Cricut Design Space Features Including Align, Attach, Arrange, Color Sync, Contour, Delete, Duplicate, Flatten, Group, Slice, Ungroup, and Weld.
Whether you’re new to Cricut or have been crafting for years, Design Space can take a while to master.
Be sure to scroll all the way down for my FREE Cricut Design Space Cheat Sheet!
Design Space offers a variety of functions to help you customize your projects. Since there’s a lot to learn in Design Space, I’ve put together 12 of the most important Design Space Functions. Let’s dive in!
Table of Contents
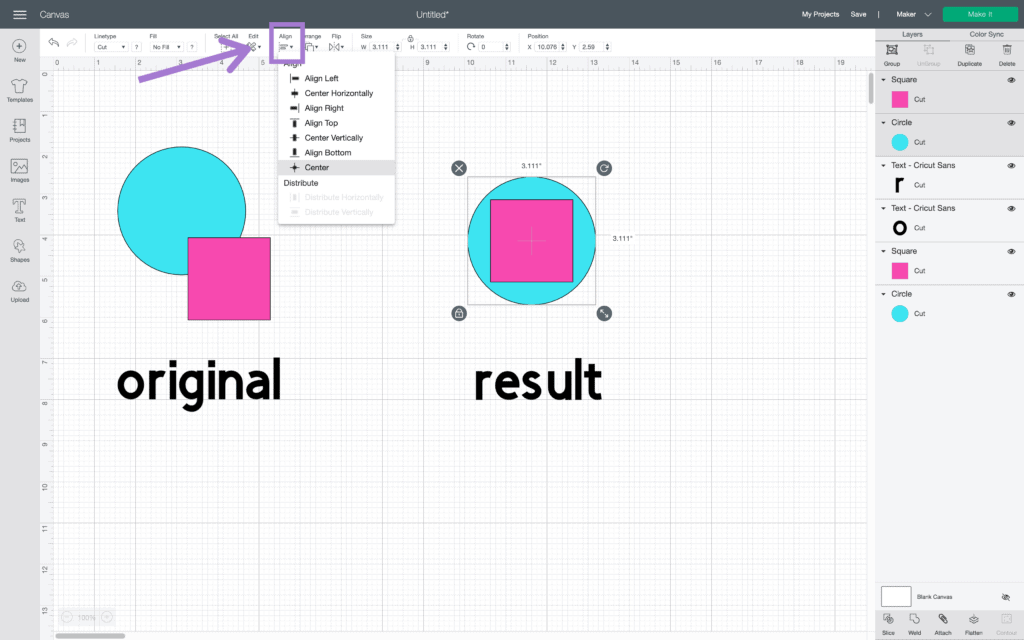
How to Use Align in Cricut Design Space
Align - This function aligns your objects according to your selection (Left, Right, Center, etc.). In order to activate this option, you must have at least two elements selected. The one I use most often is “Center.”
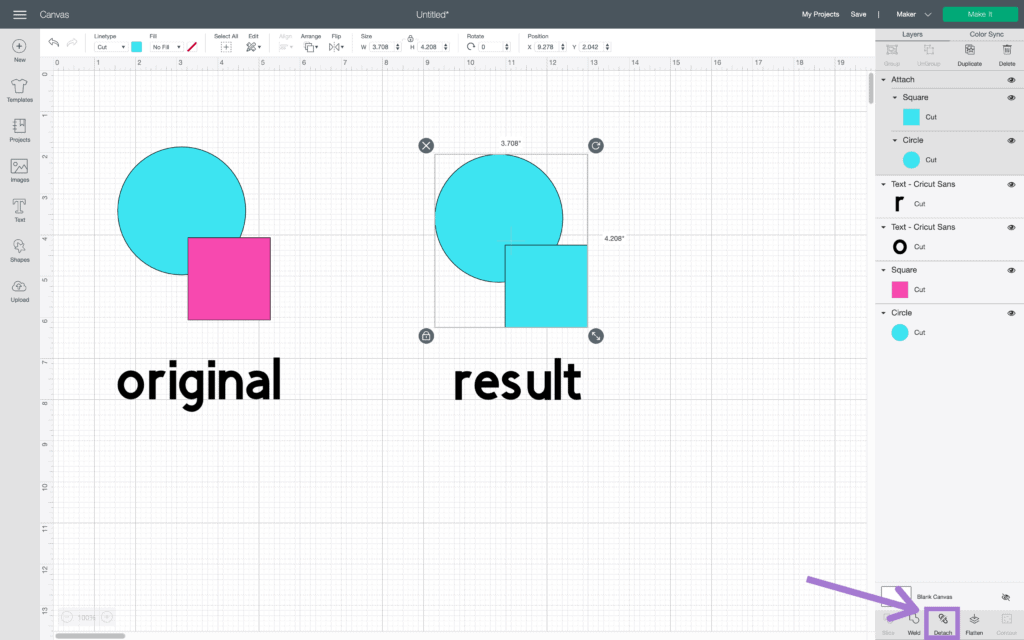
How to Use Attach in Cricut Design Space
Attach - Attach keeps two elements in the same position relative to one another. This is perfect for attaching words to a card or label.
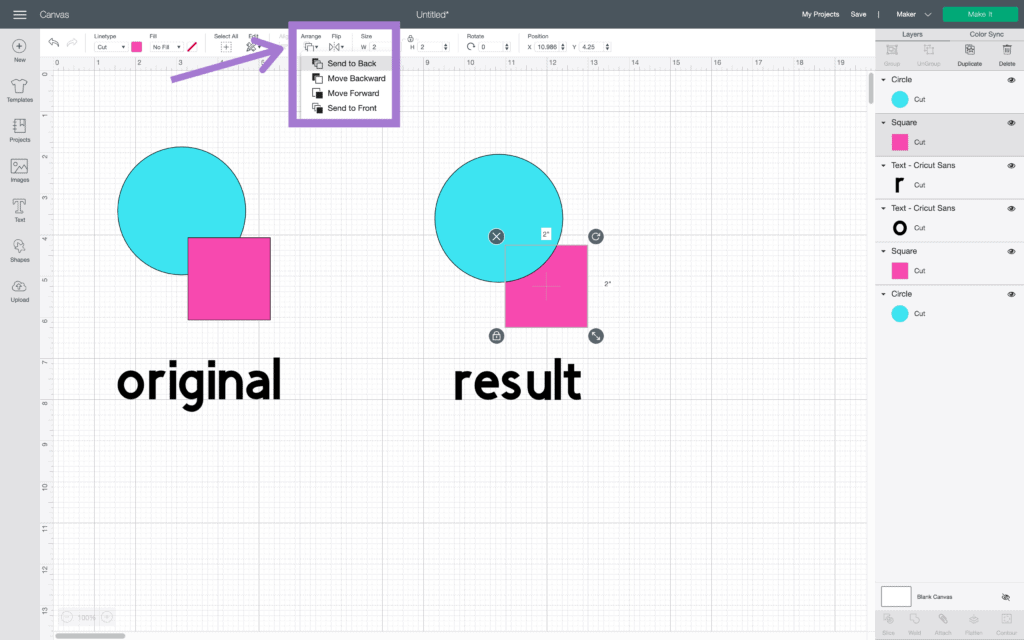
How to Use Arrange in Cricut Design Space
Arrange - This allows you to change the order of your elements. Simply select an object, hit “Arrange,” and select your desired option. You can also change the order of your elements using the layers panel.
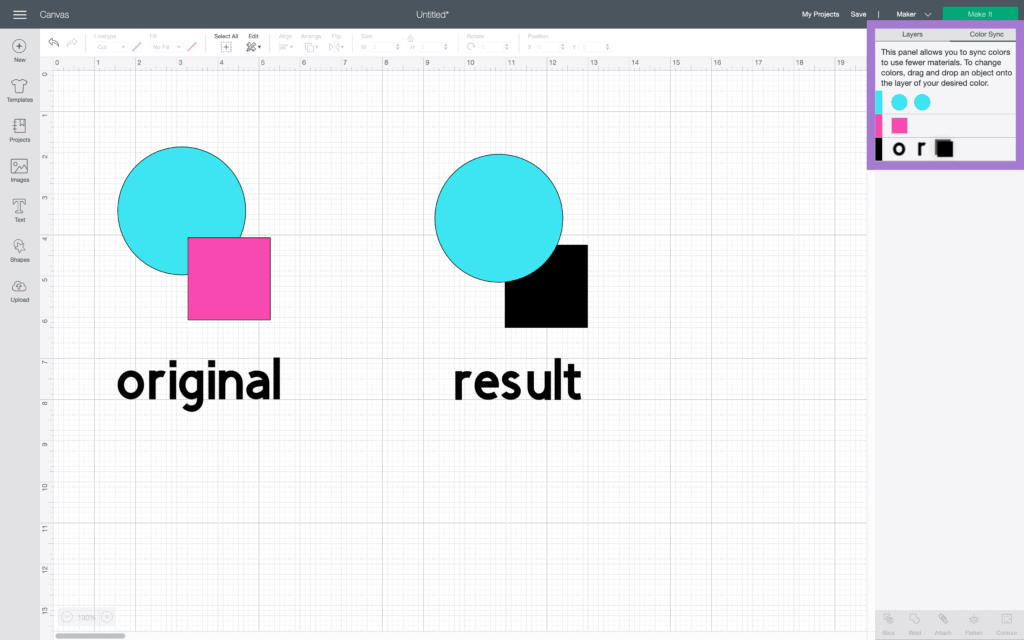
How to Use Color Sync in Cricut Design Space
Color Sync - Color Sync shows your cut elements sorted by their colors.
If you are wanting to change the colors of elements on your design, but don’t remember which color you chose, Color Sync is a quick and easy way to do that.
To change the color of an element, simply click and drag it to the desired color. This is perfect when you are trying to minimize the different mats you are going to be cutting on.
How to Use Contour in Cricut Design Space
Contour - Contour enables you to have more control to customize your design. The contour tool lets you hide individual portions of a layer so that they won’t cut out.
To use this function, select your image and click “Contour.” Then, click on the elements you want to hide. Once you are done, simply click on the “x” button to return to your canvas.

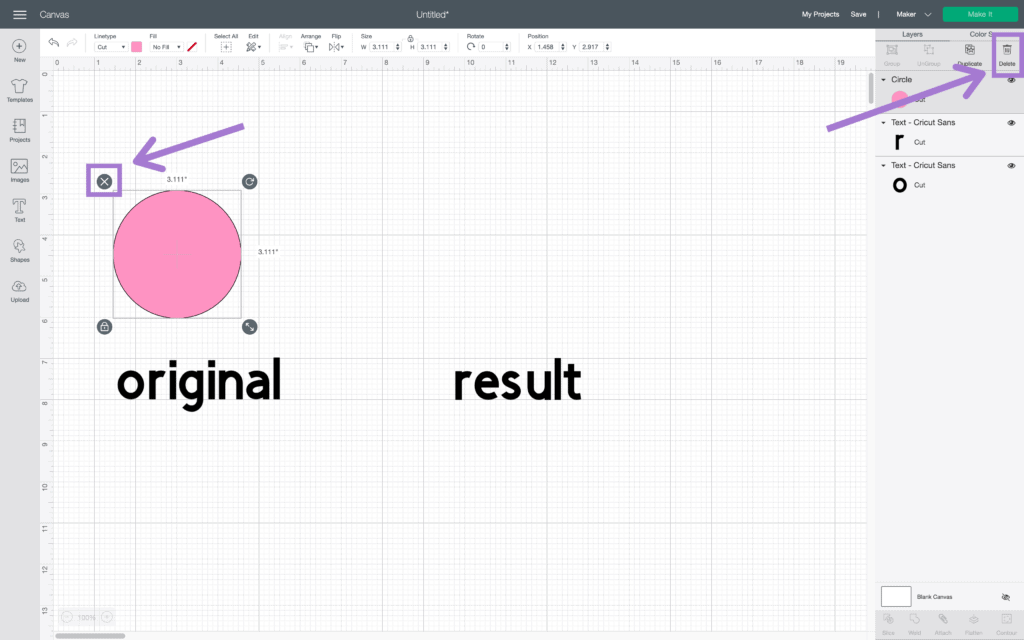
How to Use Delete in Cricut Design Space
Delete - There are four different ways to delete an element in canvas. First, when you click on the object, click on the X in the upper left-hand corner. Second, with the element selected click “delete” on your keyboard. Third, with the element selected, hold down control + X. And finally, with the element selected, click on the “Delete” button in the layers panel.
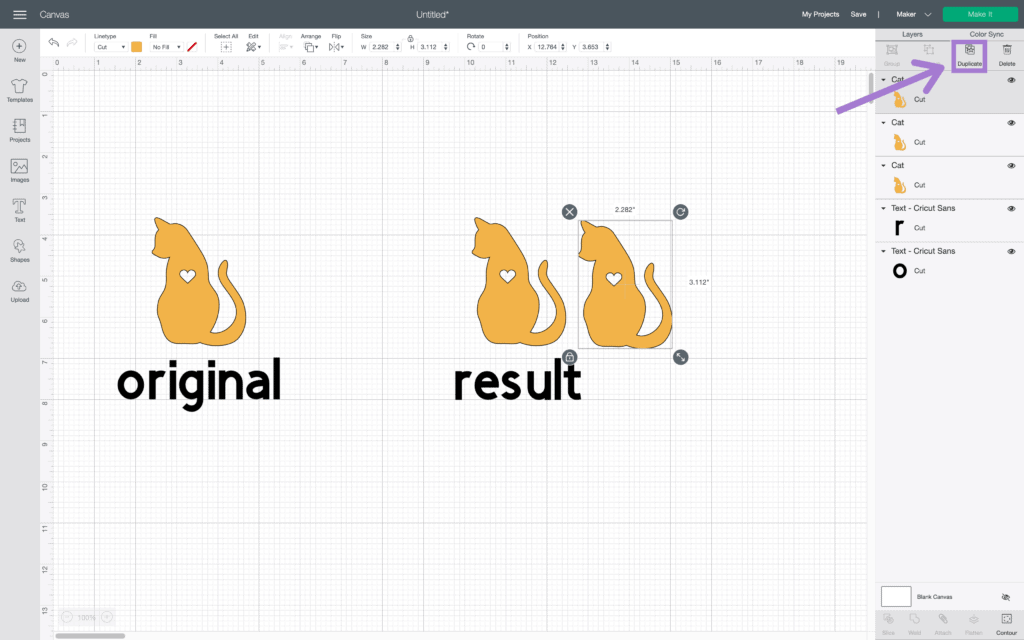
How to Use Duplicate in Cricut Design Space
Duplicate - Duplicate creates an exact replica of your selected element.
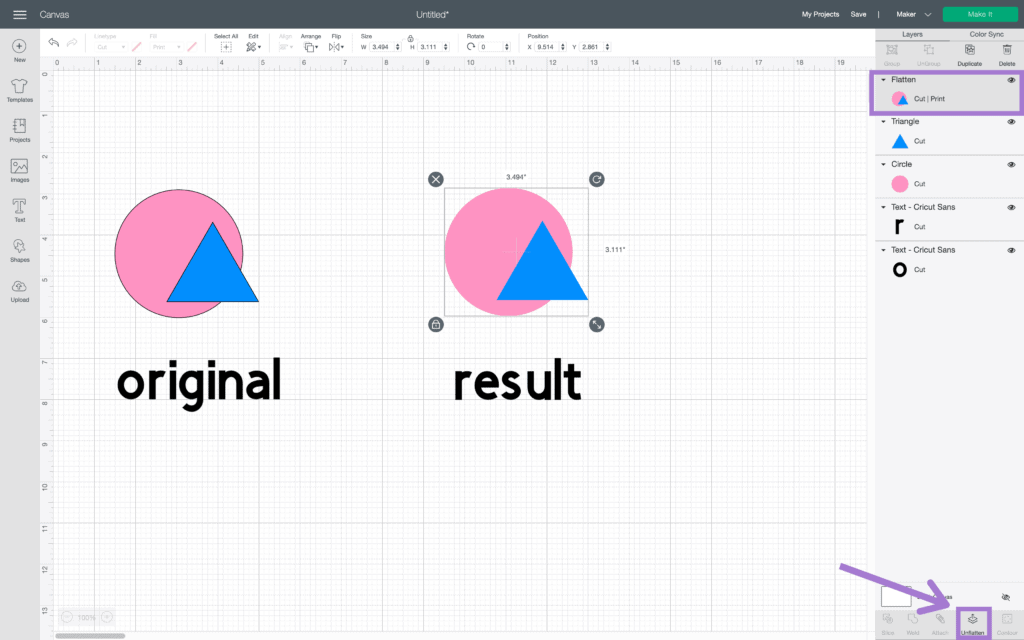
How to Use Flatten in Cricut Design Space
Flatten - Flatten turns cut files that have multiple layers into a single, print then cut layer. To use this, select multiple layers and click “Flatten.”
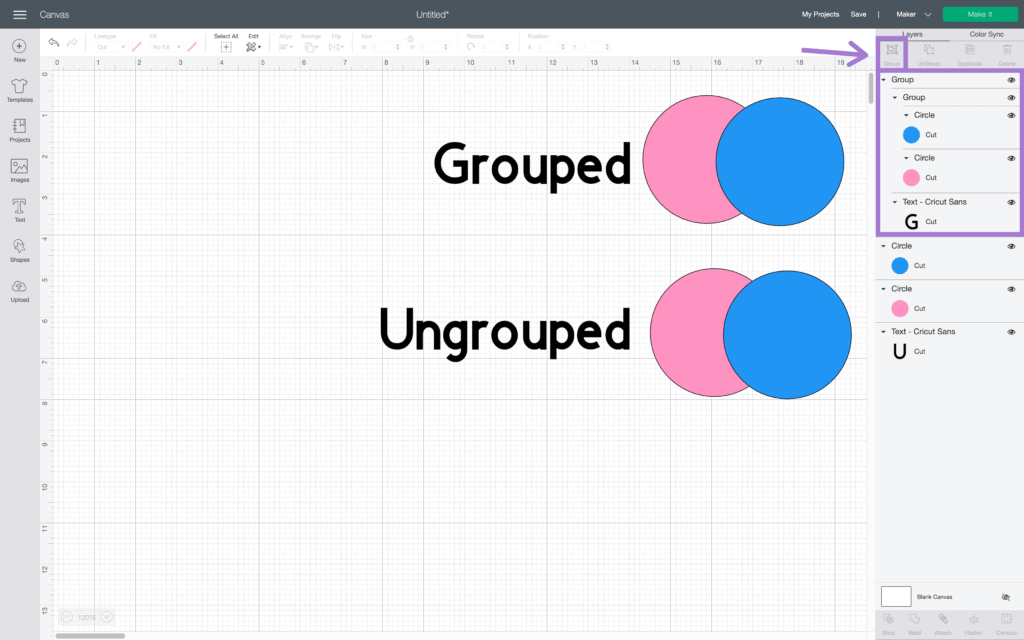
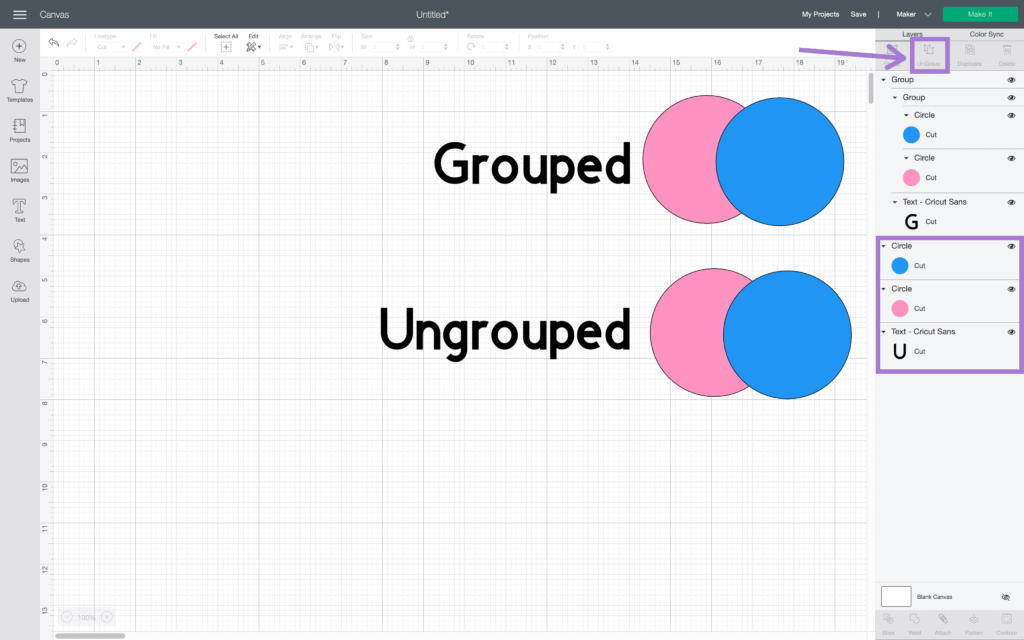
How to Use Group in Cricut Design Space
Group - To group elements together, simply click “Group” with all of your desired elements selected. “Group” means that when you move one element, all of the other elements in the group will move as well. This lets you precisely adjust multiple elements in a group at once.
How to Use Slice in Cricut Design Space
Slice - Slice acts kind of like a cookie-cutter. It’s going to cut out the overlap of the two elements selected. With two elements selected, click “Slice.”

How to Use Ungroup in Cricut Design Space
Ungroup - Ungroup separates multiple layers in a single design. This lets you move and adjust elements individually.
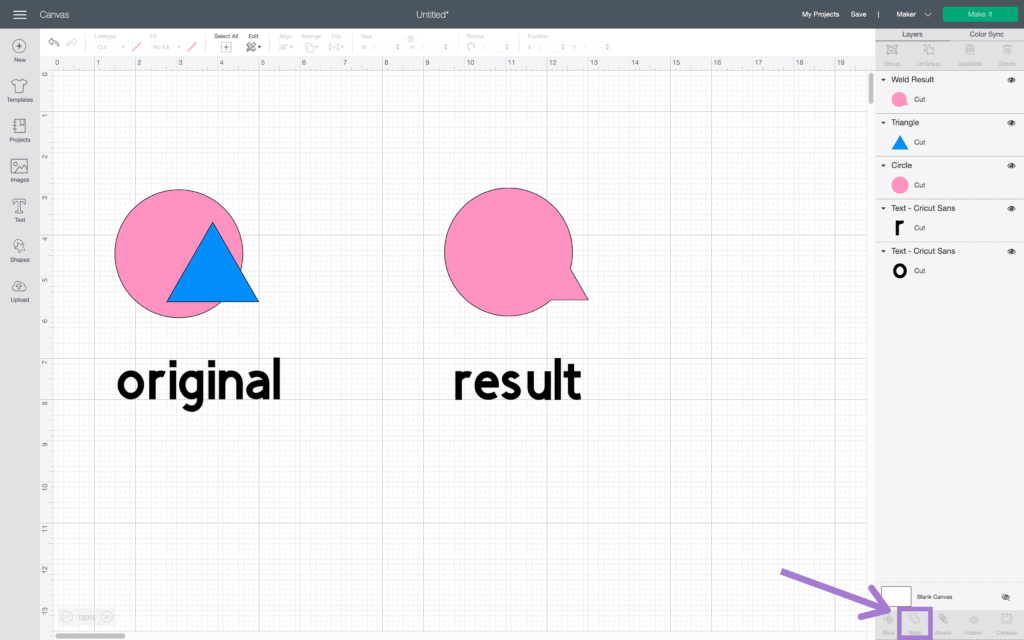
How to Use Weld in Cricut Design Space
Weld - The weld tool lets you combine two elements into one seamless design. Unlike attach, weld can not be unwelded.
For step-by-step instructions on how to weld, slice, flatten, and contour, download my FREE Design Space Cheat Sheet HERE.
For a deep dive into Design Space, be sure to check out my Cricut course - Cricut Made Easy.
Cricut Made Easy is a video and written course that not only walks you through everything you need to know about Design Space but also everything you need to know to master crafting with your Cricut. Learn more about Cricut Made Easy HERE.
Thank you for the "refresher" course. I ran an embroidery business about 15 years ago and new how to use the embroidery software and run the 18 color single needle machine. I had forgotten a lot of it but with you cheat sheet it all came back, because it is all most the same procedure. Thanks again..........