Learn How to Sew a 3D Mask with a Nose Bridge, Knit T-Shirt Ties, and a Clear Center Panel for Lip Reading, with this Sewing Tutorial and Free PDF Pattern Download in 7 Different Sizes.
For those in our communities who have experienced hearing loss or rely on lip reading, traditional fabric masks can be extremely frustrating to navigate, making it nearly impossible to communicate.
I’ve received several hundred requests from our sewing community to design a face mask that eliminates this problem and enables the loved ones of those with hearing loss to communicate with them more efficiently.

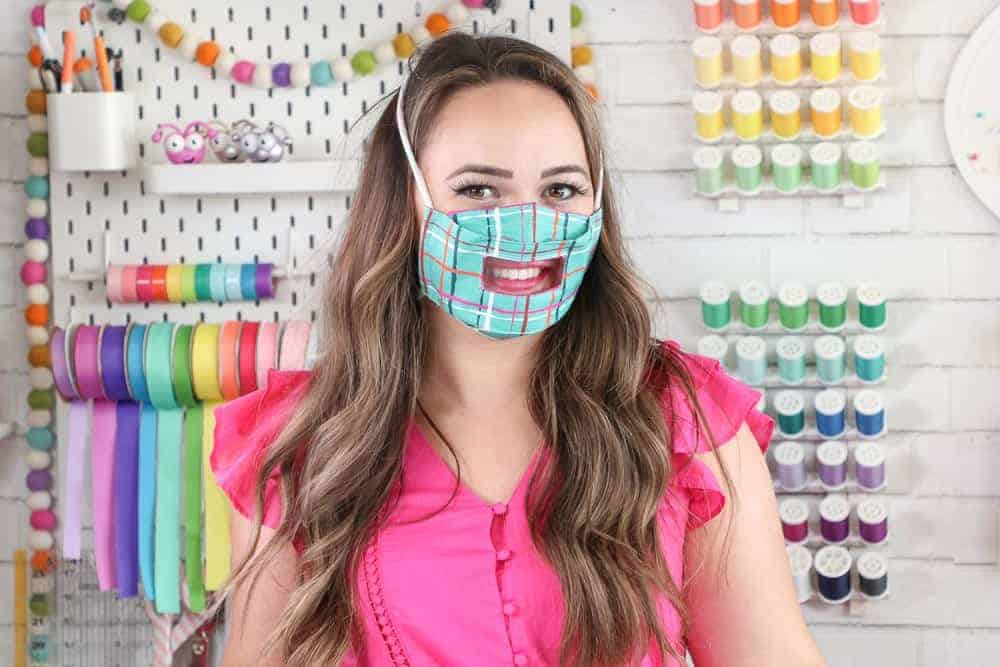
Wearing a mask with a clear insert allows those around you to easily see your facial expressions and read your lips to better understand what you are saying.
This can reduce the loneliness that someone might feel as well as improve their ability to easily communicate while still having the protection of a mask.
The trickiest part of creating this mask was designing a style that sat far enough away from the wearer's mouth so that the plastic insert wouldn’t be sucked into their mouth while breathing. It also needed to be breathable, not fog up, and comfortable enough to wear for extended periods of time. I kept the plastic insert as small as possible to avoid making it hard to breathe while wearing it.
After quite a few test variations, I’m happy to share the 3D Clear Face Mask with you today!
In addition to being beneficial to use around those with hearing loss, the mask also works great in the classroom to allow teachers to see their students' mouths and vice versa. I think it's also important for children to see their teacher's mouth as they give instructions to avoid confusion.
This 3D mask pattern is available in 7 different sizes including Toddler, Child, Preteen, Teen, Adult, Large Adult, and XL Adult. So, it's perfect for the whole family!
DOWNLOAD THE 3D CLEAR FACE MASK PATTERN HERE!
SUPPLIES FOR YOUR CLEAR FACE MASK PATTERN:
- Clear Vinyl PVC (I used 8 gauge)
- 1/2 Yard Quilting Cotton
- 1/8 Yard Knit for Ties or 1/4” Elastic
- Sewing Machine
- Scissors or Rotary Cutter & Mat
- Thread
- Pins
- Iron & Ironing Board
- Pony Beads
- Turning Tool
- Filter
- Metal Nose Bridge
Click HERE to get our Back to School Guide for Sewing Face Masks for Kids
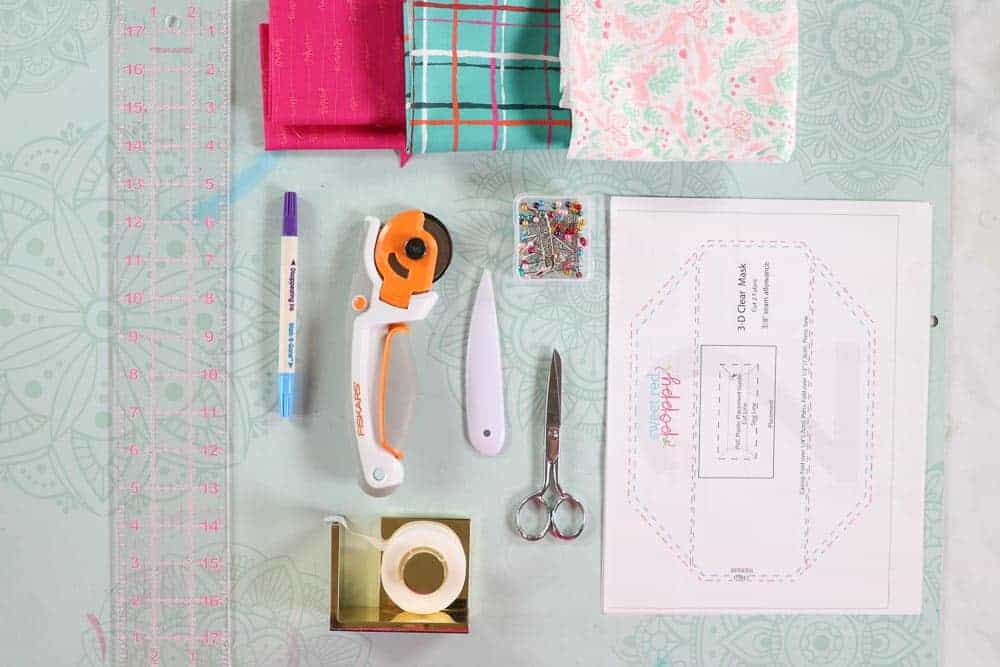
Table of Contents
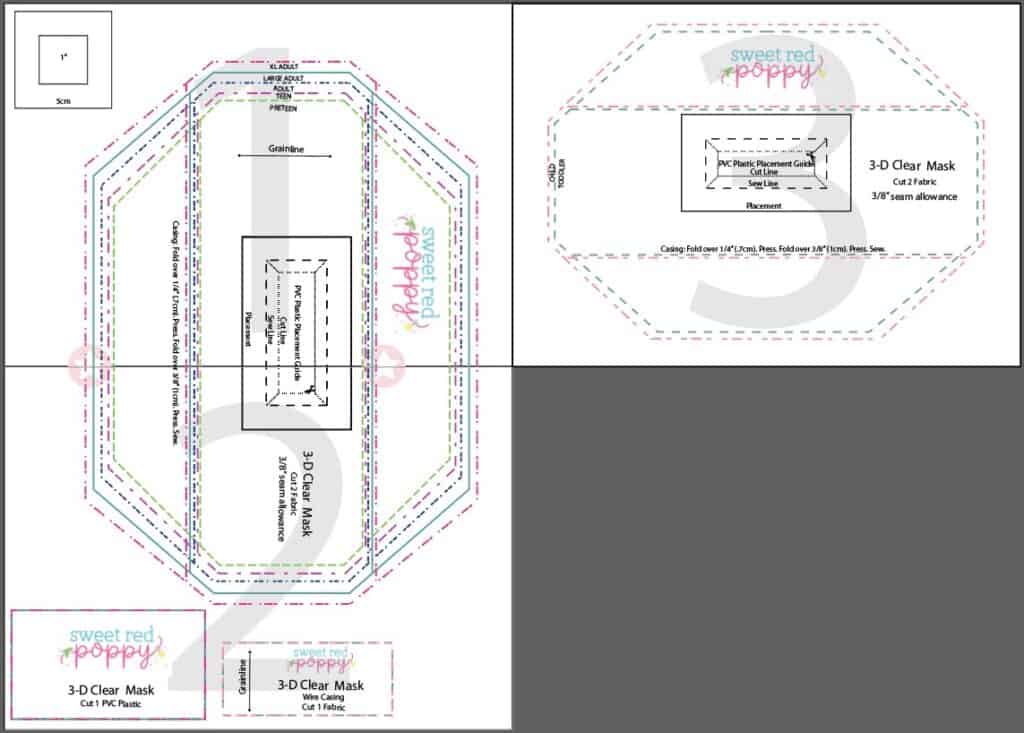
STEP 1. PRINT THE 3D CLEAR FACE MASK SEWING PATTERN
Begin by downloading the pattern to your desktop. Open the download and print at 100% with no scaling.
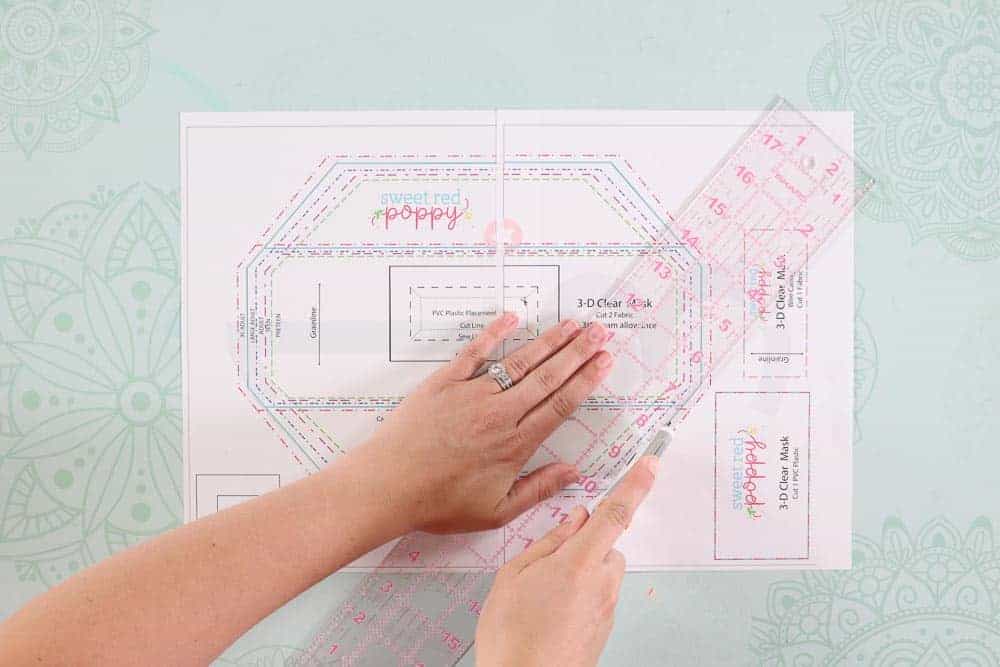
Immediately measure the 1″x1″ square to make sure the pattern has printed off correctly. Align the black lines and pink stars. Tape or glue the pattern together and cut out each pattern piece.
If you plan on cutting out multiple masks, you can cut the template out of something sturdier like a cereal box or cardstock.
STEP 2. CUT OUT FABRIC FOR YOUR CLEAR FACE MASK
Cut out 2 layers of the main mask, 1 3D Clear Mask rectangle (out of clear vinyl), and 1 nose bridge pocket. Cut a 1″ wide strip of t-shirt material to 35” to create an around the head tie. Stretch the t-shirt material by pulling it tight. You should end up with a total of 5 pieces of fabric that have been cut out.
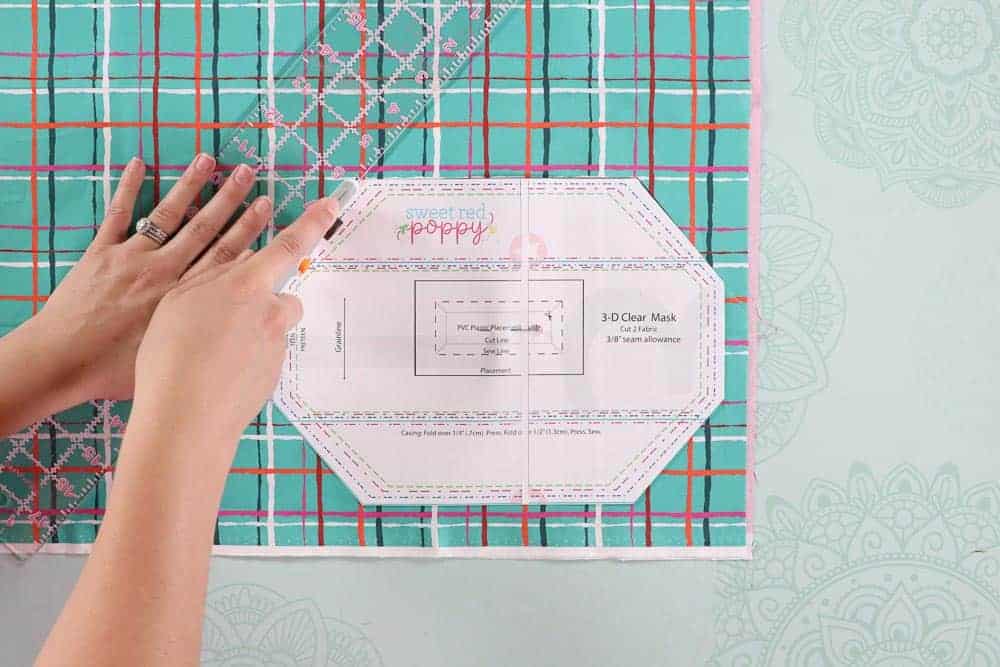
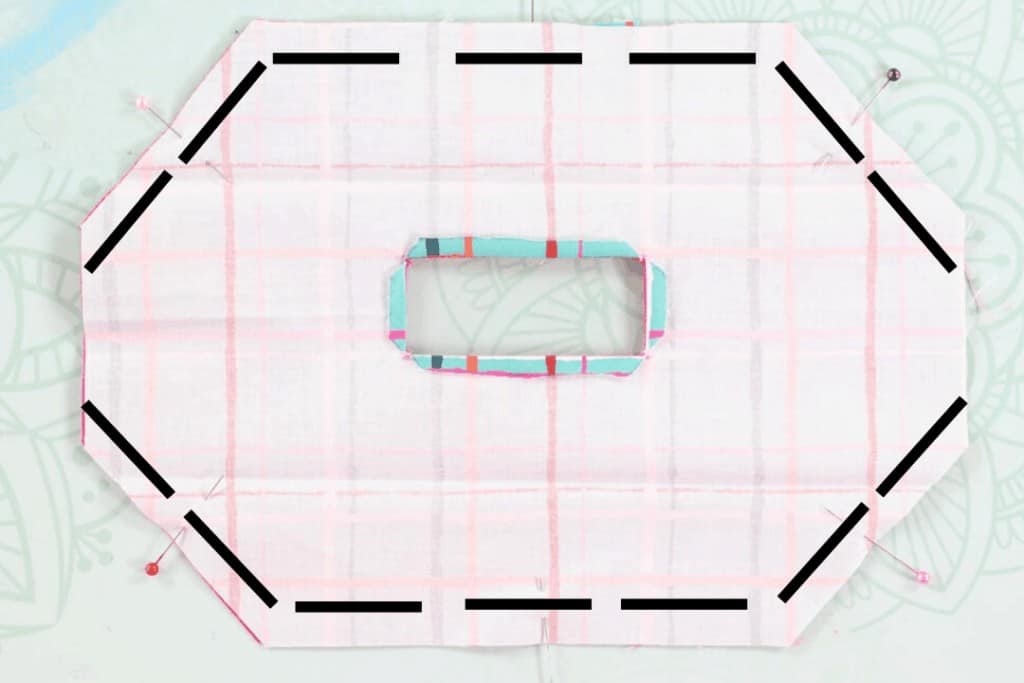
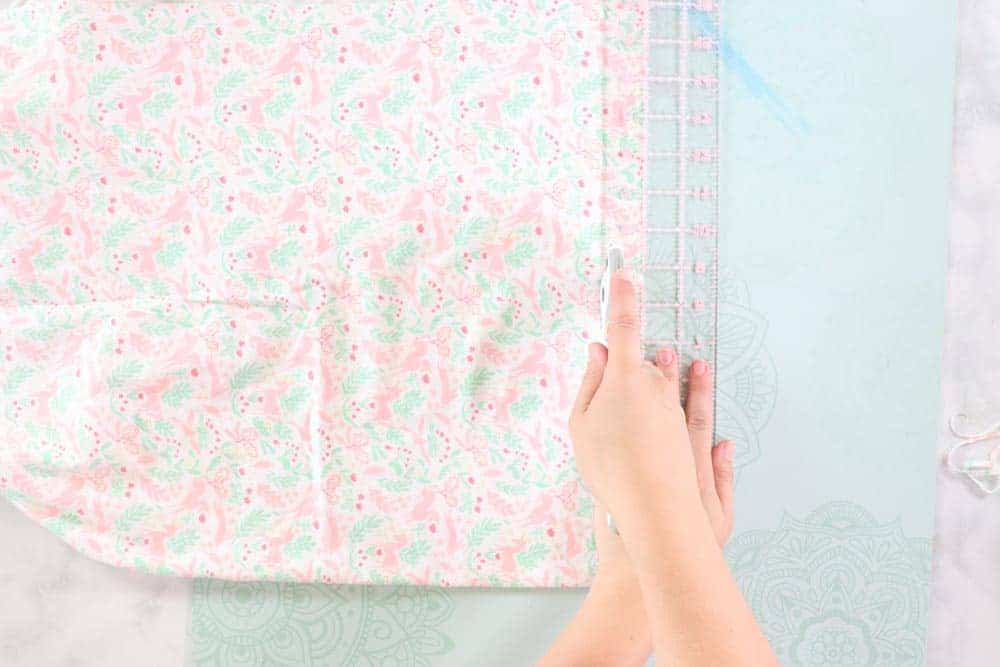
Keep the mask pattern piece pinned to the fabric. Poke a hole in each of the four corners of the smallest rectangle and the middle rectangle. Use a fabric marker to mark each corner through the hole. Remove the pattern piece and connect the dots using an acrylic ruler. You should end up with 2 rectangles as well as 4 diagonal lines connecting the smaller rectangle to the larger one.
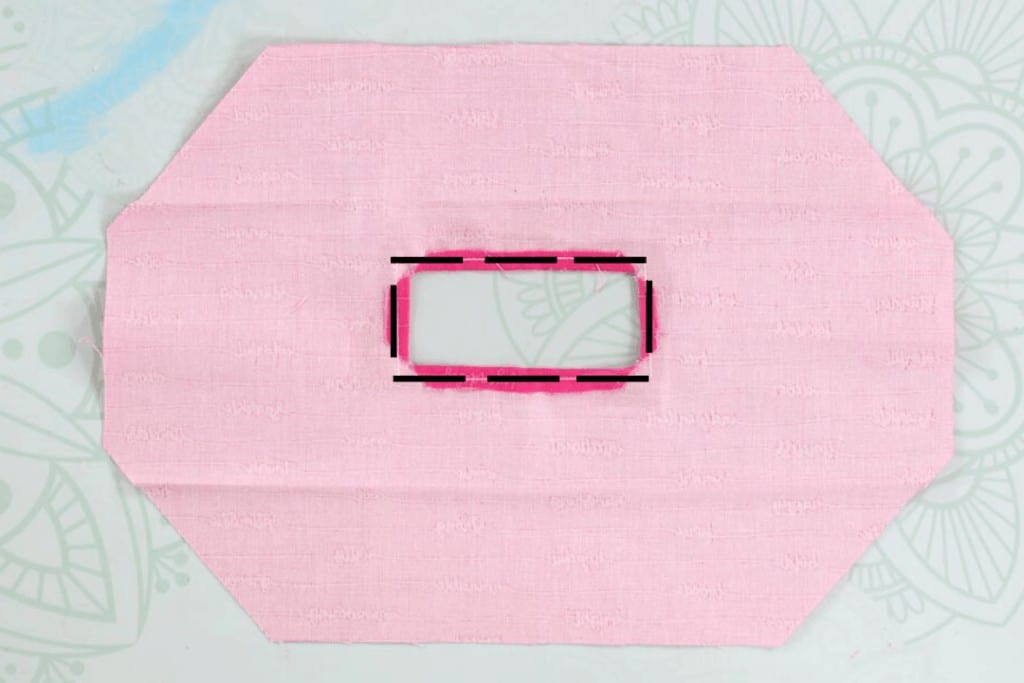
Cut along the inside of the smaller rectangle. Cut diagonal lines to connect to the larger rectangle. Iron the flaps of fabric to the wrong side of the main fabric. Flip the mask over and repeat this process with the lining fabric.
STEP 3. IRON & SEW CLEAR POCKET
Fold the main mask along the fold lines of the pattern and iron the fabric. The main mask should be folded towards the wrong side. This will create a topstitching guide for a later step.
Pin the edges of the clear vinyl to the wrong side of the lining fabric. Pin along the outer edge of the vinyl to avoid creating pinholes in the center of the mask.
Sew along the folded edge of the lining fabric to secure the vinyl in place. Trim the excess vinyl and round the corners of the rectangle to prevent the vinyl from poking through the fabric.
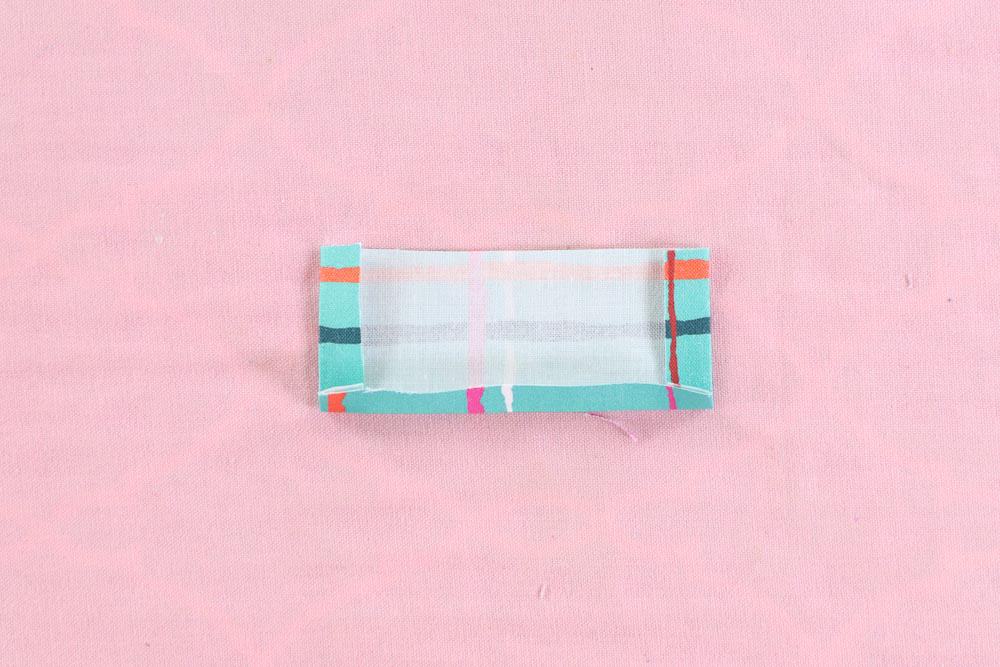
Take the nose bridge pocket and place it right side down on a pressing mat. Fold the bottom and sides inwards 3/8" and press.
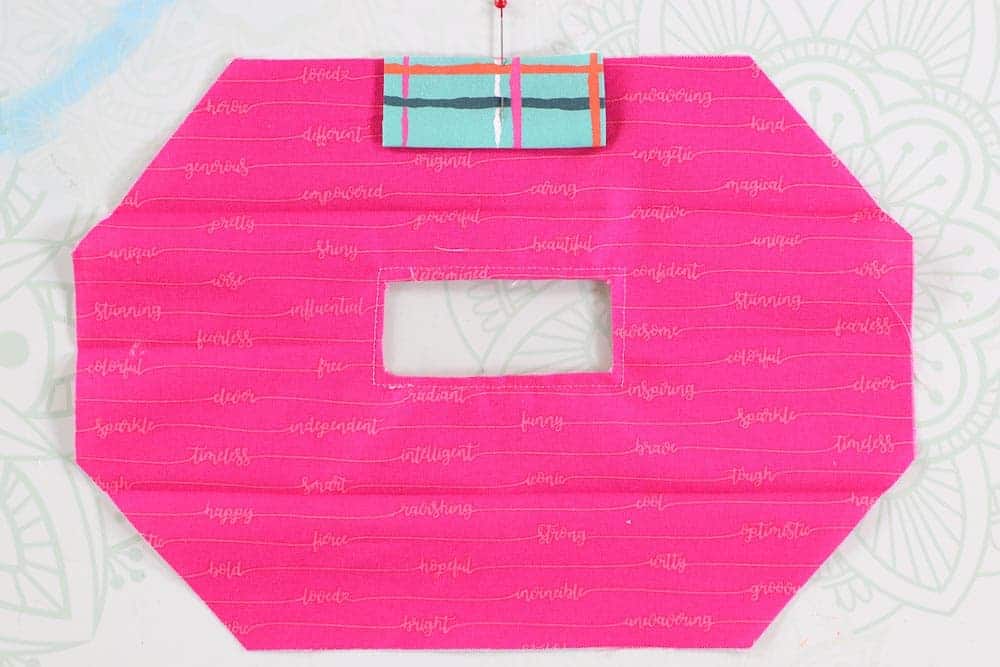
Pin the nose bridge pocket with the wrong side facing the right side of the lining. The raw (unpressed) edge should be at the top. Make sure it's pinned to the top of the mask (the clear vinyl is closer to the top of the mask than the bottom).
STEP 4. PIN AND SEW YOUR CLEAR FACE MASK
Place the main mask on top of the mask lining with the right sides together. Make sure the clear holes are aligned perfectly. The main mask's center folds should still be unsewn.
Pin the mask together around the outside edges. Sew around the entire mask, leaving both sides open. Don’t forget to backstitch!
STEP 5. TURN MASK RSO, PRESS & SEW FLAPS
Turn the mask right side out. Use a turning tool to push out the corners of the mask. Press all seams, avoiding the pre-pressed topstitching lines and the clear vinyl.
Press the nose bridge casing downwards towards the lining and topstitch along the bottom folded edge to secure in place.
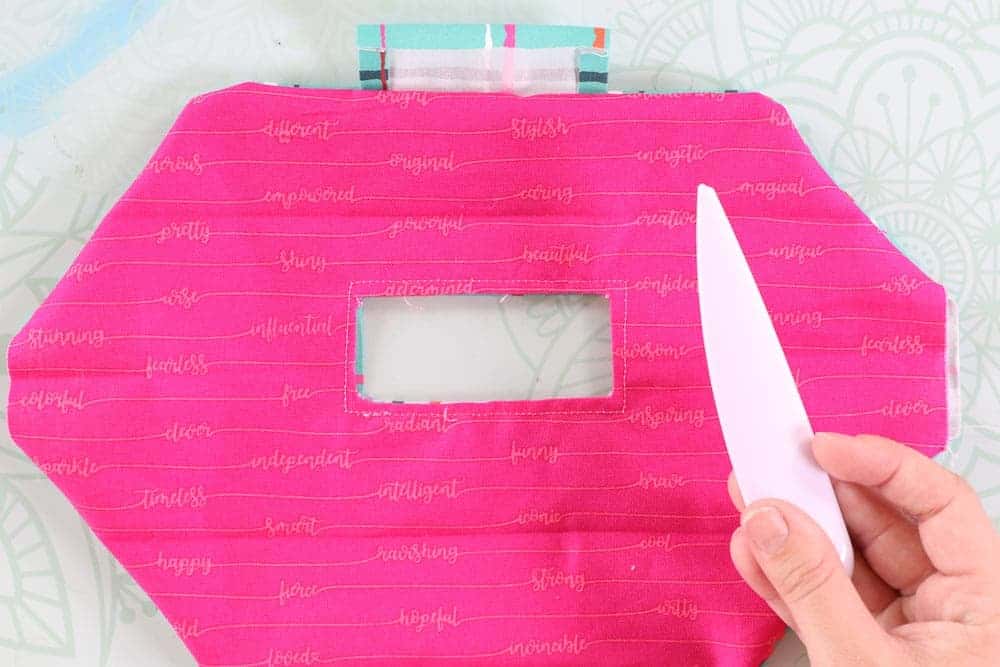
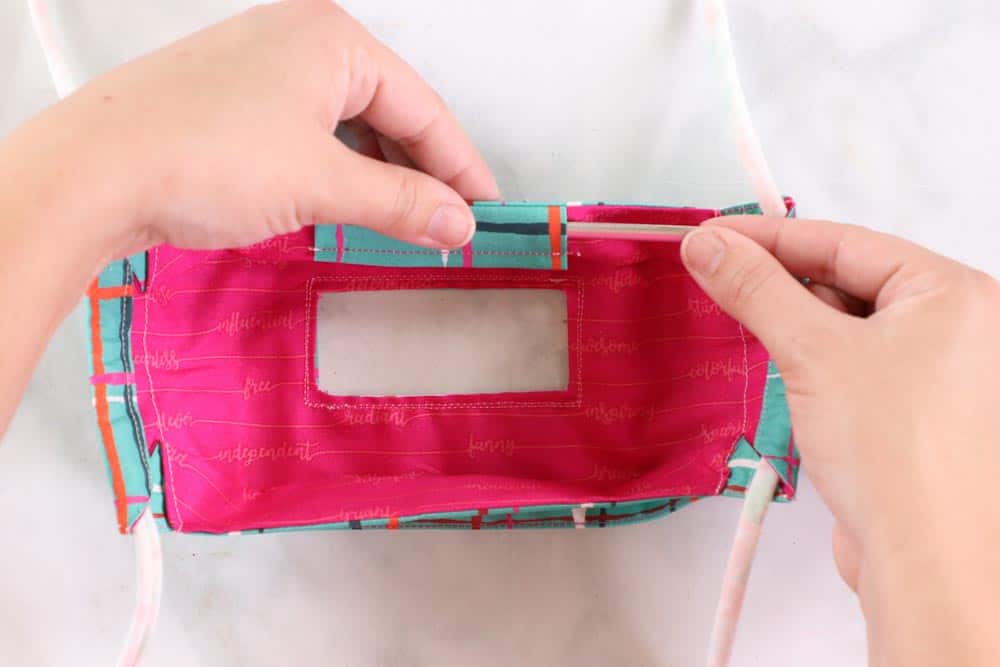
Pin the lining and main fabric together around the outside of the clear rectangle. Take extra care to line up the openings. Stitch along the edge of the folded fabric to secure the vinyl in place, sewing through both layers of fabric.
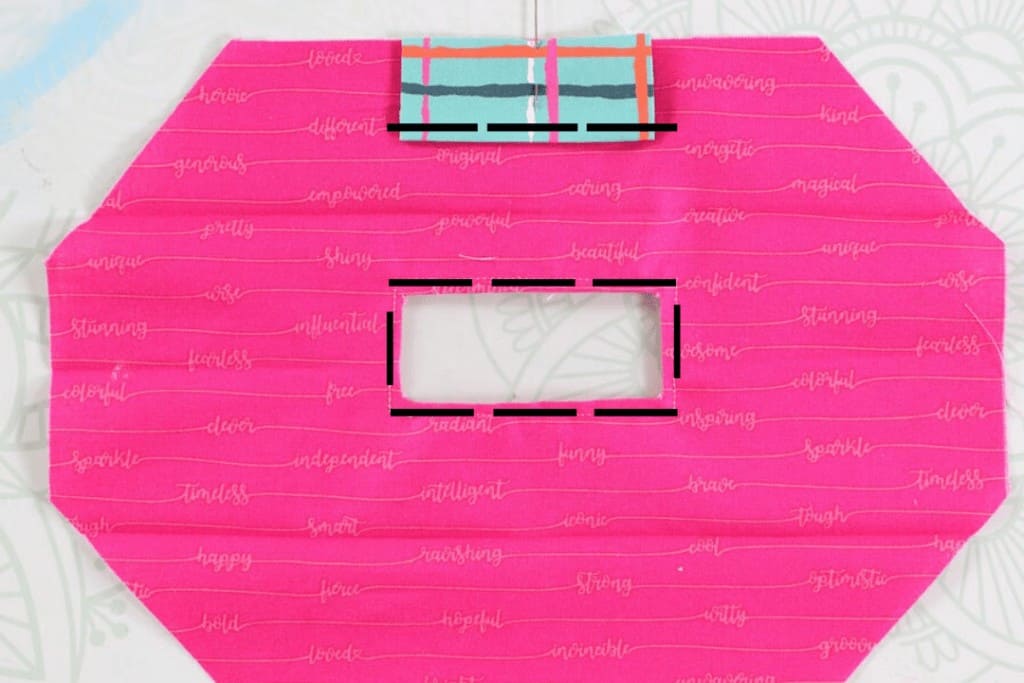
Fold the top and bottom flap inwards and with a 1/8” seam allowance sew along the pressed edge. Press the topstitching, avoiding the vinyl middle.
STEP 6. PRESS & SEW CASINGS
Flip the mask face down. Fold the raw edge inwards 1/4” and press. Fold the edge in an additional 3/8″ and press. Pin the casing in place and sew along the inner fold of the casing.
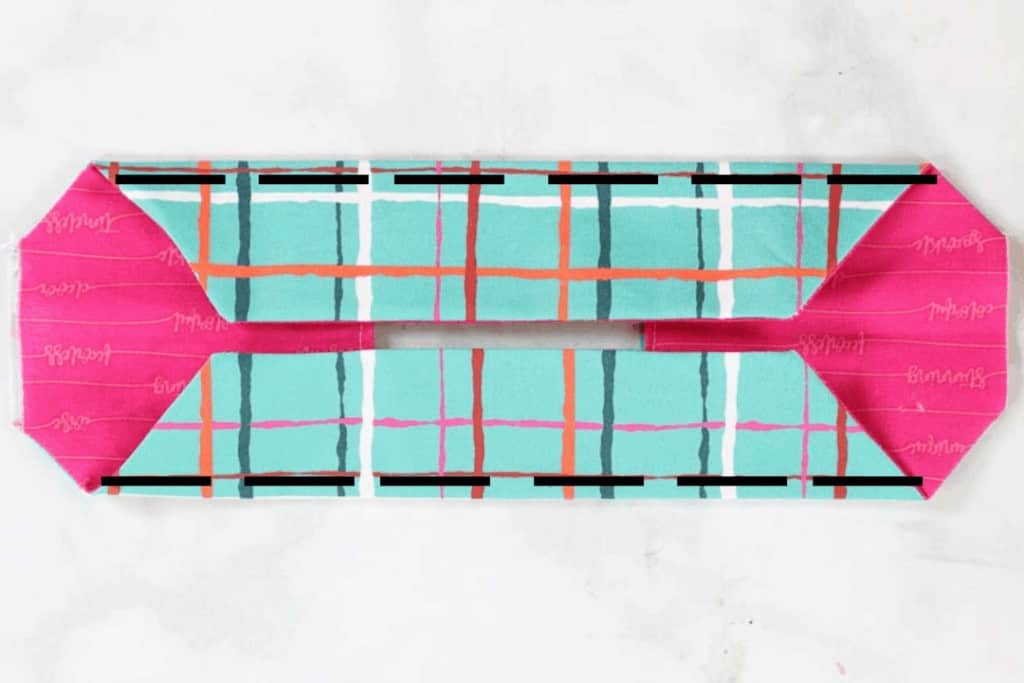
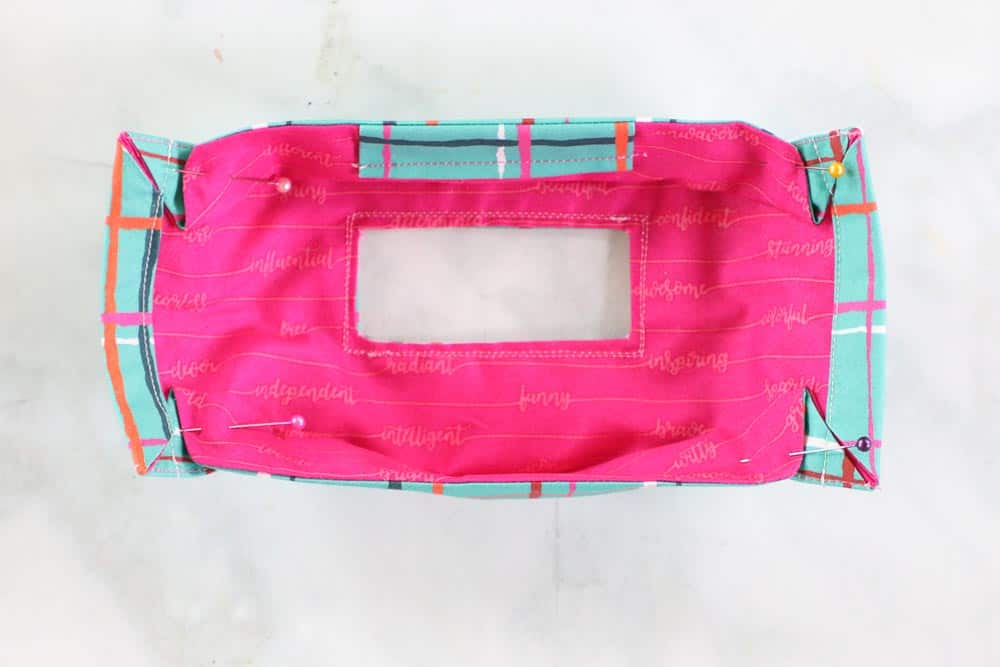
Pull the corner of the flap upwards and angle it to create a 90-degree angle. Pin in place and repeat this step on the remaining 3 corners.
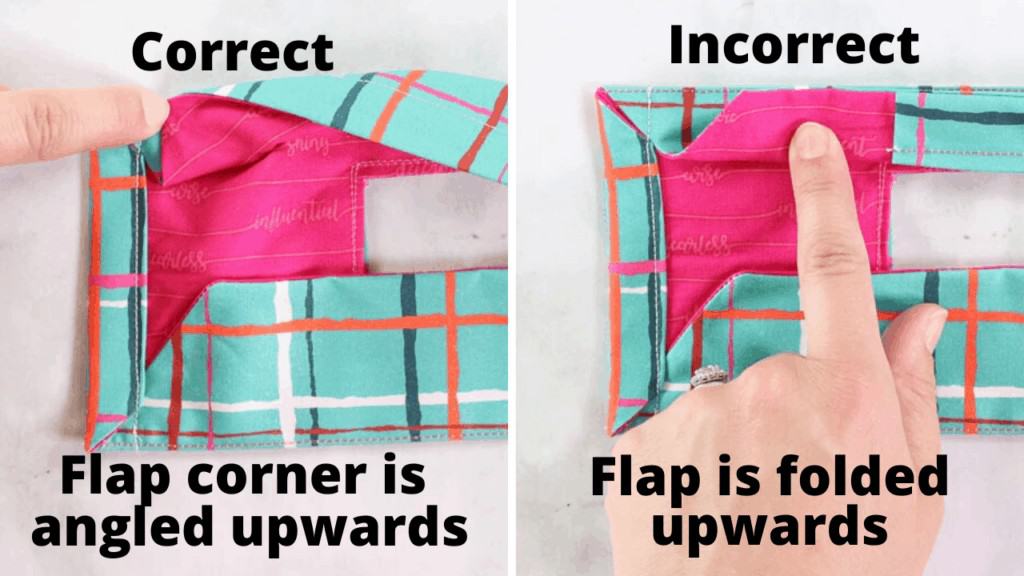
I like to draw in a stitching line parallel to my casing line to ensure I sew straight. When pinned correctly, the ends of the mask will be pulled inwards by the top and bottom flap forming a 3D effect; the mask will be able to sit up without falling over.
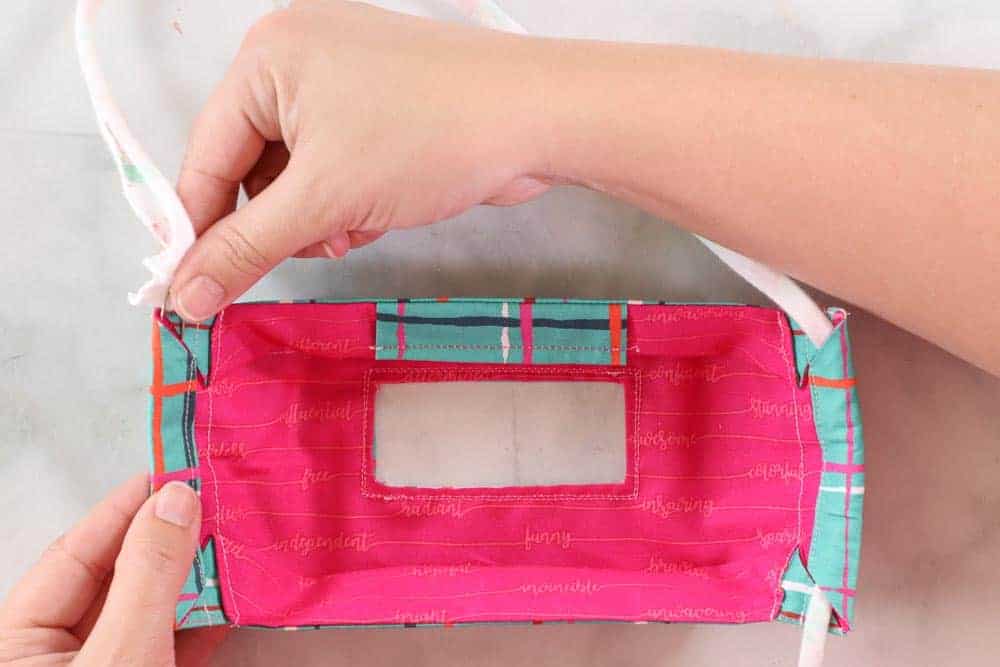
Sew a parallel stitching line to the casing line to secure the flaps in place.
STEP 7. CREATE STRAPS FOR YOUR CLEAR FACE MASK
TIES – First off, you can create a T-shirt casing that goes around the head. To do this, cut a length of knit fabric or a t-shirt 1″ wide by 35″ long. You can adjust this measurement as needed.
Attach a safety pin to the t-shirt tie and feed it upwards through the right-hand casing and downwards through the left-hand casing. The tie can be adjusted once it is placed on the wearer for a better fit and tied at the base of the neck.
You can also create adjustable ear loops using pony beads. Cut a knit tie about 13″ long. Feed the knit tie through just one casing. Bend a piece of wire in half and slide the pony bead onto the wire. Open the top of the wire and slide both ends of the knit tie in between the wire above the pony bean, pull the beads upwards on the wire to feed them onto the ties. Now you can adjust the ear tie using the pony bead. Make sure to tie a knot at the end of each side of the tie.
Slide a metal nose bridge into the filter pocket. This can easily be removed before washing the face mask.
STEP 8. TREAT VINYL TO PREVENT FOGGING
Apply a small amount of Dawn dish soap to the inside of the clear vinyl. Wipe it away with a paper towel. This creates a moisture barrier that prevents the mask from fogging when speaking or breathing.

Download a Printable PDF condensed version of the 3D Clear Face Mask instructions HERE!
Don’t forget to join my face mask Facebook group where you can show us what you’re making, ask questions, and learn from others! Follow me on Instagram for daily crafting inspiration and a look behind the scenes.
Amazing. For years, when masked and working with patients who were immune compromised, especially the children who were hospitalized for long periods of time, we worried about their social/emotional development because they could never see our smiles, our mouths. This will go a long way to helping with that.
I have missed seeing people's smiles.
Thank you!
Thank you so much for this new tutorial, can’t wait to make it.
Kimberly, thank you so much for this pattern. I will start making some of these tomorrow. You are a blessing to my husband who does not hear well and says it is harder for him to understand me when I have a mask on. I miss so much seeing people smile. We may not be able to hug each other right now but you are helping us to smile at one another again.
Is this hand or machine washable - a very important point?
Thank you so much for this pattern, instructions and video! Your video is so easy to follow! I am hard-of-hearing and my husband is too, so we both read lips. I am excited to make all my family a mask like this! Thanks again and God Bless!
Is there a way to get the directions in a PDF format, I currently only have my phone and can't cut and paste to get the directions so I can get them printed out. I would really like to make my daughter a couple of these,she's a school teacher and I know she would want her students to see her facial expressions. Thank you
I as well would like a PDF mask directions.Thank you Gayle Bgg2gallant @gmail.com
This is very similar to the Sewing Seeds of Love pattern (YouTube) that was cleverly updated by Maria the Midnight Baker (who reduced the bulk at the sides).
It is! The SSOL was too small for my daughter though. It's so helpful to have the option of different sizes with this mask!
n
I also would like to know if it is machine washable and can you use non rust wire for the nose bridge and sew it in? This is such a great idea for the hearing impaired. Thank you.
Just wanted to let you know that I appreciate you for using the words, Deaf and HH. Not many people are aware that what you used is the proper words to use for Deaf and HH people! thank you!
(I prefer the 3D mask over this one but its everyone's personal preferences, smiles!)
Thank you for all you are doing for everyone.
My fabric tends to bunch when I sew the vinyl piece into the lining. Any tips for keeping it from bunching? It throws the whole rest of the project off.
I'm so glad to see more of these tutorials coming out! I've been playing with these since March. Would you consider increasing the gauge of vinyl on your recommendation if people are sewing them to be used repeatedly? I'm a teacher and thinking of these as they need to last the whole fall. 8 starts to get really ripply/wavy after a couple washings. I found that at least 12 (my pref is 20) stands up much better if people are intending to use these repeatedly and for a while. Here's a picture if you want to see the difference after just 1 wash: https://independentlycreative.wordpress.com/2020/07/29/different-gauges-of-vinyl/
Hi, thank you for the pattern. Are there any measurement guides to help determine sizing?
Hello!
This is such a good pattern- I have tried several others and had not come up with one that was going to work.
I was curious why the nose piece has a separate external casing? I'm not using wire, I use a purchased nose piece like in medical masks so no sharp ends. Is there a reason I shouldn't just encase it in the top seam?
Thanks!
I contacted the Sheet Metal Worker's Union in my area and they gladly provided a large quantity of aluminum nose pieces free of charge. I did have to file the edges to round them off, but it was easy to do!
Have you tried maki g a mask for individuals who have small ears and also wear glasses? Maybe one that fastened with magnets? I realize this maybe hard to get the size correct for good fit.
Make sure you mark which side is the top of the mask. On the upside, I attached a small piece of elastic through the nose bridge casing to make the part around my chin on my upside down mask a bit tighter.
I like sewing the casing down to the lining before sewing the sides together.
Thanks for this pattern! I just finished 3. I'm excited for this resource for our teachers. (I live at an international school & I haven't seen anything like this available here, though the need is great.) The fabric version of this mask is my favorite mask.
Love your masks... I would like measurement to be sure when printed that it is right size. the 3-d seems when printed seems little small . the xl measure 6 3/4 by 7 . Please if possible email the sizes both 3d mask
on is just pleat and other has the nose cover...
sure this would help other also ... thank you ly*********@***il.com
I’m going to make this for my daughter-in-law who is an elementary teacher. It will definitely help communication with young children, especially with a student who has a hearing loss.
I live in Colorado Springs CO and we have a large school for the deaf. This pattern will be extremely useful.
I ha e enjoyed trying some of your masks, they were great. The instructions were very clear. Thanks