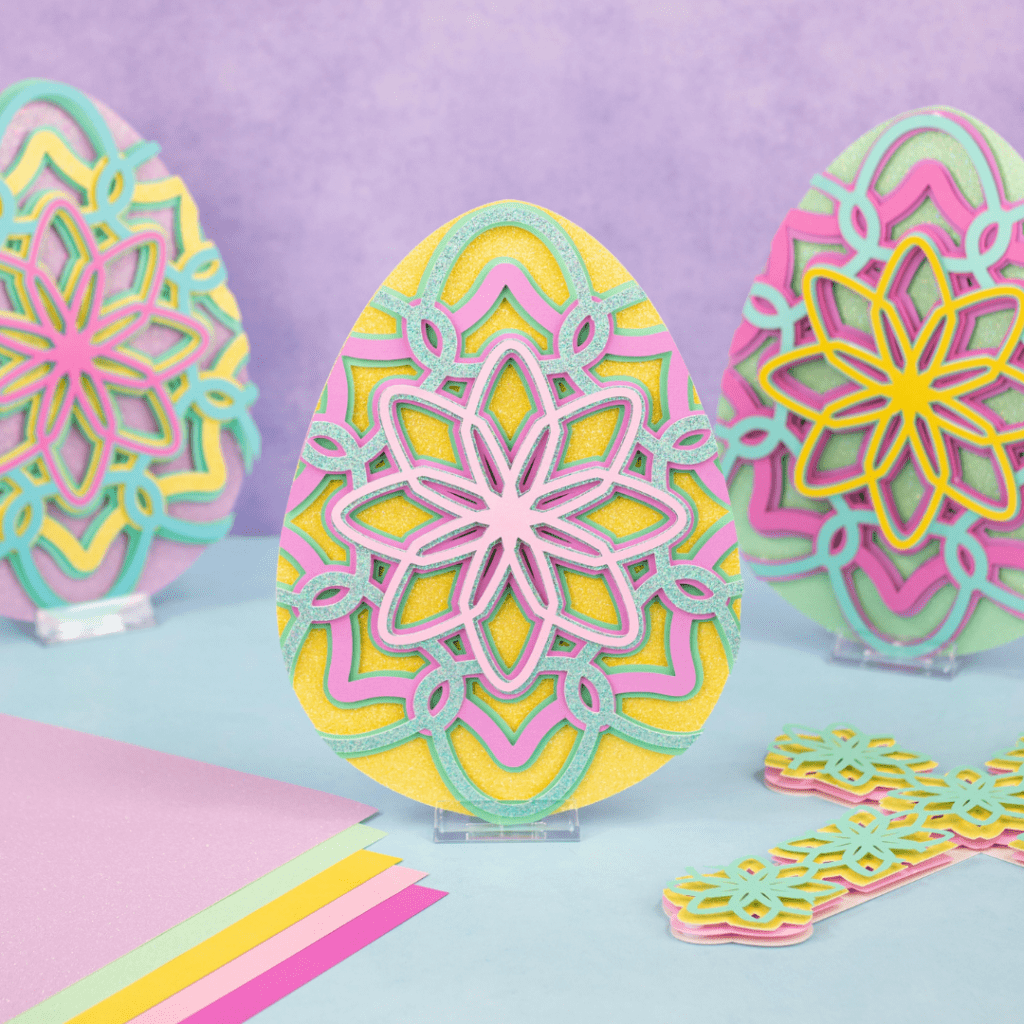
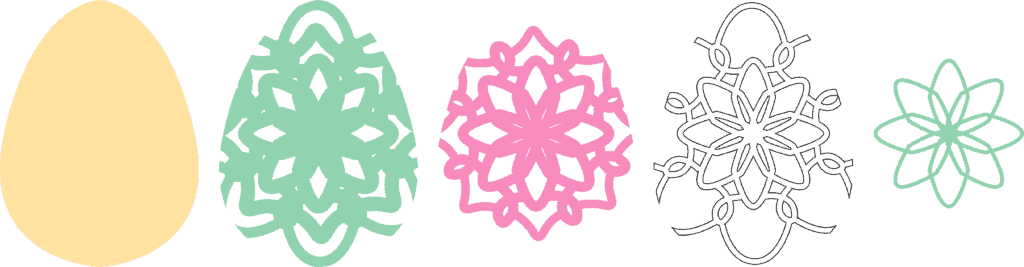
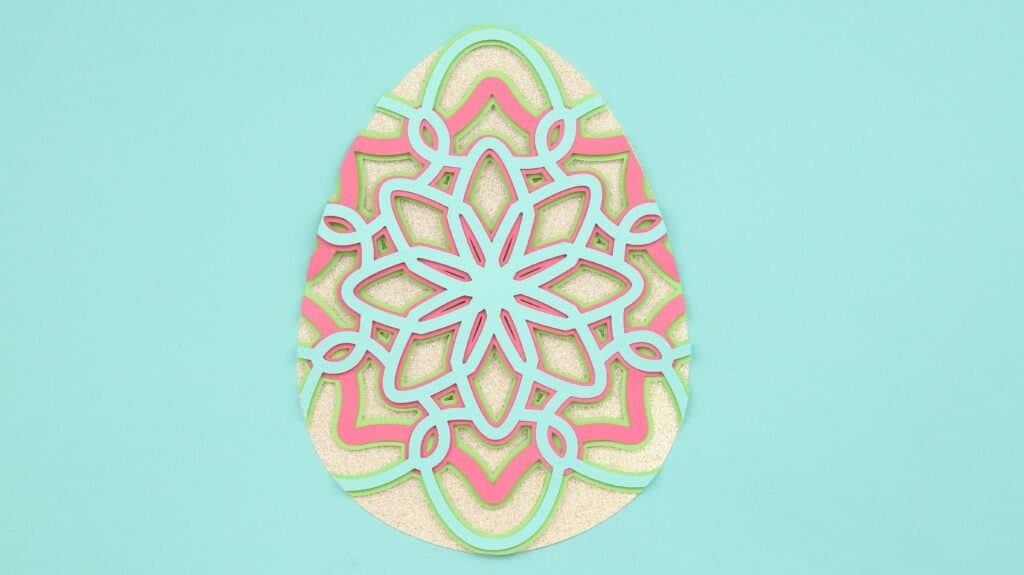
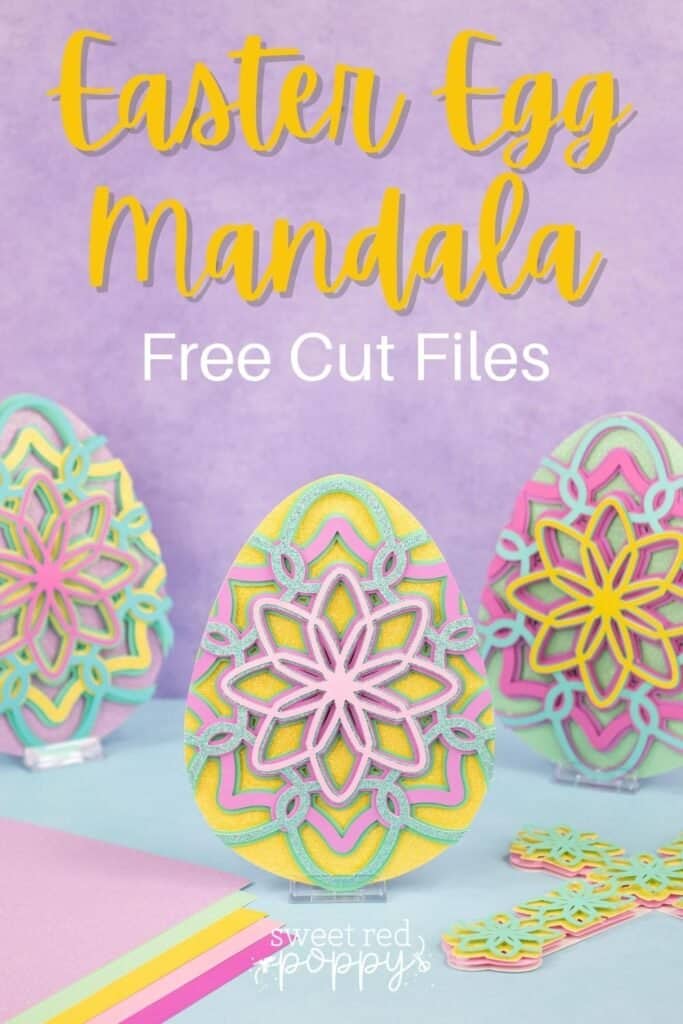
These Layered Egg Mandalas are a free SVG Cut File and a unique take on traditional Easter Decor.
Easter Egg season is upon us! If you're looking for an alternative to dying eggs, download the free SVG cut files for these beautiful 3D Layered Easter Egg Mandalas.
With step-by-step instructions and minimal materials required, these will come together quickly but look so impressive!
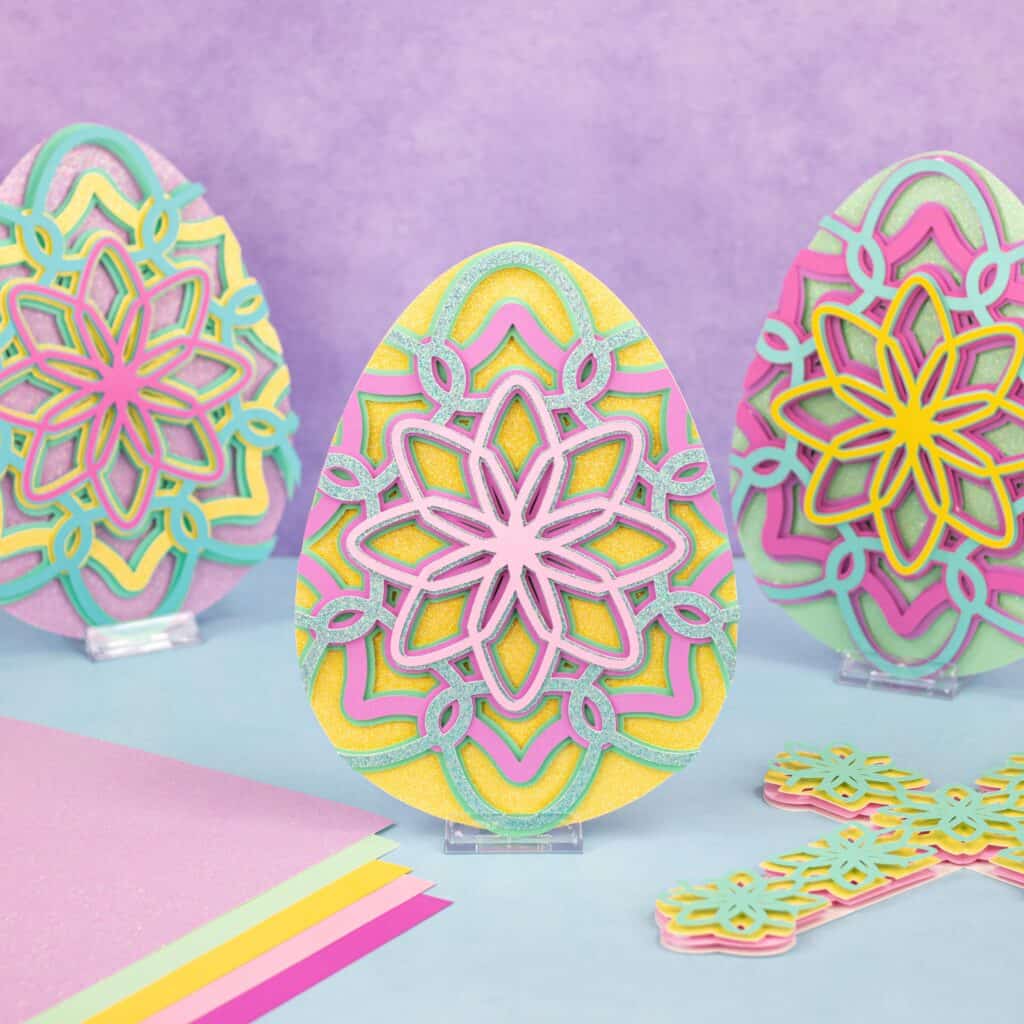
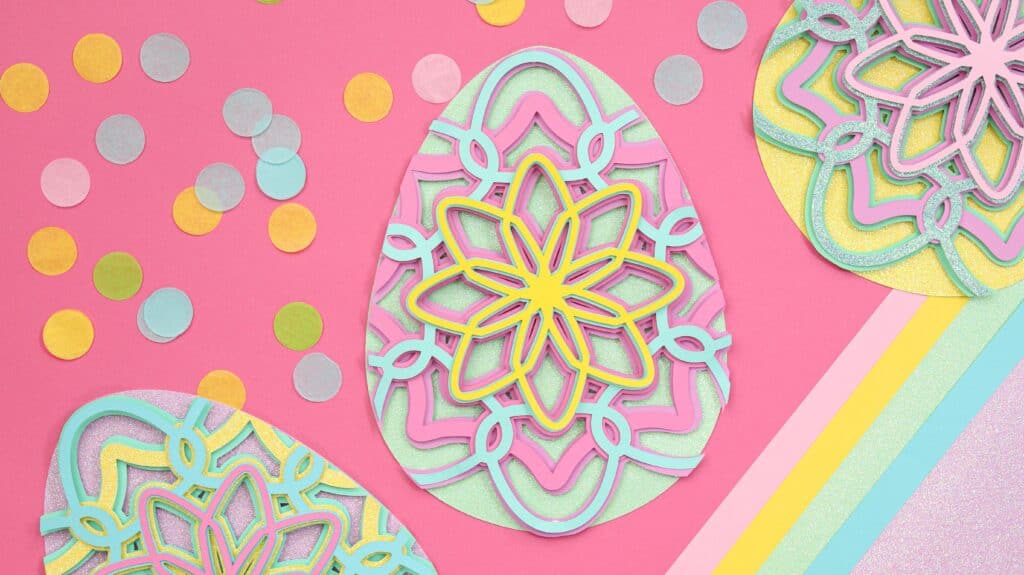
These eggs would look adorable turned into a garland, but they'd also make perfect individual cards. You can make them with plain colored cardstock in a traditional pastel palette, or jazz things up with metallic or glitter varieties. The options are endless!

Table of Contents
Easter Egg Mandalas
Fill your Easter basket with these DIY layered paper Easter egg mandalas with this step-by-step tutorial.
Click here to save this project to your favorite Pinterest board!

Supplies
- Free Easter Egg Mandala Cut Files (link below)
- Cricut Explore, Cricut Joy, or Cricut Maker
- Fine-Point Blade
- StandardGrip Mat
- Cardstock
- Foam Adhesive Dots or Craft Glue
- *Cricut Scraper (for removing small pieces of cardstock from the mat.)
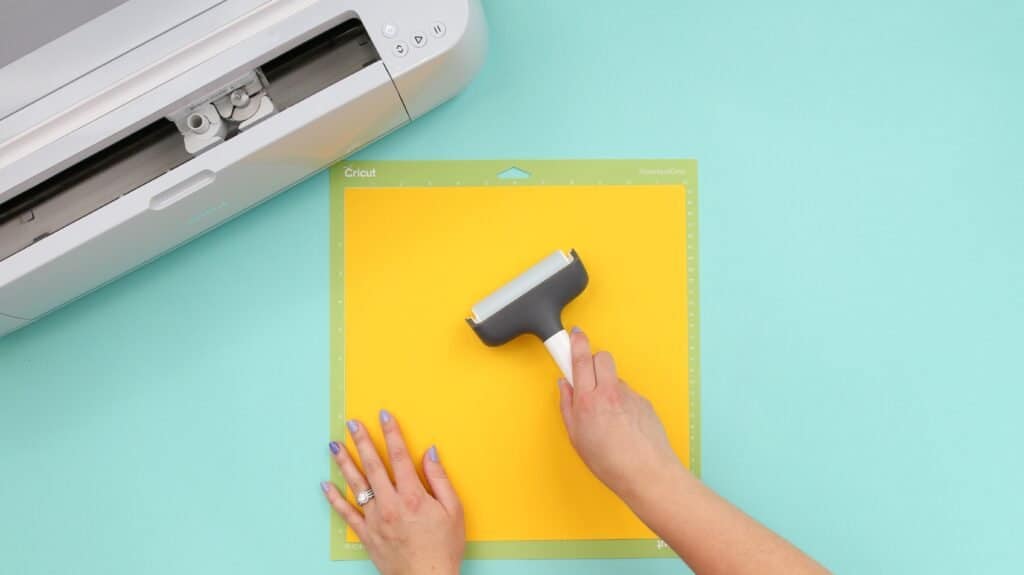
- Cricut Brayer

Click Here to Download the Free Easter Egg Mandala Cut Files!
Watch the Easter Egg Video Below!
Step 1: Upload SVG Design File to Design Space
Open Cricut Design Space and click the + to create a new project.
In the Design Panel on the left, select "Upload."
Click "Upload Image."
Click "Browse."
Navigate to the file on your device to upload it to Cricut Design Space.
Here you can change the name and add tags. Click "Upload."
Once you have the file uploaded, select it and click "Insert Images" to bring it onto your canvas.
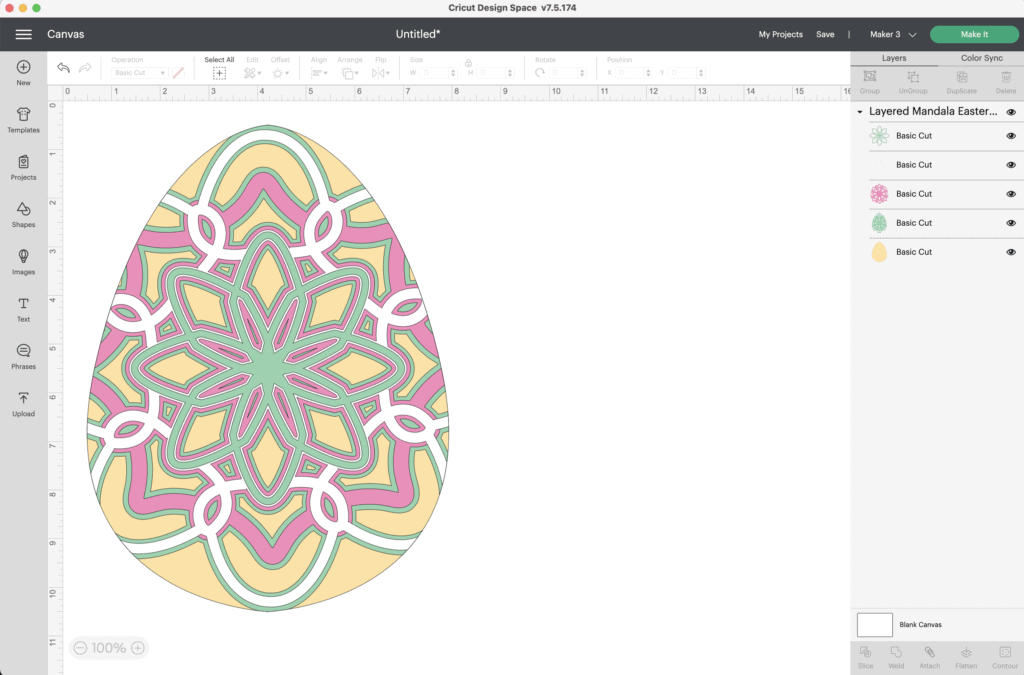
Step 2: Resize Design
Resize the mandala to your desired size.
Now you're ready to cut the design! Click “Make It” in the upper right-hand corner of the screen.
This brings you to the preview screen.
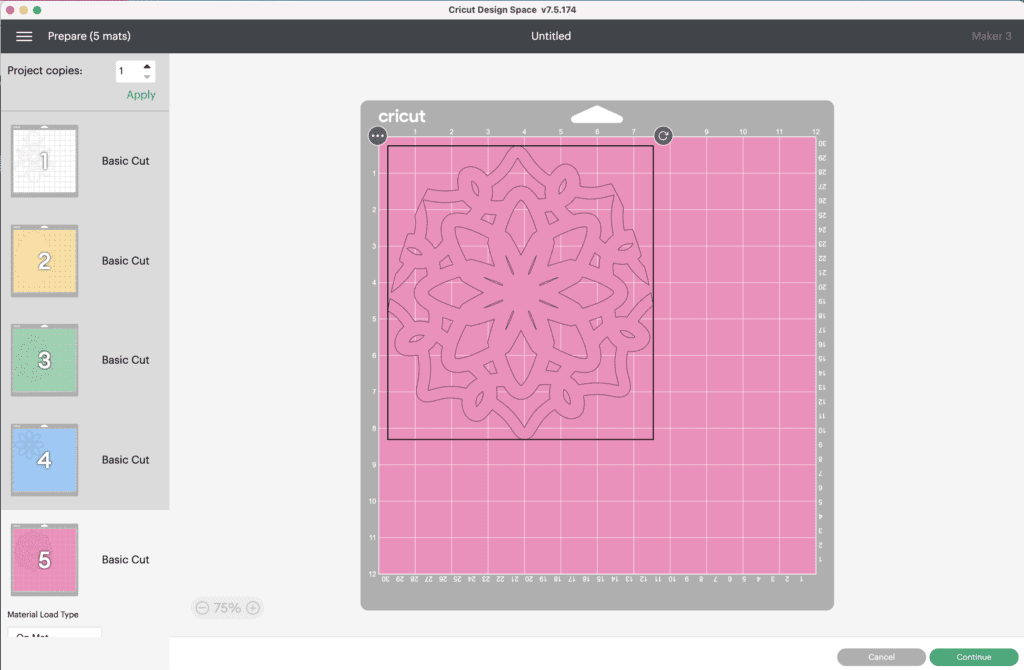
Click "Continue."
Now it’s time to connect to your machine and select your material. For all of my layered designs, I use the Cardstock (for intricate cuts) setting.
This setting along with a clean, sticky mat ensures a nice, clean-cut.
Ensure your Fine-Point Blade is loaded into your machine.
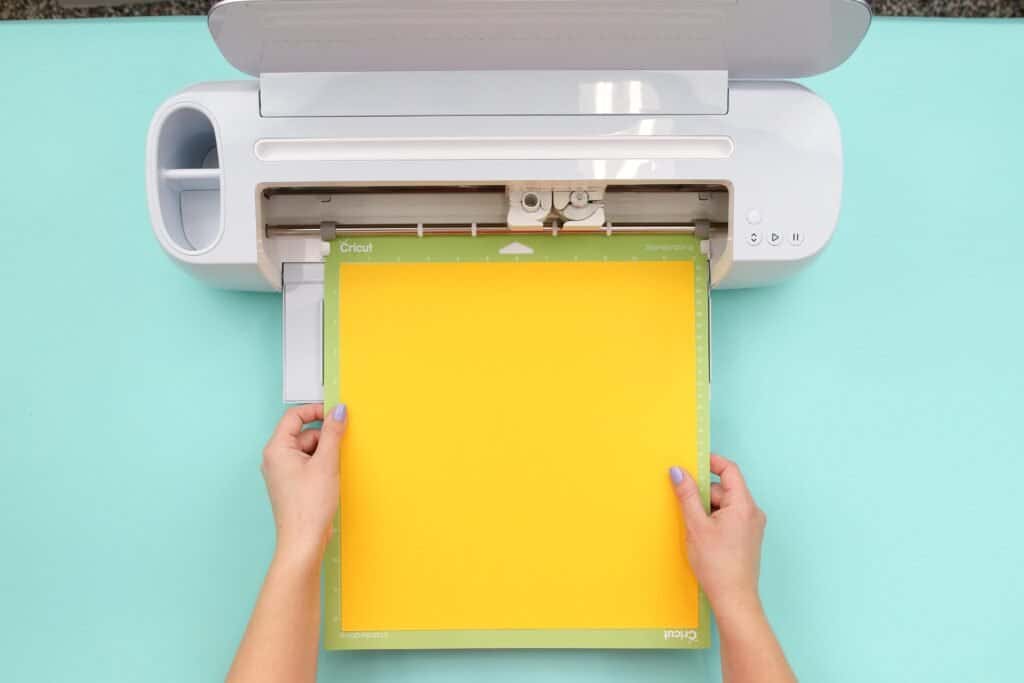
Step 3 - Cut Out Design
Peel the clear liner away from your mat.
Following Design Space’s prompts, place your first color of cardstock on your mat.
Press the load button to load the mat into your machine. Begin the cut.
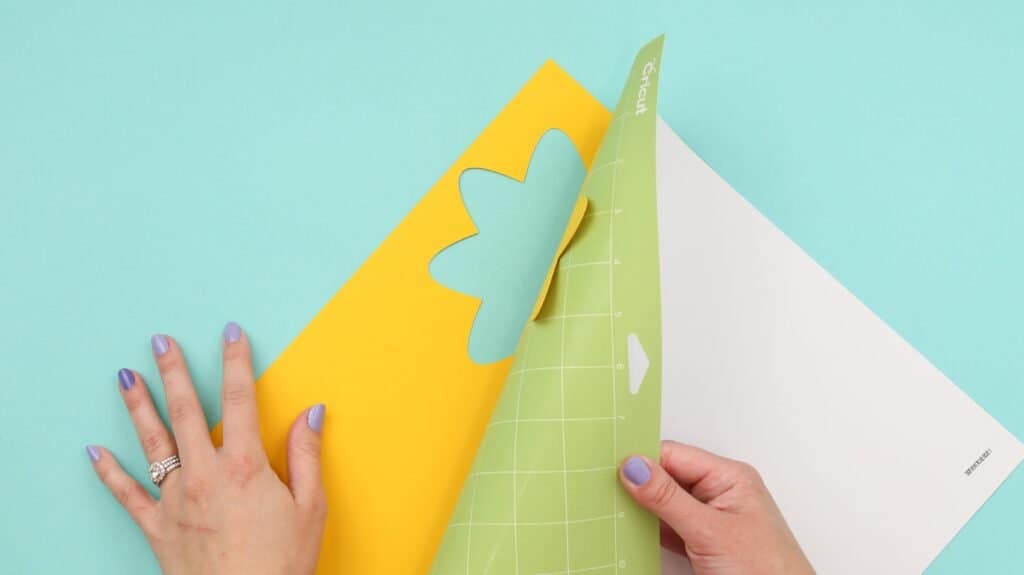
Continue to load, cut, and unload the rest of the cuts until you have all of the elements cut out.
Pro Tip - Peel your mat away from the cardstock to avoid tearing or rolling your cardstock.
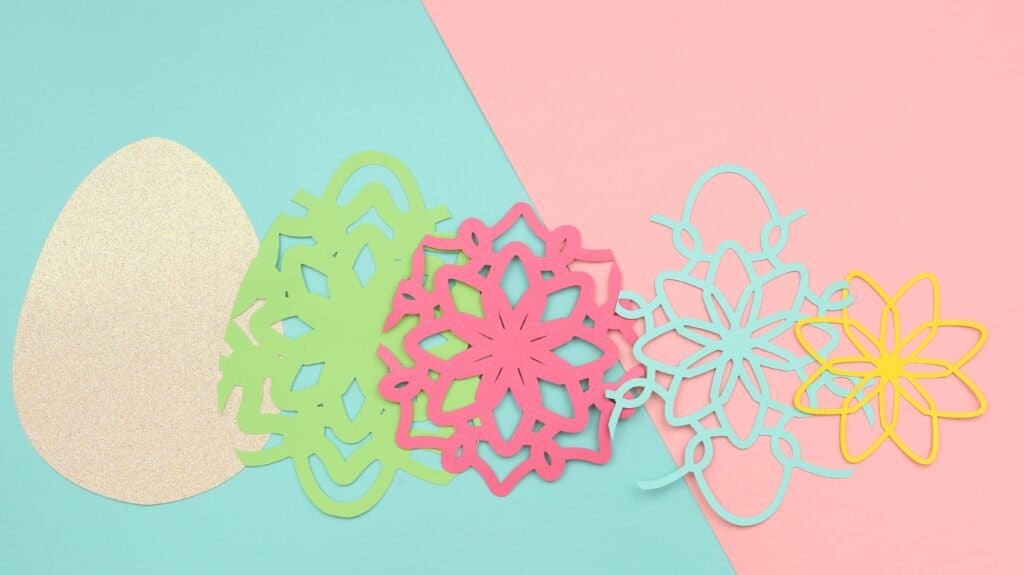
Step 4 - Assemble Layered Mandala
After you cut the design, use the foam adhesive and/or craft glue to put it together.
Pro Tip - It’s best to use the adhesive in the same spot on each layer to get an even rise and 3D layered look.
Cricut Design Space doesn’t cut out the layers in order so it can get confusing to piece together. Head back to Design Space to see the layers as a reference for how to put them together.
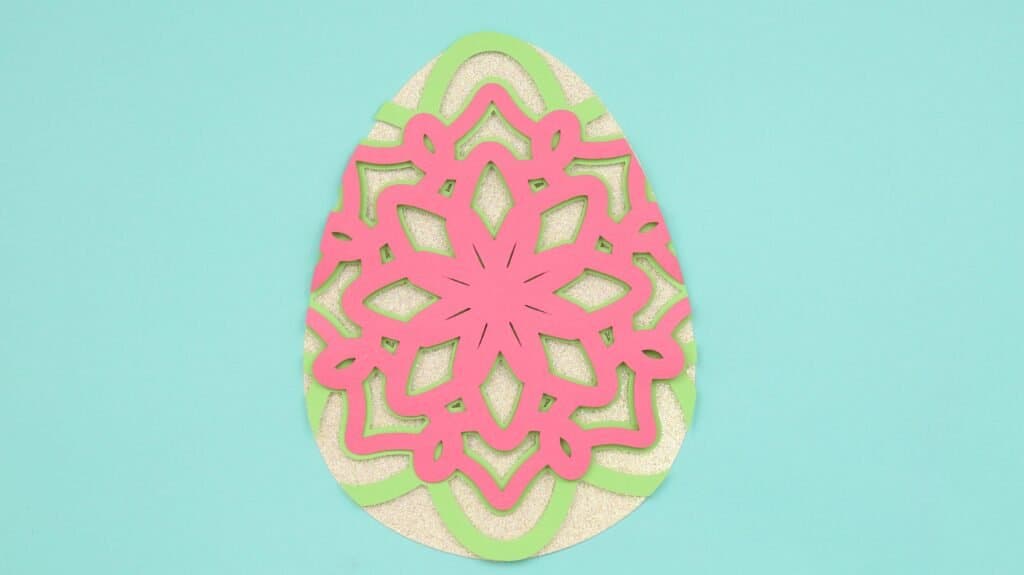
The image below shows you from bottom to top how the layers should be placed.
Begin by placing your layers out in front of you in order.
Using craft glue or foam adhesive attach the layers together from back to front.
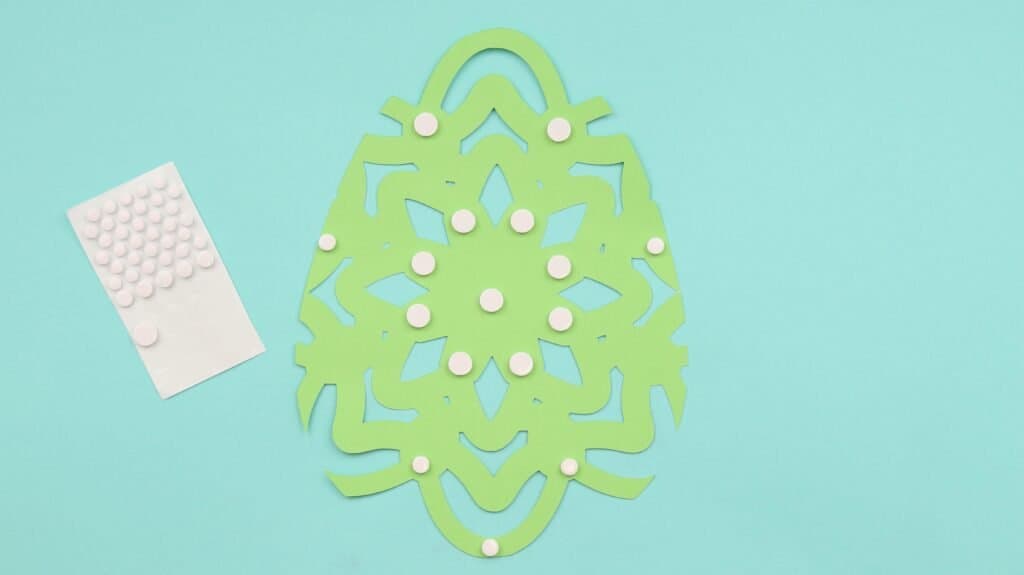
Begin by placing foam adhesive or craft glue on the back of the 4th layer. Line it up with the base layer and press it in place.
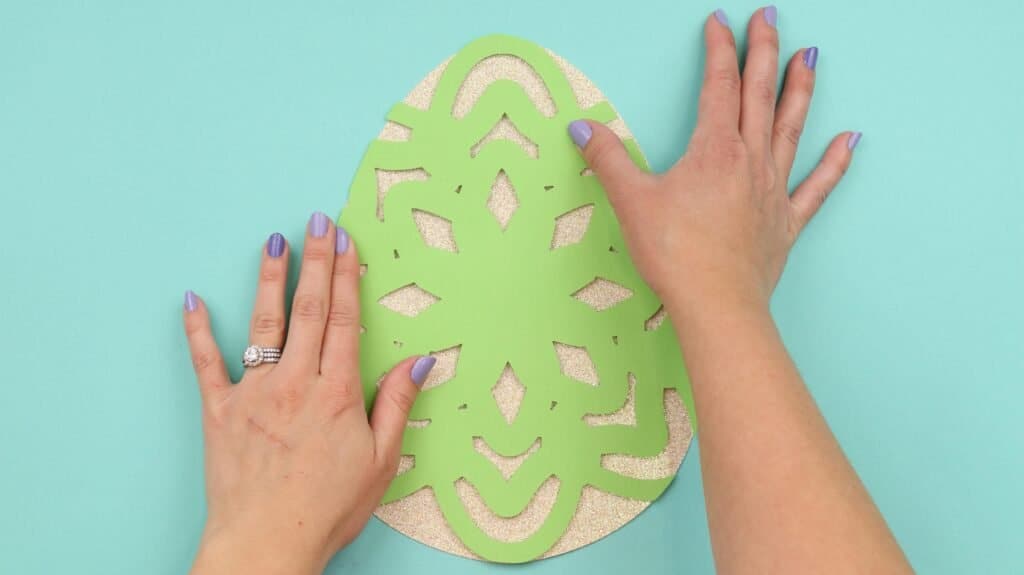
Next, place foam adhesive or craft glue on the back of the 3rd layer. Line it up with your base layer and press it in place.
Then, place foam adhesive or craft glue on the back of the 2nd layer. Line it up with your base layer and press it in place.
Finally, place foam adhesive or craft glue on the back of your top layer. Line it up with your base and press it in place.
Now you have a beautiful Easter Egg Mandala!
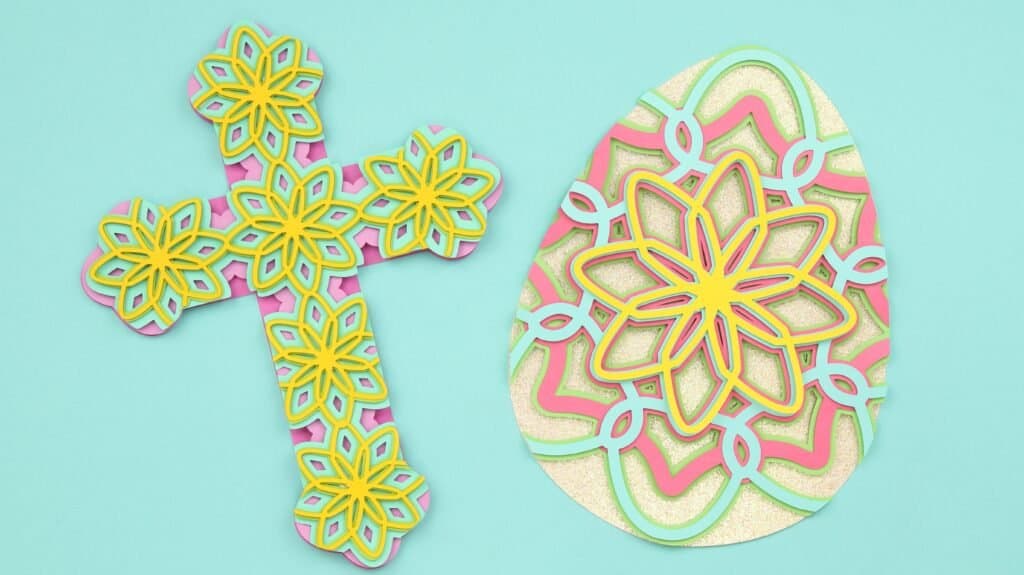
Looking for even more Easter-themed SVG files? Click here to get the layered cross mandala file and tutorial.
Don’t forget to join my Facebook group where you can show us what you’re making, ask questions, and learn from others!
wow these are so cute ...wow ...thank you for sharing such a beautiful idea....
So pretty. Great colors. Thank you!