• Skip to primary navigation
  • Skip to main content
  • Skip to primary sidebar
Sweet Red Poppy logo
  • Cricut
    • Free SVG Files
    • Paper Flowers
    • Mandala
    • Iron-On
    • Vinyl
    • Maker
    • Explore Air 2
    • Joy
  • Sewing
    • Baby
    • Kids
    • Accessories
    • Christmas
    • Blankets
    • Womens
    • Learn to Sew Tips & Tricks
    • Face Masks
  • DIY Crafting
    • Paint
    • Paper
    • Food
    • Kids
  • Holiday Crafts
    • Valentine’s Day
    • Easter
    • 4th of July
    • Halloween
    • Thanksgiving
    • Christmas
  • Books
    • Cricut Printed Book
    • Cricut E-Book
    • Cricut Joy Printed Book
    • Cricut Joy E-Book
    • Paper Flower E-Book
    • Sewing Printed Book
    • Sewing E-Book
    • Face Mask E-Book
    • Mandala E-Book Bundle
    • Mandala E-Book - Inkscape
    • Mandala E-Book - Adobe Illustrator
    • Mandala Printed Book - Inkscape
    • Mandala Printed Book - Adobe Illustrator
    • Baby Pattern E-Book
  • Courses
    • Cricut Course
    • Sewing Course
    • Serger Course
    • Quilting Course
    • SVG Design Course
    • Course Login: Teachable
  • Shop
    • E-Books
    • Printed Books
    • Sewing Patterns
    • SVG Files
    • Baby Patterns
    • Subscribe to Emails
    • Course Login: Teachable
    • Contact
  • Search

Reversible Pom-Pom Trim Skirt

Written by Kimberly Coffin · This post may contain affiliate links · 7 Comments

30.1K shares

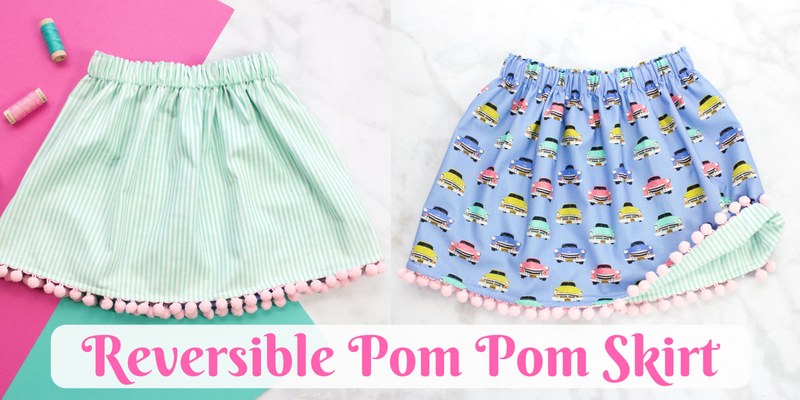
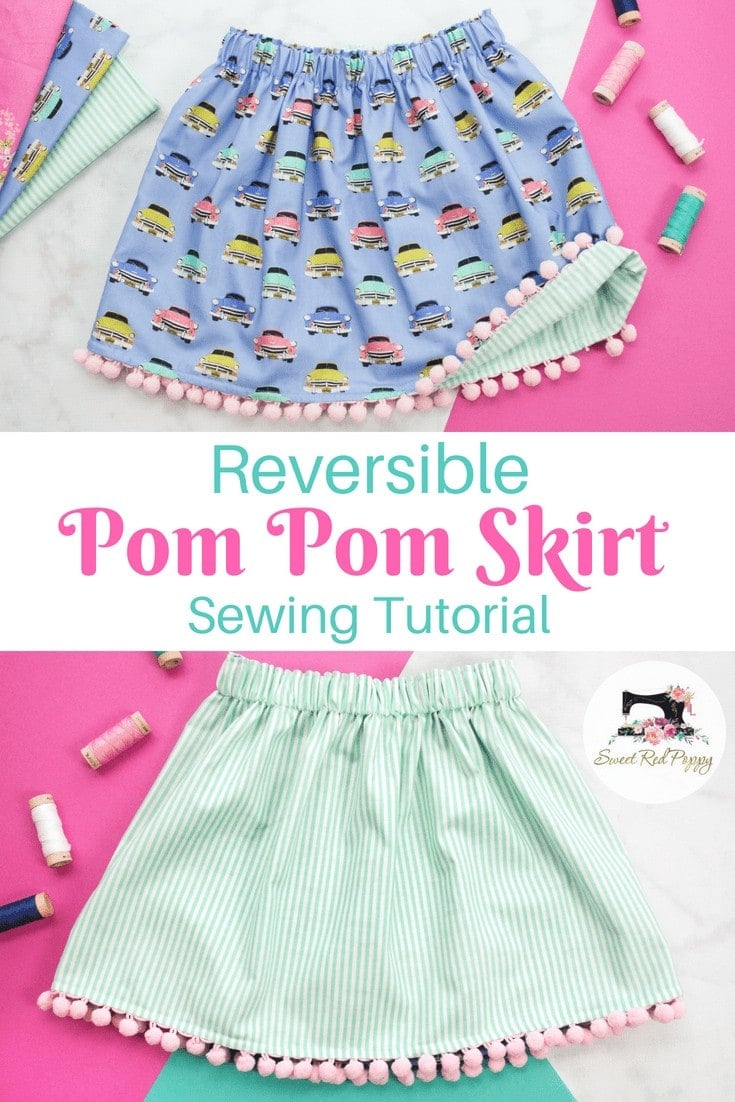
Reversible Pom Pom Trim Skirt

Sew an adorable double-sided skirt with pom-pom trim with this beginner-friendly sewing tutorial that includes step-by-step photo instructions.

My daughter has been on a skirt kick recently and by kick I mean that she insists on wearing each skirt for multiple days at a time.

So in an effort to give her outfits a little bit more longevity, I came up with a double-sided skirt tutorial. It's incredibly simple to make and it gives you twice the bang for your buck!

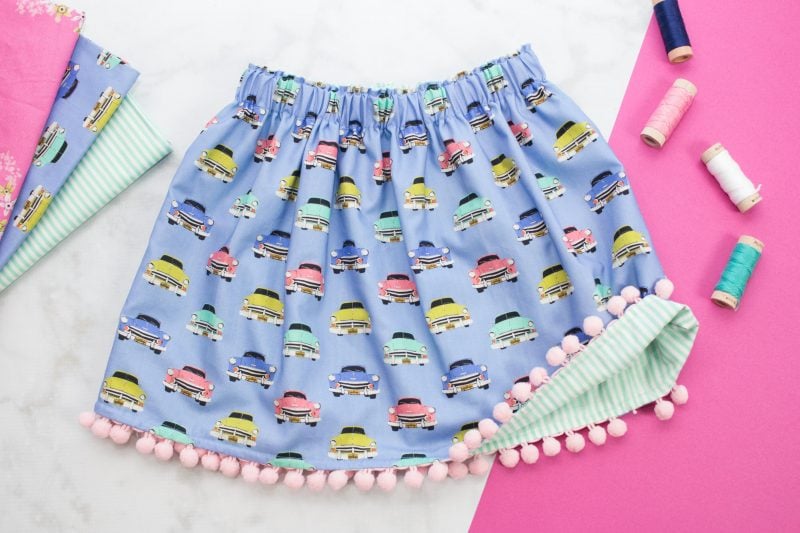
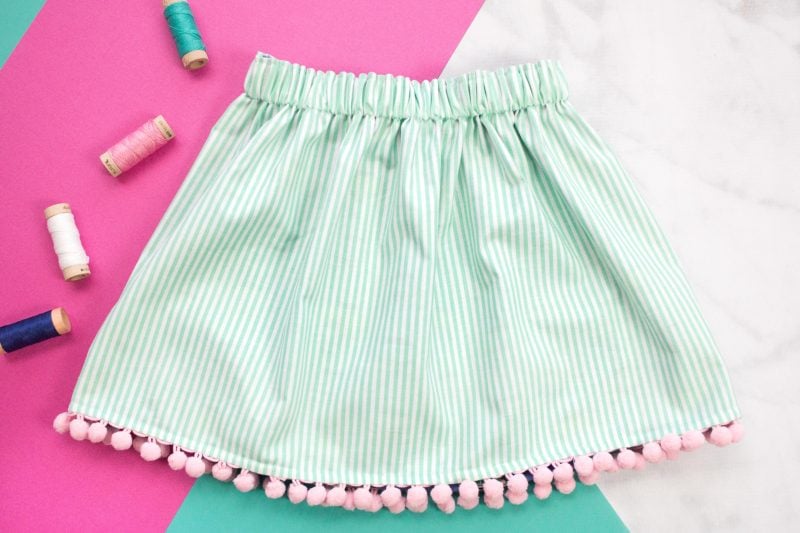
This adorable car print is part of Patty Young's latest fabric collection with Riley Blake Fabrics named Club Havana. I paired this print with a Riley Blake mint green and white-striped fabric and light pink pom-pom trim.


Supplies

2 Coordinating Fabrics

1 Inch Wide Elastic

Pom Pom Trim

Sewing Machine

Thread

Scissors

Iron

Safety Pin

Pins or Clips
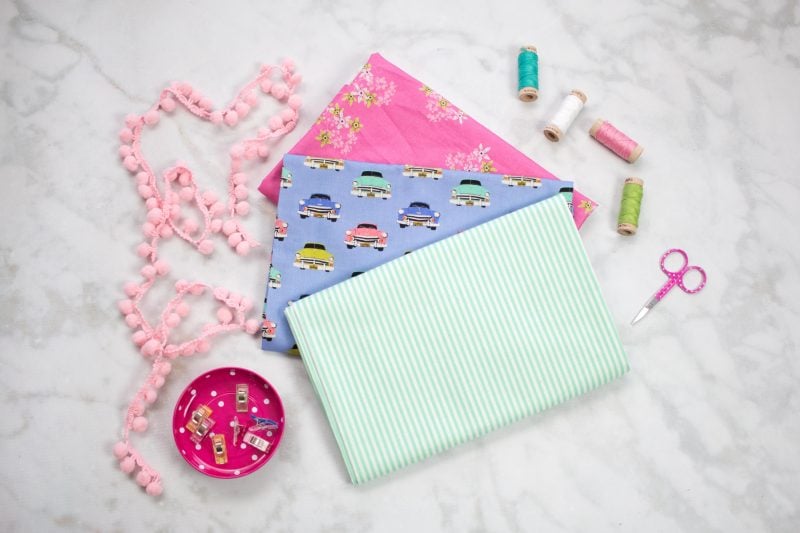
Reversible Skirt Sewing Tutorial

Measure the waist of the child you will be making the skirt for. Then measure from the waist to the knee.

The waist measurement for my daughter was 21 inches. From her waist to her knee measured 14 inches

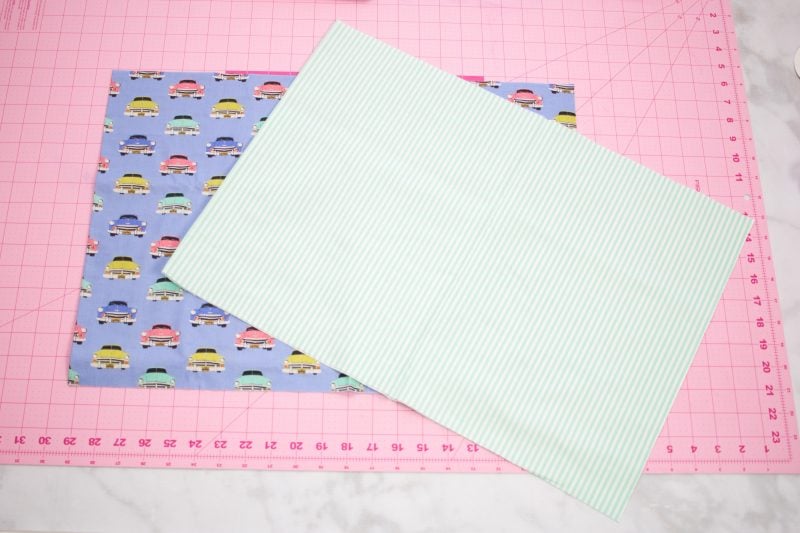
Cut two large rectangles of fabric.

The width will be the width of the fabric and the length will be the measurement from the waist to the knee.

My rectangles measured 44 inches wide by 14 inches tall.

(they are folded in half in the photo below)


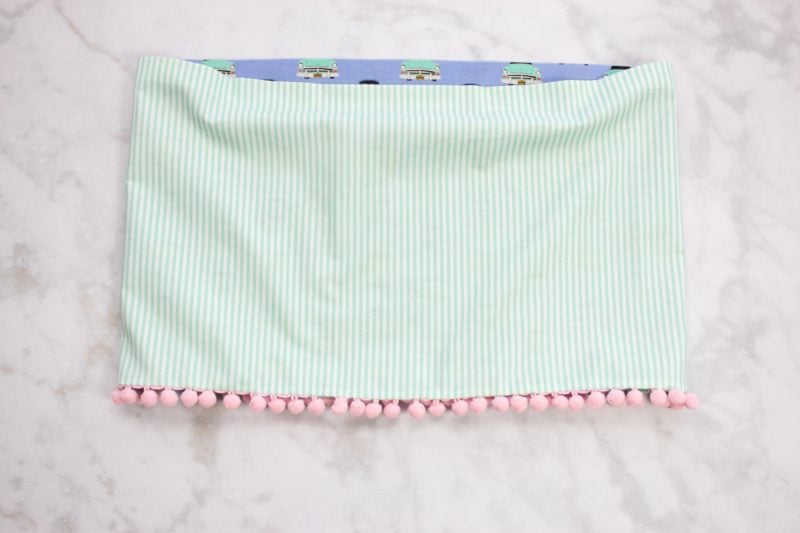
Attach the pom pom trim along the bottom of one of the pieces of fabric. Attach the pom poms so they are facing upside down.


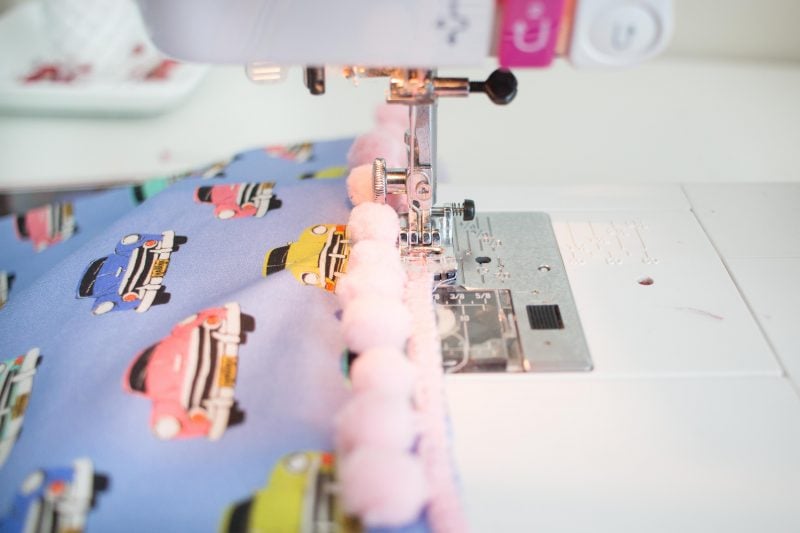
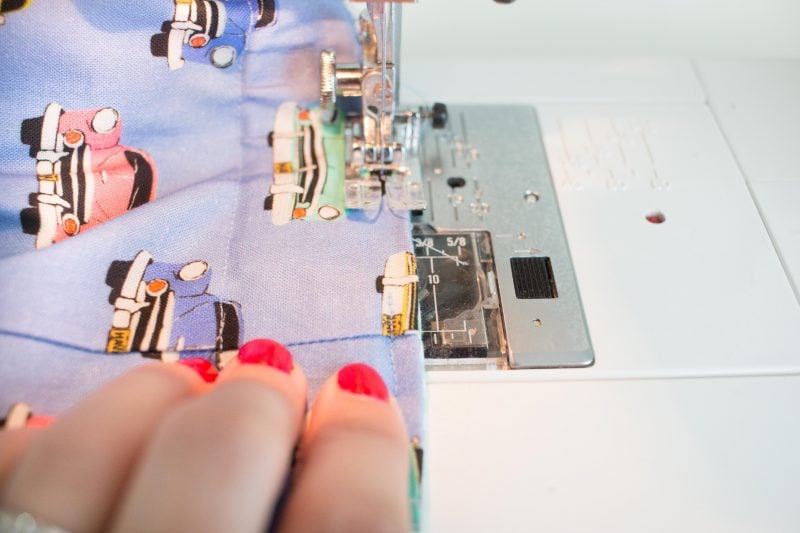
With right sides together sew the fabric together down the short side. Repeat this step with the other piece of fabric.


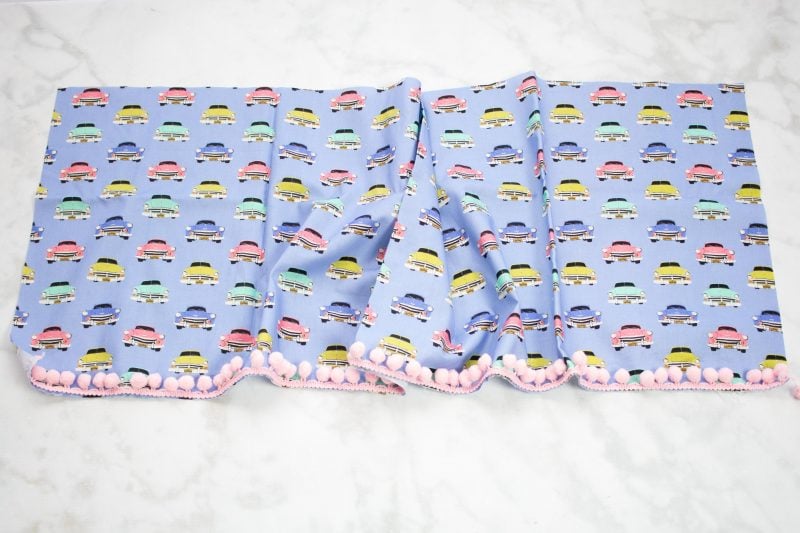
Slide one of the skirt pieces inside of the other so that right sides are facing each other and align the seam allowances together.


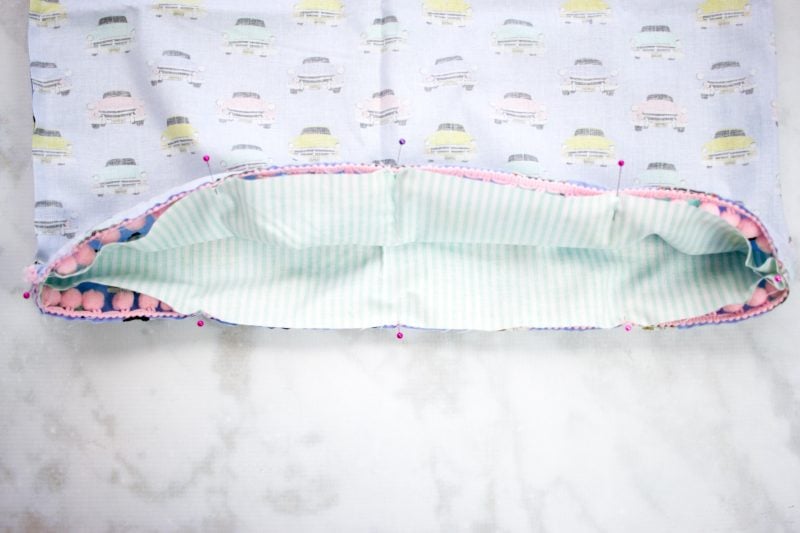
Sew the two pieces of fabric together sandwiching the trim in between them.


Open up the skirt so that both right sides of the fabrics are facing upwards.

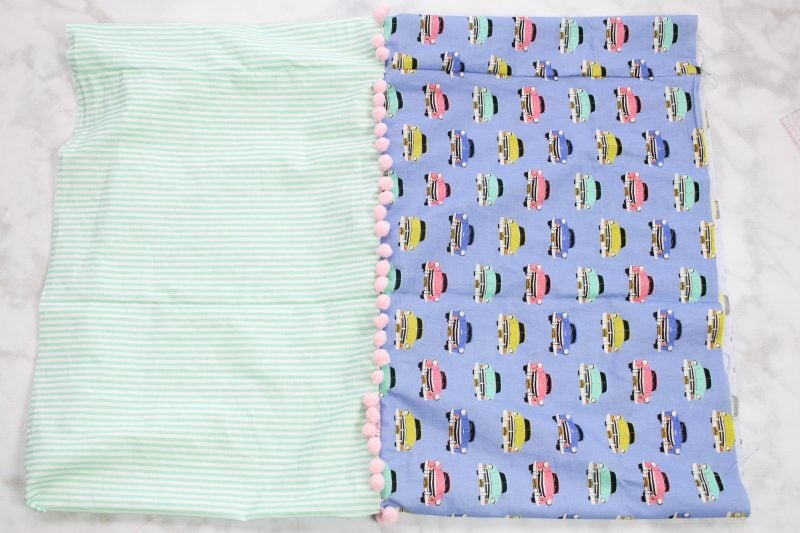
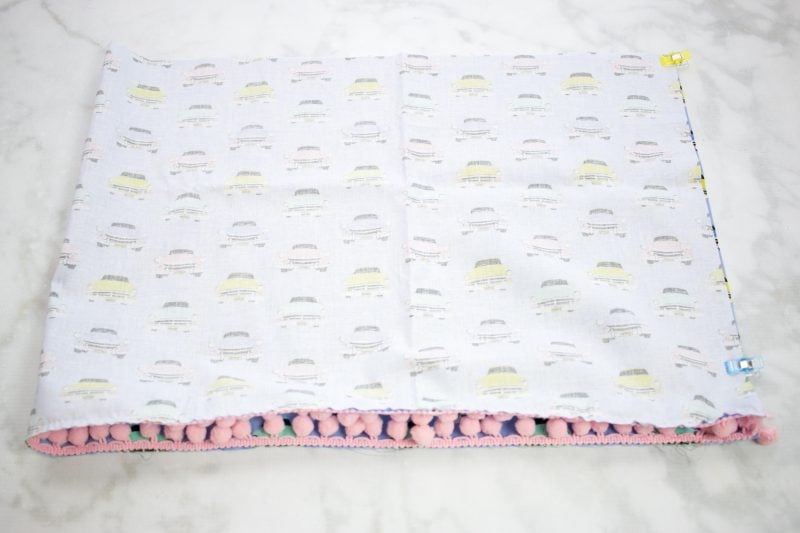
Turn the raw edge of the skirt under 1/2 inch on both sides of the skirt.


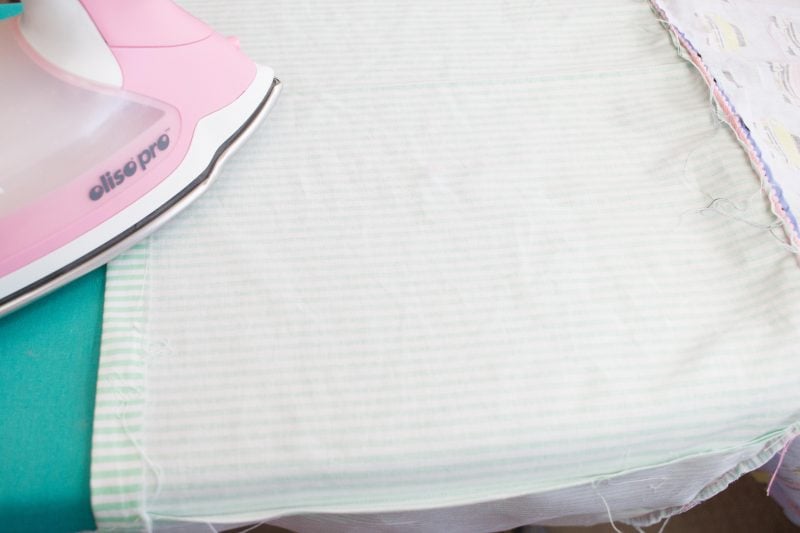
The skirt should resemble the picture below once both sides have been pressed under.


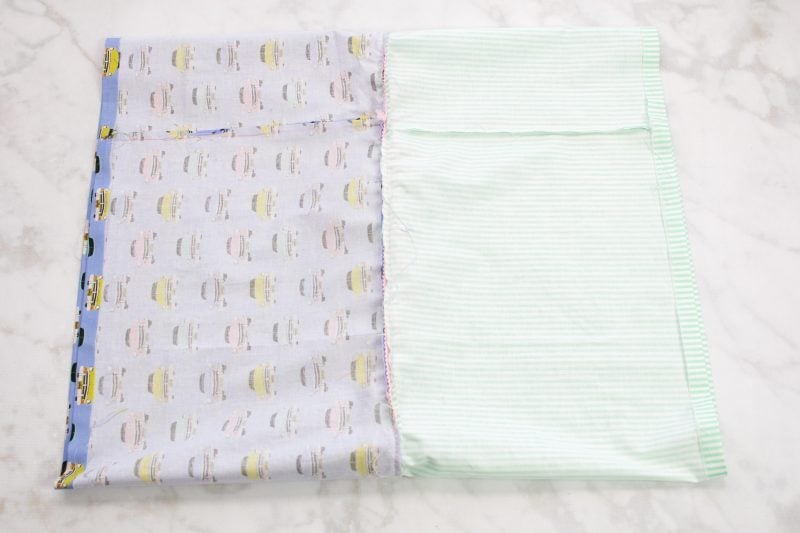
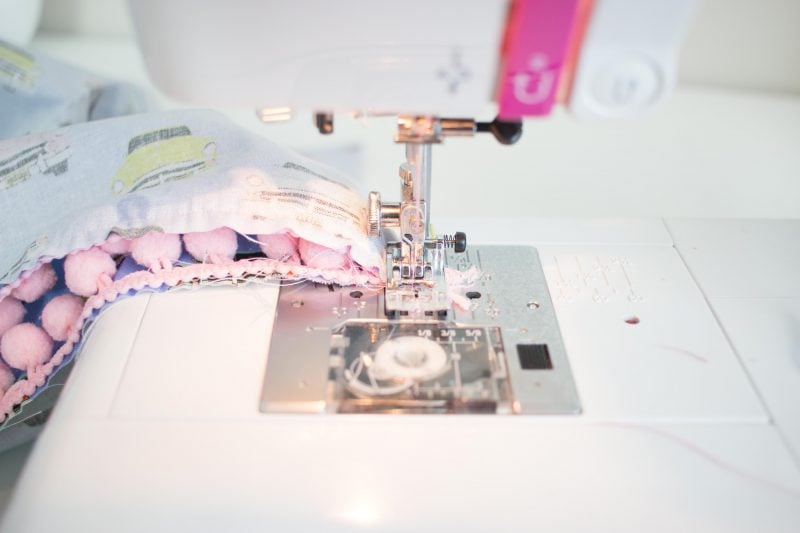
Flip one side of the fabric upwards so that wrong sides are facing each other and the pressed edges are aligned.


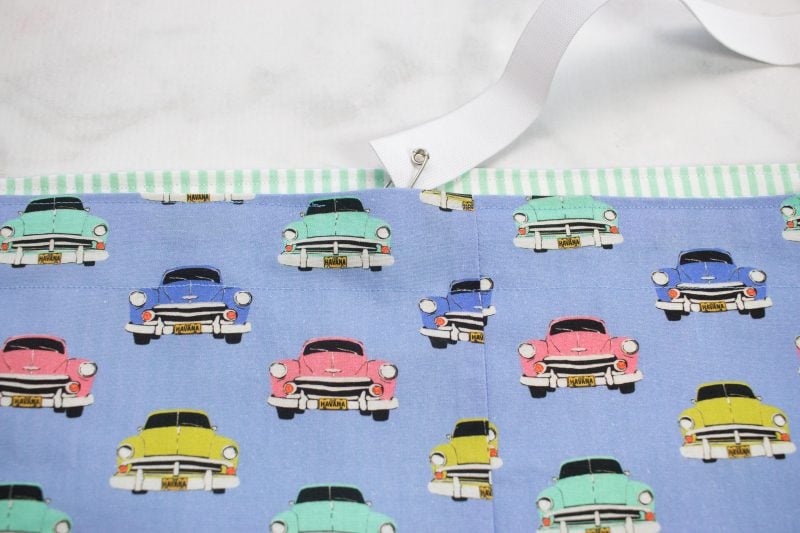
Sew the folded edges of the skirt together with a 1/4 inch seam allowance leaving a 2 inch opening for the elastic. Sew another seam line 1 1/2 inch from the original seam. This will create a casing for the elastic.


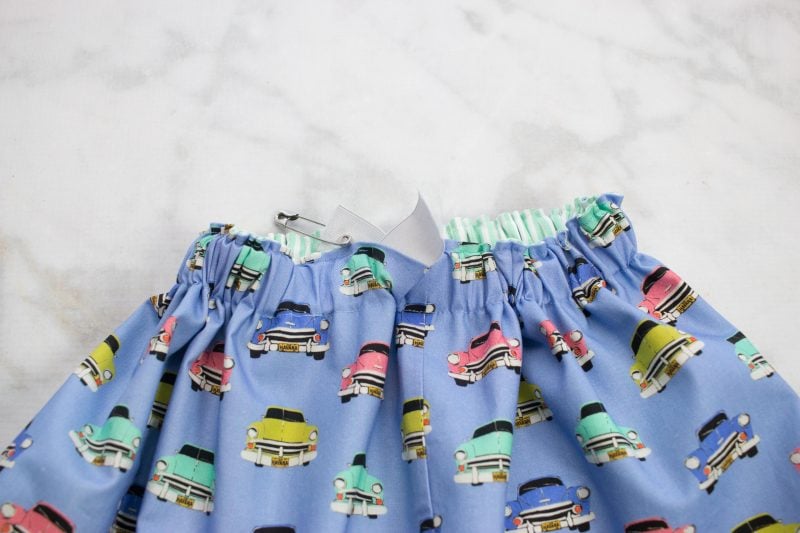
Cut a piece of elastic the same size as the waist measurement. Attach a safety pin to the elastic and thread it through the casing. Once you reach the beginning of the elastic, gently pull both sides and layer them on top of each other.


Sew a zigzag stitch to secure the elastic edges together.


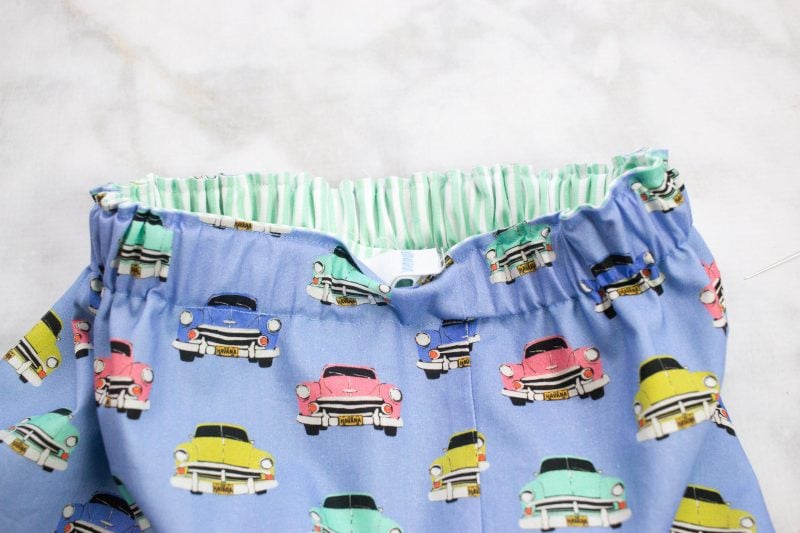
Evenly distribute the elastic in the waistband and then sew closed the opening in the waistband. Press both sides of the skirt.

Show your cute skirt off to your little girl! She's sure to love it!

Don't want to forget about this project? Save it for later! Click here to Save this project to Pinterest.

« DIY Mermaid Bath Bomb Tutorial
Bon Voyage Luggage Tag »

Reader Interactions

Comments

  1. Cheryl says

    June 02, 2020 at 2:38 am

    Absolutely adorable and so easy to make. Thanks for sharing.

    Reply
  2. ann says

    July 20, 2020 at 9:52 pm

    Hi, such a lovely little skirt and thanks for sharing.
    If I measure the child from waist to knee, do I need to add on seam allowance, especially for the channel for the elastic?

    Reply
    • Brigid Haseler says

      November 21, 2020 at 4:15 pm

      If you don’t add seam allowance it will come an inch or so above the knee. It you want it to sit a bit lower just increase the length accordingly. Xx

      Reply
  3. Jill says

    March 14, 2021 at 12:33 am

    Such a cute skirt! Thanks for sharing. Question, any trouble with the Pom Pom’s bleeding when laundered? Any that you especially like to use?

    Reply
  4. Stephanie says

    June 20, 2021 at 4:08 pm

    Cute. Made it for my grand-niece last night. First time using pom poms and they were kind of a pain to sew on. Maybe there's a trick, other than changing the foot, I need to learn. Thanks for sharing this pattern. I would post pictures but I don't see a place to do that.

    Reply
  5. Judith says

    July 17, 2022 at 9:52 pm

    Last summer I made three of these little pom-pom skirts for my granddaughters. They were adorable and such a hit! And easy! such an ingenious design!
    So now this summer I am making more upon request! Nothing like feeling appreciated!!

    Reply
  6. Lynn says

    July 24, 2023 at 6:27 pm

    First of all thankyou for sharing. The little skirt looks amazing and I can't wait to make one for my granddaughter. I love the idea you have a choice of two different skirt colours . Thank you again

    Lynn

    Reply

Leave a Reply Cancel reply

Your email address will not be published. Required fields are marked *

This site uses Akismet to reduce spam. Learn how your comment data is processed.

Primary Sidebar

Ready, Set, Sew! An online sewing course for beginners by top US sewing blogger, Sweet Red Poppy.

Hello, I’m Kimberly, the creator of Sweet Red Poppy!

I’m a wife, mother to 3, seamstress, and lover of all things crafty! Sweet Red Poppy is my creative outlet where I find and create inspiration. It’s a place where I can share my never-ending sewing projects and my love of learning!

Read more about me →

The Latest

  • How to Create Magnetic Photo Frames with Glowforge & Cricut + 20 Free SVGs
  • DIY Father's Day Magnetic Photo Frame
  • Aeon Mira5 S Sweet Red Poppy
    Aeon Mira5 S Redline Laser: Everything You Need to Know Before You Buy
  • How to Make a Large Crepe Paper Peony
  • The New Cricut Maker 4- What's the Difference Between Cricut Maker 4 vs Maker 3?
  • How to Make Easy DIY Glitter Ornaments

Footer

↑ back to top

Legal

  • Privacy Policy
  • Disclosure

Newsletter

  • Get My Cricut Book HERE
  • Sign Up! For Emails and Updates

About

  • Contact
  • About
  • Home

Copyright © 2024 Sweet Red Poppy