Wondering How to Decorate Clear Plastic Ornaments for Christmas? Top US craft blogger, Sweet Red Poppy shares some Super Easy Ways.
I made it my goal this year to create a Christmas tree that was nearly indestructible. I have a 1.5, 3 & 4-year-old on the loose in my house which means all of my gorgeous glass ornaments from years past are off-limits this year. They are neatly packed away, high in the garage where my children can't reach them.
Even though my little minions do their very best to destroy everything nice that I have, I still wanted to have a beautifully decorated Christmas tree. Practical? Probably not, but sometimes, I just have to have my way! My couch may be stained with yogurt and my floor is covered in mystery stains but by gosh I'll have a beautiful Christmas tree this year!
So I set off to JoAnn's like any crafty woman would, with three children in tow, my pockets loaded with applesauce squeeze tubes and an abundance of fruit snacks to see what I could find. While I was there I found the perfect clear plastic ornaments. Really it's quite impressive that I was able to find anything given I had three kids in tow. Do anyone else's kids go absolutely nuts at Joann's?
These ornaments are virtually indestructible and totally within my budget! I instantly started brainstorming all of the different ways I could decorate the plastic balls using things I already had lying around the house.
I dug through all of my scrap drawers and my Christmas bins and came up with some great decorations. I made a video to walk you through each step!
Are you ready to get started?

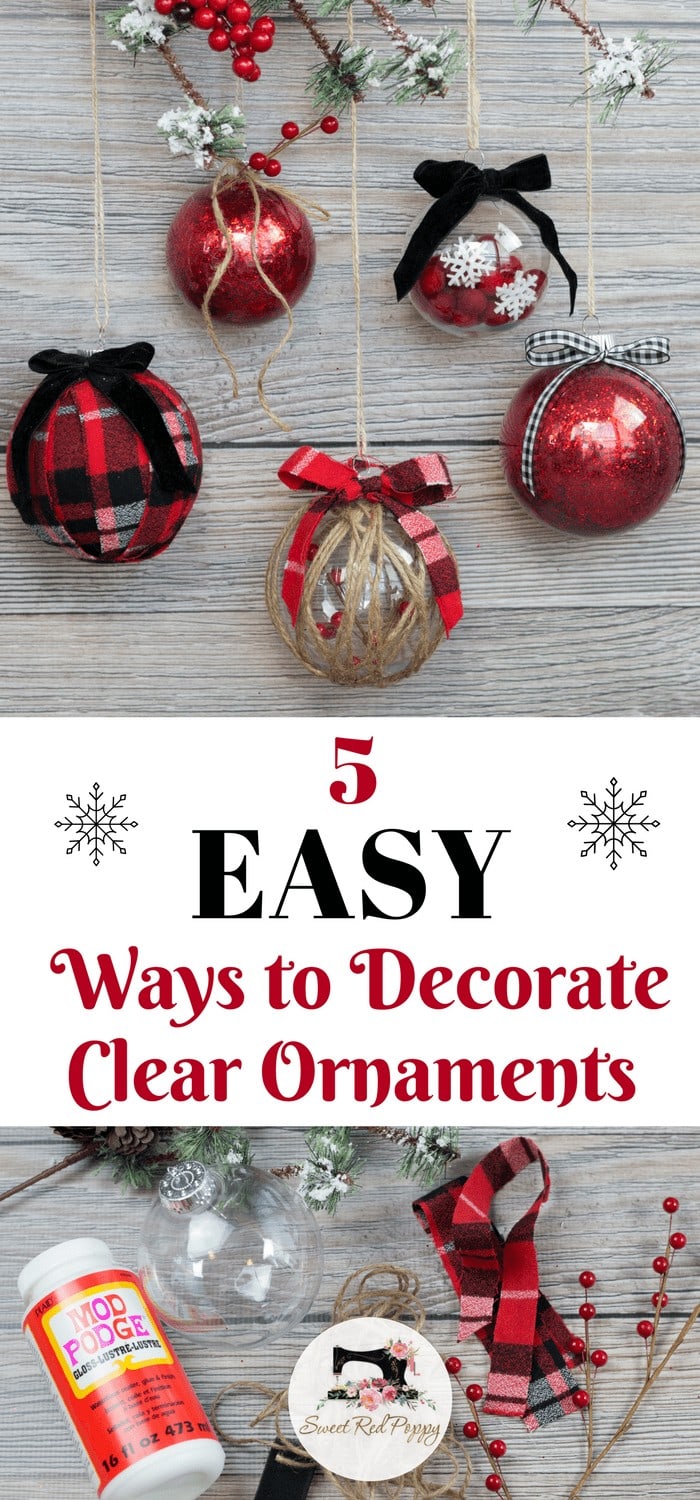
I'm not exactly sure how to name this style but I think it's somewhere around a classy farmhouse. There's a bit of rustic charm and an element of sophistication all wrapped up into five cute little ornaments.
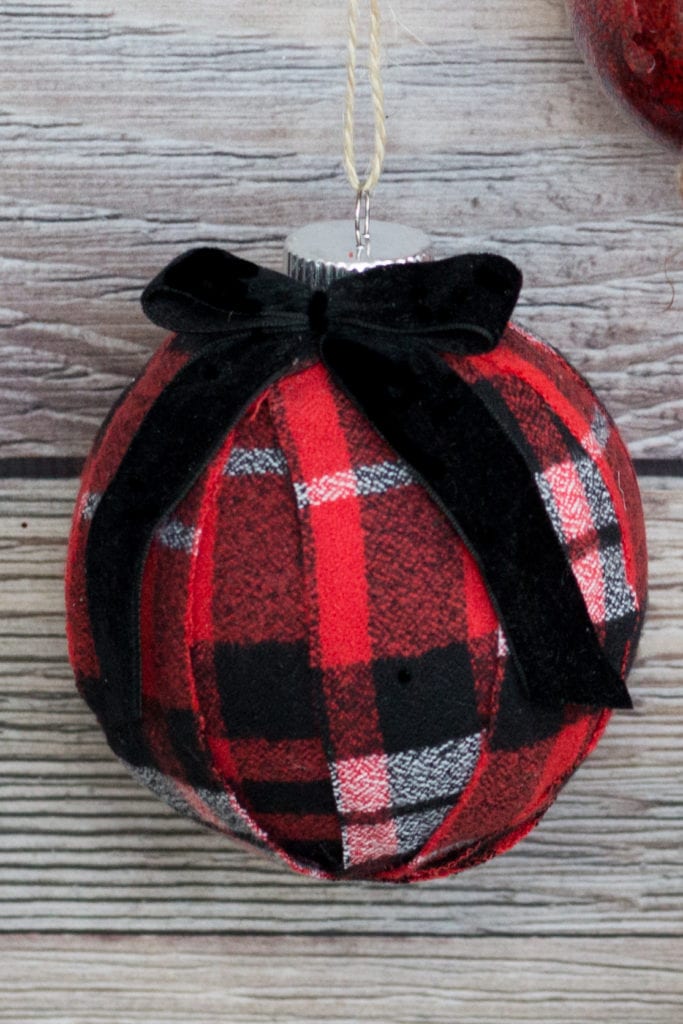
Fabric Covered Clear Plastic Ornament
Supplies
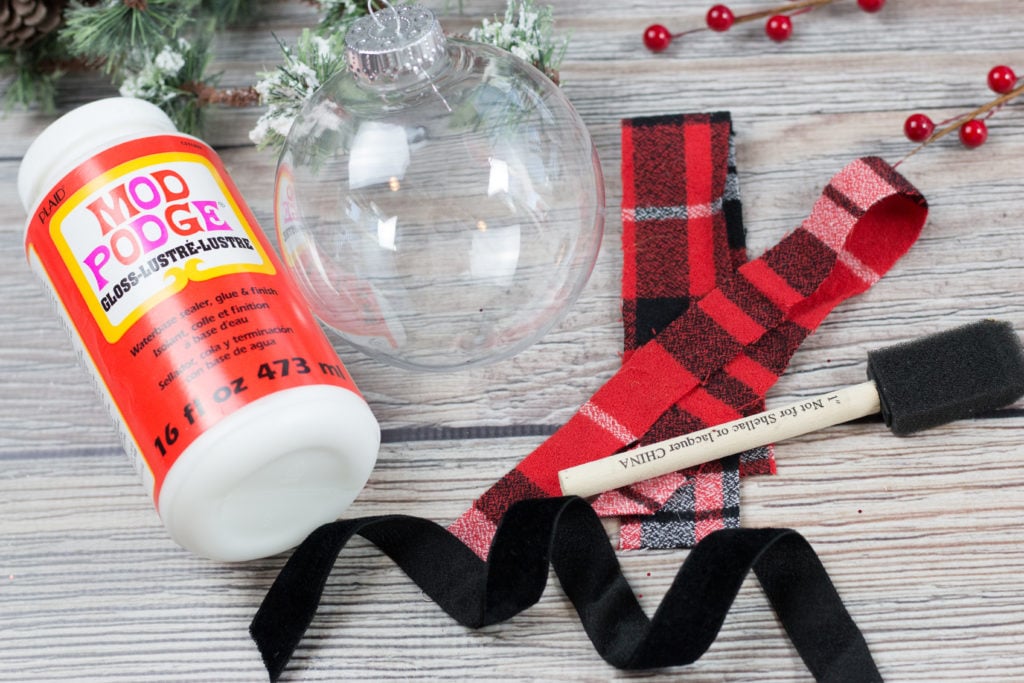
With a measuring tape, measure the size of the ornament from one side to the other. Cut out the scraps of fabric about 1/2 longer than the measurement. My pieces of fabric were 1 inch wide.
Paint the Mod Podge onto the ornament in rows starting from the top, around the bottom, and up to the top again. Slightly overlap the strips of fabric until the whole ornament is covered.
Trim any excess fabric from the top of the ornament. Place a black velvet bow around the top, place the top back on, and then tie the velvet bow.
Let dry.
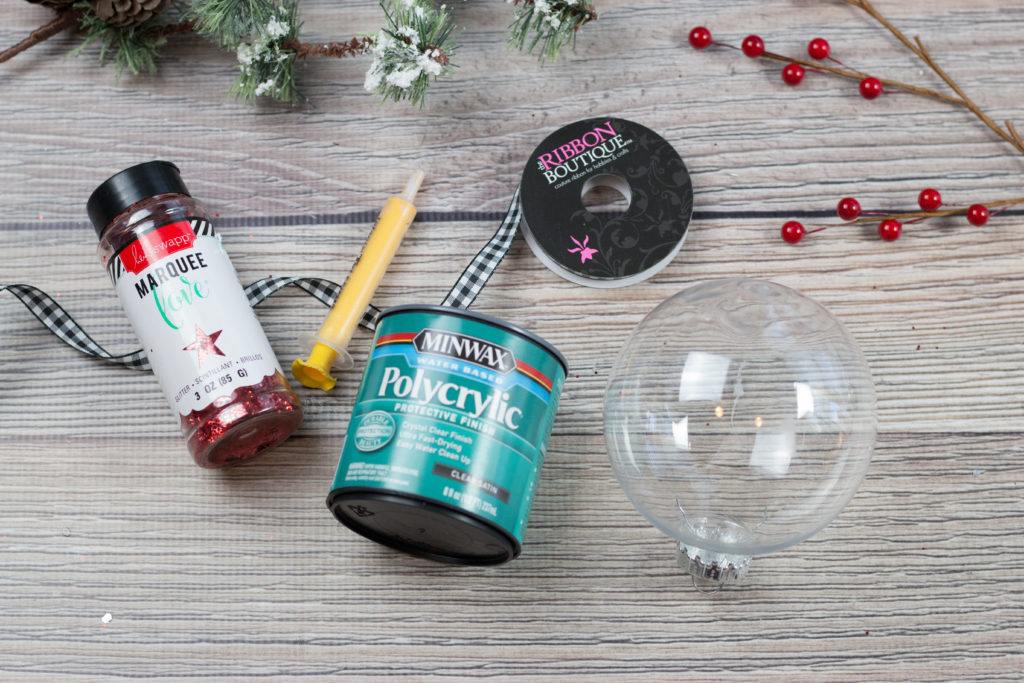
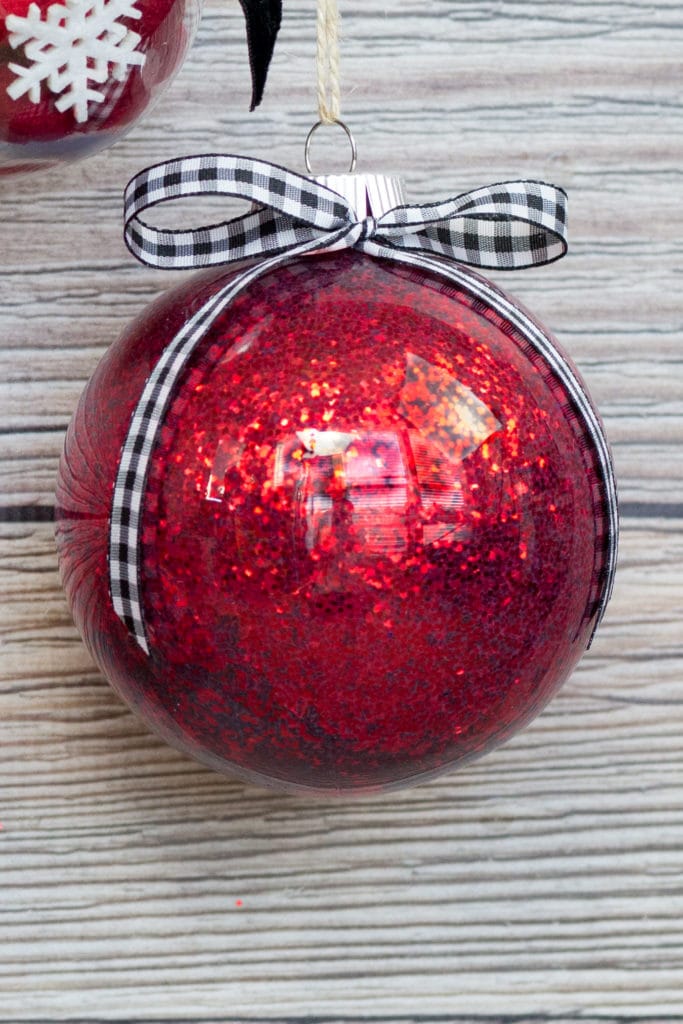
Glitter Clear Plastic Ornament Tutorial
Once it has been coated, dump out the excess.
Roll up a piece of paper to use as a funnel and pour glitter into the ornament.
With a piece of paper towel, cover the opening and shake the ornament until all sides have been thoroughly coated in glitter.
If the ornament isn't completely coated, add more glitter. Once the ornament is coated dump out any excess glitter.
*I did quite a bit of experimenting with this ornament to find the best way to seal the glitter. In the end, I found that Polycrylic (which you can buy at Walmart) dried the shiniest and had the strongest hold.
I know plenty of people use Mop N Glo or Mod Podge but I'd recommend going with the Polycrylic so the ornaments last longer.
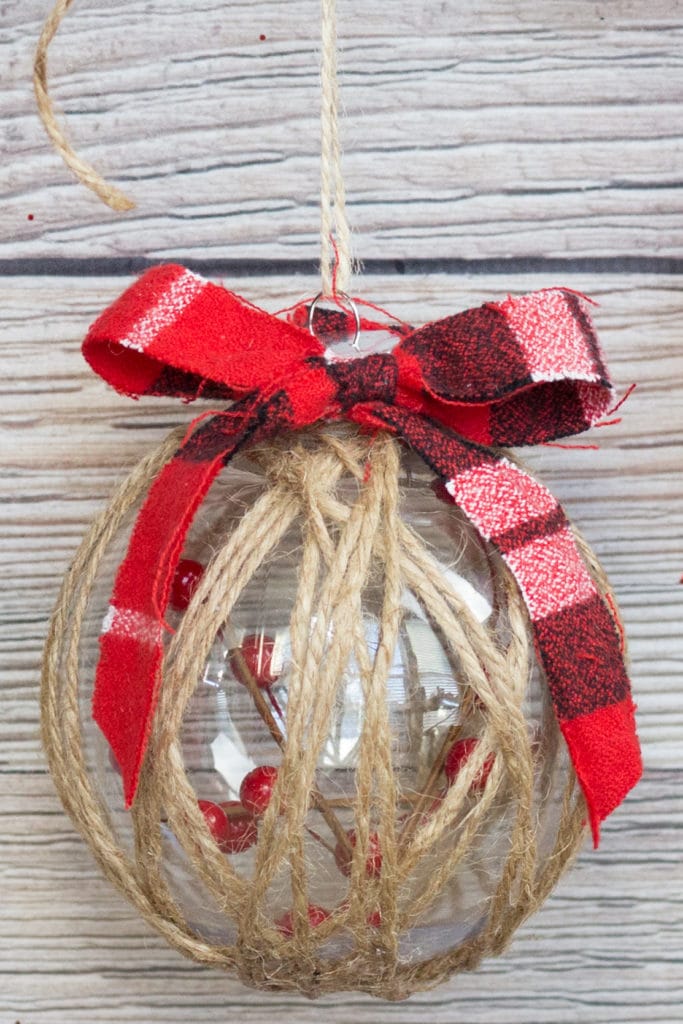
Wrapped Twine Clear Plastic Ornament
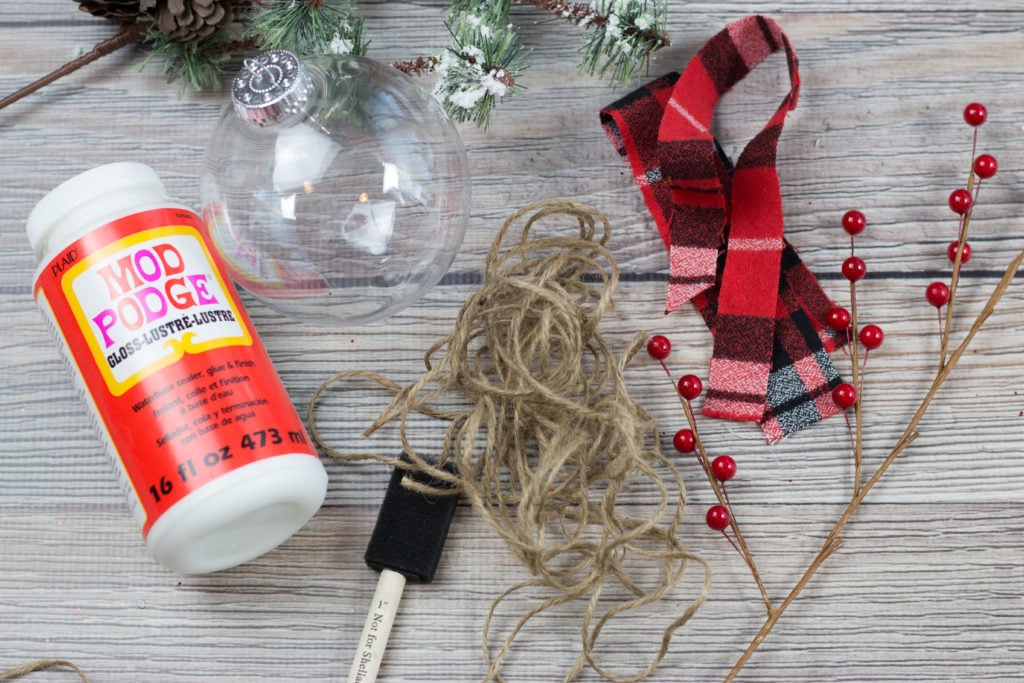
Start at the top of the ball and wrap the twine around in the same spot three times covering up the beginning of the twine.
Rotate the ball and begin wrapping it in a different direction three times.
Repeat the process until you've wrapped the ball in about 10 different directions.
Loop the end of the string under a piece of wrapped twine.
Brush the bottom of the ornament with Mod Podge to keep the twine from moving around. Let dry.
Place a small twig with holly berries inside of the ornament.
Place the top back on the ornament and tie a bow around the top.
Cut the ends of the bow at an angle.
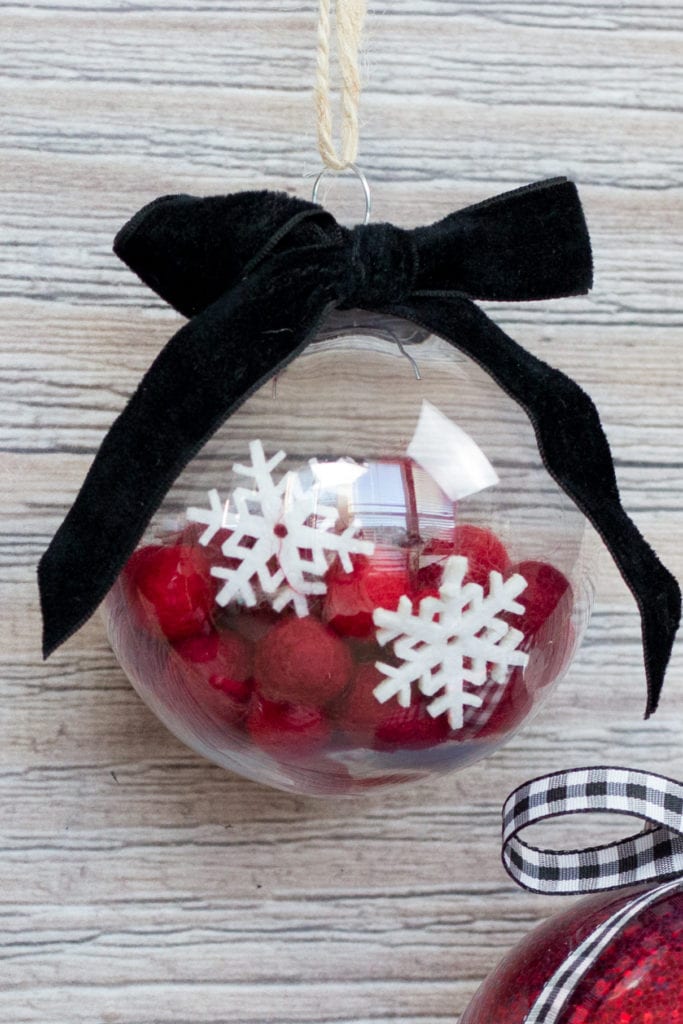
Felt Ball Clear Plastic Ornament
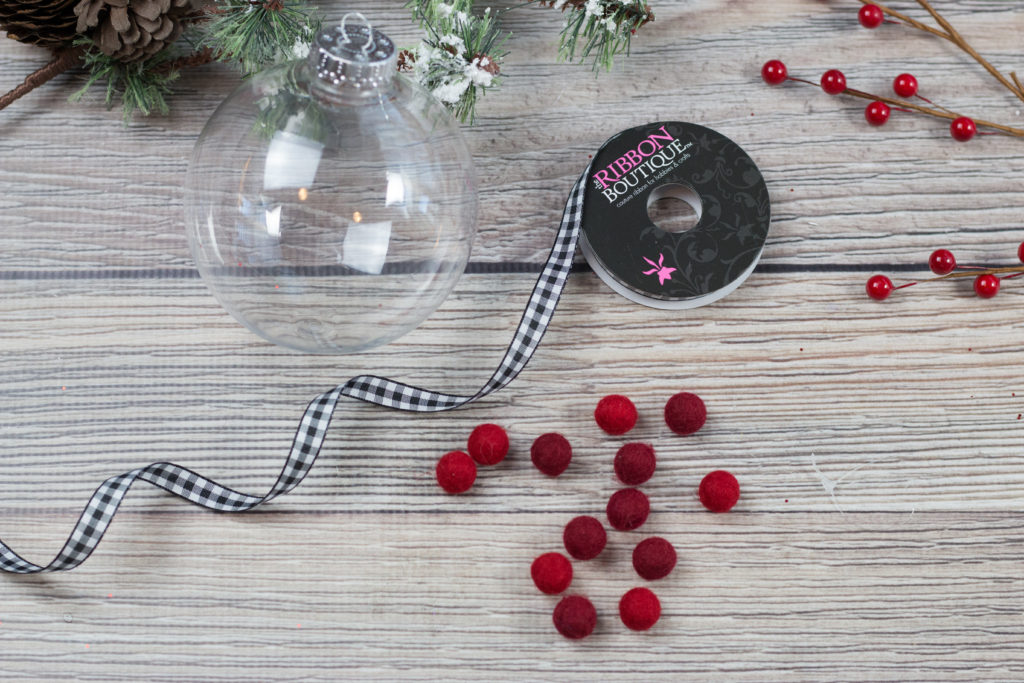
Remove the top of the ornament and place the felt balls and small snowflakes inside the ornament.
Replace the lid on top of the ornament and tie a black velvet ribbon around the metal top.
I hope you enjoy all of these different Christmas ornament tutorials!
I'm planning a crafting night with my friends so we can all make a bunch of them. Everyone can bring one or two supplies and we can spend some quality time together!
I love these ideas. So clever. My sister (a mom of 3 boys) told me the clever trick of wrapping large boxes to block off the tree so the kids would not be able to get too close. Good luck this year 🙂
I love the ornaments. I will try them next year I finished with my decoration for this year. I really love those ideas with the different ornaments.
ABSOLUTE BEAUTIFUL
Do you pour in the polycyclic after the glitter?
I just happened on your site. I read the tip about wrapping large boxes and placing around tree base to keep the kids from pulling at the tree. It made me remember way back when a friend of mine had triplets who were toddlers. I walked into her home one day to see the tree and presents in the playpen. I cracked up as she said, they kept pulling the tree over and pulling ribbons and paper off the presents. They don’t like the playpen so—problem solved! The triplets left tree and packages alone!