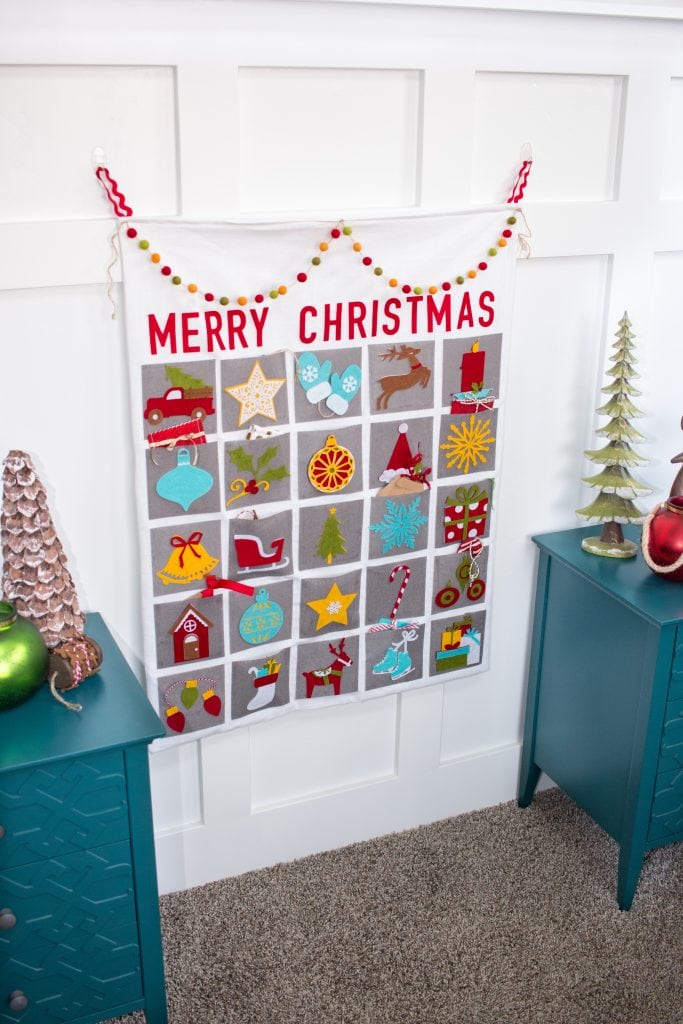
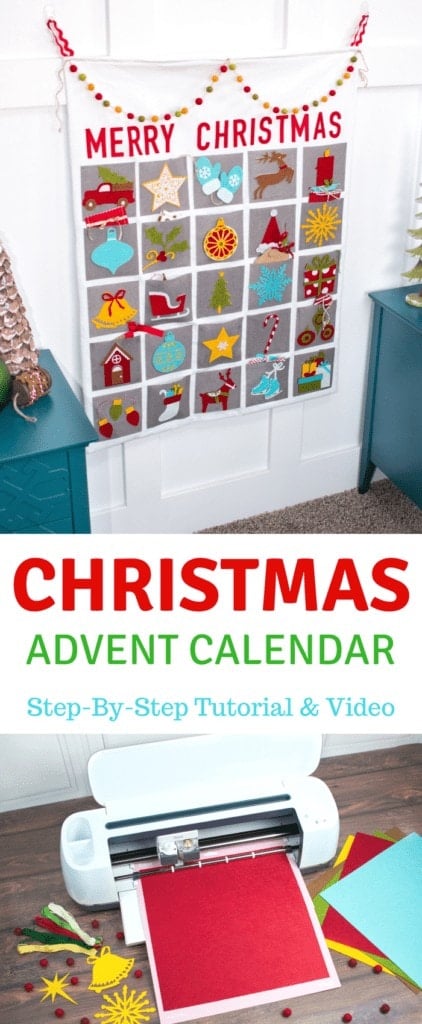
Learn How to Make a Felt Advent Calendar with this DIY Tutorial!
This is a sponsored conversation written by me on behalf of Cricut. The opinions and text are all mine.
It's the day after Halloween so I'm ready to start decorating for Christmas! My daughter is finally old enough to understand Christmas this year and I wanted to make an advent calendar to help her to count down to Christmas.

Growing up, putting up our Christmas advent calendar was one of the things I looked forward to the most! You can fill the pockets with anything! It could be candy, small toys, service ideas or even a Christmas-related scripture. I've outlined the entire process for making this advent calendar and I've even included a video!
Here's what you will need to get started!
SUPPLIES
Here's a quick video tutorial of the entire process!
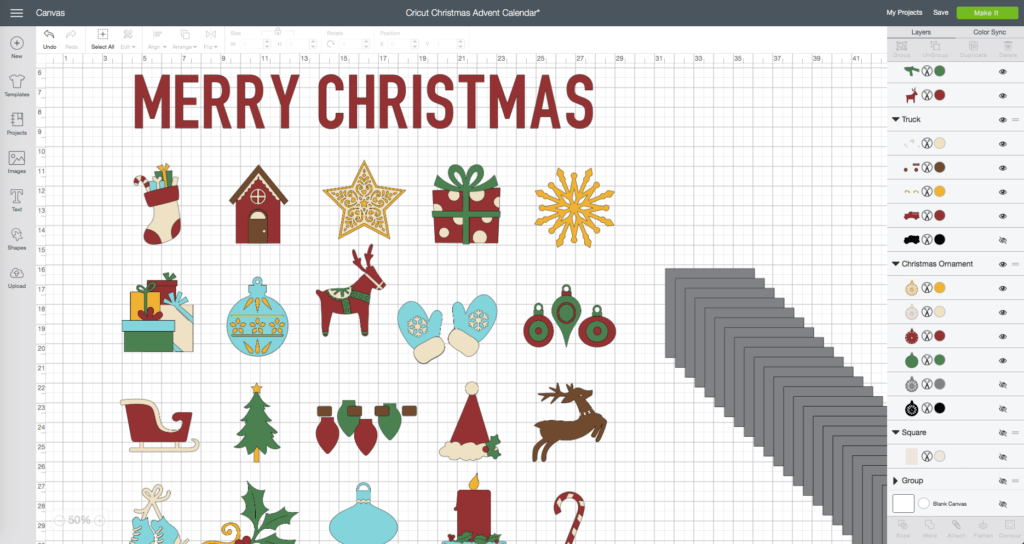
DESIGN SPACE
Open Design Space using this link.
Click "Make It" in the upper right-hand corner.
Rearrange each mat to make the most of the space.
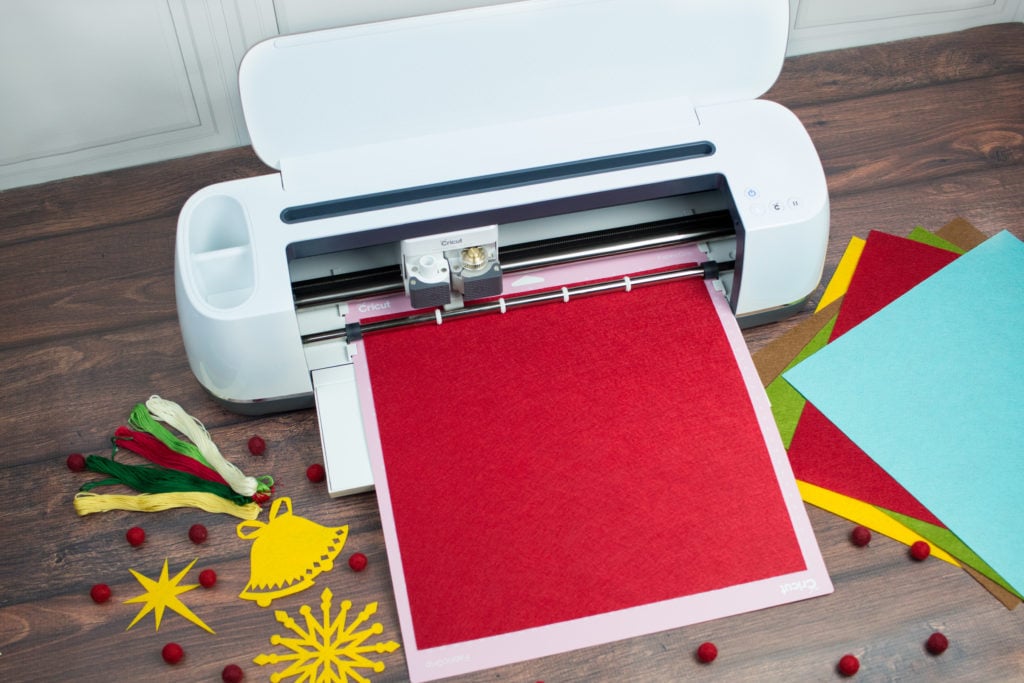
Apply Cricut Felt to mat.
* HELPFUL TIP - I found the strong grip mat combined with the deep cut blade was the best match for the more intricate cuts. Less intricate cuts worked well with the rotary blade and fabric mat.
Select Cricut Felt, load the mat and click the flashing Cricut button.
Once the machine has finished cutting, unload the mat and carefully peel back the main felt to reveal the cut pieces. Repeat this process until all pieces have been cut.
ASSEMBLY
Using Thermoweb Fabric Fuse glue all layers together. Refer to Design Space to see which pieces go together. Don't throw away any of the small pieces as they may be important!
*HELPFUL TIP - Don't overapply the glue or it may result in darkening of the felt. This glue needs to dry overnight.


SEWING
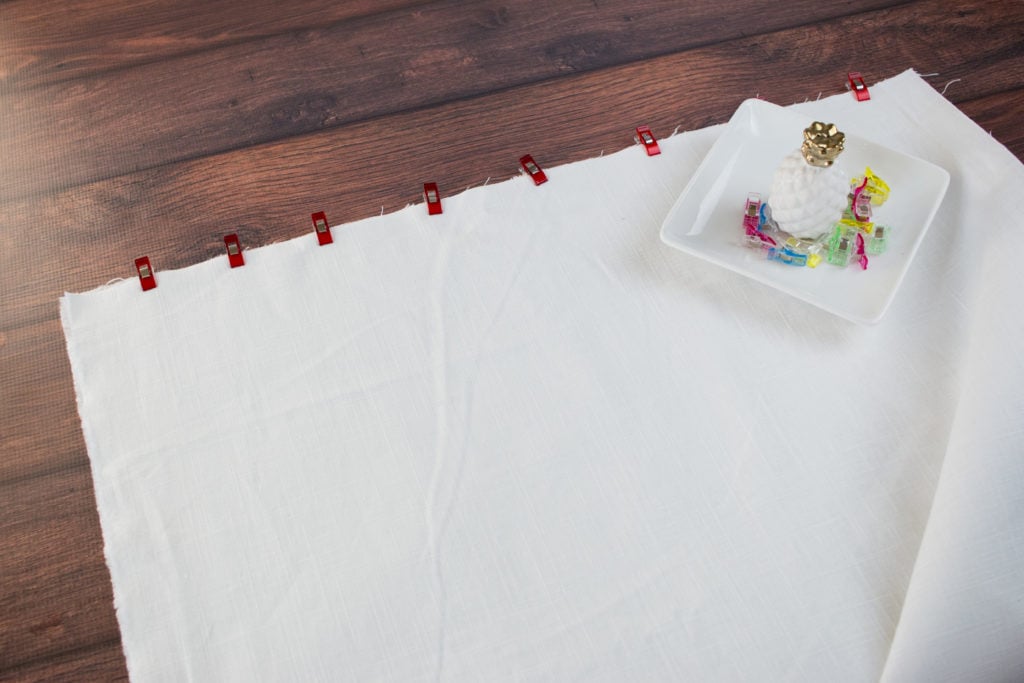
Cut out two 26"x36" pieces of linen fabric.
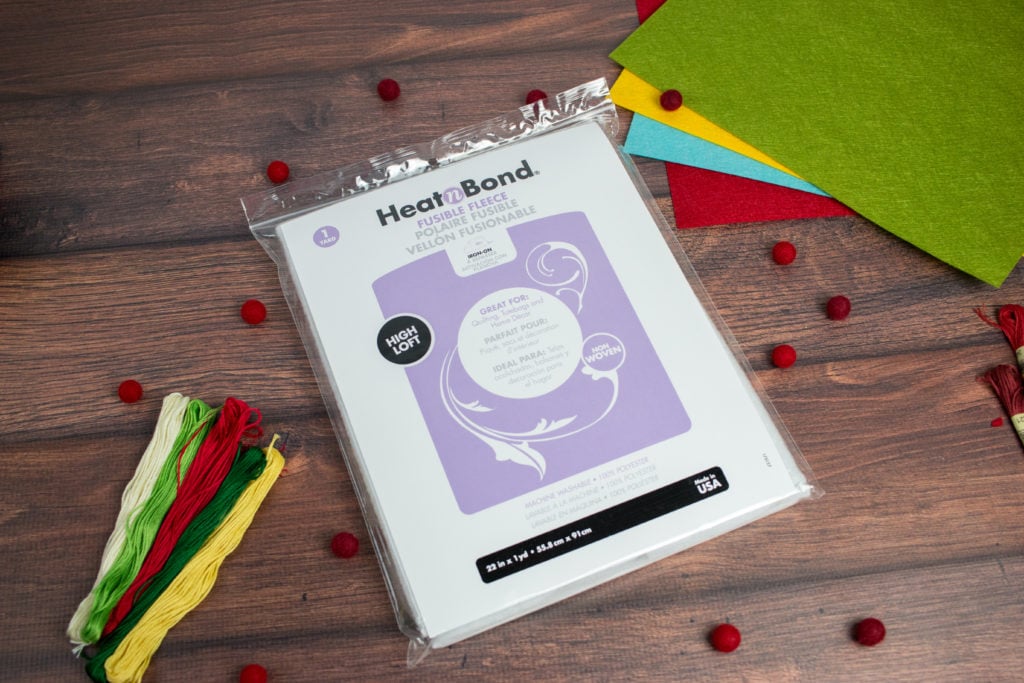
Cut out one 25"x35" piece of Thermoweb Fusible Fleece.
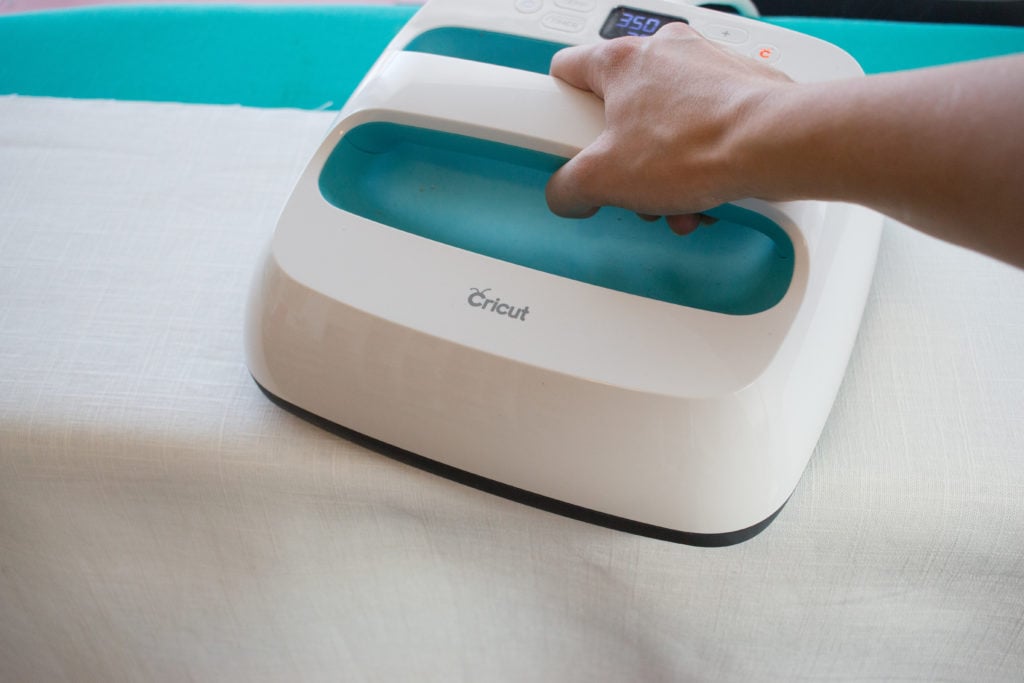
Lay one piece of linen fabric wrong side up on top of an ironing board.
Align the Fusible Fleece with the glue side facing down on top of the linen.
*HELPFUL TIP - The Fusible Fleece is slightly smaller than the linen to avoid any extra bulk in the seams.
Iron the Fusible Fleece until it is completely bonded to the fabric.
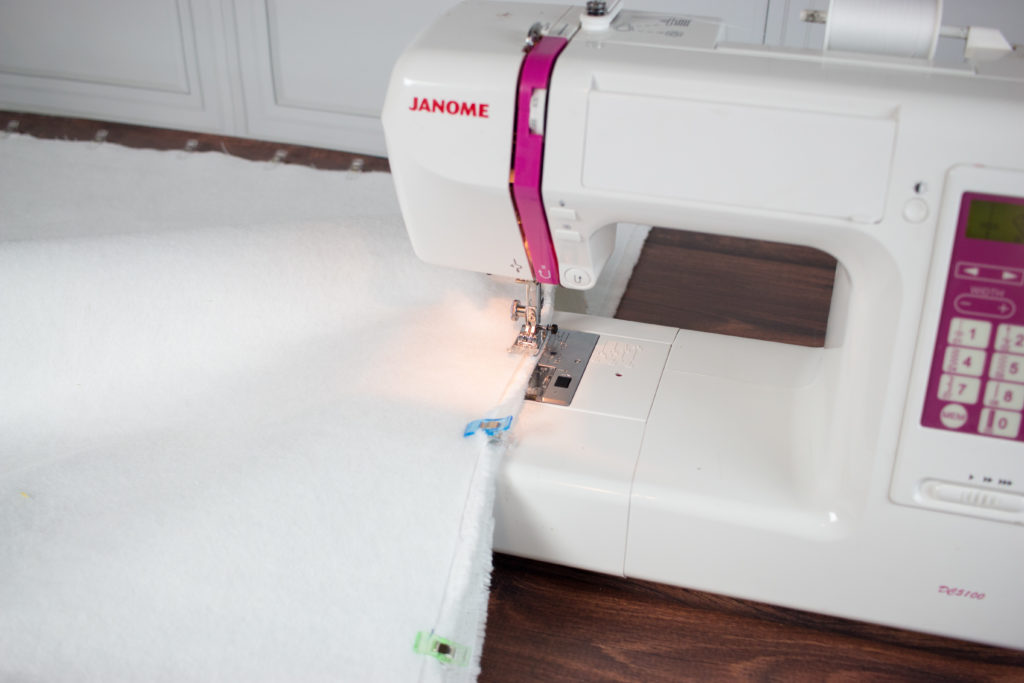
With right sides together pins the linen pieces together. Sew with a 1/2 inch seam allowance around the entire rectangle leaving a 6 inch opening at the top for turning.
When sewing the corners, place the needle in the down position, lift the presser foot and rotate the fabric for a sharp point.
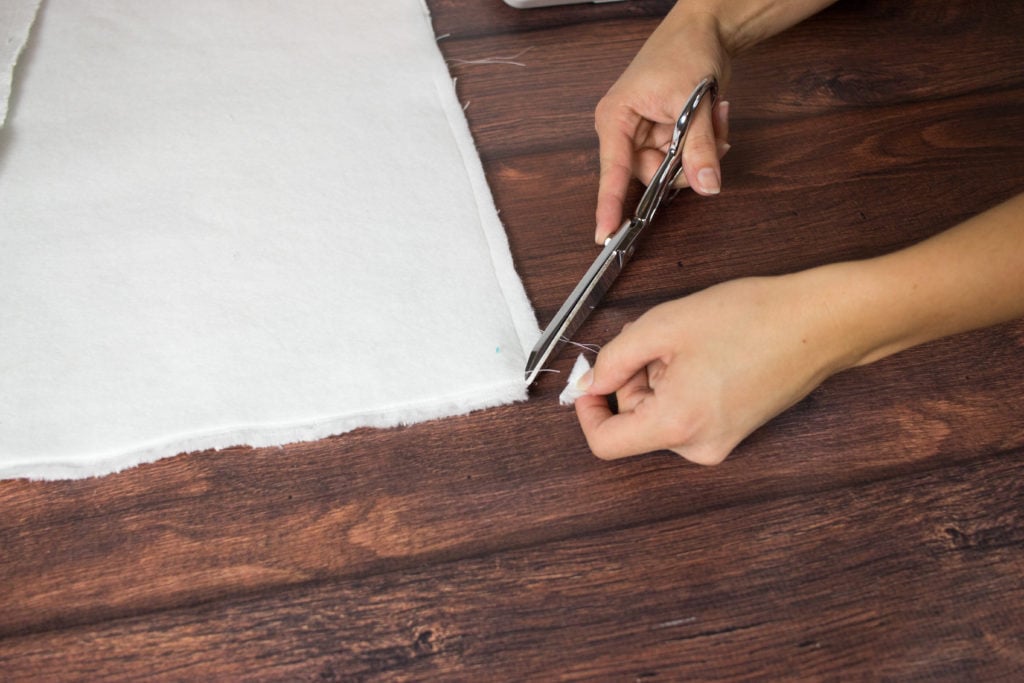
Clip all corners and turn the fabric right side out.
Use a chopstick or turning tool to poke the corners out.
Iron the entire rectangle.
Apply Fabric Fuse to the opening. Close it with a few craft clips and let it dry overnight.
FELT
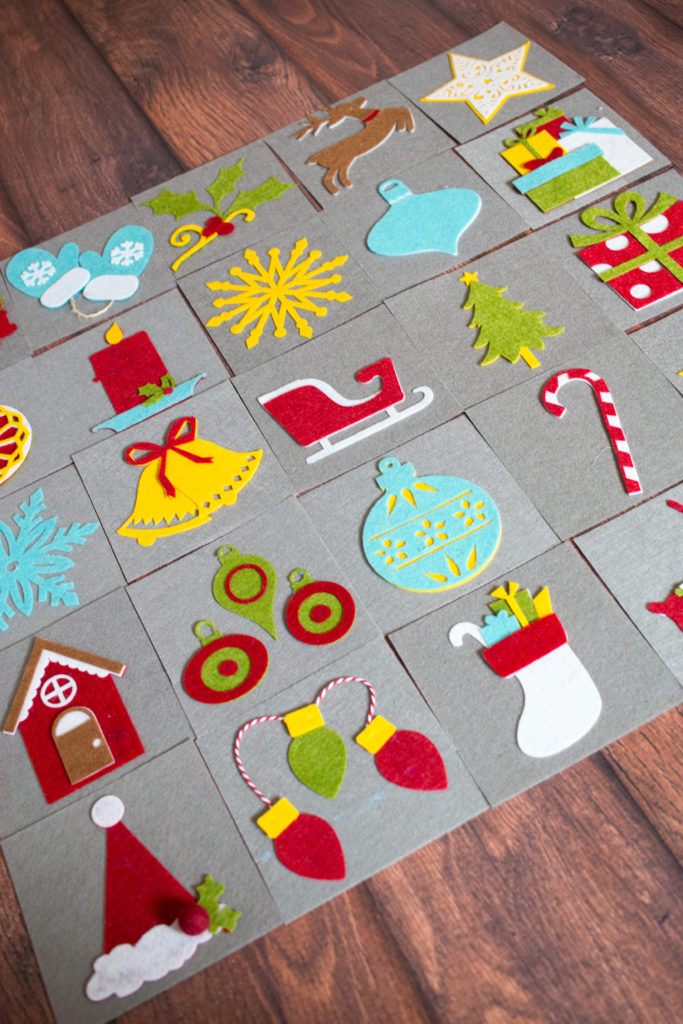
With Fabric Fuse, apply each felt cutout to the middle of a piece of gray felt. Repeat this process until all pieces have been glued.
Using a ruler, evenly space each square apart, starting from the bottom.
Apply the "Merry Christmas" felt to the top of the Advent Calendar
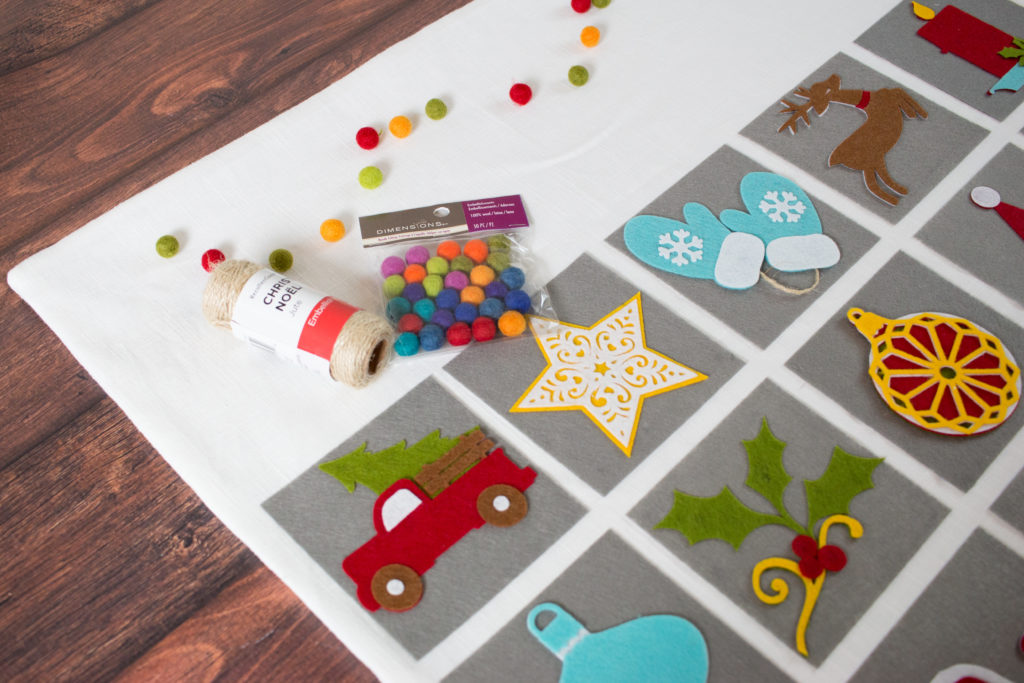
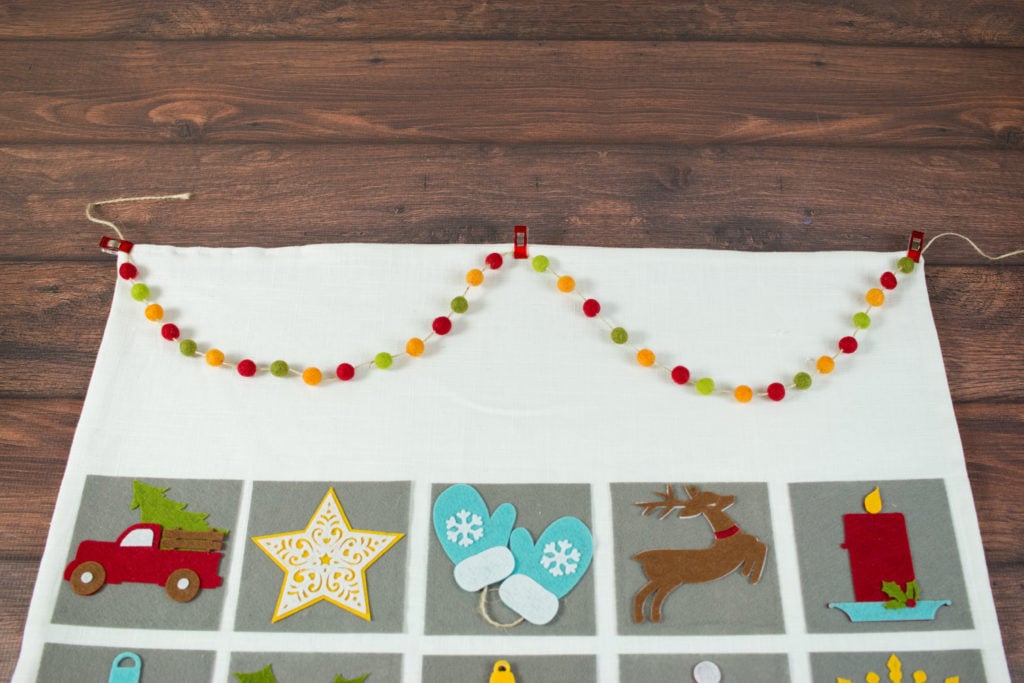
Thread felt balls onto twine and space them apart evenly.
With a craft clip, clip them to the calendar.
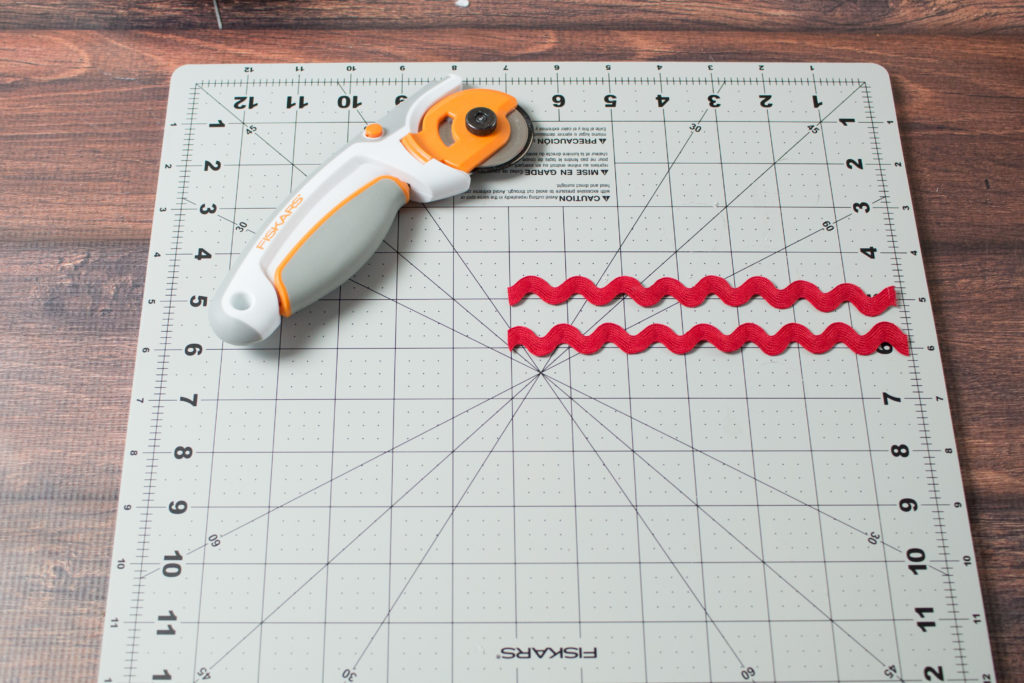
Cut two 6 inch pieces of red Ric Rac.
Fold them in half and place the edges one inch from the top of the calendar on the back side. Pin them in place.
With a sewing machine, sew the twine and the Ric Rac to the advent calendar.


Use your Cricut to make small boxes to fill the advent calendar with. Fill each pocket with a treat.
I hope you've enjoyed this Christmas Advent Calendar tutorial!
Don't forget to PIN this project to your Christmas board!
SaveSave
This is a sponsored conversation written by me on behalf of Cricut. The opinions and text are all mine.
Enter the Giveaway below!
I am loving that cute little felt ball garland! This is incredibly cut
Kim this is SO cute! And you make it look so easy!! I'm a total sewing newbie but I think I want to try this because it seriously is adorable!
Adorable!
I try to follow the link but it takes me to the app store. Can you tell me th ne of the project so i can open it in design space?
Hi Sydney, have you downloaded DS already? The link is working for me so I'm not sure why it's not working for you! It isn't an actual Cricut Ready to Make project so I think you will need to use the link. It may take a few minutes to load all the way since it has so much information in it.
FYI. I opened this on my pc and no problems. It did not work though on my IOS (iPad). Interesting. But glad to have it working now and anxious to make it! Thanks for the awesome project!
When I tried to open the DS file using the link, it says "Saved as Private". Do I have to join something to have access to the file? Also, where did you get the felt ball garland from please? It is adorable. Actually the entire advent calendar is!
Sad you need a Cricut cutter to make this.
Do you have a sag file for those